Backstrap Weaving – Tinkuy de Tejedores 2010

TINKUY DE TEJEDORES 2010 URUBAMBA, PERU

The Tinkuy de Tejedores 2010 is over and I am back home in Bolivia wondering what hit me! There were four intense days of colors, sounds and new experiences… meeting up with old acquaintances, putting faces to online user names and making new friends while trying to absorb everything around me and learn as much as I could with a head spinning from a combination of altitude and information overload.
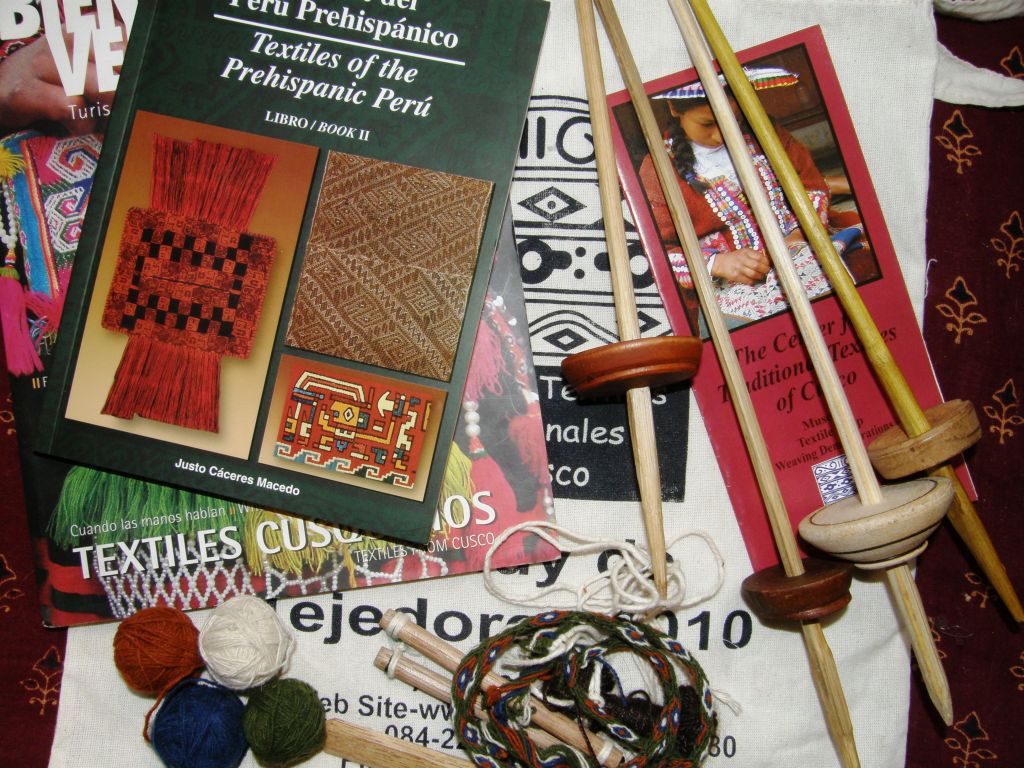
I didn’t bring back much in the way of physical souvenirs…the shoulder bag which was part of our registration package, a couple of spindles that I got in the Cusco market, two more which I swapped for one of my amulet bags with Maxima, a Bolivian weaver from Cochabamba, a locally published book on textiles which I bought at the airport while trying to use my leftover Peruvian Soles and some balls of handspun yarn left over from the workshop I took.

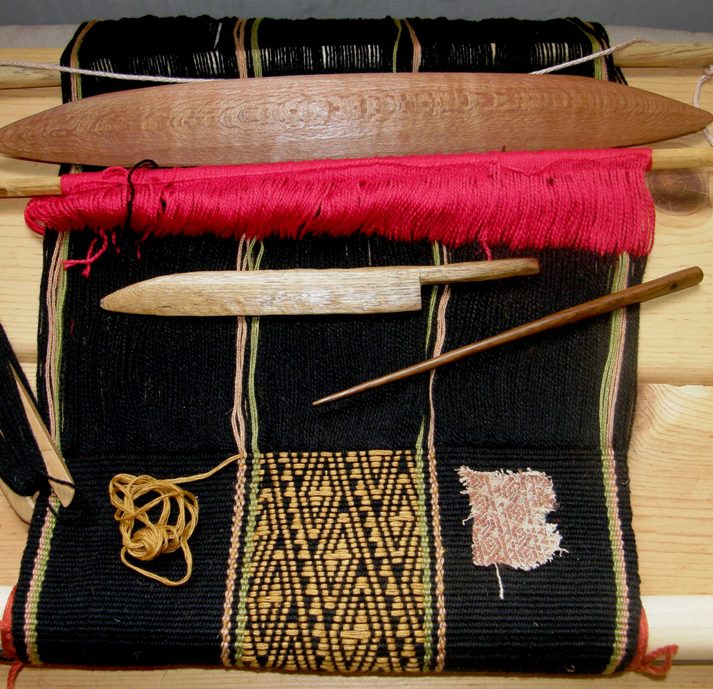
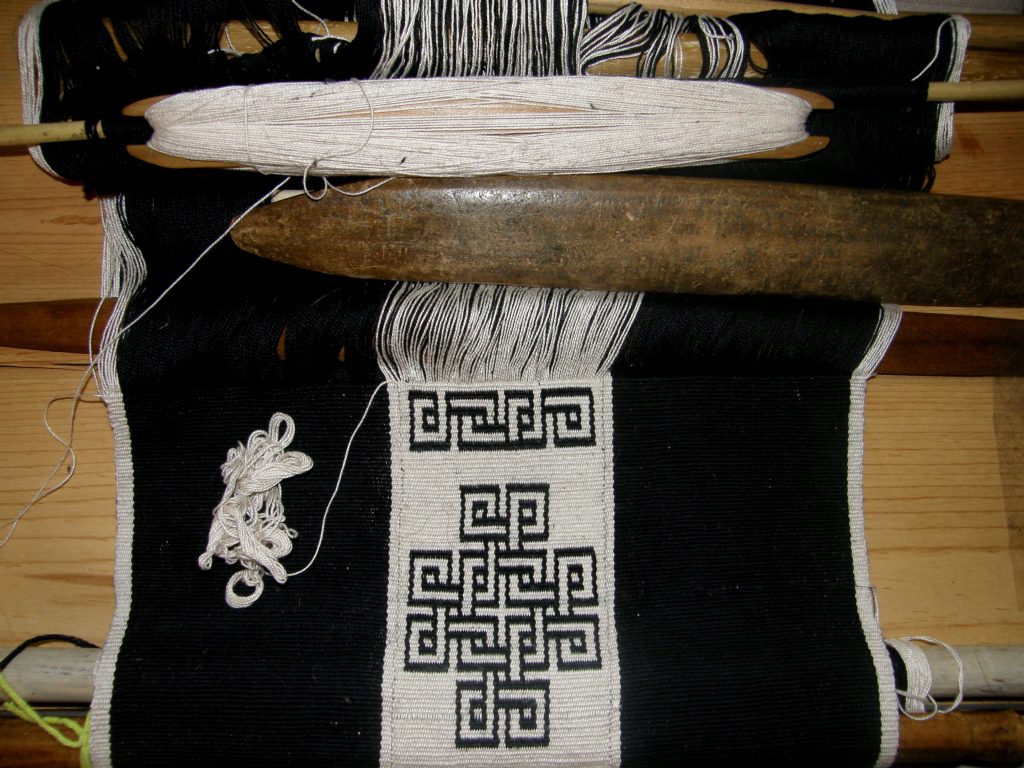
I didn’t buy any textiles but I did come back with a new weaving skill and lots of ideas about making textiles with discontinuous warps. I plan to warp for a very narrow  plain warp faced piece with discontinuous warps in the next few days which I hope to decorate with supplementary wefts as this will be the easiest technique to start with. If that is a success, I will attempt a complementary warp technique. It was great having the opportunity to get a close look at some of the discontinuous warp pieces on the loom being woven by the ladies of Pitumarca. From what I can tell, the grey and brown warps dovetail around a metal rod when the loom is being warped. The pick-up pattern appears to cover the entire length of the grey panel with no terminal area – mind boggling, really! I wish I had spent more time with this weaver. This was the most amazing thing I saw at the tinkuy.

This piece has one of its four color panels complete. Done in all natural wool colors it is going to be spectacular. The unfinished areas are those that have been rolled up on the loom bar nearest the weaver.

It’s interesting that she has woven the grey panel, turned the loom around, and now seems to be working her way back. She has just started the bottom of panel three. Perhaps she will then turn the loom around once again to weave the other end of this panel and then go filling in the space in between. There are so many questions that I forgot to ask this weaver, like, at what point the metal bars around which the discontinuous warps dovetail, are removed and replaced with yarn. Well I shall just have to experiment and see for myself.

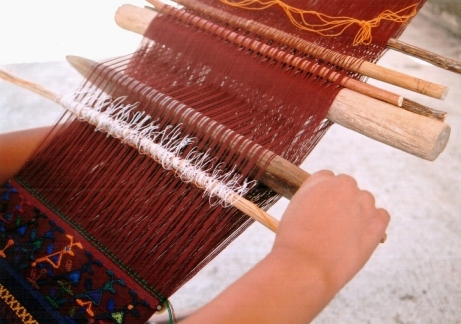
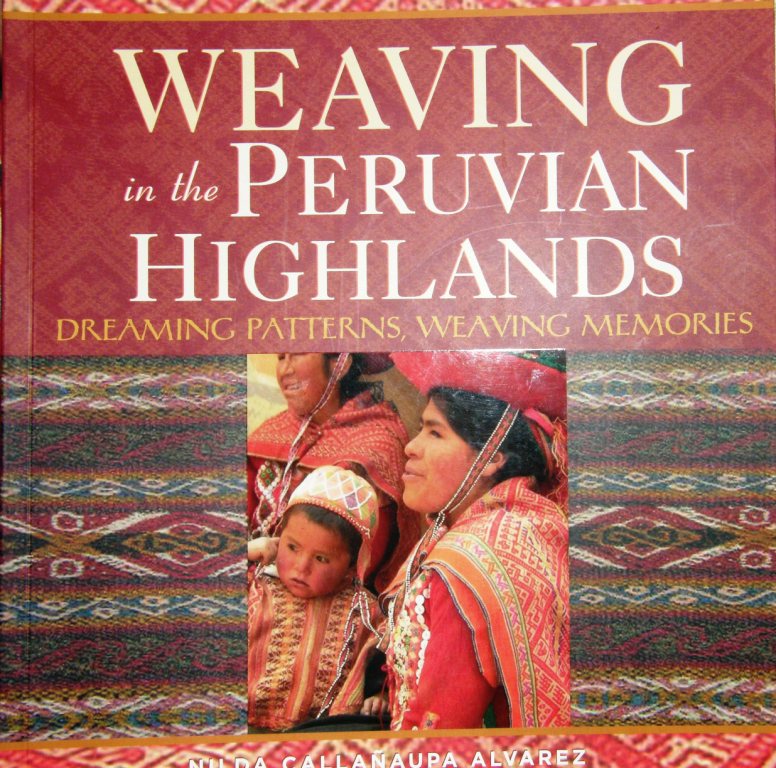
I am constructing a warping board for myself for my piece based on a picture in Nilda Callañaupa’s book pictured above.
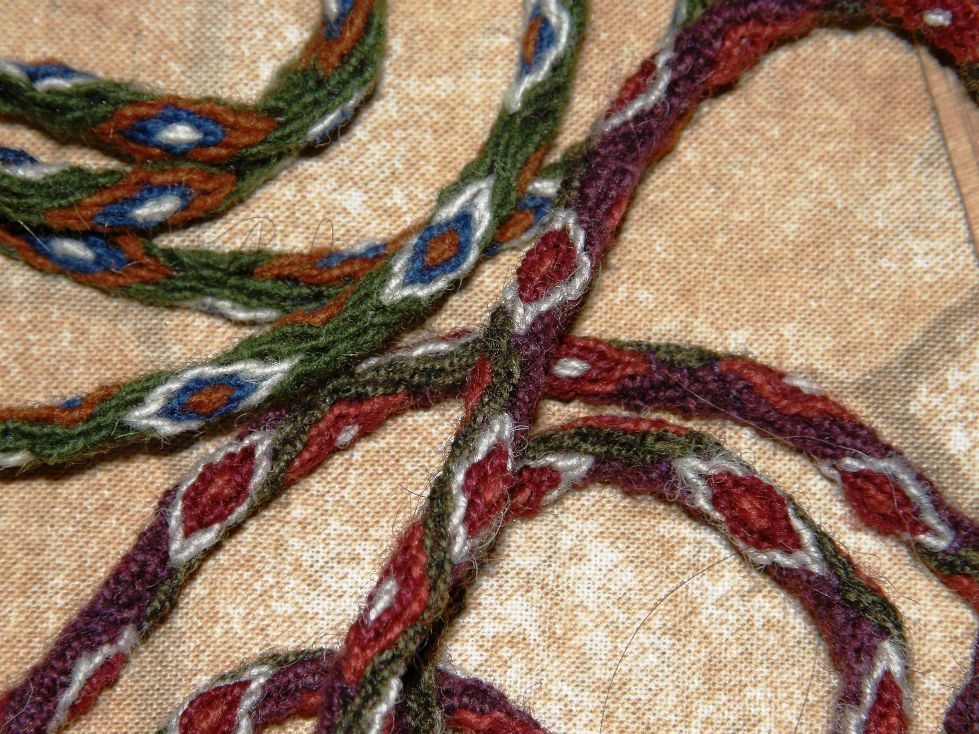
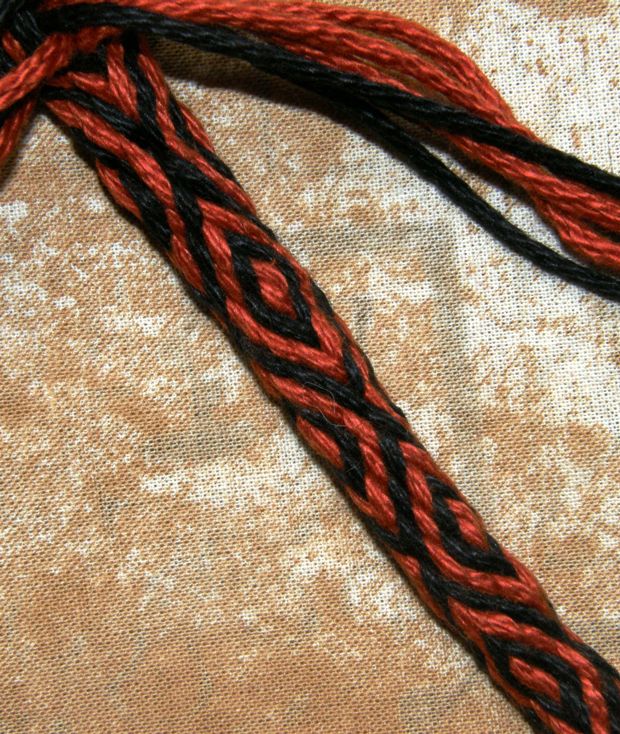
So, as far as weaving skills go, I brought back ideas about the aforementioned discontinuous warp pieces  and I learned the tubular woven bands of Chinchero and Patabamba in the workshop I took. If you have read my last two blog posts  you will know that I recently learned how to make these tubular bands or ñawi awapa from instructions in Adele Cahlander’s book. I strongly suspect that Adele Cahlander figured these bands out by pulling them apart and studying the structure rather than by learning from the weavers themselves and she has been able to give instructions so that one can reproduce them.

EDIT:  I have since been pointed to an article which says that Cahlander based her instructions on a partly woven specimen that had a complex arrangement of string heddles and shed loop so obviously the tubular woven bands were or are woven somewhere using this set up. As I said recently in a previous post…”There is no one “right” way”.

I find it amazing that she was able to analyze the specimen, compile excellent instructions for its reproduction and share all that with those who can’t travel to Peru and learn it themselves from the weavers.

However, the way we were taught in Chinchero by Nilda is SO MUCH easier!!

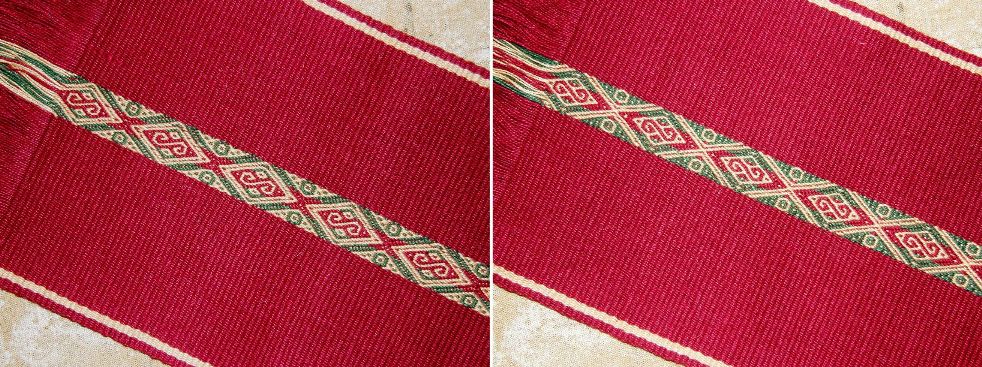
I took a partly woven band which I had warped up according to the Cahlander instructions with its string heddles to show the weavers and they were quite astonished by this strange set up. The green band above is the one I started in the workshop and finished at home. The red one was a gift for the workshop participants.

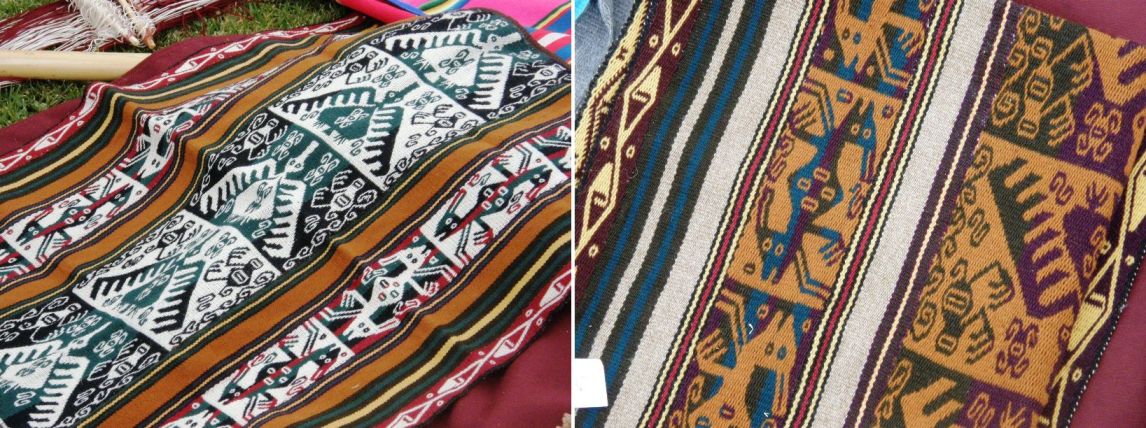
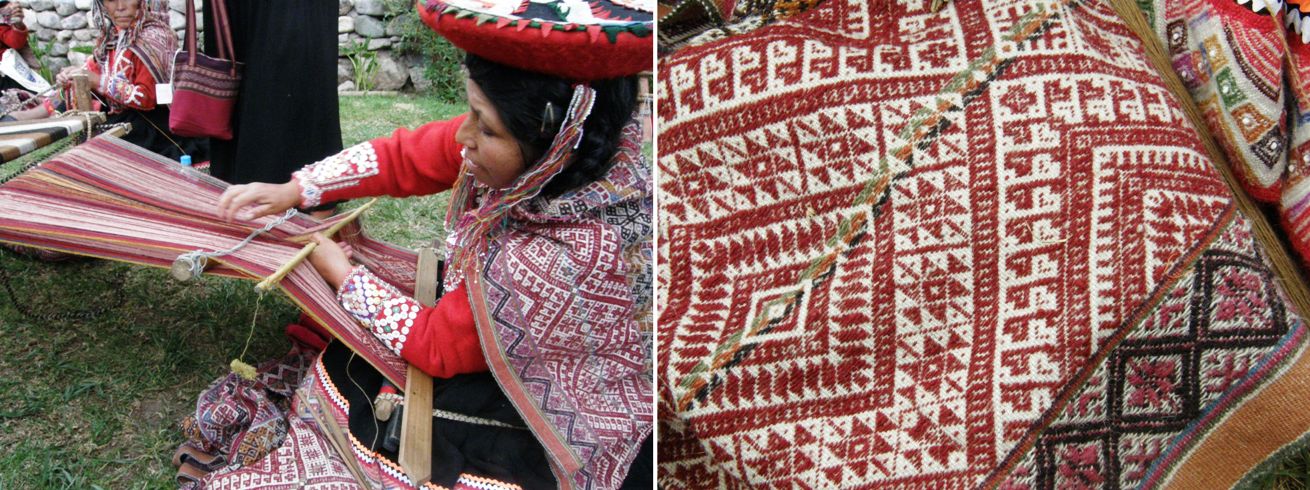
Another thing I took away from the tinkuy for my own weaving was lots of inspiration for color and design as well as a new respect for supplementary warp patterning (a technique of which I have never been a big fan) after having seen the amazing ponchos of the Chahuaytire and Accha Alta communities. A weaver from Accha Alta with her piece profusely patterned with supplementary warp patterns can be seen below. She is rolling the heddle stick towards her while pushing down on the warps behind in order to open the heddle shed.
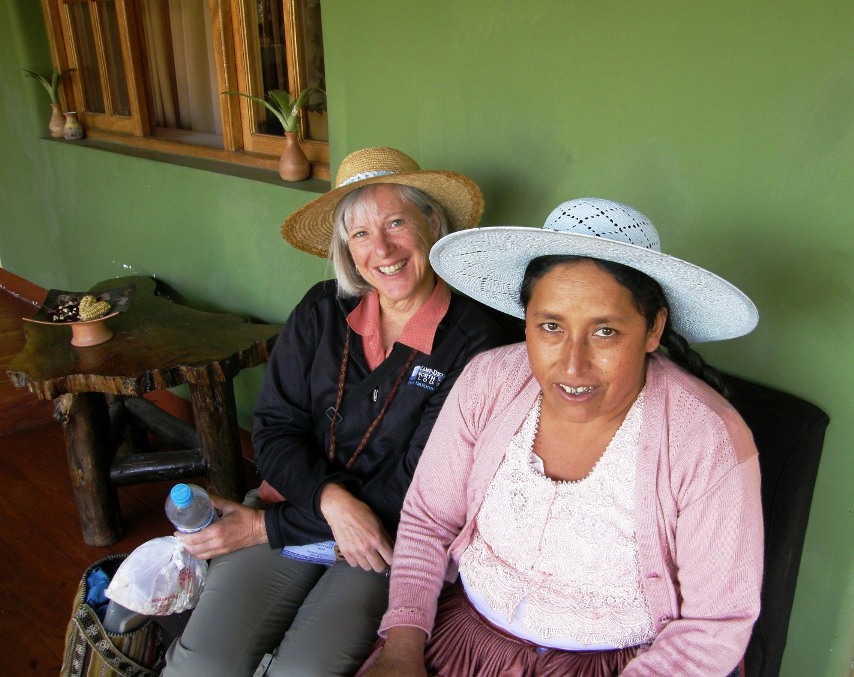
I can’t believe that I am sitting here now at home in the tropical heat of the Bolivian lowlands while just one week ago I was making my way to Urubamaba at 2863 meters in the Peruvian highlands. I would say that of all the trips made by international visitors to the tinkuy mine was probably the shortest…just a one-hour flight from Santa Cruz to La Paz with enough time to stroll around outside the airport and take pictures of impressive Mount Illimani. In La Paz I met up with Dorinda and Maxima who were to be my roommates in Urubamba. I had met Dorinda Dutcher through WARP connections over a year ago and had corresponded with her by email. This was our first face-to-face meeting. Dorinda founded PAZA (Project Artesania Zona Andina) in the town of Independencia, Aypopaya province, an organization which she describes as  “a Peace Corps project which became life’s calling”. She raised funds to be able to bring master weaver and PAZA coordinator Maxima Cortez with her to the tinkuy. The non-profit organization KURMI in Cochabamba also provided funding for a group of weavers to attend so we traveled from La Paz to Urubamba as a group of fourteen.

Witnessing the group’s reactions to all they experienced on this trip and at the tinkuy was another wonderful aspect of this whole journey. Please read Dorinda’s reports on the PAZA  blog to learn more about her goals, challenges as well as volunteer opportunities with PAZA.

These ladies had been traveling literally for days! First, an eight-hour bus trip to Cochabamba followed by an overnight bus trip to La Paz before they could even get on the fifty-minute flight to Cusco. Then came the inevitable mess of paperwork on landing in Peru but no one’s spirit was dampened.

Are we there yet?

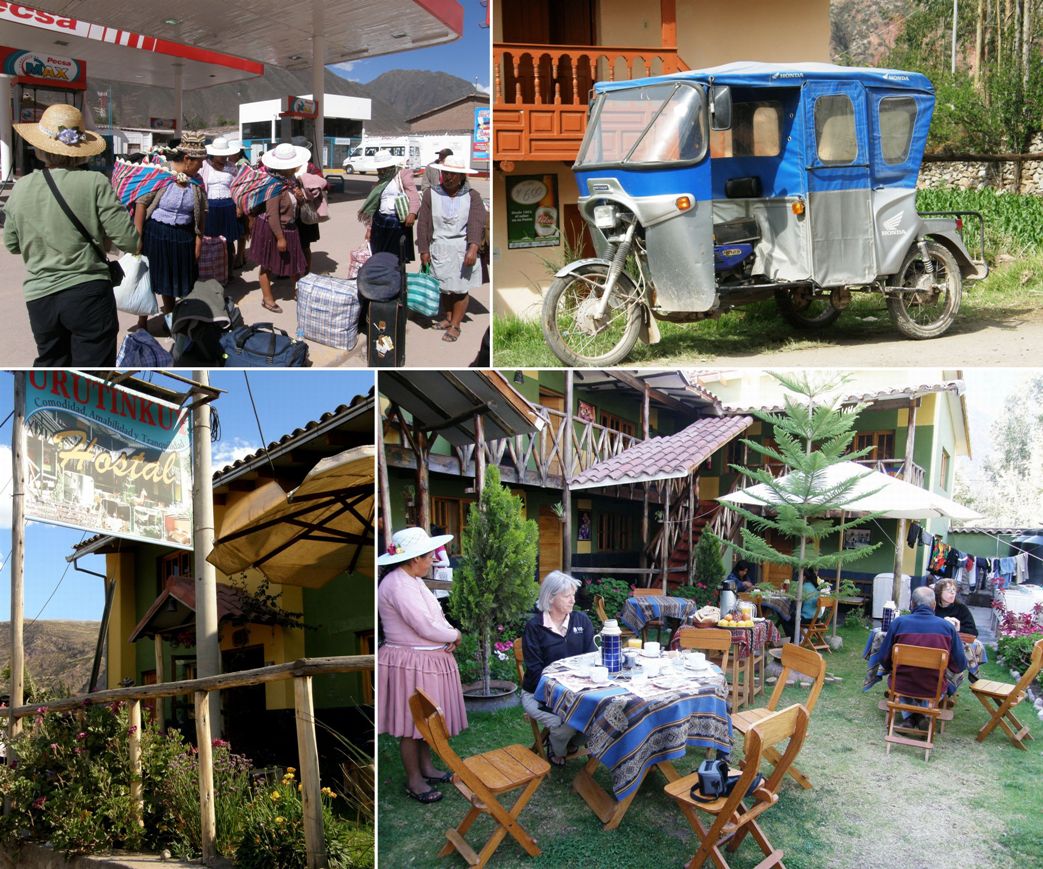
So when we got to Urubamba and made the mistake of getting off the bus too early, the ladies just took it in their stride, wrapped their luggage in their carrying cloths, hauled them onto their backs and took off up the road while I struggled along with bags in hand and dangling off my shoulder. Below you can see us lost at the gas station at the wrong end of town.

A hot, dusty and wind-tousled group finally arrived at the Hostal Urutinkuy that afternoon.

At the hostal I met lovely D.Y Begay, a Navajo weaver who had been invited to present at the conference. D.Y and I had been corresponding by email for some months and it was great to finally meet her. She was slated to be the first presenter of the conference and was a little inconvenienced by the fact that her luggage had not shown up.

The tinkuy comprised two days of conference with an incredibly heavy schedule of talks and presentations with breaks for drinks and snacks and weaving demonstrations. Lunch was followed by more weaving demonstrations and opportunities to buy textiles. If you were wise enough to arrive early in the morning you had the chance to mingle in a bit more leisurely way with the local weavers and spinners and avoid a bit of the chaos.
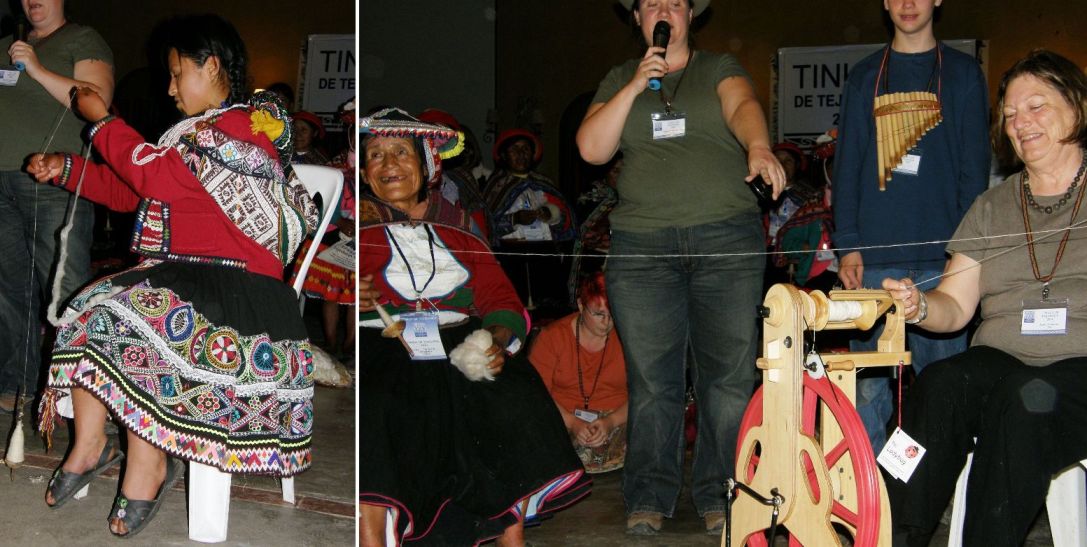
We gathered in the evenings in the conference auditorium for dancing, music, singing, spinning competitions, which were narrated  by Abby Franquemont, and lots of laughter. Beth’s (of The Spinning Loft)  young daughter competed on her wheel with a local spinner on a  drop spindle as did Judith MacKenzie. I honestly don’t remember who won but I do remember that the Bolivian ladies from Cochabamba really strutted their stuff in speed spinning the following night and my roommate Maxima took home a prize having spun over six meters in two minutes.

I am just going to show you here now a selection of captioned photos which, I hope, will give you a feel for what went on in those two days and just how much we managed to pack in!

It all started with a ceremonial offering to Pachamama performed by an Andean priest accompanied by the sounds of the pututus, (conch shells), which were also blown to announce the start and finish of each guest speaker’s presentation. Everything was translated into three languages – Quechua, Spanish and English and the Quechua translator with his strong, clear dramatic tone of voice was a joy to hear.
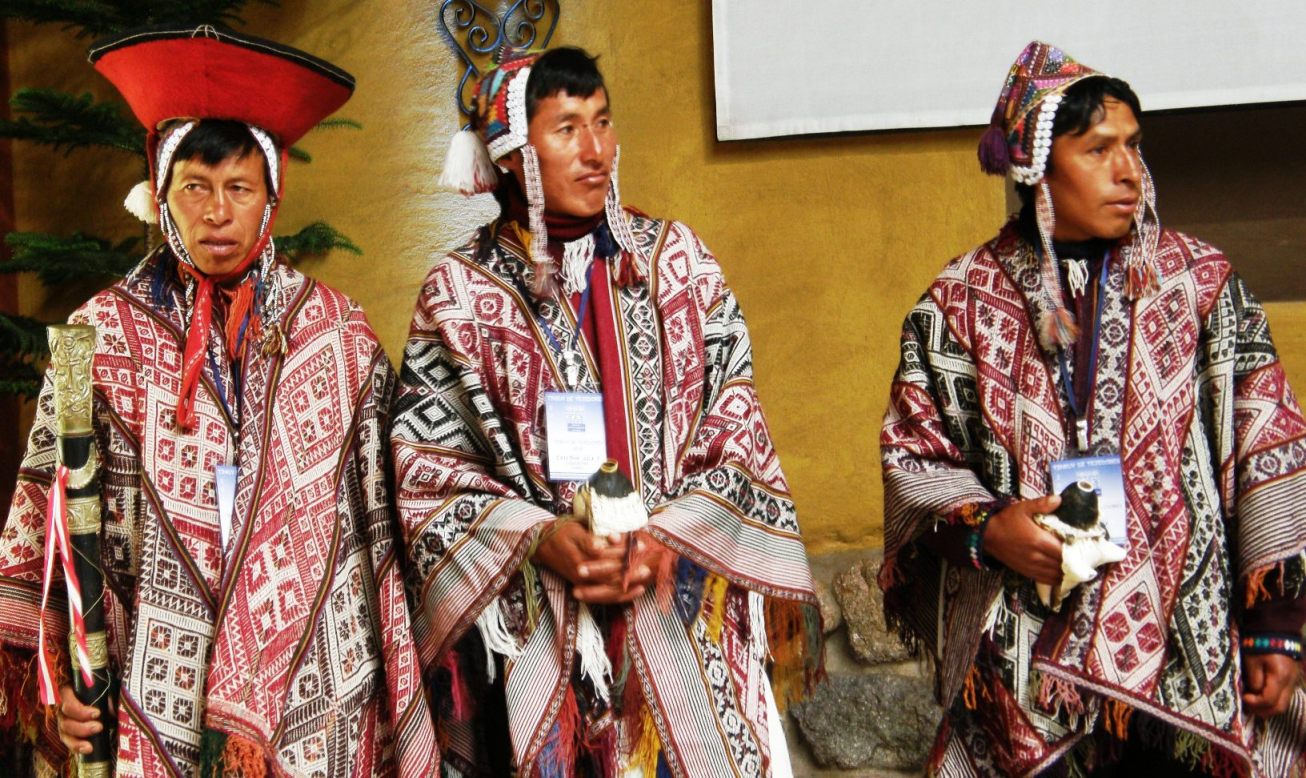
High-ranking community members with conch shells in hand took part in the opening ceremony.
Just a few of the foreign invited guest speakers: Luisa Govea of San Luis Potosi, Mexico, weaver of fine silk ikat shawls using designs from the 17th, 18th and 19th centuries. Ann Pollard Rowe - I met her in 2007 at the Textile Museum in Washington, a meeting which led me to a wonderful weaving and spinning adventure in coastal Ecuador and it was lovely to have the opportunity to see her again. She gave a presentation entitled "Looms of the Americas". D.Y Begay who spoke on the traditions and practices of Navajo weaving. Judith MacKenzie's talk was entitled "Fibers of the Americas". Luz Maria Andrango of Otavalo, Ecuador demonstrated the Great Wheel and brought textiles to show from the workshop of her famous father, Miguel Andrango.

There were at least two dozen national and international presenters over the two days. I was especially pleased to have been able to meet Mary Frame who spoke about Inca geometric figures called tukapu. I am determined to learn three color double weave so I can use some of those designs in my pieces.

In the talks we were taken on journeys from Mexico and Guatemala to Bolivia and around Peru from pre Incan and pre Hispanic times to present and taught about techniques from weaving and dyeing to administration and marketing.

Maiwa Productions showed us a wonderful video on indigo dyeing in India.

Some of the presentations I most enjoyed were those by the weavers in the communities that are involved in the Centro de Textiles Tradicionales de Cusco (CTTC). They spoke of their lives before and after their experience with CTTC, their struggles, successes, accomplishments, frustrations and failures while trying to revive their lost weaving traditions. The talk I enjoyed most of all was that given by a group of weavers who described the impact of weaving competitions on their motivation to continue weaving and improving, their self esteem and ability to solve problems and work as a team.

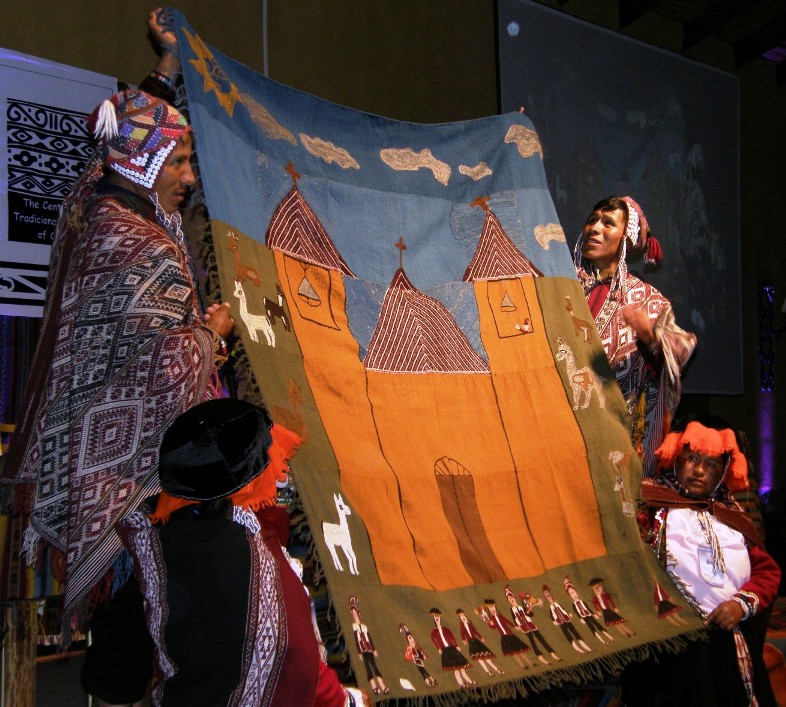
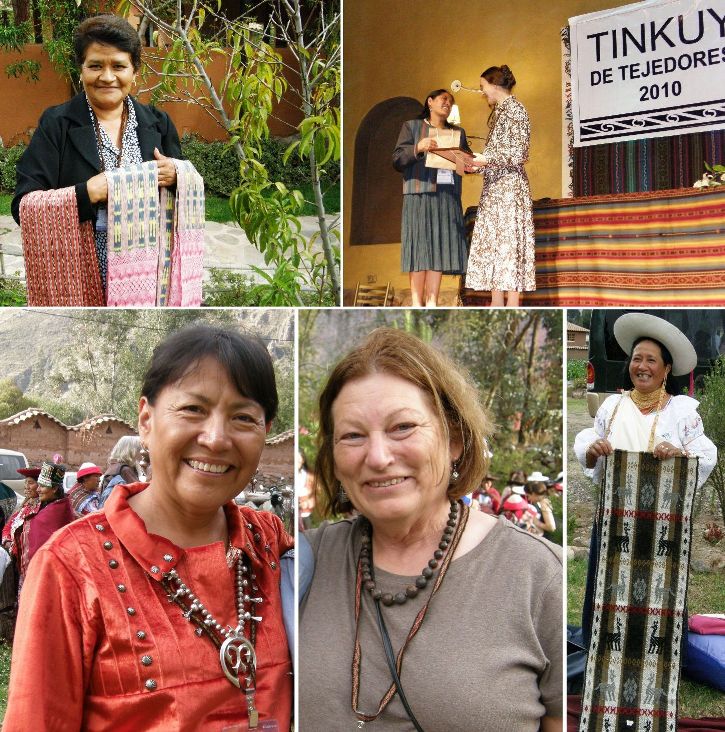
We witnessed the winning weavings and the prize-giving ceremony for the 2010 weaving competition.
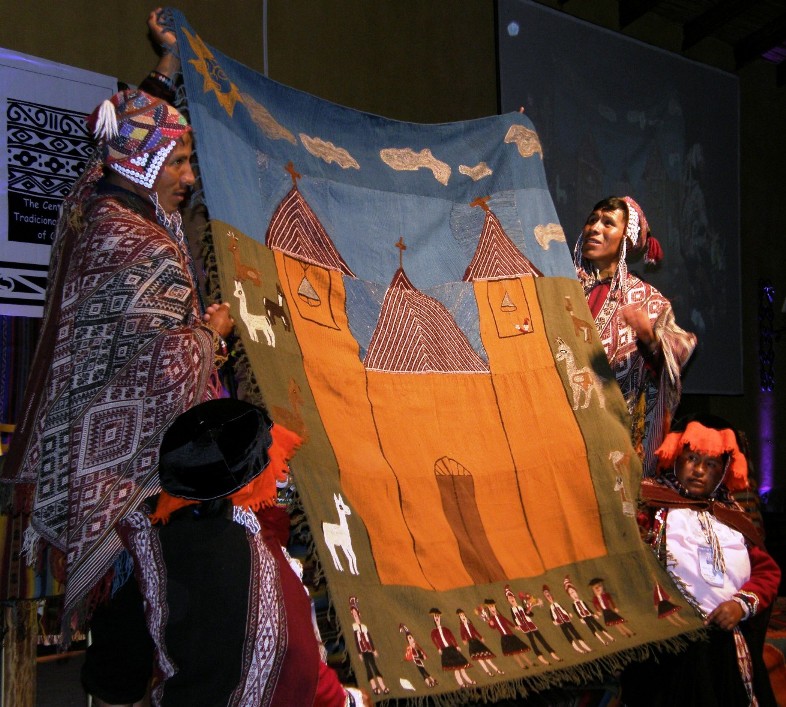
 

This is the winning piece by the weavers of Chahauytire community and is entitled "matrimonio". I have to admit that this had me scratching my head at first wondering about something so relatively plain from weavers renowned for their intricate pick up patterns until I realized that this piece is made up of thirty-six individual squares of thirty by thirty centimeters, each woven by a different weaver. Imagine!! I can't even begin to imagine how difficult it would be to create a four-selvedge piece that came out exactly thirty cm long. And thirty-six weavers had to turn out pieces with the same level of exactitude so that they could be pieced together with no puckering or stretching...AMAZING!! How difficult it must have been to match the diagonal lines on the two panels that form the church roof!!

Two other prize-winning pieces are shown below. All pieces had to meet the same requirements and have their thirty six panels of thirty centimeter squares. Every weaver has their own tension which means that no standard warp length can guarantee a thirty-centimeter finished length. The weavers who gave the presentation about the competitions let us in on some of the difficulties and disappointments they had to deal with in these projects and the problems they faced and overcame working as a groups rather than as individual weavers.

The following pictures were taken during the coffee and lunch break demonstrations and first thing in the morning when the weavers would be arriving early from their communities.
There was plenty to fascinate everyone...not only the foreign visitors but also the local Peruvian weavers. During this lunch break many couldn't take their eyes off the loom and weaving of a Bolivian weaver from Tinkipaya, near Macha, in Potosi, Bolivia. They stood and watched her from every possible vantage point and some were just as camera happy as we were.
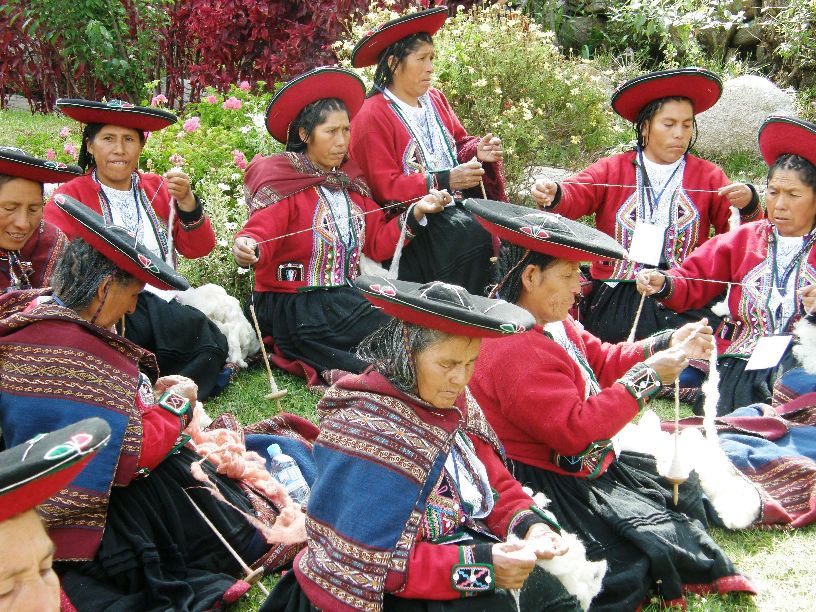
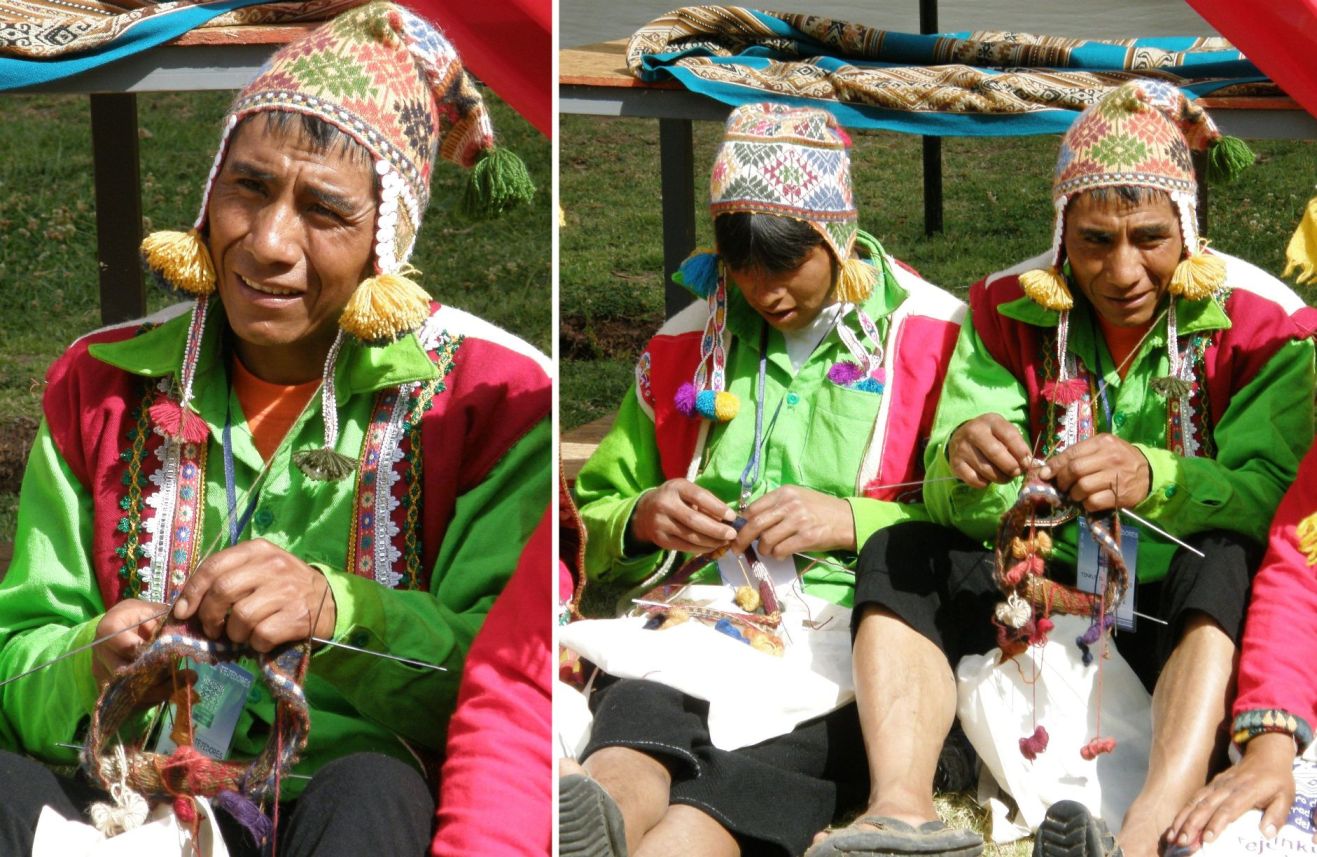
The weavers, spinners and knitters would arrive by bus early in the morning, some coming from communities as far as five hours distance from Urubamba (and some maybe even further). Time was easily passed by sitting in groups spinning, knitting and chatting.
Knitters from Sallac community pass the time before the start of the conference.

There were many kinds of looms and weaving techniques to be seen….

A Guatemalan weaver from Santiago Atitlan on the left makes designs with supplementary wefts and a Bolivian weaver from AAA, la Asociacion de Artesanos Andinos from Cochabamba, Bolivia props her loom against a low wall to weave complementary warp pick up patterns.
A group of weavers who work with ASUR in Sucre came including this Jalq'a woman from Potolo. At right is a weaver from Accha Alta weaving a supplementary warp technique.
Tapestry techniques from South and North America. I am sorry that I didn't find out which community this gentleman is from but it was wonderful seeing him weaving tapestry on a backstrap loom. At right, D.Y Begay demonstrates Navajo weaving on her vertical loom.
Weavers from Accha Alta on the left and Santo Tomas on the right. While the weaver from Accha Alta uses a stick to pick up his warps I noticed that quite a few weavers pick up the threads with their hands as I prefer doing.
I have just updated this post to add this photo not originally included as I did not know from which communities these two weavers are from. Now I see in a magazine that I picked up in a street book fair in Cusco that the lady on the left is most likely from Ccachin. I don't know about the weaver on the right. The colors in their outfits are so intense!
Luz Maria Andrango of Otavalo, Ecuador created a lot of interest with her demonstration of spinning on a Great Wheel (walking wheel?).
Ten year-old Juan Miguel of Acopia community started weaving in August and is doing pebble weave here while his grandma watches. The wee girl on the right is even younger I think and is weaving a tapestry on a floor loom where her little legs can barely reach the peddles.
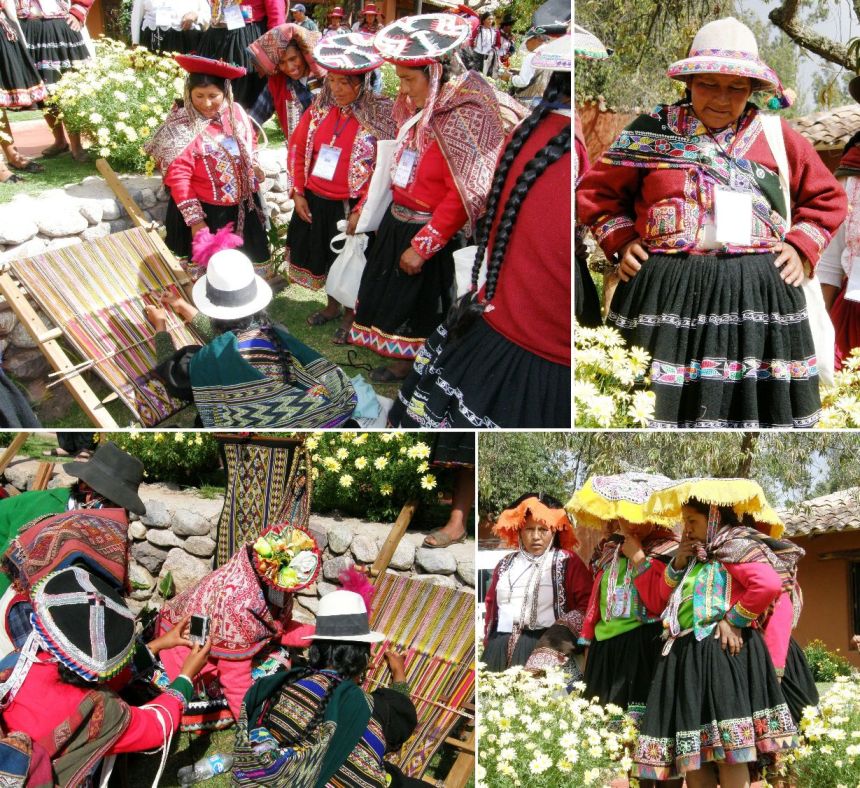
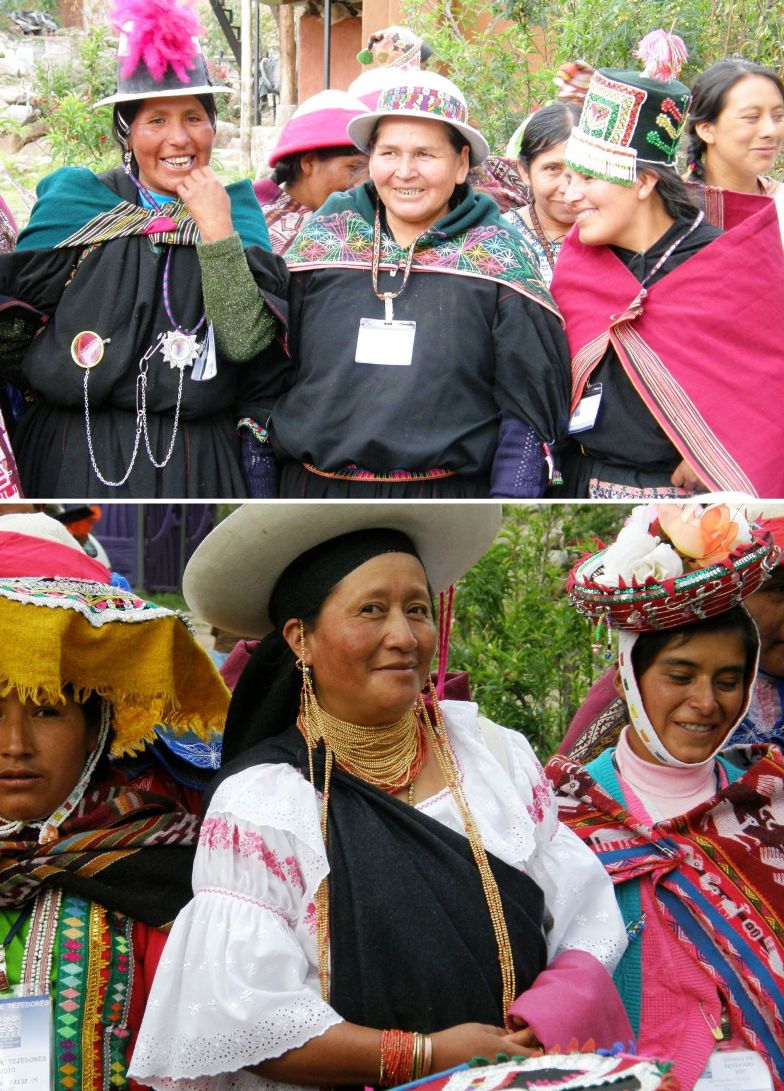
Watching the watchers...while the weavers gathered around to watch the demonstrations, I stood back and admired their gorgeous outfits. On the left is a group of ladies from Sallac community and on the right from Chahuaytire.
Bolivian textiles...a jalq'a weaving with its strange khurus, double weave belts in handspun and naturally dyed yarns made by the weavers of PAZA, Cochabamba, a weaver from Tarabuco adds a woven edging to a finished weaving, a bag made with the typical zig zag and "eye" motif of Tinkipaya and Macha in the Potosi area.
Rosa Choque, an Aymara weaver, gave a presentation at the conference on projects in which she is involved which aim to preserve the textile traditions of Moquegua, Peru. I think that these are some of the textiles which she brought but I could be mistaken. I would love it of someone would confirm this for me.

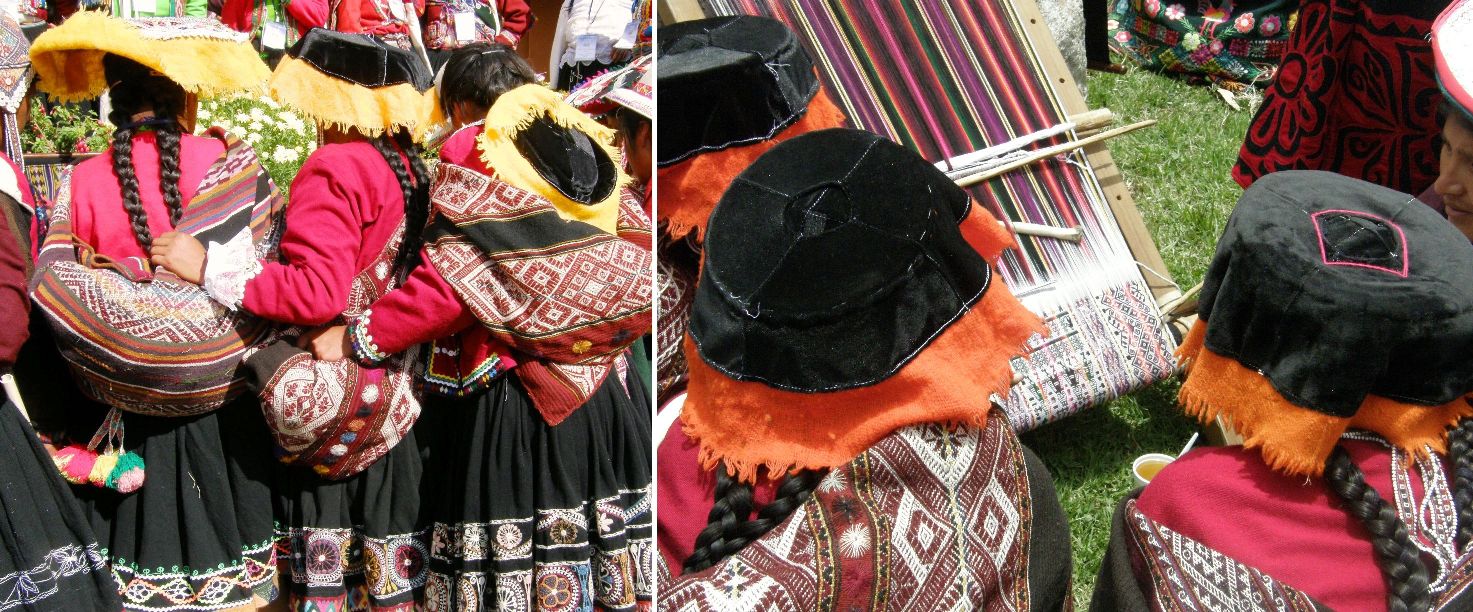
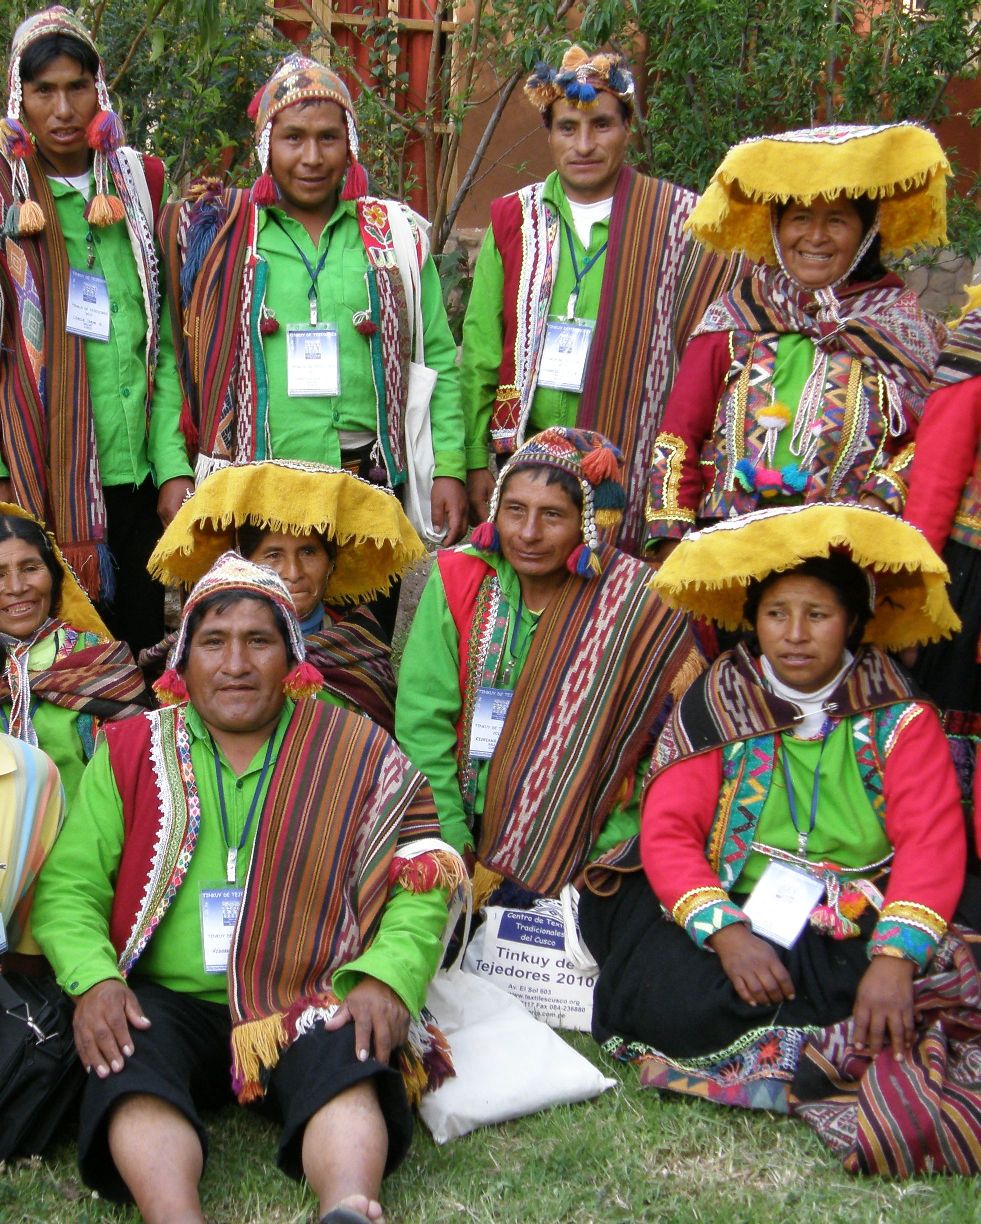
On both days during the afternoon break, the local weavers gathered in groups which gave us all plenty of nice photo opportunities as well as a good chance to learn the names of the different communities and, therefore, be better able to recognize their members by their outfits.

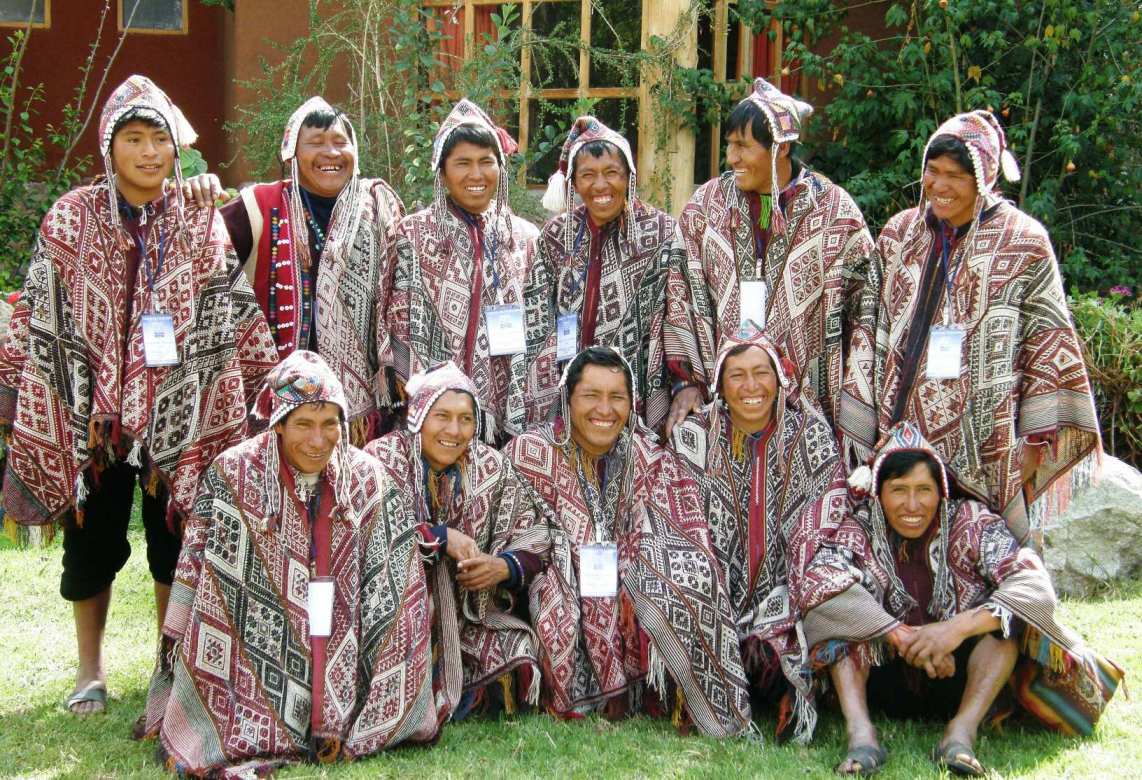
Men from Chahuaytire.
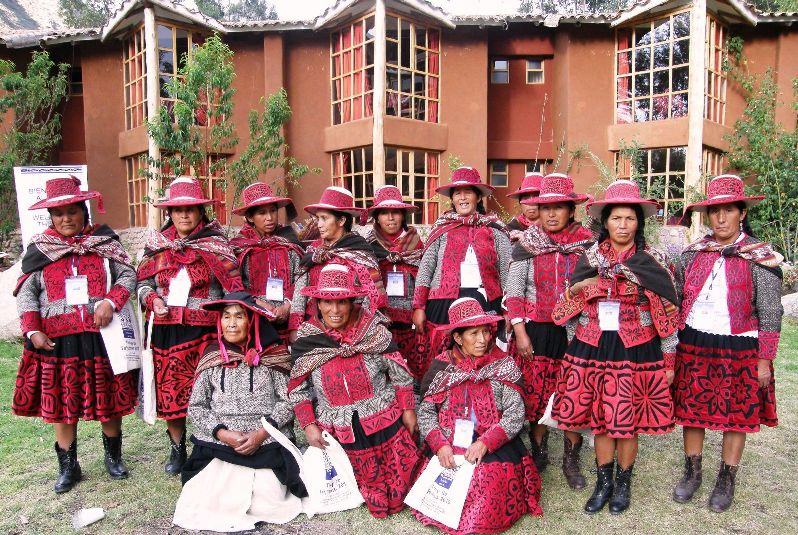
Women from Santo Tomas - we all loved their boots.
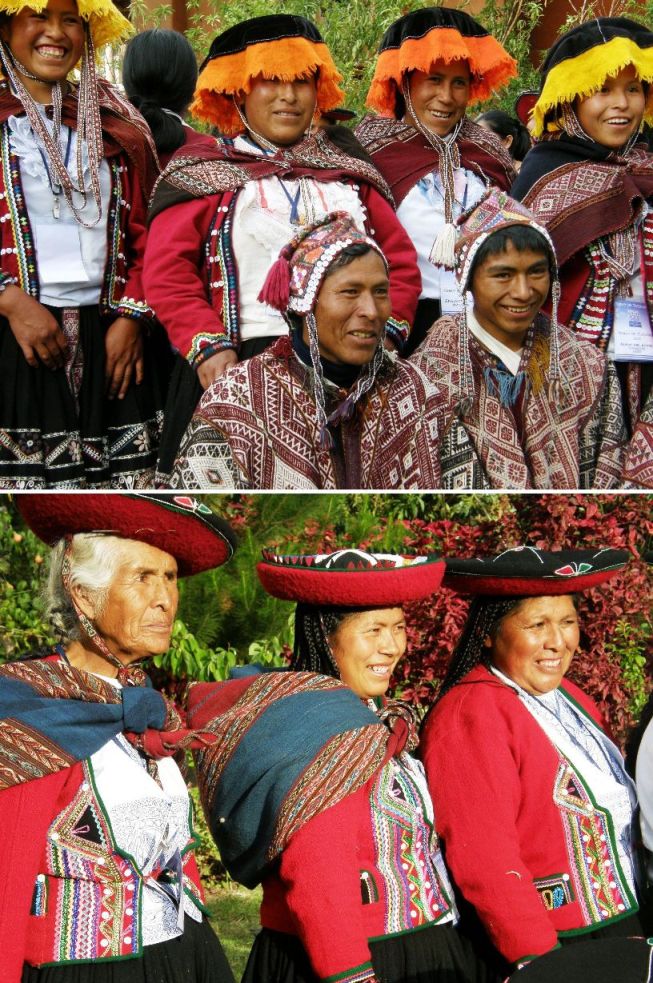
A group from Chahuaytire above and from Chinchero below. I believe, but I could be mistaken, that the distinguished lady on the left is Nilda's mother, Doña Guadalupe.
Three weavers from Bolivia above. Luz Maria Andrango of Ecuador below with two Peruvian ladies.

Artisans of Sallac. Their ponchos include panels of patterns created with resist dyeing techniques.

A young weaver-to-be and a little fellow with his pututu

Well that was a “taste” of the daytime activities. The nightime dancing and spinning competitions were a little harder to capture on film with the dim lighting but I did get some video. All the video I shot of weaving, spinning, braiding and dancing will be on next week’s blog.

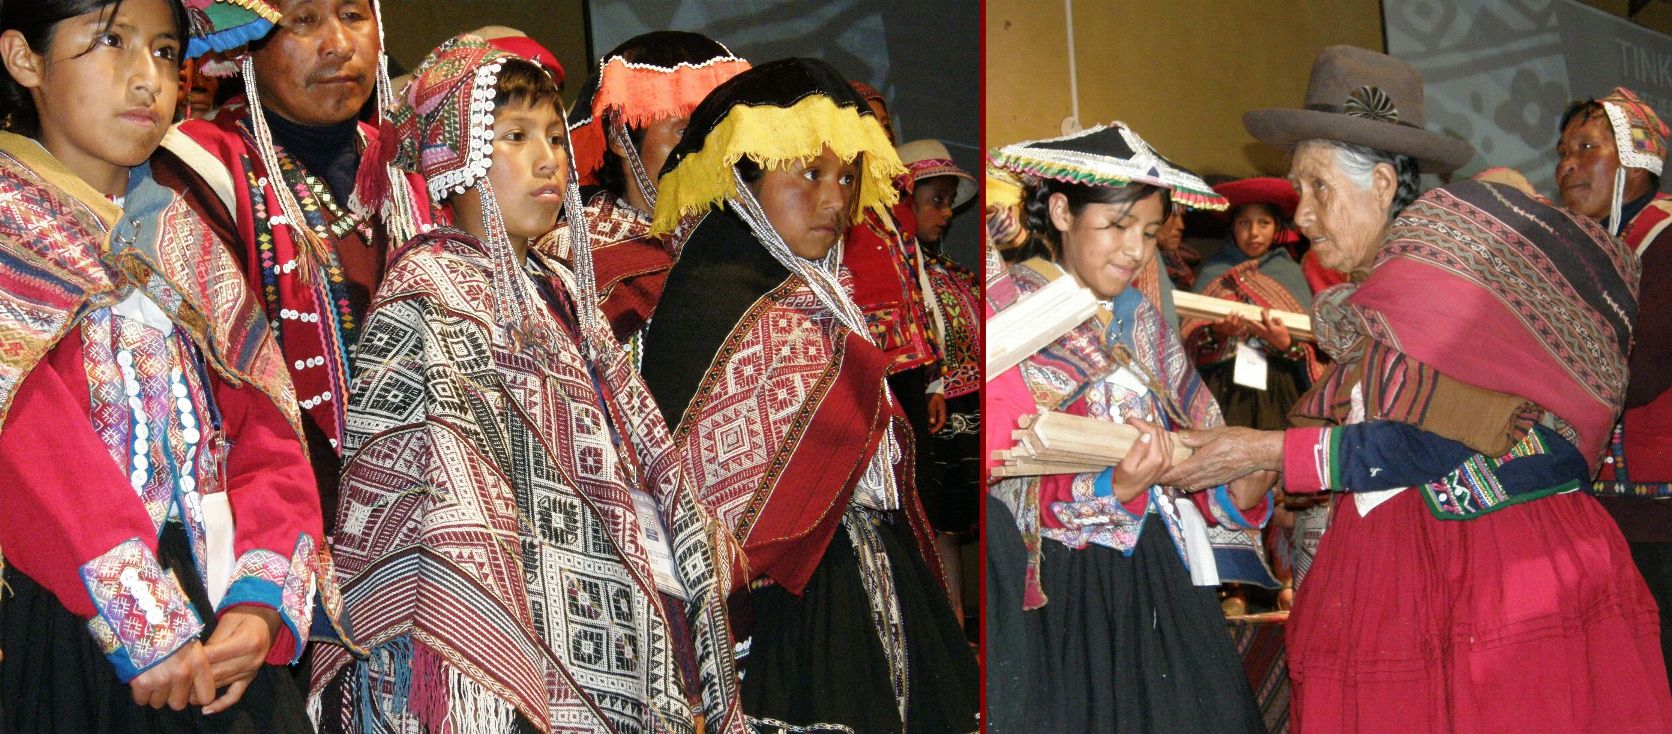
The conference closed with a very emotional ceremony which served to honor all the elders of the various communities who were given certificates and medals of recognition as well as gifts.

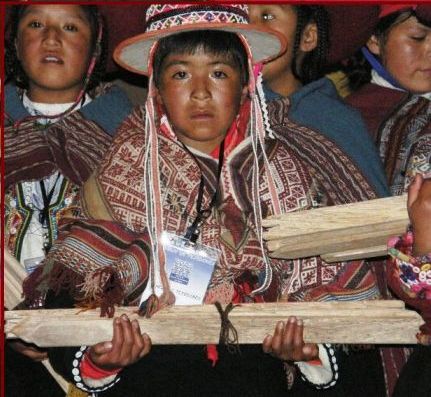
This was preceded by another ceremony in which the elders were invited to hand over sets of weaving tools to the youngsters in their communities.

Youngsters lined up waiting to receive their weaving tools. An elderly weaver passes a set of new weaving tools to a young girl in her community. The young girl's smile says it all.

So that was the two days of conference. Then came the workshops which I am saving for next week’s blog post along with the videos. And next week I will tell you about the other folks I met up with, some of whom I have been corresponding with by email or through my blog and others whom I met at Convergence. Betty Davenport, who is always lots of fun, was my companion in the little “down” time we had and we took the same workshop. Folks from Interweave were there too. The workshop days were more intimate and gave a lot of us a chance to chat and catch up. More about that next week.

And here is the amazing woman with the brilliant smile who is behind this unique event. It was not an ideal situation to meet Nilda for the first time. She was so busy and I don’t believe she stood still for a moment. Yet I learned a lot by watching her in action and seeing the warm affection she has for those who are lucky to be her friends, her passion for the CTTC and its goals and her love for her country and her people. Hopefully I will be able to go back one day to meet her again.

Part Two of my Tinkuy Tale can be seen here

#########################################

One last message…

My Backstrap Basics article is now on the WeaveZine site in Spanish. The videos remain in English but are, hopefully, self explanatory.

Mi articulo “Backstrap Basics” (El Telar de Cintura) ya se puede leer en español en la pagina de WeaveZine. El audio de los videos sigue en ingles pero las imagenes son suficientes para entender.


Backstrap Weaving- Convergence, Cusco, Comparisons and Contrasts

I have put the full tutorial for the simple warp float technique shown above on a new tutorial page along with two videos I made that show the process.  In this technique, warps of one color form a design which sits on a background of horizontal stripes. By working slowly through the steps and the two follow up tutorials on warp floats, you will build up the skills necessary to weave the kinds of pieces where floats of two colors are used to completely cover the surface of the weaving. This is the technique used in the yurt band piece below.

My yurt band reproduction moved along this week and, after having done a couple of repeats of the design, I decided that I had had enough practice on this piece and that I would make a new warp adding some plain weave and weave it again to make something useful. So it has finished up like most of my samples with a zip and will be used to store stuff or gifted. Actually, I wouldn’t mind weaving it this size again but on a much longer warp and sewing it onto brown suede for a laptop bag.

Now to chart the designs on these other yurt band pieces. I know I have shown these here before but they are well worth another look…so gorgeous! The designs are very similar and, after having charted the one above, I am sure that it won’t be too hard to do these.

Chris Buckley in Beijing was kind enough to allow me to use these images of yurt bands in his collection. The band immediately above left belongs to Lisa and Ryan Matthews. Remember that there are tutorials on my blog for weaving the red and white border design as well as the yellow and brown one.

I got a little braiding time in this week too but couldn’t find the Margarita braid that I had started for the tutorial I posted here. I suspect my cat made off with it during the night so I made another.

Braiding is fun but I have never really used the braids for anything. One is being used to hang one of my weavings on the wall.

This braid I am working on now in the 12wpi cotton is so thick and sturdy I am sure it will make a brilliant bag handle. So I will make the braid and then think about a bag to match – kind of putting the cart before the horse.

I had started a Palma braid some time ago to use as a handle for an existing bag but the colors were not a good match and that idea was abandoned.

These are the two main braiding styles I learned with a sling braider in Peru many years ago.

Here is a summary of the steps to this braid following on from the original tutorial here:

Part 1,2,3,4,1,2,4,3,2,1,4,3,2,1,3,4,1,2,3,4,1,2,4,3,2,1,4,3,2,1,3,4,1,2, etc……..

This is turning out to be a very red dominated page especially with this, my latest project…

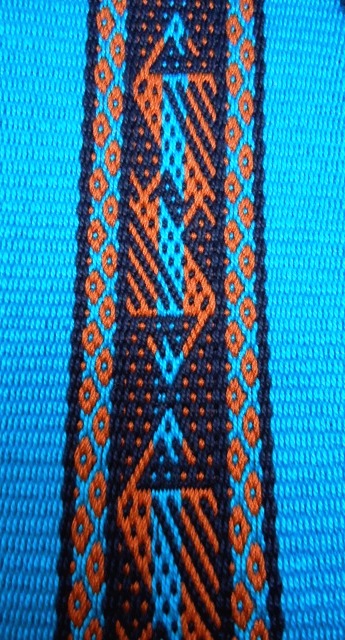
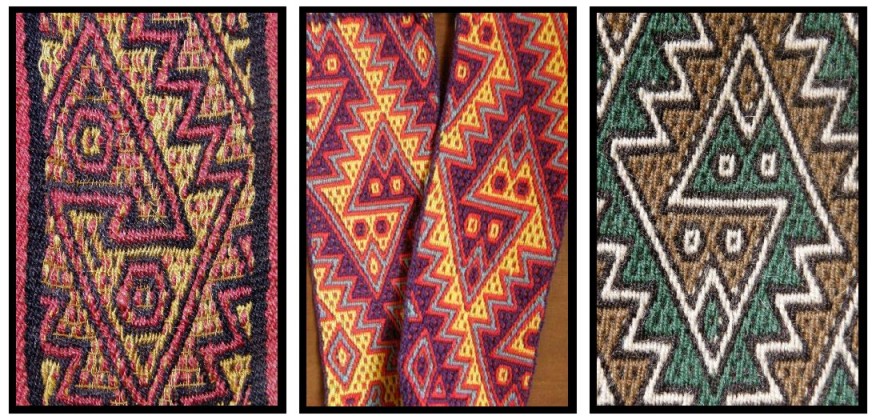
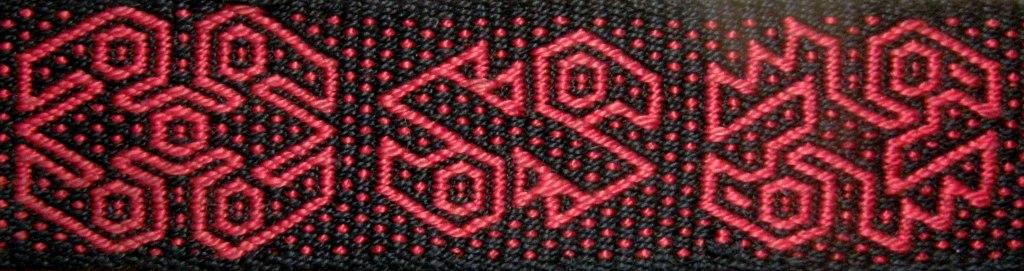
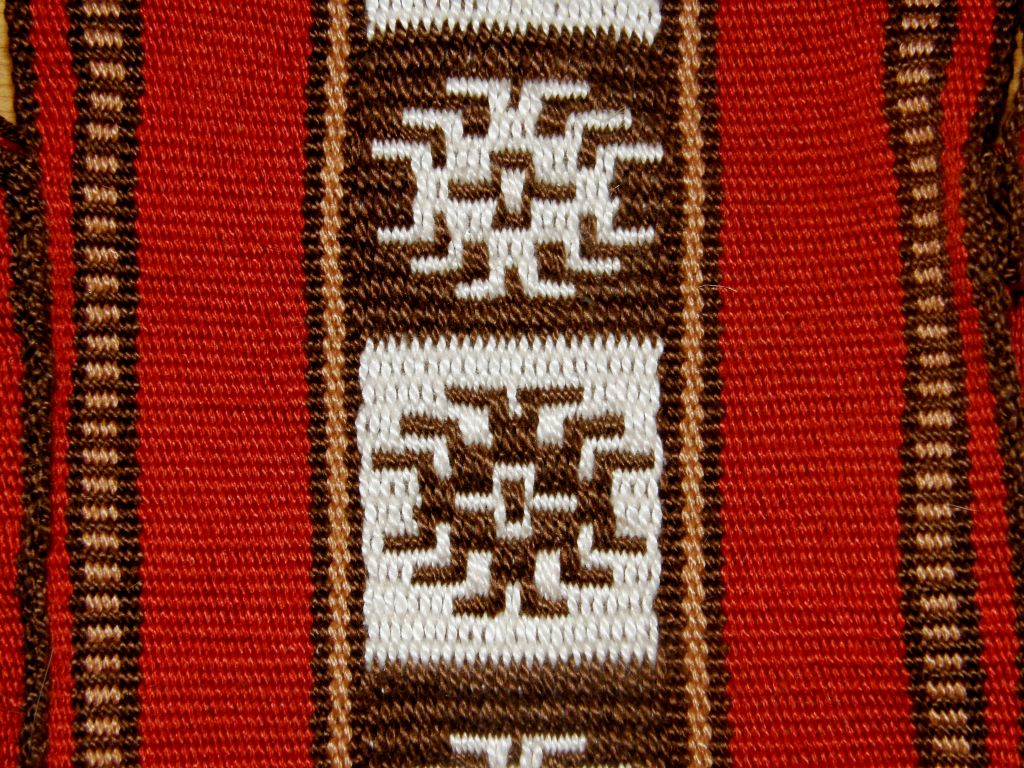
This is both faces of a piece that is destined to be part of the colorful tool bag collection I am making. The design is a classic one from Chinchero, Peru which turns up on so many of the beautiful textiles from there.

Although I have been to Chinchero and bought weavings I only really noticed this particular design for the first time when I was in Sydney of all places at the Saturday Paddington market. An American chap was promoting and selling the knits and weavings of the Cusco and Ausungate areas and amongst his goodies were some beautiful bags with this motif which he allowed me to photograph. I tried to persuade him to sell me a ball or two of the handspun yarn he had there in the basket without success. Since then, I have seen this motif over and over again in various gorgeous pieces of Chinchero and have been waiting for the opportunity to get down and chart and weave it.

It was only when someone participating in the Andean pebble weave weave-along, that I ran recently at Weavolution, asked if this motif could be charted for the pebble weave that I described in my e-monograph, that I took a good hard look at the structure. (This is one of the many things I love about the weave-alongs I run…I get to learn stuff too!)

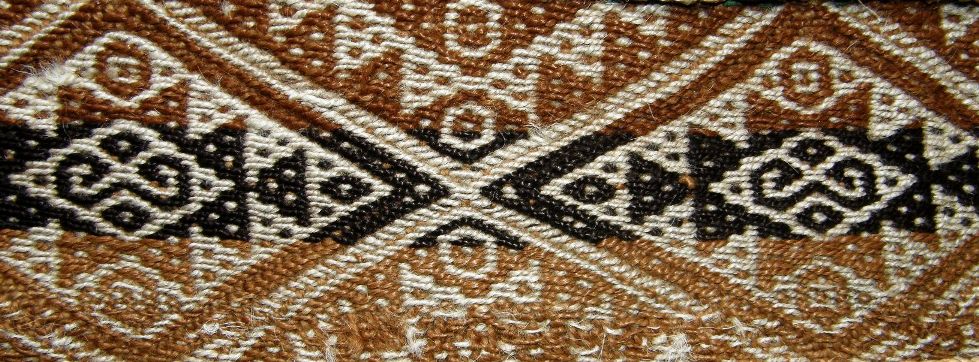
Certain small elements of the Chinchero motif alone could be woven as a partly loom-controlled piece like the pebble weave I learned in Huancayo. The central “s” and diamond motifs as well as the “eyes” would be easy to chart and weave using pick-up and two sets of string heddles. However, the structure of the other parts of the design make this impossible if one wants to exactly reproduce it. It has to be totally weaver-controlled which means pick-up for every single weft pass.

From what I have seen, the Chinchero weavers use four colors in their design, two for the central motif and another two for the outer ones. I only used three. I confess that I started with four and my color choices were so ugly that I had to unweave a good five inches and take out those warps and replace them!  That’s the price you pay for not doing a sample!

I also noticed that they usually divide the design in three sections of ten warp pairs. I divided mine as nine, twelve, nine so that the diamonds would be split down the center.

In the close-up above you can see the little pebble spots in certain areas which is what had me hoping that this could be woven using the Huancayo technique.

I love looking at these different structures and comparing and contrasting.

Recently on Weavolution a link was posted to a guild gallery of Peruvian weavings purchased in the 1990s that one of the members had brought in and there was a beautiful Chinchero design band in black and white still on the loom. I love this picture as it also shows the overtwist in the handspun wool.

So now I have taken a closer look at the very first weaving I ever bought in Peru (actually the first in South America) on my trip there in 1996. I was in Cusco before I made my way to Huancayo and learned pebble weave and this used belt in one of the market stalls caught my eye.

I sewed this belt onto a cushion in my living room and it has been there so long that I just don’t notice it any more. At first glance you see it covered with pebble spots and it looks like the partly loom-controlled pebble weave that I learned in Huancayo. However, those two sets of long diagonals that enclose the main motif do not follow the pebble weave warp float arrangement. I wove a shoulder bag in my handspun llama fiber many years ago with a motif in the Andean pebble weave I learned in Huancayo using a design based on this belt.

You can see that the central motif is the same except that I chose to weave an “S” in the very center but I was not able to exactly duplicate those diagonals as I did in my latest project, the red piece above. Believe me, the Andean pebble weave that I learned in Huancayo is a lot faster for me with the two sets of string heddles. However, I know that the Chinchero weavers are very fast at pick-up and, whatsmore, have this motif well memorized. I haven’t woven this motif enough yet to be able to let go of the pattern chart I made and that slows me down.

Here are a couple of other pieces I bought on this first trip to Cusco…

Although I have been a few times to Peru, I have only been once to Cusco  and am looking forward to seeing it again this November during the tinkuy de tejedores – a gathering of weavers in Urubamba, near Cusco over four days. I finally registered and am so looking forward to going and know quite a few people from the US and a few from Europe from my various online groups who will be there.  I will have the opportunity to meet some of the people that I didn’t manage to see on my US visit in Cusco instead! The tinkuy promises to be a wonderful event with weavers from South America and beyond meeting to share techniques. Experts in the field, including Ann Rowe and Mary Frame will give lectures and presentations on various aspects of indigenous weaving. Workshops are also being offered on Andean knitting, dyeing and weaving techniques. It is not too late to sign up!

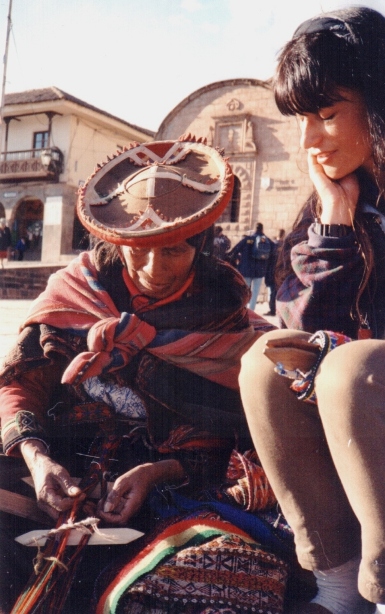
Watching a weaver at work in the main square of Cusco

I thought I would show you a few shots of my visit to Cusco and the Scared Valley in 1996.

I am wondering how much Cusco may have changed.

I have to admit that I was slightly disappointed at first as I was expecting to feel some sort of spiritual vibe from the place similar to what I had felt in Kathmandu when I was there in the mid 80s.

It was soon obvious that I wasn’t going to experience this sitting in the main plaza of downtown Cusco and my special place turned out to be Ollantaytambo.

I felt it as soon as I stepped off the bus at sunset.

My bus had broken down and we had gotten in late after having repaired the mechanical problem with banana skins!

The Sunday market at Chinchero. I bought one of the typical hats and caught the woman at right watching me, probably wondering what in the world I was planning to do with it. I smiled and walked up to her and she took off her old hat, put on the new one and handed the old one to me! I was actually very pleased to have the older one which had some character. A man, who I assumed was her son, came along and they had a good laugh about it.
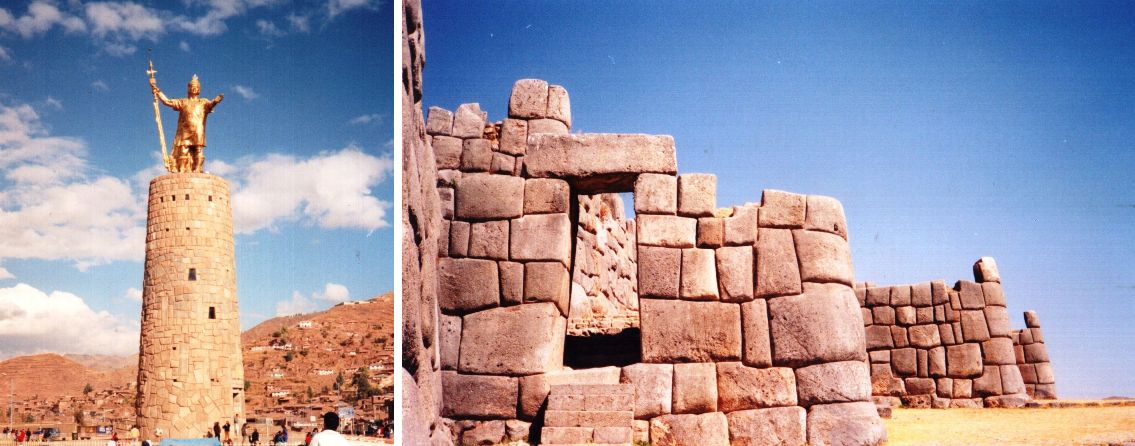
Walking around Cusco itself you can see the statue of the Inca king Pachacutec with whom the history of the Inca empire begins. He is behind one of the great expansions of the empire in the 15th century. The ruins of Sacsayhuaman with its examples of Inca stonework can be reached on foot from the center of Cusco.

A spinner and weavers near Pisac. The weavers are making the band that decorates the edge of their skirts. I have since learned from Nilda Callanaupa’s book that this kind of weaving is called golon. It is a twill tapestry weave.

There are lots of photo ops with the ladies and their lovely llamas. At right is the train station at the bottom of Machhu Pichu. Remember that this is 14 years ago. I had the “Cusco cough” and wasn’t in any shape to hike the Inca Trail and so I did a day trip to Macchu Pichu. Things look completely civilized in this picture but I have to tell you that when the train came in, everything went to hell! People were jumping on and throwing backpacks onto the train before it could even come to a halt. There were no reserved seats and far more passengers than seats and the guys who had spent three days hiking the Inca Trail were determined not to have to stand the 5 hours back to Cusco. I don’t think anyone stood in the end. There were bodies everywhere on the floor on top of backpacks in the aisles, four to a double seat etc….all very cozy, friendly and a wee bit smelly and we had a nice trip back!

Finally, after viewing my pictures from fourteen years ago, let me show you one of Guaman Poma de Ayala’s drawings of Cusco from his chronicle written in the early 17th century:

#############################################################

Finally, a reminder that my e-monograph on Andean Pebble Weave now has an  appendix with instructions for weaving this technique on a four-shaft loom.

I am hoping to warp up for a large pebble weave project on my friend Lisa’s floor loom on my next visit to the US. I leave in a week! Lisa and I wove a narrow band last time I was there.

Here is a new image of the wall hanging that Lydia made on her floor loom using one of the bird motifs that I wove in Huancayo.

Lydia calls this “Fish or Fowl” as she spent some time thinking it was a fish until I told her otherwise! She can see both a fish and a bird. I can’t see the fish at all!

Jennifer’s new backstrap at left and Lisa’s practice band on the right.

The appendix shows how to weave Andean pebble weave motifs using a combination of shafts alternated with pick-up. There are no string heddles involved. Plain pebble weave can be totally loom controlled.

So I am off to the US  next week slowly making my way to Convergence!

I will be hanging out at the Weavolution booth and wandering the vendor hall with my backstrap loom. Please come and visit, bring your loom and weave for a while. I hope to have an Easy Weaver warped up for pebble weave too. Just come along and weave with me!

Backstrap Weaving-MORE mysterious sticks and beautiful braids

MORE MYSTERIOUS STICKS!

I set up  my loom yesterday to weave a narrow band – just 28 ends. Once I had made my simple heddles, tied them in a bunch and added the shed loop I realized that my entire loom consisted of just two simple sticks – the two loom bars and that’s all – one attached to a bed and the other to me. My weft was tied in a butterfly – no sticks there. The only other stick involved was a wooden beater to prop open my sheds and beat in the weft. How much simpler can it get?

I filmed the entire process from warping stakes to ready-to-weave if you would like to take a look. (Donna, I made this especially for you!)

So, again I ask you, how much simpler can it get?

Actually it can get simpler! I was in Tarabuco recently and watched a weaver sitting on the ground deftly wind a warp around her hand and foot. She tied one end of the warp around her foot, passed a length of yarn through the end loops at the other end and secured it to her waist. Then she made simple heddles around her hand, added a shed loop and started to weave. Briiliant! All in a matter of minutes.

A weaver in Tarabuco using a “toe” loom

You are probably thinking: okay, a simple loom for a simple weave– but even very complex weaves can be done on a very basic set-up.

A weaver from Tarabuco creating a complex design on a simple loom

You may recognize Felicia above with her sleepy cat from the video in this previous post. She has a shed rod, a heddle stick and some bars between which to stretch her warp. She has just inserted a couple of thin sticks to help with the pick-up but look at the photo at left and see the complex designs that she creates on this simple set up.

Now what about those looms that you see in pictures on the internet and in those Youtube videos? Some of them are loaded up with sticks – all those mysterious sticks – what in the world do they do? Hopefully I can solve the mystery behind at least some of them here. I have to admit that there are Asian looms that I have seen online with a multitude of patterning sticks and that I still haven’t figured out how some of those sticks work.

An extra stick added in a second cross in Guatemala

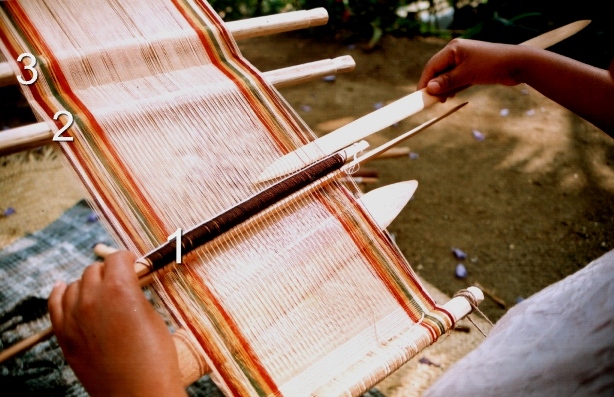
But at least I can let you know a bit about  the sticks I have seen here in my travels in Central and South America and what they do. In the picture at right, number 1 is the heddle stick and number 2 is the shed rod. We are familiar with these. But what about number 3? This is an extra stick to hold a second cross. A lot of weavers wind a second cross as they warp. I don’t.  I find that the fewer twists and turns I make on the warping board, the easier it is to wind a warp with  good even tension. I only use a second cross  on narrow warps to stabilize my shed rod which tends to slip from side to side and be a thorough nuisance. Making a second cross and putting a stick within will lock the shed rod into position.  It is very easy to create a second cross once your warp is already on the loom. Here are the steps…

LEFT: Your loom is set up with heddles and a shed rod. RIGHT: Open the shed rod shed, place your beater within and draw it down to the weaving line. Remove the shed rod. It is important that the beater not fall out at this stage as it is saving your shed rod shed. Use a back up safety string if necesary.
LEFT:Open the heddle shed and place an additonal stick within. RIGHT: Tilt the beater to open the shed up beyond the heddles and place your original shed rod within. Tie or tape the shed rod and additional stick together.You have created your second cross.
Another Guatemalan loom with a second cross installed. The shed rod is pvc pipe which is often used as it can be thick without being heavy. Notice the orange safety string – if disaster strikes (and it most probably will with those 3 little guys hanging about!) and all this weaver’s sticks fall out, the safety string will save her cross. Even the experts use them! Look at the little future weaver there on the left. She is wearing the typical long “corte” skirt and even has her own woven belt.

Some looms have a mind boggling amount of sticks but the reason can be very simple!!

LEFT: The 11 sticks on this upright loom in Ecuador will become heddle sticks. The 22-row design, which is horizontally symmetrical, will be programmed into these 11 heddles. RIGHT: This is one of my own warps set up on my Navajo loom in Chile. As I am using 4 colors in my pebble weave I have extra sticks to separate and keep the colors in order for the pick up.
Miguel Andrango’s granddaughter poses with one of the looms. You can see the two shed rods above the heddle stick. The space for the extra shed rod is programmed into the warp by using an extra stake during the warping process.

In Ecuador I saw the use of an extra stick which I have not noticed anywhere else. This is especially useful for wide warps or particularly fine yarns but I saw it being used on warps of all widths and yarn sizes in Ecuador. It is an extra shed rod. I know from my own experience that the shed-rod shed on a wide piece with fine yarns is really difficult to open. It was a very slow and tedious process on my Abba Yohanni piece, for example. The extra shed rod in Ecuador holds every second warp that passes over the main shed rod. This means that half the number of warps can be raised using the extra stick. Then it is very easy to use the main shed rod to raise the rest of the warps.

This is one of Miguel Andrango’s looms. He is a very well known weaver from Agato, a small town near Otavalo. You can watch a video of his work here. Fifty-seven seconds into the video you will get a very nice close up of the two shed rods. You will also see the typical white woven alpargatas he is wearing. I spent some time with an alpargata weaver and hope to blog about that some time. Miguel Andrango is not a large man and, although the piece above is not particularly wide,  he weaves some of the widest backstrap woven pieces I have ever seen!

A weaver near Otavalo is preparing to make her string heddles. She is using the extra shed rod on her loom. This rod has a dual purpose as it also serves to stabilize the main shed rod.

Now we come to the patterning sticks that are used by weavers in Guatemala to create designs using supplementary wefts. The supplementary wefts are either laid in to form block patterns or wrapped around warps to form little figures.

It is not my intention here to teach you how to insert and use these sticks. So, don’t worry if you don’t quite get it. No doubt, I will be doing a tutorial on this in a future post. I just want to take a little bit of the mystery out of it so that when you are looking at weavers and looms in books and on the net you may have a better understanding of what all those sticks do. For now, read on and  just enjoy the beautiful textiles!!

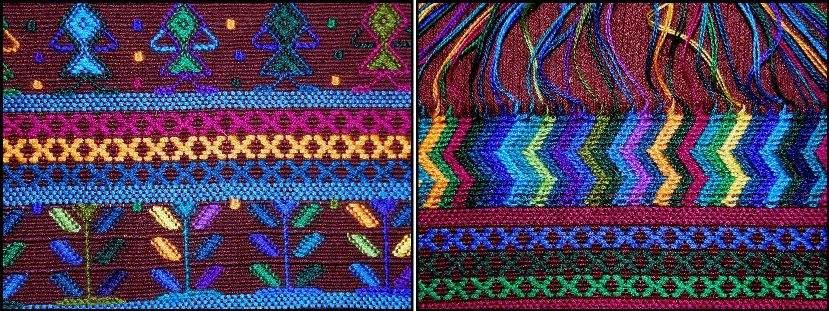
Typical designs of Santa Catarina Palopo.LEFT:Supplementary wefts have been laid in to make designs like the X’s in the center or wrapped around warps to form figures, like the stem of the plant below and the arms of the woman above. RIGHT: The upper design has been woven using the technique employed in making the typical huipil of this town.
LEFT: Bands woven using patternig sticks and offered to toursits. RIGHT: The typical huipil of Santa Catarina Palopo. These colors are a relatively recent introduction. Old huipiles in crimson and white can be seen in paintings by Carmen Pettersen. My teacher told me that only the very oldest women in the town may still have the old huipiles.
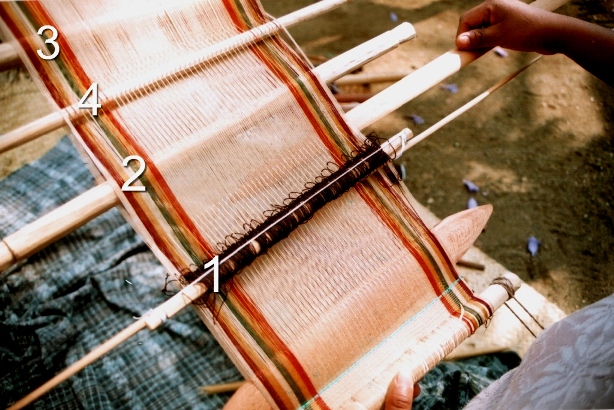
Carmelita is teaching me on this loom in Santa Catarina Barahona. Number 1 is her heddle stick, number 2 her shed rod, number 3 the stick in the 2nd cross and number 4 is her newly introduced patterning stick.

These patterns are created by adding two extra sticks to the loom – the patterning sticks. In Santa Catarina Barahona, the weavers open the shed-rod shed and pick up every fifth warp. They store these warps on a stick – the patterning stick that sits up behind the shed rod.

The heddle shed is then opened and, once again every fifth warp is picked up but in such a way that each picked up warp sits between two that were picked up on the first patterning stick. The warps are stored on another patterning stick which sits behind the shed rod but, this time, under the warp.

Here is how the loom looks with both patterning sticks installed.

Number 1, heddle stick. Number 2, shed rod. Number 3, stick in 2nd cross. Number 4, 1st patterning stick and number 5 the 2nd patterning stick. The patterning sticks are simply drawn down towards the heddles to create sheds for laying in the supplementary wefts.
This diagram shows a loom in profile with the positions of the patterning sticks
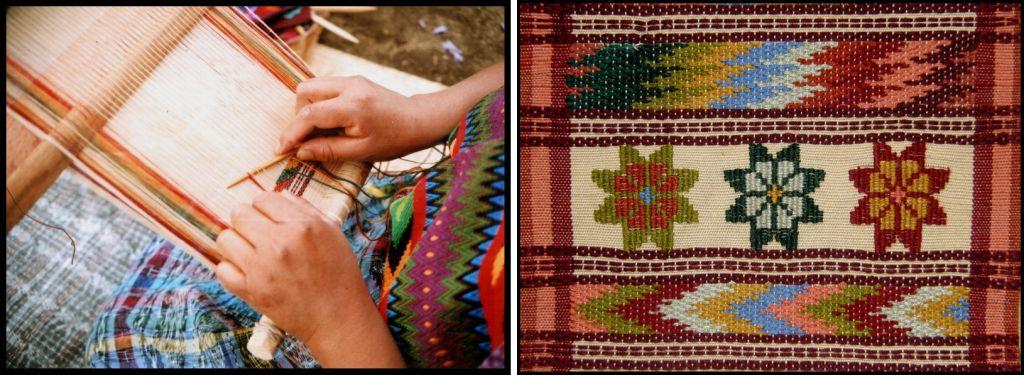
LEFT: Lydia is laying in a supplementary weft in one of the patterning sheds. RIGHT: The patterns at top and bottom were made with the aid of the two patterning sticks.

Sometimes a second pair of  patterning sticks is inserted when the weaver wants to change the design. These are only temporary and will have to be removed when she wants to return to the original design.

Take a look at the photo below…can you name all the sticks?!

Two pairs of patterning sticks are in this loom

################################################################################

BRAIDS AND FINISHES

A sling braid made from llama fiber from the Colca Canyon area of Peru. It comprises a braid with a finger loop in one end and a cradle in which the stone to be hurled sits.

Now to return to the simplicity with which I started this post…………some braiding and edging techniques with few or no tools required.

After having done the tutorial on cross knit looping last week, I  remembered another interesting edging that I learned with my sling braiding teacher in Yanque, Peru. We used it to edge the cradle section of an Andean sling braid.

I made one sling with him and he taught me to make three different braids. Men in Peru braid their slings holding all the braid strands in their hands – no other equipment is required – and can quite happily stroll along the road while braiding. Two of the braids I learned had twenty-four strands and the other twelve. I was told that the main use of the slings these days is to hurl stones in order to  keep control of animals straying from the herd.

LEFT: The single cross two-color edging that I was taught on my sling. RIGHT: A double cross two-color edging on an Andean sling that I bought.
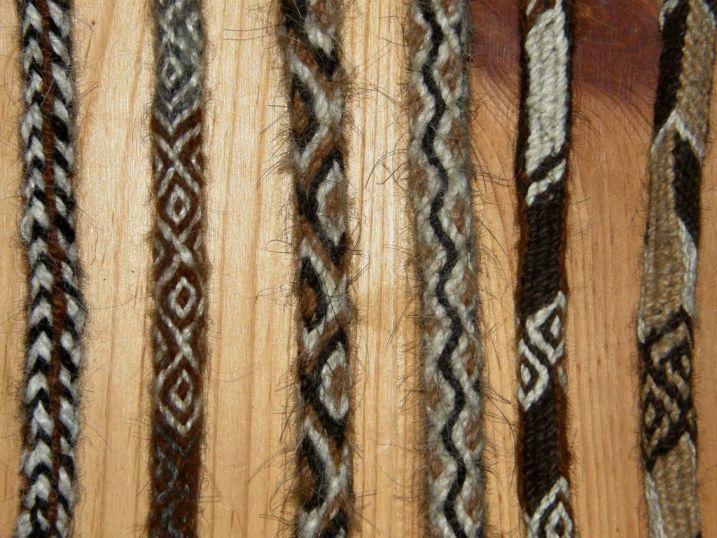
A few of the braids used for Andean slings. Named from left to right…PALMA, MARGARITA (2nd and 3rd),SALSA and CAJAMARCA (5th and 6th)

When making an Andean sling, first, one half the braid is made. The strands of llama fiber are measured from the tip of the nose to the toes and then doubled. The first section usually includes the finger loop. More strands are added to weave the cradle in tapestry technique and then work the braid for the other half.

The cradle is woven on a backstrap set-up tying the braid to the waist while the strands which serve as warp are tied to a fixed point.  Then the second half is worked in two braids – first a thick one and then a thin one to finish.

Decorative tassels and edgings are the last things to be put in place. Some of the tassels can be quite flamboyant. My teacher didn’t care at all for the more extravagant decorations!

I love these slings as there are several skills involved. Without even realizing it, this was my very first taste of backstrap weaving and with this one teacher I learned so much. He taught me the Palma and Margarita braid styles and a thin version of the Palma which didn’t seem to have a name, a little tapestry weaving by backstrap as well as tassel making and decorative edging.

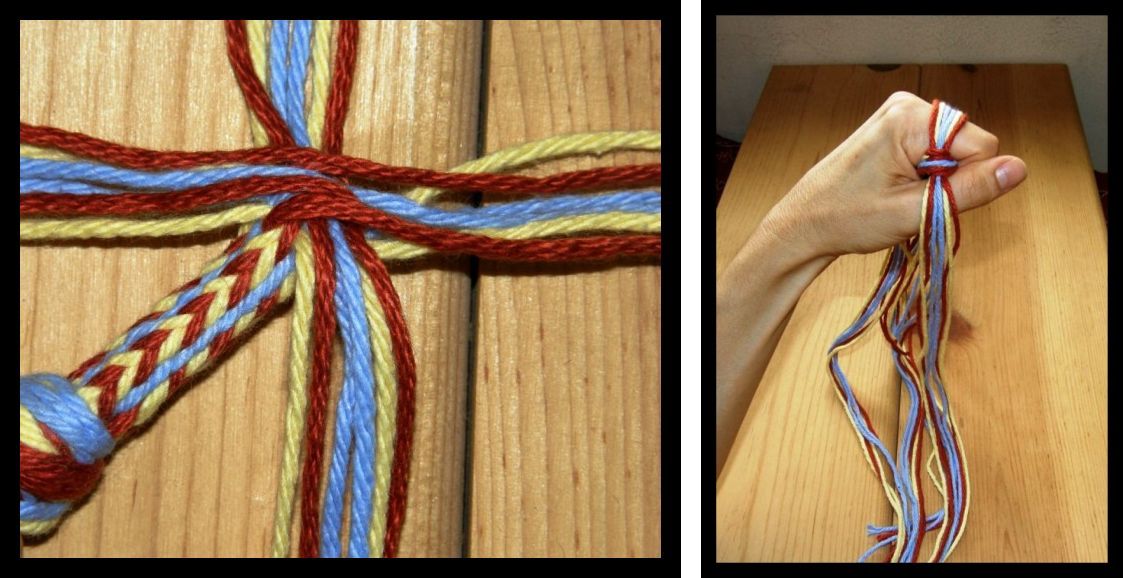
LEFT; The very start of the Palma braid with the 4 sets of 6 strands used to make it. RIGHT: My hand in the braiding position. Two opposing sets of strands are interchanged. The braid is then rotated  90 degrees so the other two sets can be worked.

Zacarias was a marvelous teacher with a lot of patience. He would get me started on my work and leave me while he harvested the barley crop – plans were afoot to make some alcohol – moved the animals from one field to another and generally took care of things on his property.

LEFT: My sling braiding teacher, Zacarias on his property near Yanque, Peru. RIGHT: A woman by the shores of Lake Titicaca shows me how to hurl a stone with a sling braid.

################################################################################

WHAT HAVE YOU GUYS BEEN UP TO?

I know that backstrap weaving isn’t for everyone and I am so glad that people are still able to make use of the instructions here and at Weavolution and use the techniques and designs on other looms. Ellen Turner, in Denmark, has woven a double weave band on her inkle loom using my tutorial at Weavolution.


She made a celtic design inspired by something she saw on the internet.

I also ran into Jessica’s blog where she has been experimenting with double weave on an inkle loom too. Check it out.

Kristina in Germany  wove a double weave band on her inkle loom using her own handspun llama fiber. She commented that it put a lot of stress on her inkle loom so that is one important thing to take into consideration.

So if you have been enjoying the designs and have found the tutorials interesting and tempting but are still hesitating about getting strapped in, remember that you can adapt these techniques to other looms. I have set up warps on my rigid heddle loom and woven bands with string heddles rather than with the rigid heddle.

I have to tell you, though, that for me the backstrap loom wins hands down for the ease with which I can adjust tension with the slightest of body movements.

And, finally, I mentioned above the paintings of Carmen Pettersen. Check if your library has a copy of “Maya of Guatemala-Life and Dress”. Her paintings of Guatemalan people in traditional dress are stunning.

Backstrap Weaving-balanced weave, double weave and balanced double weave

BALANCED WEAVE, DOUBLE WEAVE AND BALANCED DOUBLE WEAVE….

I made some New Year weaving resolutions. What about you? One is to weave at least one balanced weave on my backstrap loom per month. So I got one done in January which I’ll show you later and I am planning February’s project. You will see that I am all about process rather than product for this project as all I know is that I want to weave a shadow weave piece but I have no idea what I want the piece to be. I am counting on an idea developing as I go through my yarn bags.

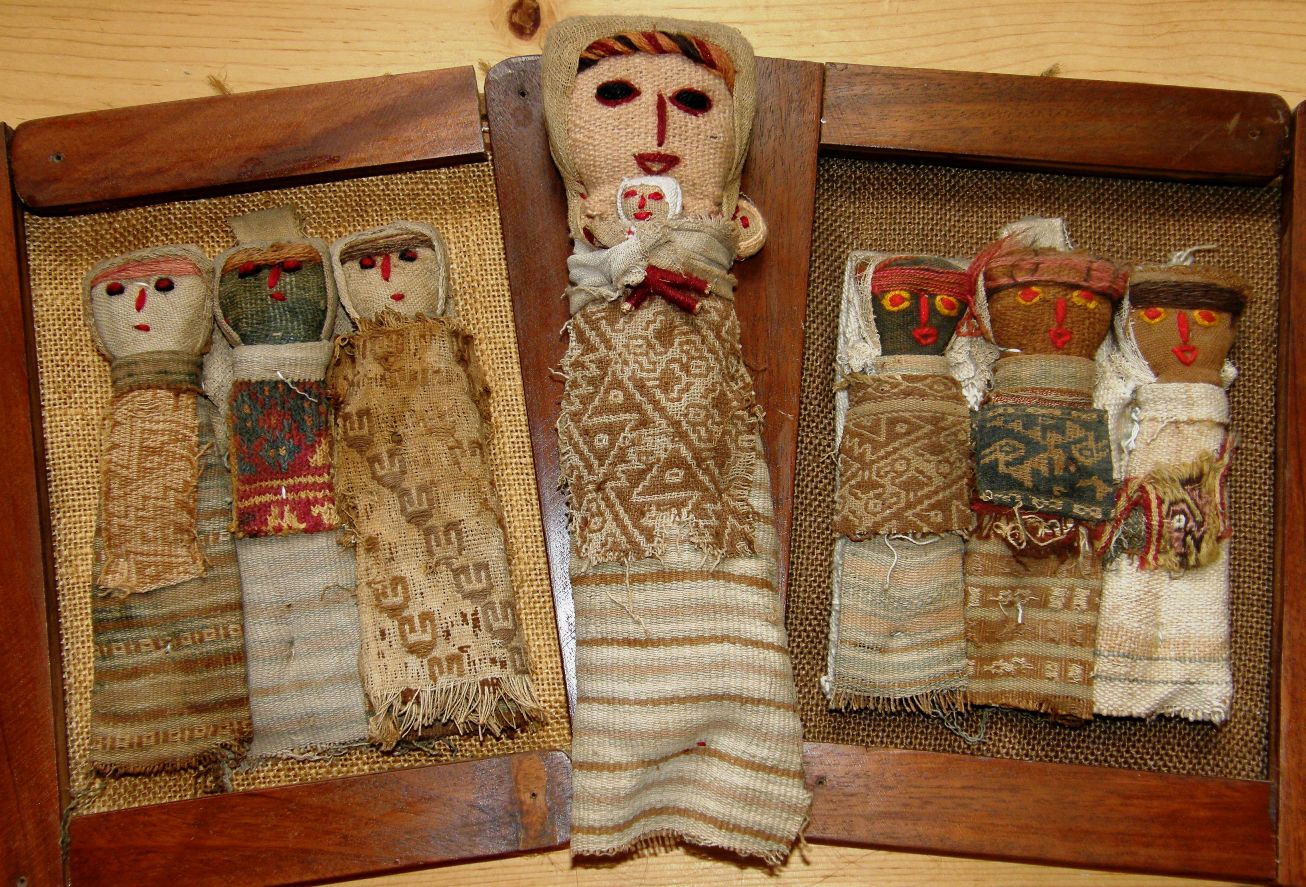
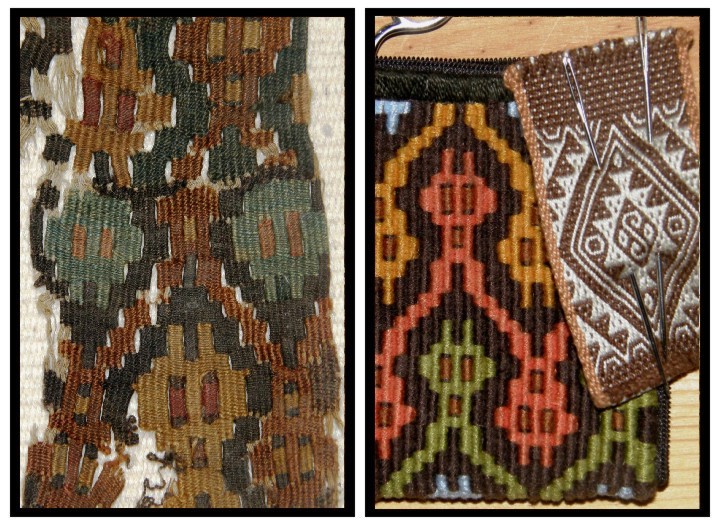
Another resolution is to weave reproductions of the designs on some pre Columbian textile fragments that I have gathered over the years. How did I get hold of these tiny scraps and fragments? Well, some industrious Peruvian artisans have been recreating Chancay dolls and dressing them in bits and pieces of old textiles.

Sets of Chancay doll reproductions

The Chancay culture existed  on the Peruvian central coast from around AD 1000-1476. It is believed to have been conquered and incorporated into the Inca Empire in the mid to late 13th Century. The people of this culture were prolific weavers and, as the central coast of Peru is a particuarly dry area, many of their textiles have survived remarkably well preserved  and are kept in museums around the world.

I was dubious for a long time about the authenticity of the textile pieces. However, it just didn’t make sense that someone would weave structures, some of which are no longer woven in Peru, take all the trouble to stress the fabric in order to make it look old, tear it up, sew the pieces onto dolls and then sell them for very little in the street market.

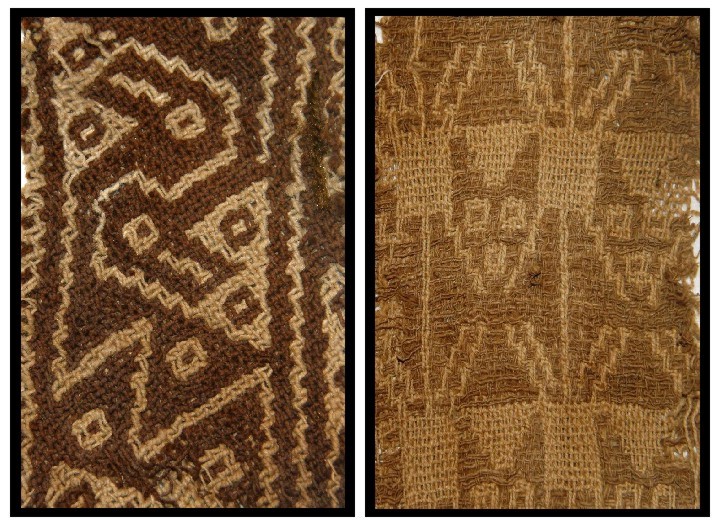
A close look at a couple of the fragments with bird and bat motifs

I have yet to find a good image of an authentic Chancay doll to make a comparison but apparently the originals did not have embroidered faces. Rather, the facial features were woven into a piece of cloth which was wrapped around plant fiber to form the doll’s head. As with most things, I imagine these dolls started out as quite faithful reproductions of the originals and that the quality of the work has since deteriorated.

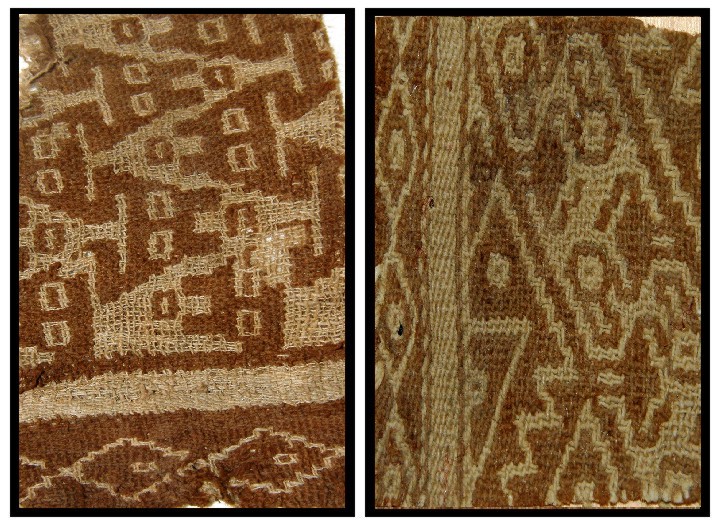
Two more pieces with bird and snake motifs

The original Chancay dolls have been  found in tombs and were possibly funerary offerings. Recently I found an article online which, not only confirms the authenticity of the ancient textile fragments used to dress and decorate the dolls, but also gives information abut the Chancay culture and speculates about the dolls’ purpose. It just gives me chills looking at and touching these pieces-something the museums won’t let you do! and wondering about the weavers, their looms and their lives.

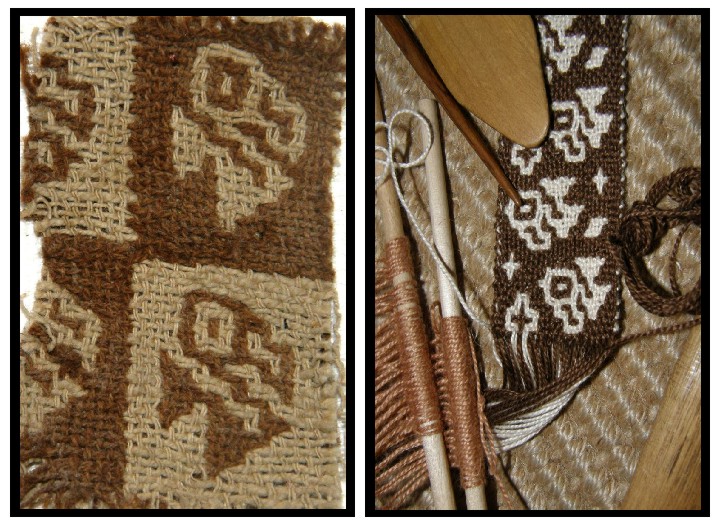
Snake motif in pebble weave

I have been weaving the designs I have seen in photos of museum pieces for years. The two pieces above  center and right were made by me in the 90s. Imagine the thrill when I found a fragment, on the left, with a very similar snake design some years later.

A piece in slit tapestry that I copied on my backstrap loom

I copied the slit tapestry piece at left on my backstrap loom without the slits and made it into a small sewing kit purse with a zip on three sides.

This little purse goes with me on all my weaving safaris. Some people tell me that the design looks like figures from a 1980’s video game!

This was a very slow and tedious weave using split embroidery floss for the weft. I was quite happy to see the end of this one!!

Bird motif in pebble weave

Again, I had woven this little 4-color bird motif many years before finding the little fragment almost completely in tatters on a doll at the Otavalo market. I had to work hard to hide my excitement while cooly bargaining with the vendor-bargaining at the Otavalo market is expected. Although my bird is a little different and was copied from a book, it is still thrilling to see a  similar original piece.

According to the aforementioned article, birds were highly esteemed in these cultures “because of their ability to cross between earth and sky” as well as due to ” their association with water…..and source of guano for fertilizing crops”.

Pre Columbian bird motifs

I love these birds and they find their way into a lot of my weavings.

Balanced double weave bird figures

Which brings me finally to balanced double weave and my weaving resolution for the year.  This structure is no longer woven here so there is no one around to teach it to me. I found out that the Huichol people in Mexico weave it and recently got Chloe Sayer’s Mexican Textile Techniques which has pictures of some examples. I had dismissed the instructions by Suzanne Baizerman in Double Woven Treasures of Old Peru as they were written for the treadle loom but recently returned to them to find, to my delight, that I understood them. So I set to and wove the above band using the pattern chart in the book which just happens to be the very same bird motif that I have on a doll fragment.  I used four sets of heddles for this weave and kept the cross sticks in to help spread the warps. This was just a narrow band.  Now I hope to make a large wall hanging incorporating bits and pieces from several of the fragments.

Something that is on the loom at the moment….supplementary weft patterning. You can see the tiny fragment from which I am copying the design on the right. This was another exciting find as, at least here in Bolivia, I have not seen this technique used for anything other than hat bands and on one old chuspa in a book. I would love to know the original use for this piece.

You can find the chart for this design here. I have also put the chart for the Abba Yohanni double weave design from last week’s post here.

This is just a small selection of my fragments. I am sure that more will show up in future blog posts as I strive to reproduce them. There is one technique that I as yet have not been able to identify.

Now what about those balanced weaves? I am still very much into my recently gifted rigid heddles and have been using them to make samples and a few useful pieces.

"Strawberries and cream" pinwheel mats

The rigid heddles arrived while I was in the middle of this “strawberries and cream” pinwheel piece. Rather than struggle on with my multiple stick spacers, I added the rigid heddle to the backstrap loom and finished it in no time.

Last month we had a WAL at Weavolution weaving rosepath motifs so I used my rigid heddle as a spacer and beater and used four sets of string heddles for the motifs.

Spring garden table runner
A small log cabin sample

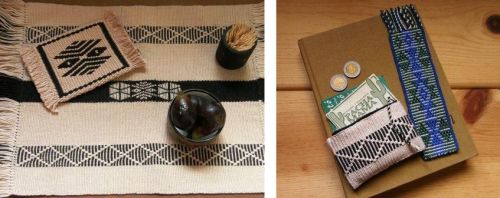
Sometimes I just mess around and make samples trying to discover what is comfortably possible on my backstrap loom. The above log cabin piece was the first balanced weave I tried before my rigid heddles arrived. I thought the squareness of the design would look good as a notebook cover. I’ll take this little notebook along for my next weaving classes wherever that may be. It is nice to find a use for even the smallest of samples. You can see my test piece for the llama bookmark has been padded with foam and made into a pin cushion saddle cloth for the ceramic llama!

As the title of this post suggests, there is also some warp faced double weave to talk about. The last of my weaving resolutions is to design some nice letters to weave in double weave. I have been very much inspired by Linda Hendrickson’s beautiful book Please Weave Me a Message where she has designed alphabets to weave with tablets. You may have listened to Syne Mitchell’s recent interview with her at WeaveZine. I hope to come up with something like that for double weave. My stick alphabet above looks very humble next to her beauties.

Lastly, I would like to show off some work by one of my blog readers. Ann Littlewood wove a supplementary weft patterned  band using embroidery floss for her supplementary weft. It is a great way to “paint” in designs and play with colors. It absolutely makes my day when I hear from people who have  used my instructions. 🙂
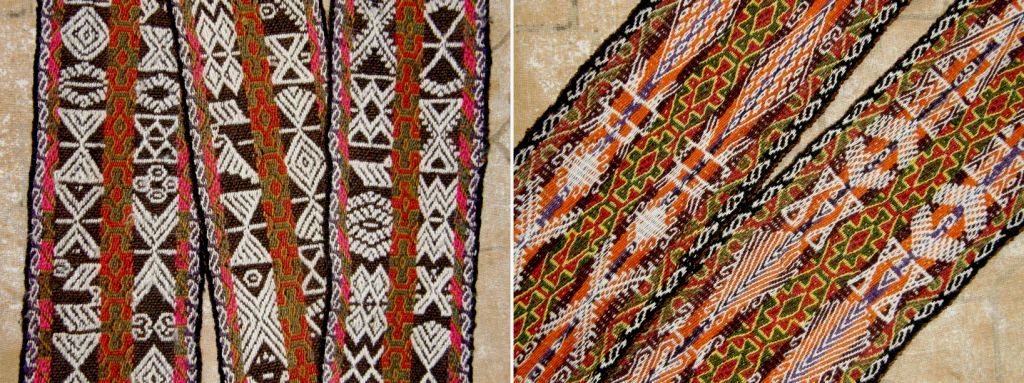
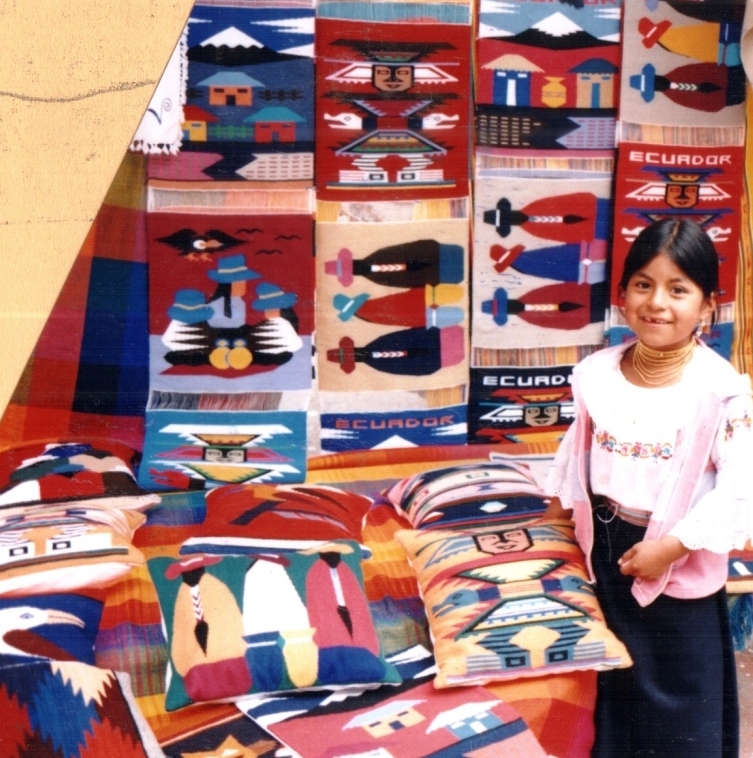
I will leave you with a cheery little Otalavalena, below, at her brightly colored market stall at the enormous Saturday market. Otavalo is a town in Ecuador which has a lively and popular craft market every Saturday and is where I bought some of my dolls. Goods from near and far are sold there such as braids and beads from Peru, molas from Panama and Colombia and belts from Bolivia and Guatemala as well as an enormous variety of weavings and crafts from all over Ecuador. While the market largely caters to tourists, locals also shop there for clothes, footwear and beads.
Thank you for the nice comments last week. I am glad you found the videos useful. One of  the visitors from Argentina, who has a limited understanding of English, had one of those “aha!” moments when she watched the double weave video. I hope to be able to show you one of her weavings soon 🙂

A girl from Otalvalo in typical dress-embroidered blouse, "anku" secured by a woven belt, beads, woven hair wrap and alpargatas

Backstrap Weaving- A Word or Two and a Video on Warping.

I love how easy it is to warp for backstrap weaving especially after reading and hearing about what is involved with warping those bigger table and floor looms-all that threading! However, finding the place and equipment for warping for the backstrap loom is often the problem. Finding the sticks  to put a loom together seems to be relatively easy, making a nice beater takes a little time and thought but where and how to wind that warp-now that can be tricky.

As you can see above, my first weaving teachers in Peru taught me to make tiny bands using a tiny warping board. I learned two techniques with them and was eager when I got back to my home in Chile to incorporate both into one large piece.

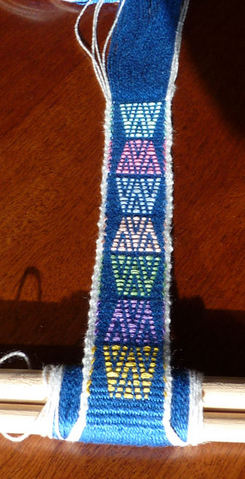
Perhaps a  little over ambitious but you can see the results of my attempts to wind a longer wider warp. My warping stakes leaned horribly and I ended up with this wonky thing-look at the far loom bar and the tilt on it! Firmly grounded warping stakes are a must.

Well,  I persevered and put a lot of work into that piece but it was never quite right. At least I was satisfied that I could weave the techniques without the supervision of  my teachers.The piece itself ended up in a box. Recently I got it out and salvaged what I could and am now using it to cover some small photo albums that I take with me on my travels.

The colors and layout were inspired by woven sashes that I had seen on Taquile Island on Lake Titicaca,  Peru.

Photo album covers made with the two patterning tecnhiques I learned in Huancayo, Peru.

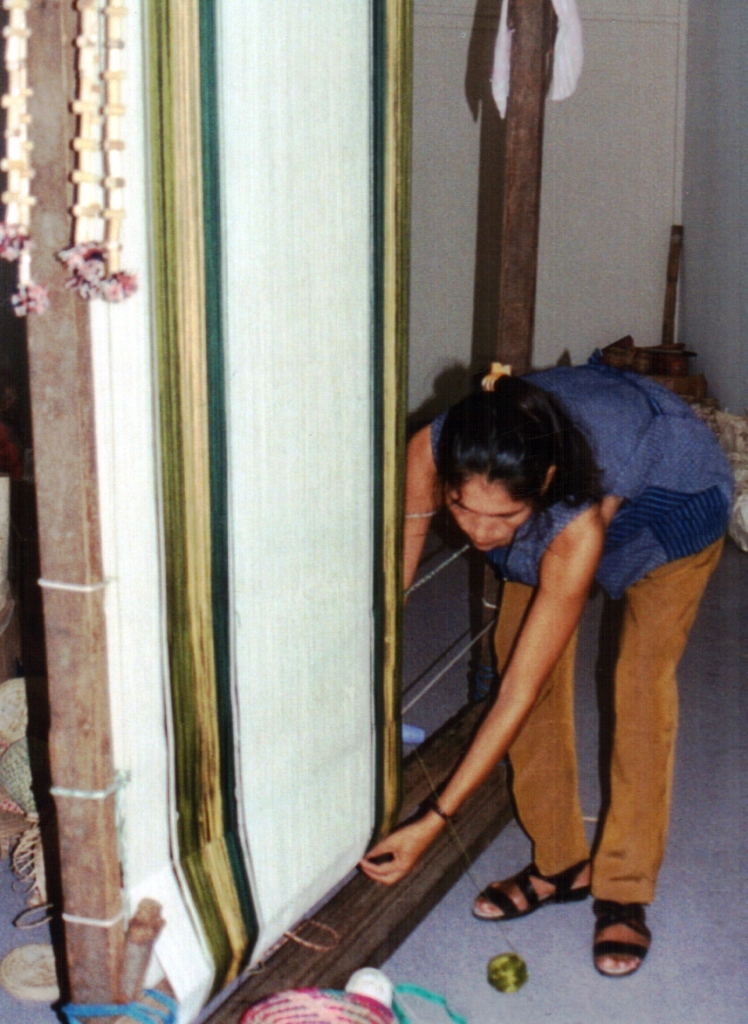
A year later I went to Bolivia and studied with two sisters in Potosi. They weave their large pieces on a staked-out ground loom and only use a backstrap set-up for small bands. I love the way they warp there. Two women seat themselves at each end of the loom and roll the ball of yarn back and forth while winding the figure-of-eight. The only problem–you tend to talk too much and lose count. Neither of us was counting in our native language-Hilda’s being Quechua and mine, of course, English. Between that and the chatting we lost count many times!

We are using respun acrylic yarn in the bright colors that the weavers in Potosi love. With two people, this would be a great way to direct warp for backstrap weaving.

The weaving I worked on in Potosi is almost finished here. It is a four-selvedge piece and there are a couple of inches to go to close the gap. It took all day to weave that last bit!
Warping the Potosi way (almost)

Probably nostalgia for the fun I had had with Hilda and her sister Julia in Potosi led me to try the following way of warping  when I got back home to Chile.

I can tell you right now that it is not as entertaining to do alone and it is pretty slow and difficult trying to manage two colors at once as you need to do for double weave and complimentary warp weaves.

Neverthless I got this warp done, it was well tensioned and even and I wove a big bold design inspired by designs of the Mapuche people of central Chile and Argentina.

One of the Mapuche inspired designs I wove into the above piece.

I traveled a lot more, met many weavers and saw a lot more ways to warp for a variety of looms and techniques, some of which I’d like to share with you here.

Making a dovetail warp for the collar of a poncho in Otavalo, Ecuador. Note the horizontal bar that helps stop the stakes from leaning in towards each other.
In Salasaca, my teacher Felipe wound a mini dovetail warp for me to take home just in case I forgot how to make one for the belt weaving technique he taught me. This was put together hastily. The sticks leaned and the resulting warp was crooked but it was just meant as a reminder and served its purpose..
Look at this beauty from Guatemala at a nice height so you can stroll up and down with your yarn.
Warping for a hammock in Santa Cruz, Bolivia. This would certainly give you a work out.
With my teacher, Trini, looking on I am learning to make a dovetail warp for a mini hammock in Zapote, Ecuador
Probably the set-up I would most like to have–just the 5 stakes that my teacher in Santa Catarina Palopo is using here.
My favorite way—group warping! We are making a straight warp here with stakes and metal rods driven into the ground-Salasaca, Ecuador.

Probably the most interesting system I saw, which, unfortunately, was impossible to photograph, was near Huancayo, Peru where a woman had stakes embedded in the walls of the hall of her home at chest level so she just had to walk up and down the length of the hall to warp. Now if only I had a longer hall……….

So what do you do if you don’t have a warping board? I have seen a Youtube video where a guy wedges stakes between books in his book case and warps around those.

I was lucky to have this chair to use when I first got settled in here in Bolivia.  It was useful for narrow projects- practice bands, small bags and bookmarks.

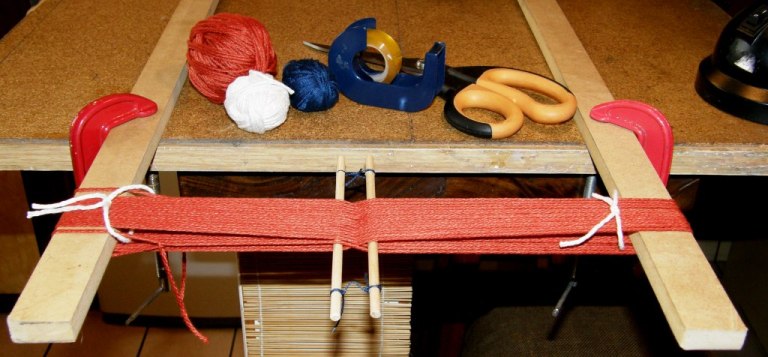
The way that I showed in my WeaveZine article using clamps  is fine as long as you can clamp those stakes down really well . Don’t use your good table for this. I have heard of people turning chairs and tables upside down and using the legs. I once used a coat rack in a hostel room where I was staying. Whatever way your creativity and circumstances lead you, just make sure that the stakes or posts are very well grounded and will not lean in at all as you wind your warp. Even the smallest amount of lean will make a difference.

If you see yourself continuing in backstrap weaving and making longer and wider pieces, it will be worthwhile buying a warping board or making something sturdy and more permanent. It doesn’t need to be fancy as you can see from my little ”beauty” here.

This allows me to wind a 36”  long warp which I have used to make shoulder bags, sets of three mug rugs, placemats, table runners, pillow covers  and wall hangings. For making longer pieces such as belts and guitar straps, I have had to get creative.

Basic warping involves winding your yarn around two stakes, like those seen above, in a simple figure-of-eight path. Your loom bars will replace the two warping stakes and the cross you have created will allow you to set up your two sheds using a shed rod and continuous string heddles. I often put a second cross in once my warp is on the loom. (More about that in a future post)

Warping with a single color

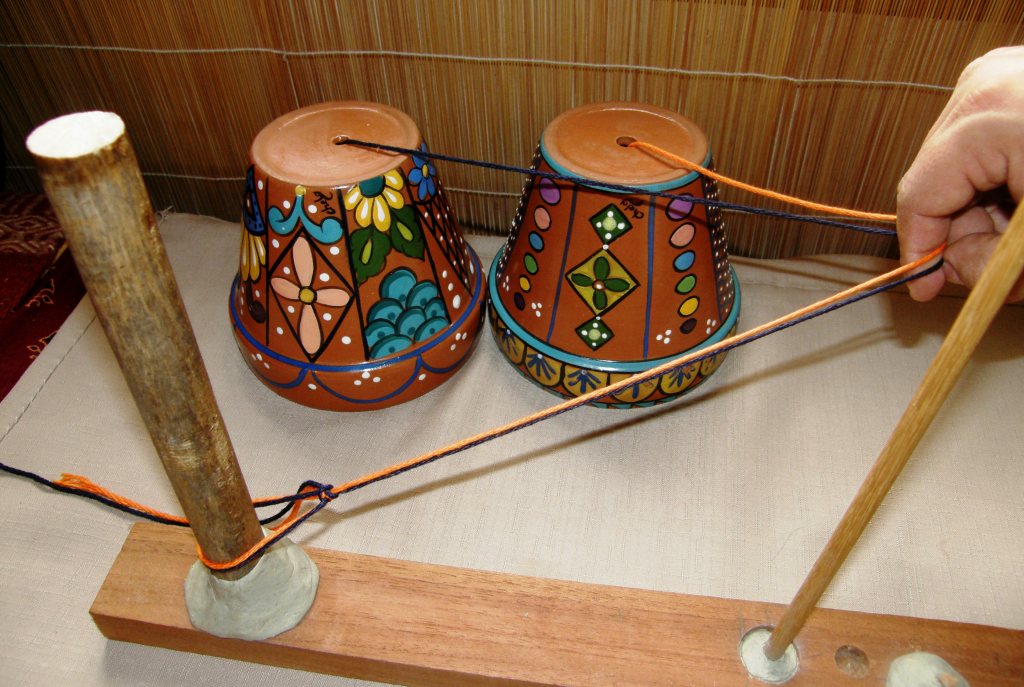
If you want to weave a  piece with horizontal stripes in two colors or weave simple warp float patterns or any other complementary warp technique you will need to wind two colors together. Again, this can be done on just two stakes. I like to place my balls of yarn in flower pots so they don’t roll about and get tangled. Other hints and tips will come up in future posts or you can find them in the Backstrap Weaving Group forum at Weavolution.

Winding red  and yellow yarns together
Preparing to wind 2 colors together on my smaller warping board.  Note the large loop of yarn around the warping stake which can be easily slipped off the stake and onto your loom bar.
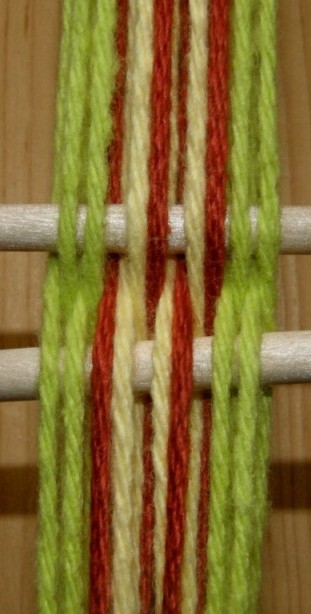
Warping with 2 colors together will result in a cross like this.
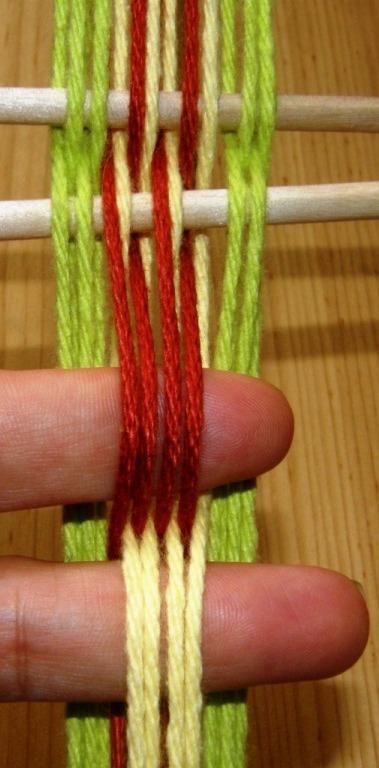
The colors on this tiny band can then be rearranged so that the original cross can be replaced by a new one where each color along with the green borders is in its own shed.
Many Andean weaves are complementary warp weaves and require an arrangement of warps into sheds of two colors as shown above right. This arrangement of warps will allow you to weave something as simple as horizontal stripes or more complex warp float patterned weaves.

FOR THE ADVENTUROUS!!

The following is a video from my Flickr page which shows how I was taught in Peru to warp with two colors using four stakes. The colors are separated– each color into its own shed on the warping board itself as you warp–fast and efficient and especially recommended for wide warps. (The two additional stakes that you see in the video are temporarily fixed to the warping board with ”blu-tack”).

Just to finish off, here is what I am working on at the moment……

Two-weft double weave piece in progress

I fell in love with this design the moment I saw it posted at Weavolution. A member had woven a reproduction of a tablet woven curtain that hangs in a cave church in Abba Yohanni, Ethoipia. These curtains were produced and hung in many such churches in Ethiopia in the 17th Century. Rob S, who wove the reproduction, used over 300 tablets. This is just a small part of the overall curtain design. I am weaving it  in two-weft double weave. I have a strip of double weave bordered by plain weave. One weft weaves the plain weave and upper layer of the double weave. The second weft weaves the lower layer of the double weave.

This is quite a change after making all those colorful key fobs but now I have to deal with the black picking up every single speck of dust in the house! I hope to now reverse the pattern and weave a white motif on a black base. I am not sure what I will make of this piece. I’ll decide when it is done. 🙂