I have been kept from my loom at home this week. Normally this would have left me very agitated but it has been for a very good reason.
I spent my Friday goof-off day and all weekend working on a slide presentation and then woke up on Monday morning to my boyfriend reading to me from the newspaper over breakfast about an Encuentro de Tejedores (gathering of weavers) that was going to happen right here in my home Santa Cruz.
Oh darn I thought with a sinking heart, I bet it’s on when I am due to be away in the US. So, when does it start? I asked, dreading what would surely be a disappointing response.
TOMORROW!
was the shocking reply. Maybe we just missed all the previous announcements. I really had no idea and so there was a mad rush to gather information and make sure that I could be a part of it. The conference is officially entitled…
ENCUENTRO DE PORTADORES DE TRADICION DEL UNIVERSO TEXTIL ANDINO Y DE TIERRAS BAJAS
(A meeting of the bearers of the traditions of the Andean and lowland textile universe)
which brought weavers, artisans, anthropologists and academics from Colombia, Ecuador, Peru, Argentina and other parts of Bolivia to my lowland home. Now this sounds like an enormous gathering but it wasn’t really. Only two to four people came from each place which has made it an extremely intimate experience with plenty of space and time to spend chatting with and getting to know people.
Only a handful of outsiders such as myself have attended which makes me feel even more privileged but at the same time alarmed and saddened although not totally surprised by the apparent lack of local interest in this event. Perhaps it wasn’t widely advertised in order to preserve this intimacy and make it more possible for the weavers themselves to interact more closely. Either way I feel extremely blessed to have been able to participate.
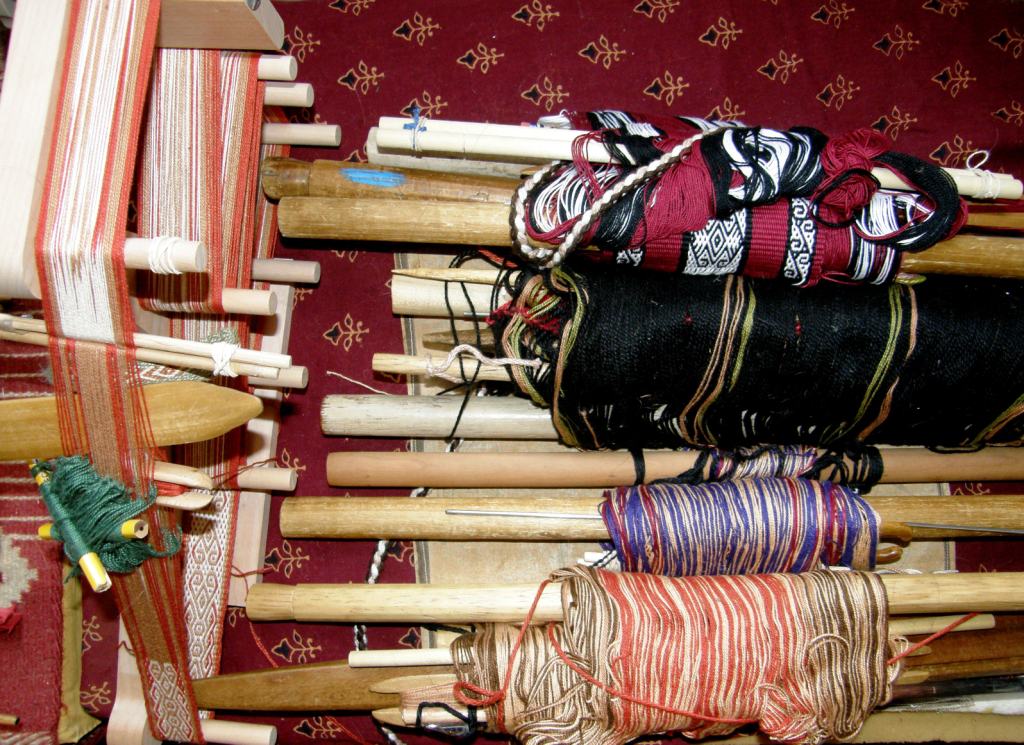
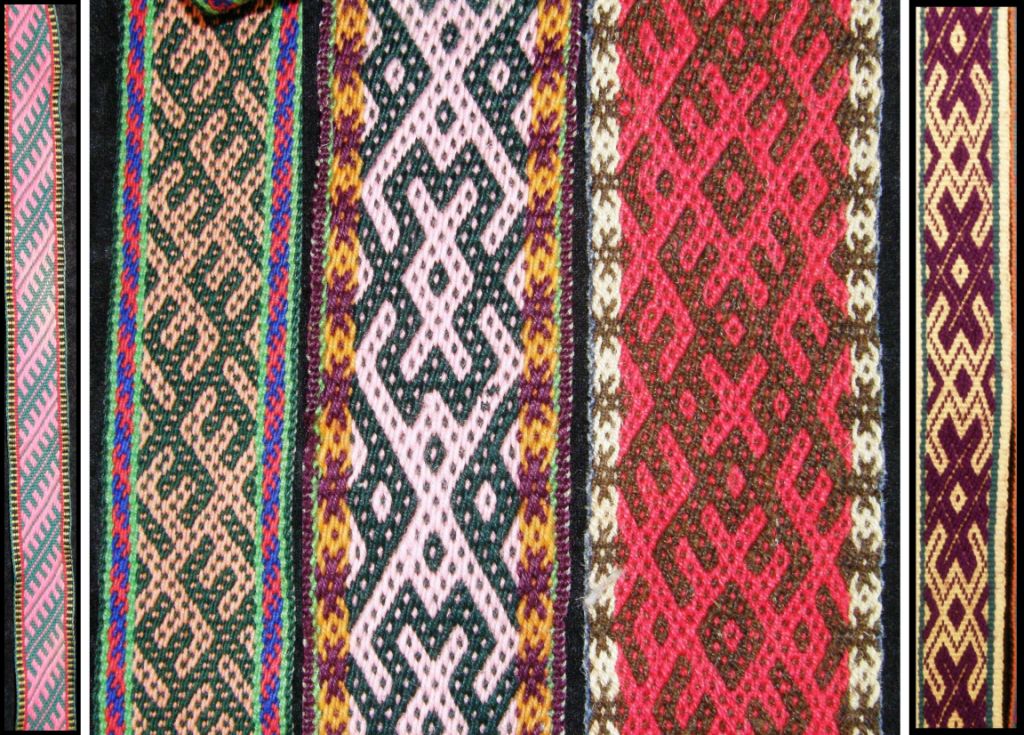
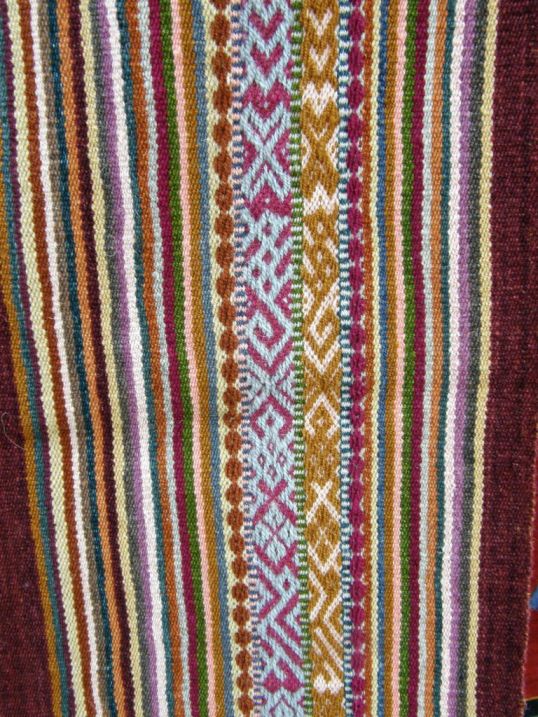
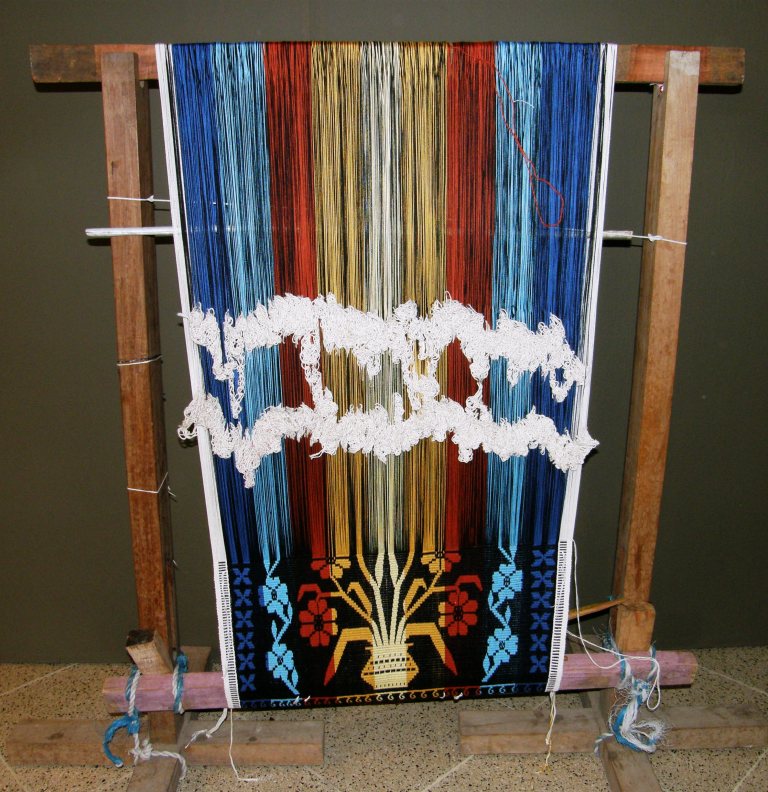
Weavings from highland Peru, lowland Bolivia and the Chilean high plains.
So, this means that this week’s blog post will be rather short as there are still two more evenings and one more day of conference to go. I will give you a few tidbits here to whet your appetite for a full report next week. I am still in the process of gathering information, facts, etc…and would hate to get anything wrong and I apologize if I have misspelled names.
I will tell you now that this whole event was organized by three wonderful Chilean ladies, the idea for which had its roots in an exhibit by Chilean artist Natasha Pons, which will run here for a month, called “Relatos Migratorios”. The Centro Cultural Simon I Patiño made it possible for people like me to experience all this for free. I still haven’t gotten over this fact!
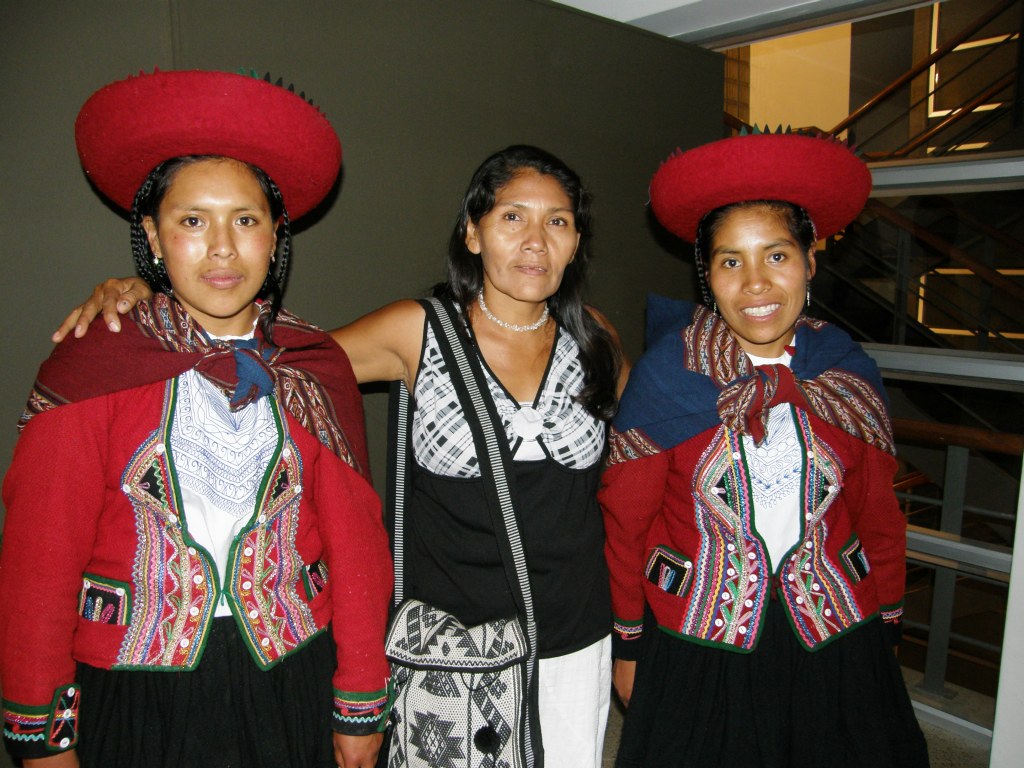
Angela Suarez, a Guarani weaver of the Bolivian lowlands met Chinchero weavers Sonia and Sanaida(sp) at the inauguration gathering.
The inauguration of the conference and exhibit took place on Tuesday. I went along and met up with my Guarani weaving teacher Angela. Walking up the stairs at the cultural center, my heart skipped a beat when I saw two ladies from Chinchero, Peru right behind me.
Last November after a little weaving class with Angela we had to part for some time as I was leaving for the Tinkuy de Tejedoresin Peru and she was going to her home of Isoso to organize the weavers to make an enormous order of woven Christmas cards. I had told her about the exciting event in Cusco all the time wishing that I could have gotten my act together and taken her with me although I doubt that she would have gone with the extra responsibilty she was carrying at that time to fulfill the Christmas weaving orders.
So, here now was a little part of Peru coming to her instead! along with Colombia, Chile and Ecuador. And, on top of the beautiful pebble weave bag that she is carrying in the picture above, she brought one her wonderful works-in-progress in the Moisy technique to show to the highland weavers.
The program comprises three mornings of four-hour workshops along with audio-visual presentations and conferences in the evenings. The first day’s workshop was backstrap weaving which was offered by the ladies from Chinchero along with Celinda and daughter Isobel, Aymara weavers from the northern Chilean highlands.
Organizer Cristina introduced the workshop and put it very well when she explained that there are many roads that can lead to a single destination and many ways of achieving the same objective. The warping, set up and weaving techniques used by the Aymara and Quechua weavers teaching us here side by side have their differences but our goal, she explained, would be to learn to weave narrow bands, called jakimas in the Quechua language of Chnichero, and what the Chilean weavers call cintillos.
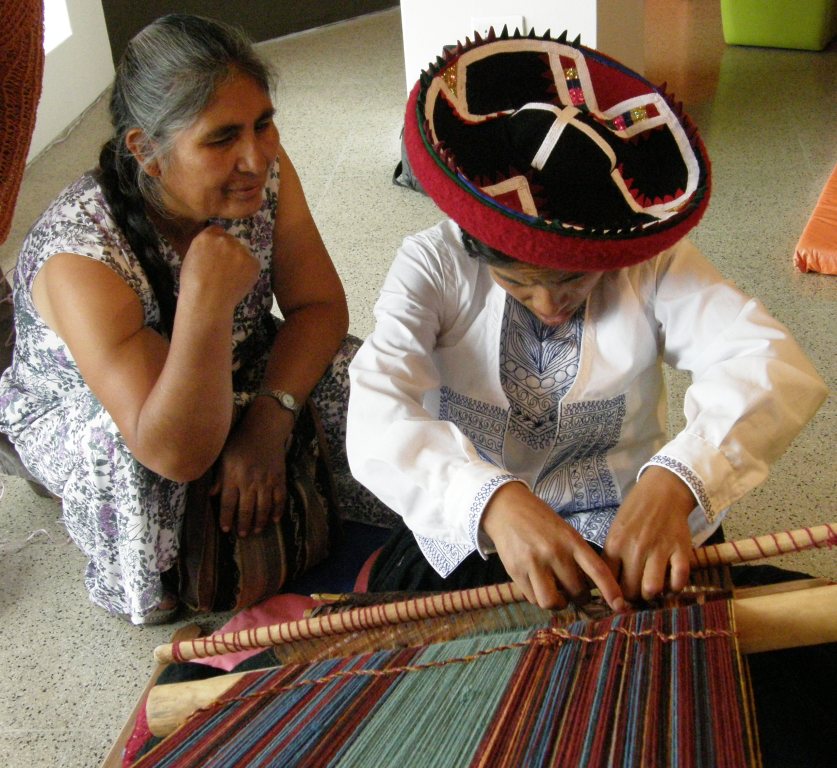
Aymara weaver Celinda watches with fascination as Chinchero weaver Sanaida works on her pick up weaving.
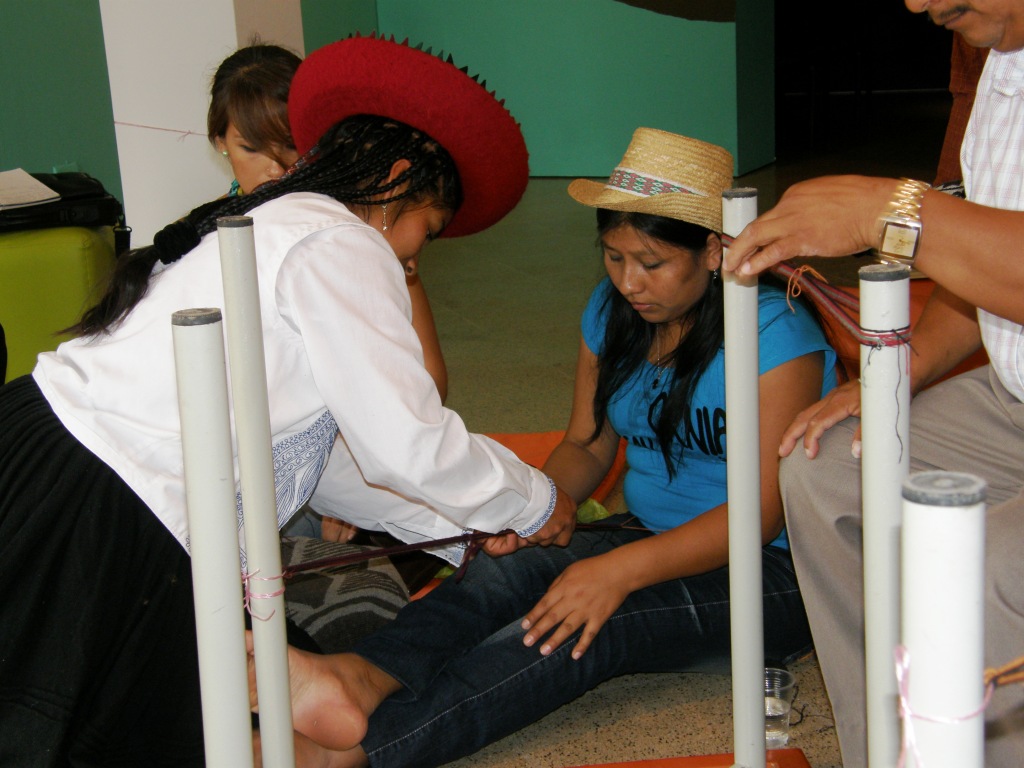
Cabuya fiber artisan Maritza from Colombia receives help from Sanaida while one of the Ecuadoran gentlemen prepares his warp around a pair of table legs.
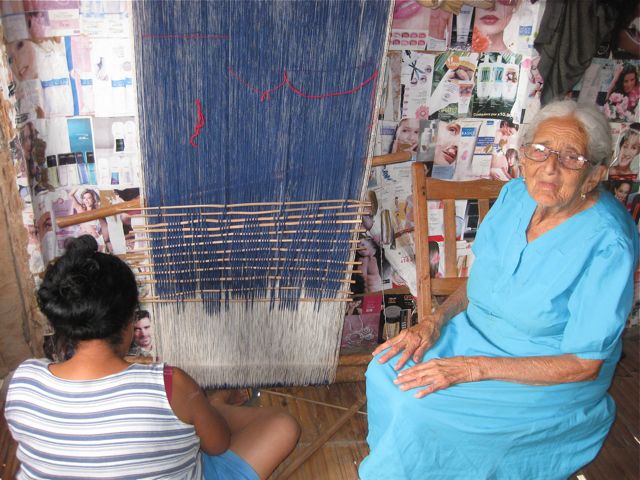
Well, you can imagine that this had me wanting to hop from one group to the next so as not to miss a thing! but I settled finally with Sonia and wove my first flat band with the gorgeous Chinchero handspun (I had used this fiber before to make tubular bands at the tinkuy).
My experience with my own handspun has been almost exclusively with llama fiber and so there were quite a few interesting things to note about this wool warp, the behaviour of the weft, the appearance of the woven surface from the high twist yarn and the different kinds of weft that Sonia and Sanaida were using.
Having the backstrap weaving moves down, I was able to focus very much on the material rather than on the technique. So, I did get to weave this week after all.
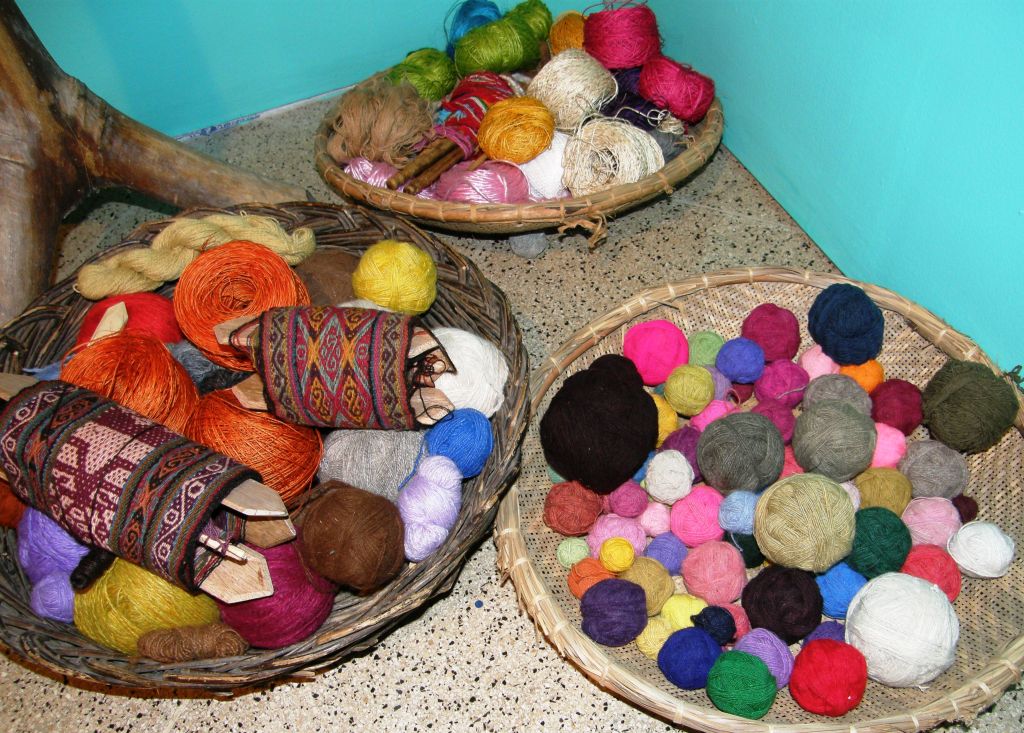
Cabuya fiber from Colombia and handspun wool from Chile and Peru along with other random bits of cord and twine that we used to tie up the warps.
The artisans from Ecuador, Colombia and Oruro in Bolivia joined in enthusiastically as well as a small group of outsiders such as myself and staff from the cultural center. Most outsiders were non weavers and were terrified to beat hard and pull at the warps fearing they would break. The handspun wool was of course wonderfully resistant which was a good thing as there was the usual amount of beginner heddle-sawing going on.
I didn’t have to worry too much about missing out on Celinda and Isobel’s (the Chilean weavers) instruction on day one as today Angela and I got to spend a lot of time with Celinda as she wove. I found her very tranquil and lovely to watch. Daughter Isobel, on the other hand, is a live wire! You will see and hear more about her next week.
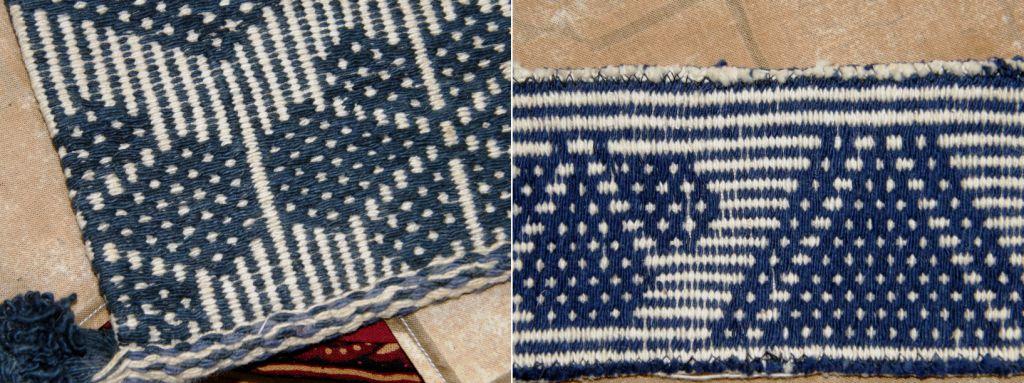
The technique that Celinda was demonstrating is a variation of the Moisy that Angela weaves except with three patterning colors which requires a fourth set of string heddles to manage. This does not create a double faced textile but there are no long floats on the back of the band either.
Angela noted that Celinda’s heddle order arrangement was quite different to hers and asked many questions. I could see her soaking it all up.
Finally she wasn’t asking questions but rather pointing things out to confirm that she did indeed understand. I wouldn’t be surprised to see her adding this to her repetoire and you can be sure that if she believes that any of Celinda’s ways are better she will adopt them. She is already using a stick for her lower set of heddles on her narrow bands after asking me to teach her how to make them on a stick – something she said she had always wanted to learn.
Well, I really must stop here as there are more events to attend tonight and one more day of this conference to go. No doubt there will be much to tell and show next week.
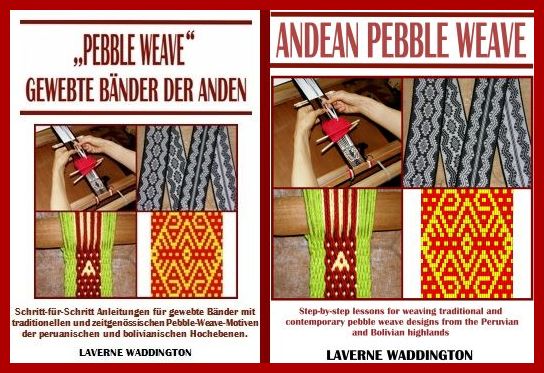
I can’t go without giving my thanks to my online weaving friend Kristina Krenzer who has worked hard to translate my e-book Andean Pebble Weave to German. It is now available on Patternfish. It looks so weird and, at the same time, so great in another language! Of course you can get the English version on Patternfish too.
Ich danke Kristina Krenzer für die Übersetzungsarbeit. Meine Monographie über die Stippenweb-Technik der Anden, auch bekannt als “Pebble Weave”, ist nun auch in deutscher Sprache bei Patternfish erhältlich .
My weaving explorations seem to be taking me further and further afield these days…outside my city, my country (Bolivia) and even outside the continent and I have found myself visiting SE Asian weavers in the USA and learning about weavers in the Middle East from books.
Sometimes I forget about the treasures that are here right in my own backyard.
I wrote about the Ayoreo people who live in this area and their looped bags in a post a couple of weeks ago and the difficulties I have had in winning their trust so that I could learn more about them and their crafts. I have given up on that for now but hope that I can pursue it again some day. In the same way I was reminded of a Guarani weaver with whom I made contact here over six years ago.
I used to visit Angela, a Guarani weaver, every Saturday morning over a period of a couple of months about six years ago. She had her loom set up in a handcraft store and was warping to make a hammock.
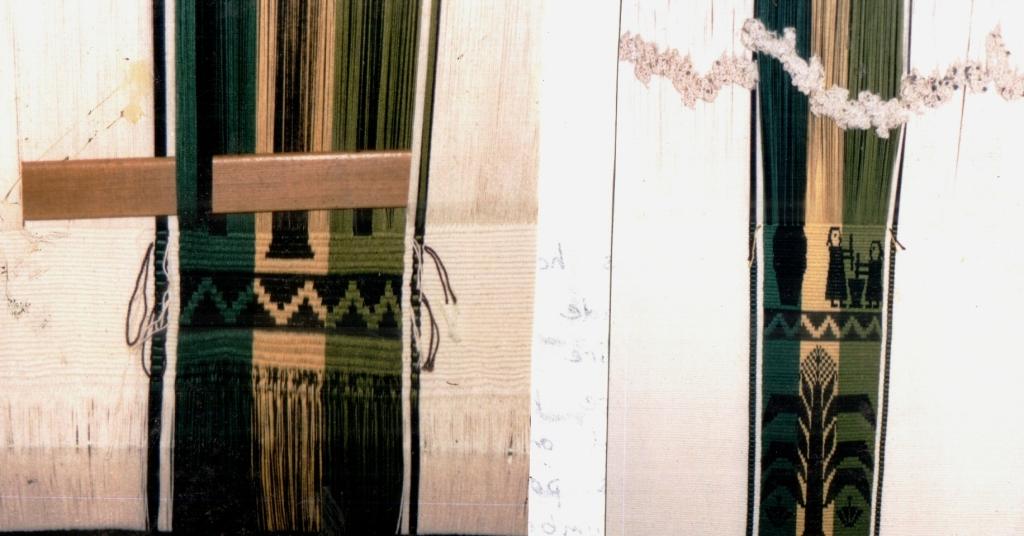
It was such an opportunity to meet up with Angela like this as it is very difficult to find weavers right here in the city let alone a weaver who has a loom and a place in which to use it . Angela’s hometown of Isoso is about twelve hours drive away from here. Angela would weave in the store twice a week. On my Saturday visits I got to see her warp most of the loom, but missed seeing her setting up the heddles. I saw her start the weaving and part of the designs. The white cotton hammock had three bands of green, yellow and black pick up designs. Angela’s motifs included flowers, geometrics, pineapple plants and scenes of people in their typical daily routine.
The motifs are hard to see on my scanned photos. On the right you may be able to make out two ladies “machucando”, that is, pounding plaintains, in order to make “masaco”, a typical Santa Cruz snack.
I would ask Angela where she lived hoping that I could maybe visit her at home and have some lessons. She had told me that she had a small loom in her house. She would stretch out her arm and say “leeeejos” (“lejos” means far) as if to discourage me from visiting. Unfortunately, her son fell ill before we could really bond and she stopped coming to the store. Eventually the loom disappeared and now even the store is closed. I did manage to give her a copy of the photo of herself and her baby boy before I lost touch with her.
After Angela’s disappearance, I found bits and pieces about Guarani weaving in books and found that the technique she was using to weave her hammock is called Moisy. They also use a pebble weave which in the Guarani language is called Karapepo. I bought a hammock and bag in the Karapepo technique
I was able to copy the deigns from the hammock using Andean pebble weave technique and make this guitar strap.
From books I learned that the earth and the cosmos are represented by the star and snake skin designs. These are pretty much the only designs you will see woven in the pebbled Karapepo technique. In the Moisy technique, however, the weavers have a far greater repertoire and the designs are not like any others that you will see any where else in Bolivia. They speak of the lush tropical fruitiness of Santa Cruz! Leaves, flowers, vines, butterflies, animals and people involved in their daily routines or dancing and celebrating carnival are depicted on the hammocks, wall hangings and bags.
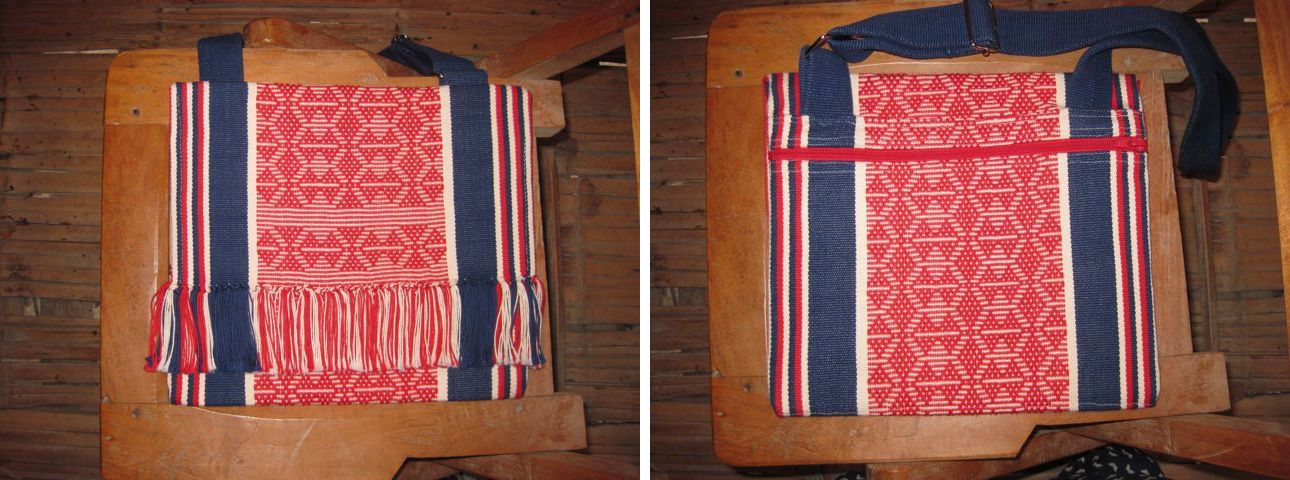
Cell phone pouches made with the Moisy technique with flower and butterfly motifs. A band of horizontal bars serves as the strap and velcro has been sewn on as a closure. A black band was woven and sewn simultaneously to the edges using the weft as the sewing thread to give a very nice neat finish.
And here is the best part of the story…I bought the above cell phone pouches from Angela last weekend at her home. Yes, I found her again, was invited to her home and got to spend the afternoon with her looking at her looms and weaving. The little fellow pictured with her above is now 8 years old and she has since had another son – that makes five sons in all now! Her eldest is married with his own family.
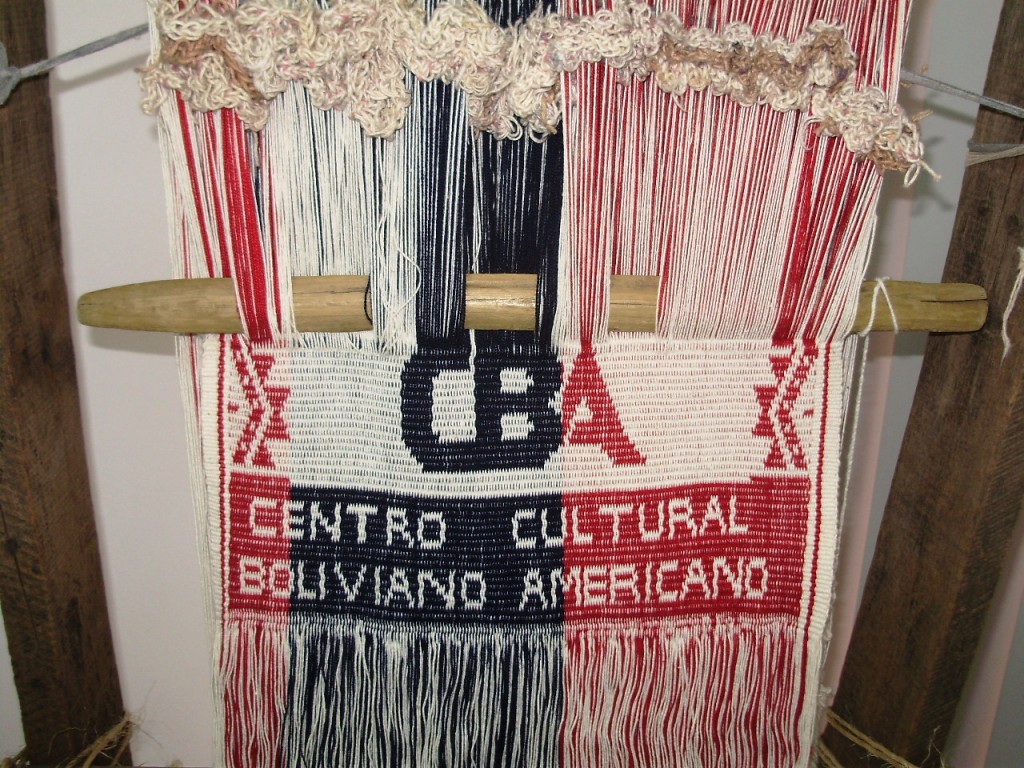
How did I find her? Very much by chance. The English institute where I taught English for eleven years started offering classes in the Guarani language shortly after I left. I recently noticed the loom and weaving pictured at left in the library which had been made and placed there to celebrate the start of the new Guarani program. I asked the receptionists about it they showed me the lovely cell phone pouches that a Guarani weaver had sold them. Fortunately, they had the weaver’s number and it turned out to be none other than Angela.
One of the karapepo cellphone pouches that Angela made for the receptionists – quite a different style to the blue and black ones she made using the Moisy technique.
I was very keen to see how Angela sets up and weaves her pebble weave as well as to learn how to do the Moisy. I was pleased to see that she uses the very same crochet cotton to weave as I do. When I visited her last Saturday, she had just warped up to make a colorful wall hanging on the smaller of her two looms, had just finished a book bag for a university student and was also in the middle of weaving a belt with fighting roosters which had been ordered by a Brazilian business man who mounts the woven pieces on leather and then apparently sells them for a very good price in Brazil. Angela’s enormous hammock loom is there in her patio and she can warp up several small projects on it at a time. She seems to have enough orders to keep her very busy.
She showed us one of her hammocks, the finished book bag, her cell phone pouches, greeting cards depicting carnival celebrations in her hometown of Isoso, pillow covers, belts and purses.
At left, the smaller loom warped for a wall hanging in Moisy technique and at right Angela is warping a narrow band to show me how she sets up for Karapepo technique.
She stretches a cord across the loom around which the start and end loops of the warp dovetail. Except for when she is weaving a hammock, she usually creates a third selvedge by starting her weaving right at the dovetail string.
I filmed her warping, making heddles and weaving the Moisy technique. As usual when I have the camera in front of my face. I find it hard to really absorb what is going on and so I had to come home and watch the movies over and over before I could grasp completely what she had been doing.
I like the way she makes her string heddles chaining them together. You will see her doing this in the video.
Angela’s chained heddles.
She, on the other hand, loved my heddles on their sticks (I had taken my backstrap loom, which she found very amusing, with a double weave piece on it to show her) and so I taught her my way of making heddles.
Here are two short clips of Angela warping using the dovetail string and making heddles. As she makes the heddles she is explaining to me the meaning of the designs on my guitar strap and telling me about the snake skin and how the snake that taught the first Guarani woman to weave in a dream is also embodied in the Parapeti River. Her little boys can be heard chattering in the background in the Guarani language.
In the next video, she is weaving the belt with the fighting roosters in Moisy technique. She has three sets of string heddles and another shed above the cross string. You must see the way she does her pick up. It is quite unique!
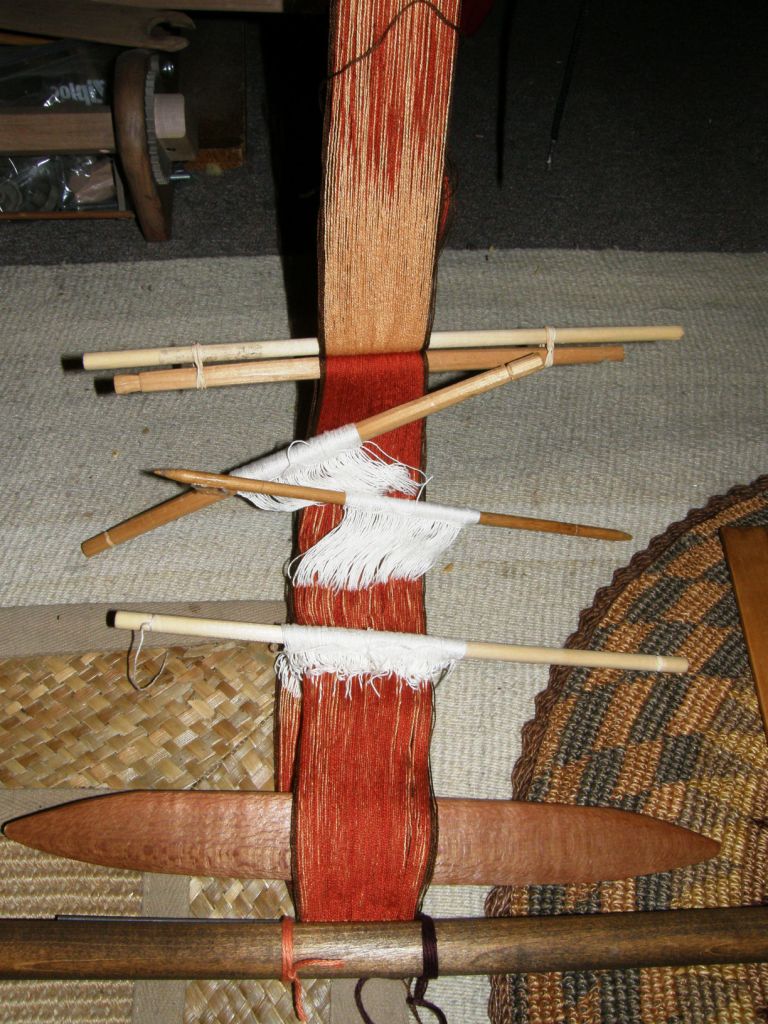
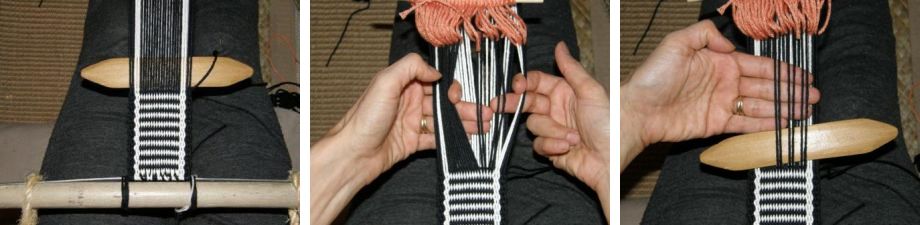
The lower of the three string heddles holds a shed through which she simply passes the weft without having to do any pick-up. The two upper heddles hold the separated colors. She pulls on those two heddles working her way from left to right to pick out the colors she needs. Watch her left hand gathering up the selected warps. Her eyes are down at the weaving line watching the design so she knows which colors to pick. Then she opens the shed which the lower string heddle controls. Then she does another row of pick up before opening the shed above the cross string, through which she can pass the weft without having to pick up warps. This shed is a little difficult to open as the warps have become entangled in the string heddles.
So I had to go home and see if I could figure out the Moisy! The best way was to try and reproduce one of her woven motifs. I found that I had to pull the weft really tightly through the shed to have my design look like hers. It makes a very, very sturdy fabric. For those of you who have my Andean Pebble Weave book, I would compare it to the thickness you achieve when you use the three-shed border. In fact, I quickly realized that the three-shed border is the very same structure.
There is my attempt to reproduce the flower on the cell phone pouch. It really helped a lot knowing that we both use the same thread so I knew what width to expect right from the start. I really had to pull the weft tight and force it into that width.
The motif is not exactly the same but I understand the technique.
I tried to chart it and then found my chart was wrong and so ended up just reading it directly off the cell phone pouch which was a really good exercise.
I did notice that Angela is weaving the rooster belt a lot more loosely. .
I confess that, although I started out with my warp set up as Angela showed me with the three string heddles, I found it quite uncomfortable simply because it was so foreign to me…impatient!… and so I changed to another set-up after a while with which I felt more at home. I would like to try Angela’s pick-up technique on her vertical loom and hope to visit her again soon. She has invited me to come and see her floral designs on the colorful wall hanging she is making.
In the meantime I will work on my charting as I would like to make a collection of these uniquely Cruceño designs.
###################################
What else have I been up to?
Well I started my double-weave belt using the Bedouin designs that I wove into my wall hanging.
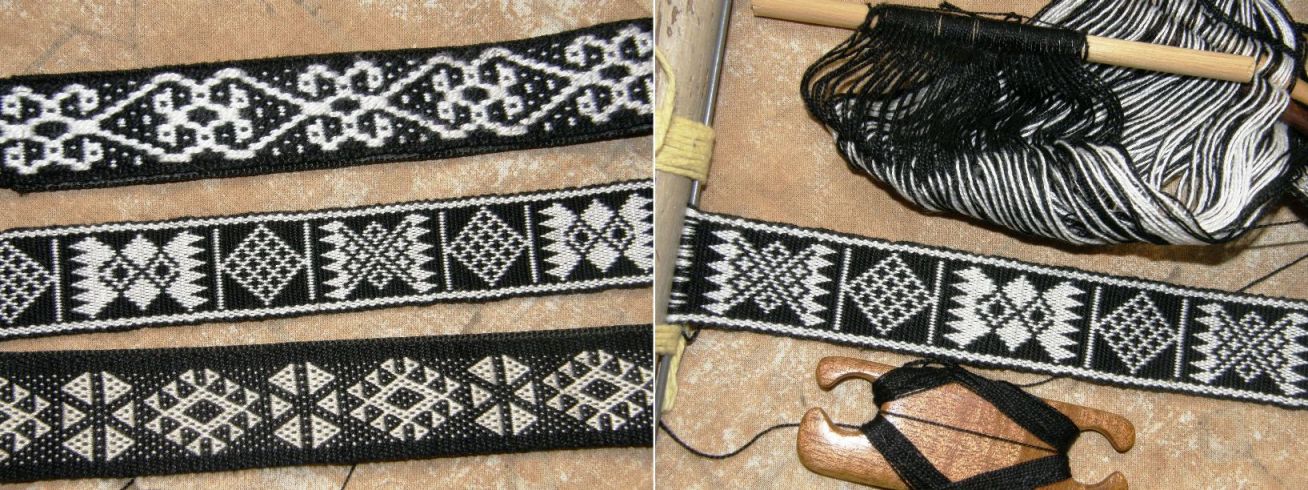
I seem to be gathering a collection of black belts. At least they are all in different techniques with designs from different cultures. The uppermost one is two-color alternating warp floats (my made-up name for it…we could use the Kyrgyz word “terme” for it). The center one is the yet-to-be-finished double woven example with Bedouin designs and the lower one is, as you must all know by now, Andean pebble weave as taught to me by weavers from Ayacucho, Peru.
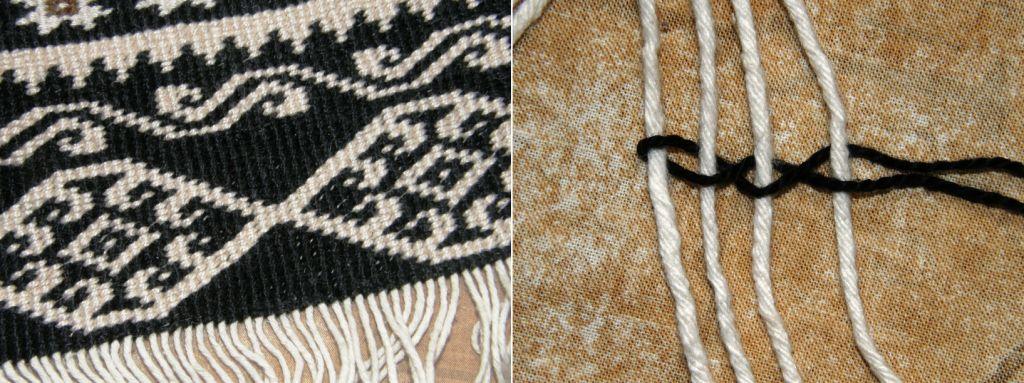
I have also been weft twining but using floats this time to make a textured design in one color which is inspired by the alpargatas worked in ply-split darning that I showed you last week.
I am totally unimpressed with the results so far!
I’ll keep at it. Who knows, it may look better as I progress. Maybe I should overlap the floats by two warps instead of just one. What do you think?
What have my online weaving buddies been up to?
Anna, who is cycling down to Tierra del Fuego has turned up in Salta, Argentina and has added braiding to her skills following my instructions for the Margarita braid.
This is one of the two braids that was taught to me by my sling-making teacher in Peru.
I usually advise people to start with the Palma braid first as a skills builder but she jumped right in and, as you can see, has done really well!
I have gathered up all the information on the Palma and Margarita braids that is embedded in various posts here on my blog and put it all together on one page here.
Zacarias in Yanque Peru taught me these two braids which are used to make the typical slings of the area.
Marsha Knox of Pandula Arts Creations has been playing with simple warp floats in two-color alternating pairs on her Gilmore Wave loom and has created some great designs of her own. More designs like these can be seen on the Guatemalan belt in this post.
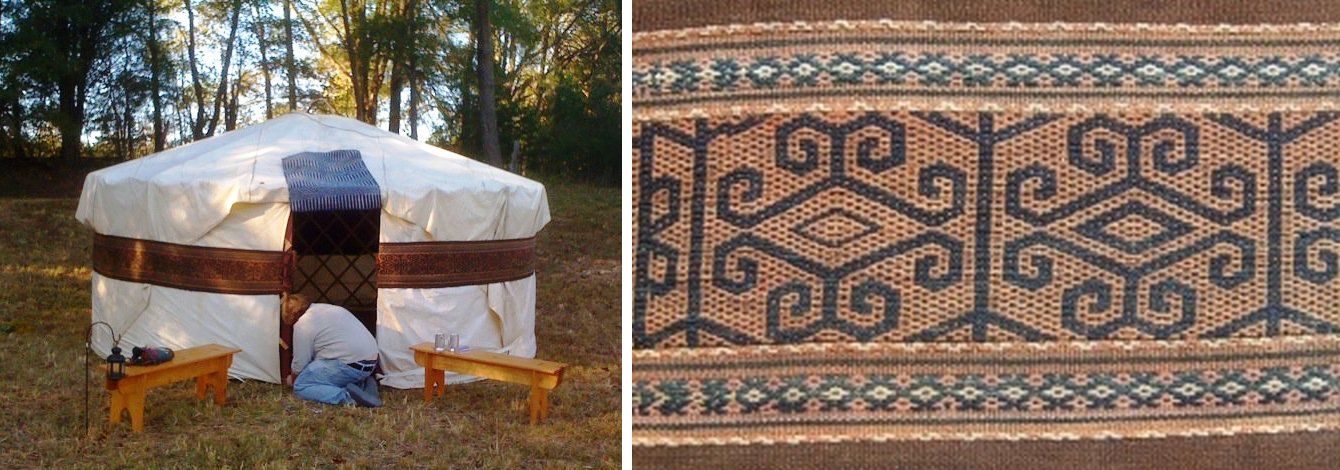
Lisa has been up to her eyeballs in dyeing but took some time out to enjoy a night in her yurt. You will probably recognize the band encircling the yurt that she was lucky enough to purchase at a reenactment event and which I have shown off many times here on my blog. It is woven in the “terme” technique.
######################################
Finally…you may remember my posting a video some time ago, which had been made in March this year, showing little Melina learning to spin cotton from her aunt in coastal Ecuador. This is the family with whom I stayed in 2007 and learned about the process of weaving cotton saddlebags and the simple warp float technique. I accompanied anthropologist Kathleen Klumpp on this trip and Kathleen has just returned from another trip there with a new video of Melina’s improved skills seven months down the track.
Kathleen tells me that Melina is not yet able to support the weight of the spindle and so rests it on her thigh.
The original video of Melina’s first steps can be seen here. How quickly she has picked up the skills! Aunt Trini and Grandma Luz are master spinners and she is lucky to have such skilled teachers but I think that Melina’s success is largely due to Kathleen’s encouragement. How wonderful too that Kathleen has made and shared these videos so we can all follow this story.
And I have been inspired by a very sweet recent comment from Graciela here on the blog. I don’t know where she is from but she has inspired me to get my act together and put up the tutorials translated into Spanish that I have been promising. Another task for this weekend and I will try try try not to get distracted!
Pssst! There’s a Spotlight article about my backstrap weaving in the latest issue of Handwoven…
Weft twining is showing up all over the place. I just discovered what I think might be classified as “sort of”‘ weft twining in an unexpected place in my journal of notes on my first trip to Ecuador. So I have decided to call it ‘weft twining with a twist” as I don’t know how to define this. Perhaps you can help me. More about that a little later…
I have just about finished the Bedouin piece I was working on last week. I just need to make some tassels from some of the weft ends and figure out what to do with the warp ends and I will be done.
I found two more designs in books and online for the last two panels. The design on the right is from a book that I have had for at least ten years and I can remember years ago marveling over the pictures of the Bedouin looms with their long long warps stretched out over the stony ground. It is exciting to now be able to weave some of their designs myself even though I used my backstrap loom rather than a staked out one.
I twined a broader band of design at the bottom this time with three colors and “s” wrapped the warp ends. I also wove two plain narrow black bands which I sewed to the edges to cover the weft ends from the twining.
This one will go on the wall as a long narrow hanging and now I would like to get down to planning a much wider one.
As I told you last week the main designs are done in a technique known as warp substitution which creates long awkward floats on the back. The floats can be eliminated by weaving the designs in double weave but I wanted to stick to the traditional technique. However, I couldn’t resist warping up to try the designs in double weave. I warped up my Ashford inklette as I had showed you last week a little about doing one-weft double weave on this kind of loom.
On the left you can see one of the designs from the large Bedouin style piece woven white on black using 26 doubled warps in the pattern area. On the right, the inklette is tipped upside down so you can see the same design in black on white.
Now I think I want a belt with these black and white designs made on my backstrap loom. The piece on the inklette is a sampler. You can see that I have put a very short warp on it.
I haven’t paid all that much attention to my off loom weft twined piece but I did make a little progress. I am still having a few tensioning issues with this and the piece is getting gradually wider. It’s good practice until I can get to the stage where I can make something useful with this technique.
I am using a swirl border and large motif from Montagnard twined textiles on the left. On the right you can see how the weft twists to encircle each of the hanging warps.
As I was twining away this week my mind was taken back to a trip I did to Ecuador in 2005. There in a small town near Otavalo I met a man who is still making alpargatas, the traditional footwear of Otavaleño men, by hand.
Admittedly most men are choosing sneakers over alpargatas these days but on market day in Otavalo I saw a few older men using them. The very oldest men tend to get about with bare feet.
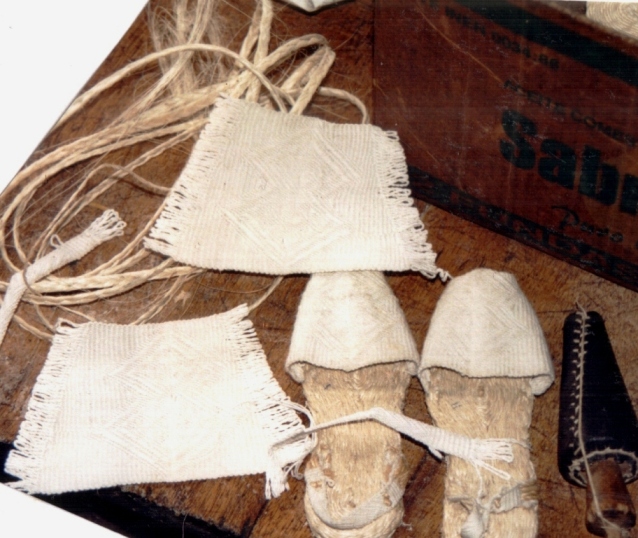
You can see that the foot covering and heel straps are fabric which are worked in a “sort of” twined technique. The sole is braided and coiled “cabuya” fiber (a kind of agave). The cabuya soles on the tiny pair of alpargatas in the above picture have been mounted on rubber.
I asked around as I really wanted to see how these fabric pieces were made and was told to go to a tiny town, a short bus ride out of Otavalo.
I imagined that I could just stroll into town ask around and be pointed in the right direction. Not so! and this day spent touring this town along little lanes between the fields in search of the alpargata maker is one of my favorite memories of that trip to Ecuador. Everyone was very friendly but no one seemed to have the slightest idea about this person I was seeking.
Finally two people pointed in the direction of some hills behind the town and I headed there not really knowing if I could trust this information. People are so eager to please and will often tell you what they think you want to hear. Of course I should have known that the best place to ask theses things is at the corner store. Corner store owners know everything about everyone and the owner’s daughter was dispatched to take me by the hand right to the door of the alpargata maker.
Aurelio, the alpargata craftsman, can be seen braiding cabuya fiber which will be later coiled to make the soles of the alpargatas. His wife at right asked to have her picture taken with her finest traditional Otavalo clothes.
Unfortunately, Aurelio was not in the process of making alpagartas when I met him. In fact, he had just taken the woven pieces off the mold but he was more than happy to show me his tools and equipment and tell me about the process. The alpargata fabric is worked around a mold rather than on a loom. I bought the two finished pieces of cloth from him along with the heel straps and a tiny boy’s pair of alpargatas.
The triangular fabric pieces are "woven" around a conical wooden mold which you can see on the right. The foot covering pieces called "mantas" are there with the "taloneras" or heel straps. The braided fiber will form the soles.
The conical mold or ‘horma” is made of wood and covered with non slip leather. On this the “mantas” and ‘taloneras” will be worked. Aurelio has several molds of different widths and lengths to cover all range of shoe sizes from boys to adults.
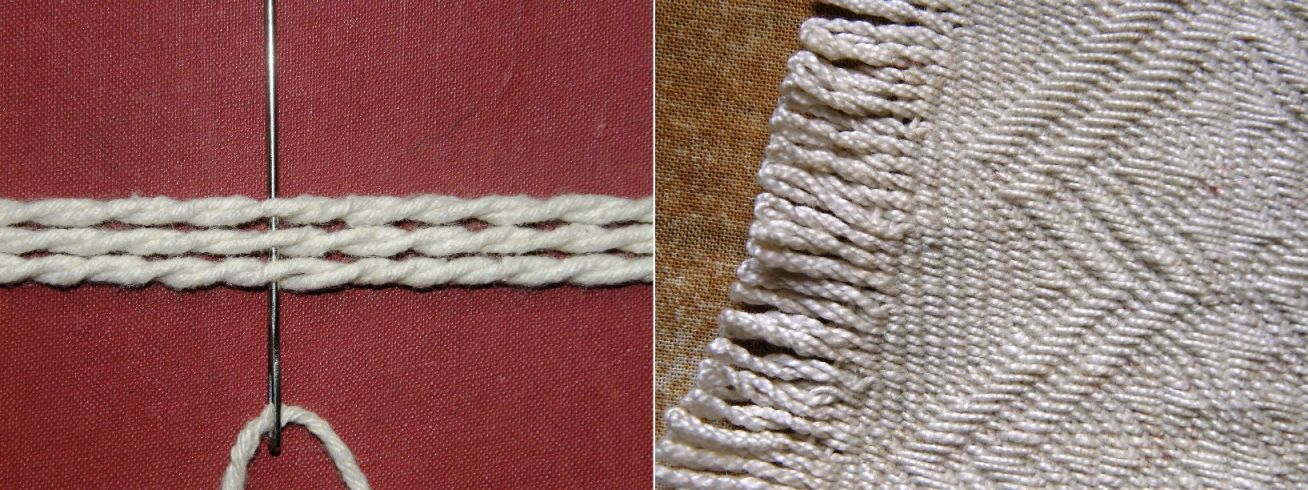
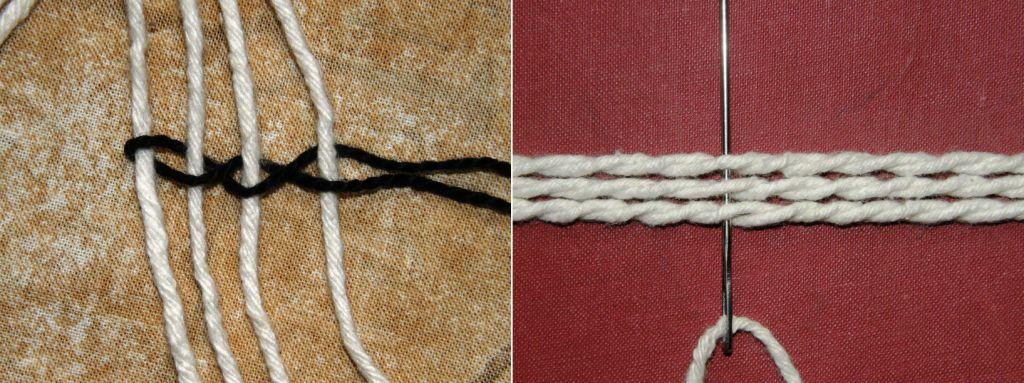
To begin “warping”, a length of cord is tied from the top to the bottom of the mold. Cotton thread is plied and then wound around the mold. Starting from the center cord the plied cotton travels around the mold and passes around the cord before returning in the opposite direction. And so, back and forth it travels until the required length is reached.
I am using a cardboard mold here for these photos just to demonstrate this along with some very thick cotton string which I have roughly plied just to give you the idea.
Aurelio plies his cotton evenly on a drop spindle unlike my uneven thick cotton string above which I just twisted by hand. You can see the neat twist in the end loops of the piece below.
The “weaving” process then begins…
A single strand of cotton is passed on a needle between the twist in each of the plied cotton strands from bottom to top, turning at the top and returning through the adjacent twist to the bottom. Designs are formed by passing the needle through the same twist twice, that is, on both the upward and downward journeys, thus creating a float. When the work is finished, the center string is cut and the piece of fabric can be opened out.
So what do we call this? Twining? EDIT: Since posting, there have been a few comments suggesting that this is most likely what is known as ply-split darning (not to be confused with ply-split braiding). Thank you to all who contributed their thoughts and suggestions.
The results look the same. You can see that the “stitches” created have the same slants as those created by weft twining. If you compare the method used by Aurelio to make the mantas with the picture I showed of the weft twining earlier you can see that the same thing is being achieved.
I have been twisting wefts around static warps. For the sake of the comparison we could say that Aurelio draws the “warps” through static twisted “wefts” with the same result. (The moving element on the needle is, however, the weft and the twists the warp).
I have not thought about creating designs with floats this way in my weft twining . I love this textured patterning in one color and can’t wait to try it.
Here are other typical patterns used on the mantas of the alpargatas…
Common designs worked into the alpargata pieces.
The finished mantas….
The finished alpargatas…
These are a small boy’s size and so, eventhough I only saw them being worn by a few older men in the city of Otavalo, they are quite likely being used in towns and villages in the area by males of all ages.
Women also use alpargatas but theirs are now factory made from synthetic materials. The heel straps, however, are still being made by craftsmen like Aurelio. I did not see a synthetic version of the men’s style.
This tiny black pair is a baby's size.
I wish I had better images of the alpargatas in use but here is what I have…
If you look very closely you may be able to make out that one of the men looking at beads at the Otavalo market is wearing the white alpargatas. The weaver at right is wearing the typical women's alpargatas. Cord is tied from loops in the heel straps to hold the shoe onto the foot.
I am happy to see that a couple of Weavolution buddies have been inspired to give weft twining a try too. Franco has had this on his “to-do” list for some time and has decided to shift it to the top. He has been making a weft twined bag around a cardboard support. You can see it on his blog. Jennifer has been experimenting with it on her cricket loom and I am sure she will have something to show us next week.
I can’t tell you how many things are on my own “to-do” list. Adding to it this week…a belt with black and white double weave Bedouin designs, a larger Bedouin style wall hanging with weft twined bands included and now… float patterns in weft twining inspired by the Otavaleño alpargatas.
I hope that you will be inspired to try some weft twining or perhaps one-weft double weave on your backstrap or inkle loom.
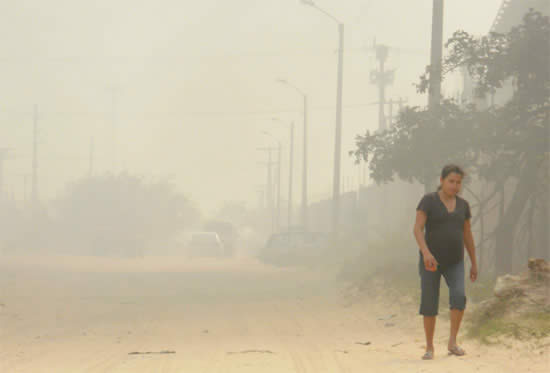
Widespread scrub fires in the countryside here in Bolivia got a dousing recently so that the atmosphere here in Santa Cruz, which looked like that pictured at left during the height of the fires about a week ago, is once again relatively clean.
And just in time for the month of September which is a month of celebration in Santa Cruz.There will be all sorts of cultural activities and fiestas culminating in the Feria Expo, an annual international event, and September 24th, Santa Cruz Day which marks the day of the initial call to take up arms against the Spanish in the fight for independence. This year will be particularly festive as the city celebrates the bicentennial of this event. Along the way the first day of spring will be marked on the 21st which is also Students Day as well Bolivia’s answer to Valentine’s Day.
This week I have been studying the letters worked into the bag strap woven by the Montagnard weavers of Vietnam that I met while in the US. Once again I marvel at the possibilities that the simple warp float technique presents and the way it has been used by different weavers around the world.
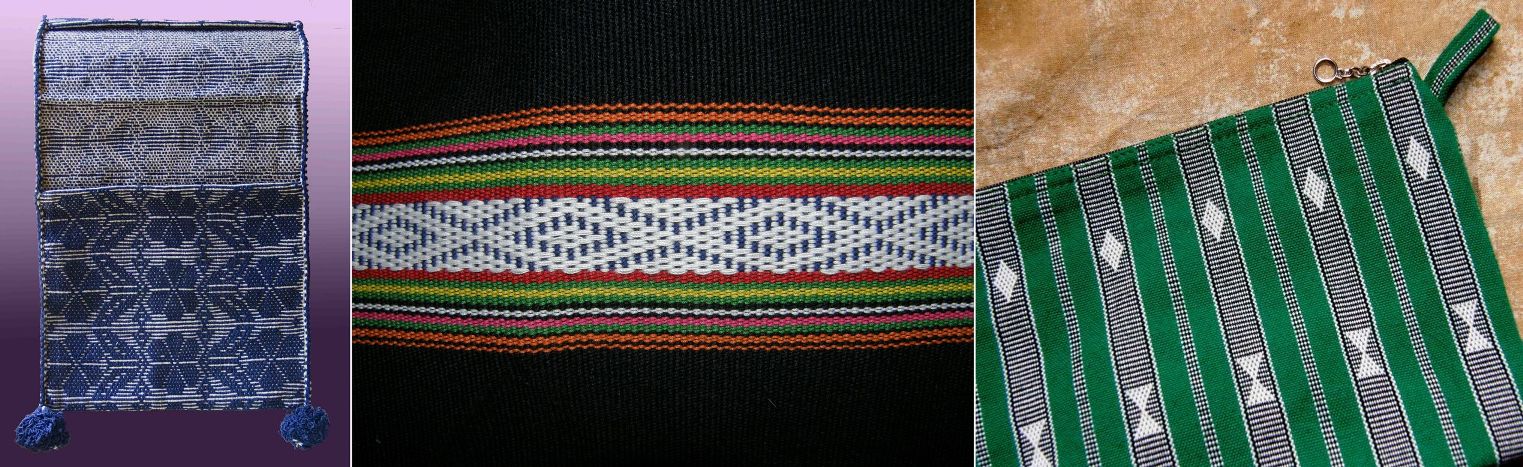
From left to right: simple warp floats decorate a cotton saddle bag from Manabi province in coastal Ecuador, the same patterning technique on a blanket woven made by Montagnard weavers of Vietnam and a simple but very effective piece made in Sagada, Mt. Province in The Philippines. The latter was sent to me by Trish who lives in The Philippines. We met and spent many hours together in Los Angeles airport on one of my standby flight sagas.
In the examples above, the technique is seen in its very simplest form, floating single or paired warps of one color over horizontal bars of alternating light and dark warps.
As we have seen here before, the technique can be taken a step further by floating both the light and dark warps in succession, filling in the background to the main motif and thus covering the horizontal bars completely.
This technique is employed to pattern one style of yurt bands made in Kyrgystan where the technique is called "terme". I wove this sample piece to check if my charting was correct and made it into a small bag.
While doing a bit of a desktop clean up this week I came across an image of a Central Asian piece that Lisa had photographed at one of her reenactment events and sent me about which I had completely forgotten.
The photo on the right is the one that inspired the small bag that I wove. The picture on the left is the new buried desktop discovery and it is nice to see the same hook design that I copied on this piece too.
Here is a quick summary of the difference between the single color and two-color versions of this simple warp float technique.
Basically, when you weave the single color version, the weaving sequence can be summarised with four “S”s:
Shed….Open the dark shed and pass the weft
Select..Choose the dark warps that you wish to have floating and forming a pattern
Save….Save these chosen warps on a stick
Shed….Open the light shed, add the saved warps to this shed and pass your weft
We could even add a fifth “S” to the sequence which would be Start again.
Here it is again with pictures…
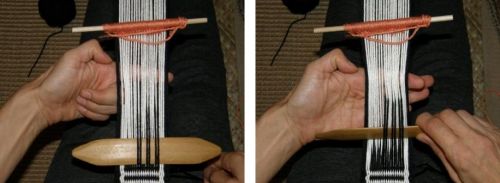
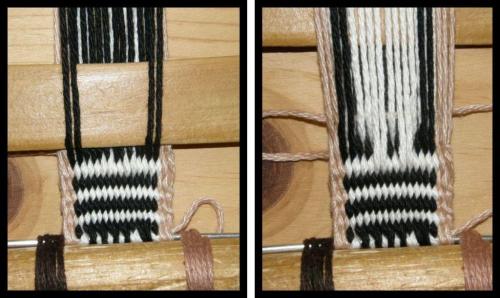
The dark Shed has been opened and the weft has been passed. The dark warps to be floated have been Selected. The selected warps have been Saved on a stick.
The light Shed has been opened and the dark selected warps added to it. The weft is then passed. Then you Start again, that is, open the dark shed etc etc…
Moving on to the two color simple warp float technique, the sequence changes to: (this time I start with the light shed for no particular reason)
Shed…..Open the light shed and pass the weft
Select…Select the light warps that you want to float to form your pattern
Save…..Save the chosen warps on a stick
Shed…..Open the dark shed and add the saved light warps to it. Pass the weft
Select…Select warps from the dark shed which will float and form the design
Save…..Save the selected dark warps on a stick
Shed…..Open the light shed and add the saved dark warps to it. Pass the weft. From here move on to the second step: Select.
In pictures:
After passing the weft through the light Shed, two pairs of light warps are Selected, Saved and added to the dark Shed.
Dark pairs are then Selected from the dark shed, Saved and added to the light Shed.
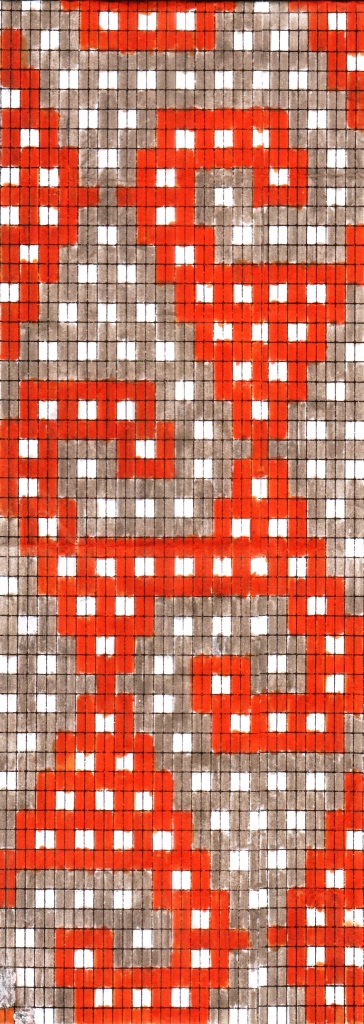
Here is the pattern chart for the hook design taken from the yurt band and woven piece that Lisa photographed.
Full tutorials for both the single and two color warp float techniques are here on my blog.
The single color version has videos too.
Click on the TUTORIALS tab at the top of any blog page here and scroll through the list of tutorial links.
As always, things should be taken in steps and so, before attempting this hook design, I suggest weaving samples in single color floats first. There are so many possibilities for this simple technique using a single floated color and so there is no need to rush into the two-color version until you are good and ready.
With some experience in the single color version under your belt, you can then try the two-color “S” design for which a full step-by-step tutorial is provided here.
I wove the above pouches in order to reproduce some of the motifs woven by the Montagnard weavers with whom I got to spend some time in North Carolina. The technique is a twist on the basic simple warp float technique. Their way of arranging the sheds and selecting the warps produces warp floats on the back of the weaving and exposed weft on the front but the basic steps in the weaving sequence are the same. The resulting bands of pattern are more flexible than those produced by the Philippine and coastal Ecuadoran weavers as they are not truly warp faced.
This week I worked on extracting and charting all the woven letters that I found in the photos I had taken during the visit. I then wove up a sample band.
There are a few unorthodox moves that they use to form nicer curves for the letters. Betsy Renfrew who is working with the Montagnard weavers tells me that someone wove a banner with the words Montagnard-Dega Association for their office. I am looking forward to seeing that as the letter “s” is amongst the five or six that I am missing. I have been wanting to weave nice letters ever since I saw Linda Hendrickson’s beautiful book on card-woven letters Please Weave a Message. All I have done so far myself is devise a simple stick alphabet which I sometimes weave in double weave. Now I have another alphabet for my repetoire.
Another source for beautiful woven letters is Annie MacHale (aspinnerweaver) who weaves a line from musicians’ favorite songs on the guitar straps she makes for them on her inkle loom.
Some weavers who employ the simple warp float technique choose to float single warps, others pairs. As the weavers in coastal Ecuador are weaving with their homespun cotton, they float pairs of doubled strands of cotton to form their designs.
This photo was taken by anthropologist Kathleen Klumpp and shows one of the completed saddle bags or "alforjas" . This particular design is called "rosa y hoja de naranja", rose and orange leaf. The piece was woven on a vertical loom using a circular warp.
Kathie is with the weavers right now and has been urging me to go and join her with Doña Luz and her family whom I met on a three-week visit back in 2007. Knowing the amount of laughter that shakes their stilt house every evening when the extended family gets together, I know that they must be all having a wonderful time. Unfortunately I could not get my program to fit with Kathie’s and I am unable to accept her invitation.
In 2007, sharing prints of photos from the 1976 visit.
Kathie has enjoyed a long, close and warm relationship with this family over the last four years visiting them to document the entire process that takes them from cotton boll to finished woven saddle bag and commissioning pieces to encourge them to continue weaving.
However, the story of her contact with these talented weavers started back in 1976 when Kathie was in Manabi province collecting data on village pottery making. She happened to see a gentleman on one of the rural buses carrying a most unusual saddle bag. It immediately stood out from other saddlebags that she had seen which were patterned with simple warp stripes as it was covered with geometric designs in indigo blue.
Her enquiries led her to Doña Luz Parraga and her family, master spinners and weavers in the settlement of Zapote and a friendship was formed.
At left you can see Luz’s daughter Trinidad, at fourteeen years of age in 1976, weaving and sewing an edging onto a finished saddle bag using a wooden rigid heddle fashioned by Luz herself.
After this visit, life interrupted, as it often does, and Kathie had to put her anthropological work aside. It wasn’t until her retirement that she was able to return, thirty years later, to the very same family, rekindle her friendship and continue her research.I would have loved to have been a fly on the wall of that stilt house when Kathie emerged from the vehicle and walked up the dusty slope to meet once again with her old dear friends. The following year I was able to join her.
Photos taken by Kathie of Luz in 1976 and during her return visit in 2006.Here we are in 2010 with Luz and Trini at the loom. They have set up the warps which will go into twelve heddles to weave the orange leaf design after several days of studying the samples and struggling with the warps. This is a design which they had not woven for some time and were on the point of forgetting. Luz's eyesight is at the point where it is almost impossible for her to select the warps and Trini had great difficulty at first relating what was on her woven sample to the loom. Her perseverance paid off and, thanks to Kathie's encouragement, this design has been revived.The rose and chalice design at left is probably the one that is most often woven. This design requires eleven heddle sticks. The warps which are programmed into each of the eleven heddle sticks are recorded on the woven sample at right.On this latest visit Kathie is helping Trini to develop new products as the market for traditional cotton saddlebags is now virtually non existent. This shoulder bag with a zippered outside compartment and made with factory cotton, has an adaptation of another traditional design of the coastal area. With Kathie's help the family members have planted and are raising 150 cotton plants on their property so that eventually they will once again be able to use their own handspun and pass on the spinning traditions to future generations.
Here is an edited version of a video that Kathie has made during this visit showing Trini making her string heddles and weaving a piece. You will see how she uses a flat stick to help ensure that all her heddles are made the same length. Those of you who have studied the simple warp float tutorial will recognize the moves when she starts weaving although she doesn’t have to select her warps to float as they are already in the heddles. The full version of the video can be viewed here.
I love the way she opens the heddles! They open relatively easily as she is using a smooth factory cotton.
It was never so easy when I was with them in 2007 and we were using their homespun thread.
At left is a flashback to 2007 when I was with the family. I wove quite a lot of this piece as part of my “training” so here you see the two proud weavers in front of their finished work!
Speaking of opening heddle sheds, I have put together a video of my own this week to show a couple of ways that I use to open a sticky shed as well as how I open each of the two sheds when doing Andean pebble weave.
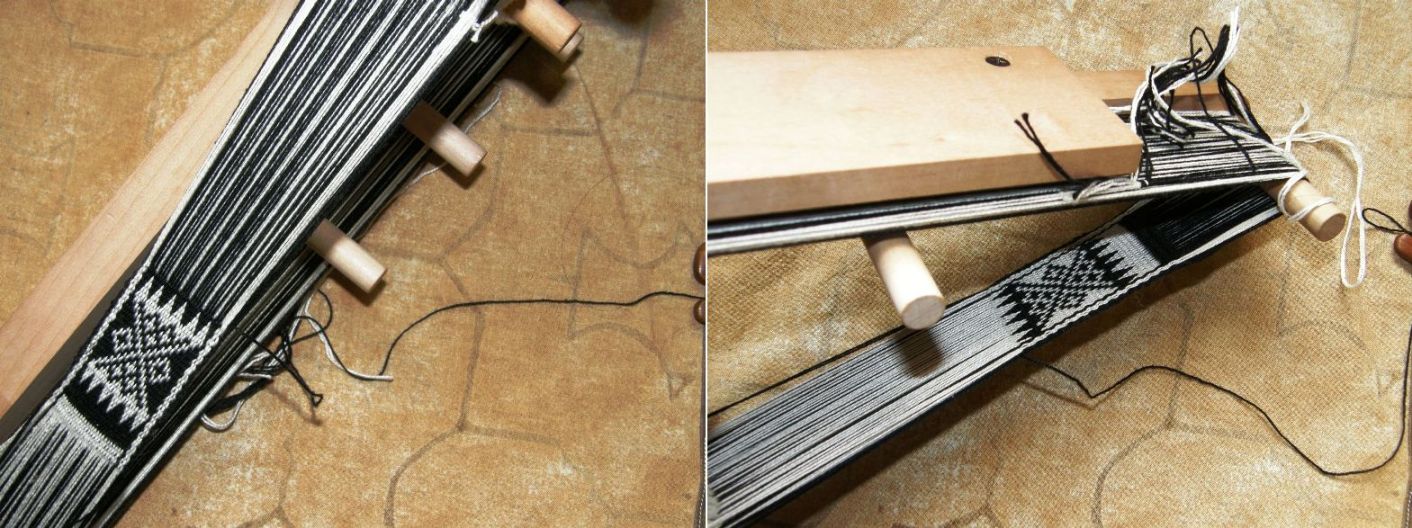
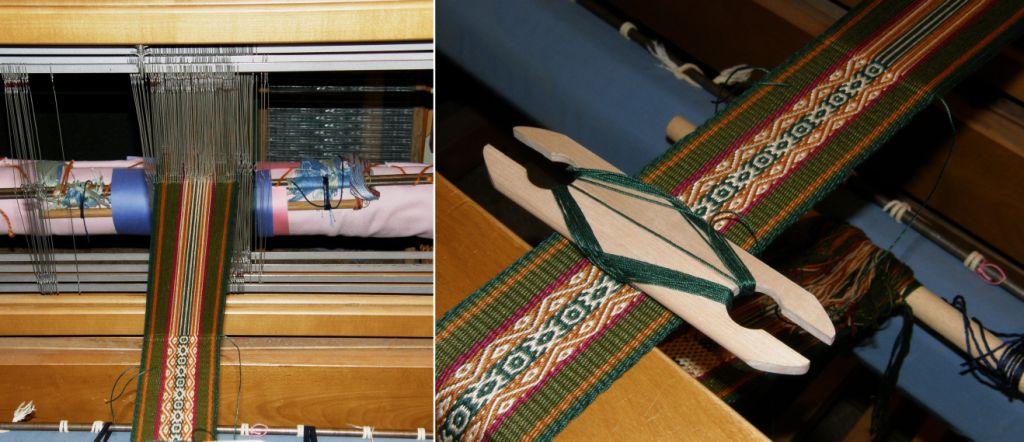
The warp in the Andean pebble weave segment of the video is the one that Maurice, Lisa and I set up on Lisa’s four-shaft loom in North Carolina. I had intended doing something a lot wider but had not anticipated the amount of warp length that was required for the four-shaft loom and so had not bought enough yarn. So I ended up with a piece that happens to be just the right width for a guitar strap and I already know a guitar player who will love it.
As you can see, it ended up back here in Santa Cruz on my backtrap loom and wasn’t as difficult to retension as I had imagined.
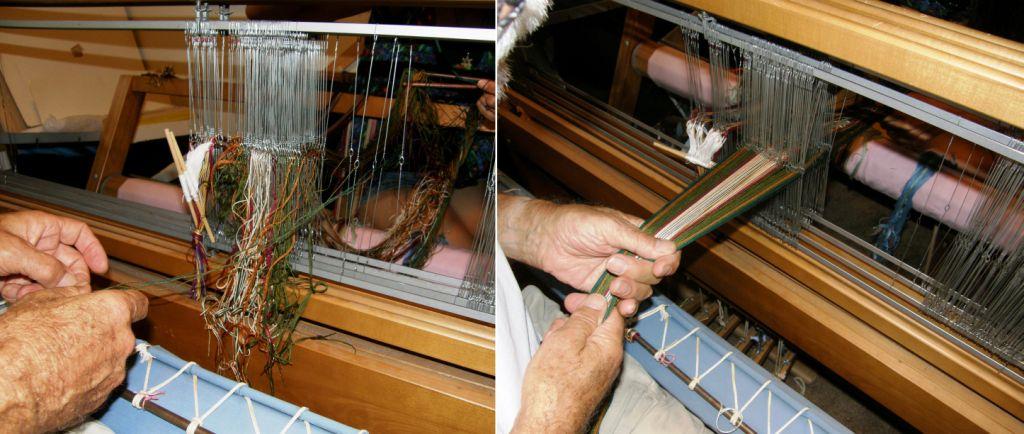
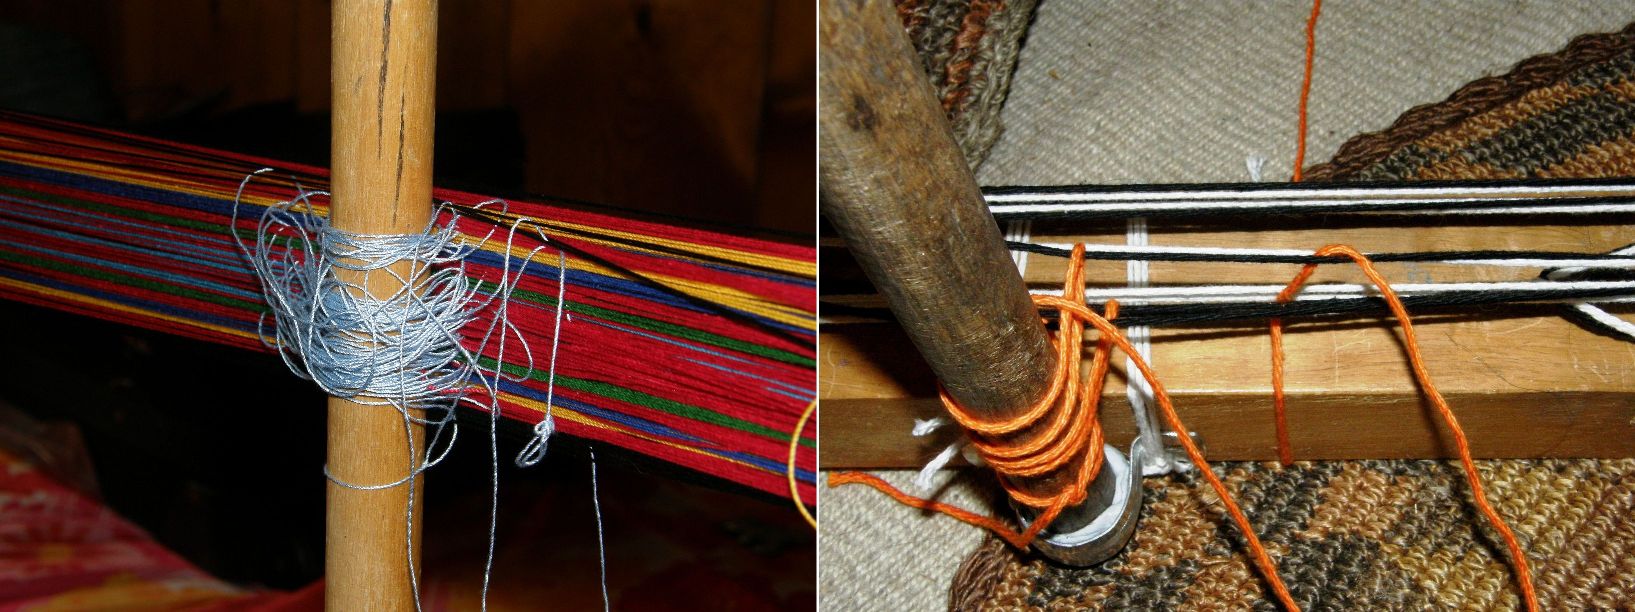
Setting up on the four-shaft loom was a bit freaky. Maurice, however, was completely unphased by this mess and soon tamed it into submission. The two dowels you see at left in the picture are part of a previous abandoned project and were later cut out.Weaving underway...
Using that big loom to weave a narrow band may seem a bit strange but, if this is the only loom you have, you are not keen on trying backstrap weaving but really want to try Andean pebble weave, then all I can say is, why not?
What’s in the mail and the inbox?
Speaking of Andean pebble weave on other looms, Jennifer is weaving another pebble weave band on her inkle loom and has sent me pictures..
Inspired by Jennifer's progress, Marydargie on Ravelry warped up her inkle loom to weave the band in lesson one in my book.
In a discussion in the inkle weaving group on Ravelry we all agreed that mini inkle looms are not well suited to weaving pebble weave. A heavy-ish with a lot of room in front works well for this technique. My Ashford Inklette needed to be clamped to a table as it was too light and felt very cramped. Although I managed to weave a band on it in pebble weave, it was not very comfortable.
Francois in California, who has been following this blog, sent me a picture of his finger weaving, at left. I dabbled in finger weaving many years ago attracted by the Peruvian bands Ifound in a book and was surprised to see the enormous piece that he has created. I imagine that this comprises several bands sewn together. Another great technique requiring few or no tools.
Another small discussion on Ravelry was started when someone asked about whether people preferred backstrap or inkle looms in general. I could find advantages for both, naming as one of the inkle loom’s advantages the fact that the heddles are put in place as the warp is wound but…now I have learned a cool way to do that while winding the warp for backstrap weaving thanks to the Montagnard weavers…
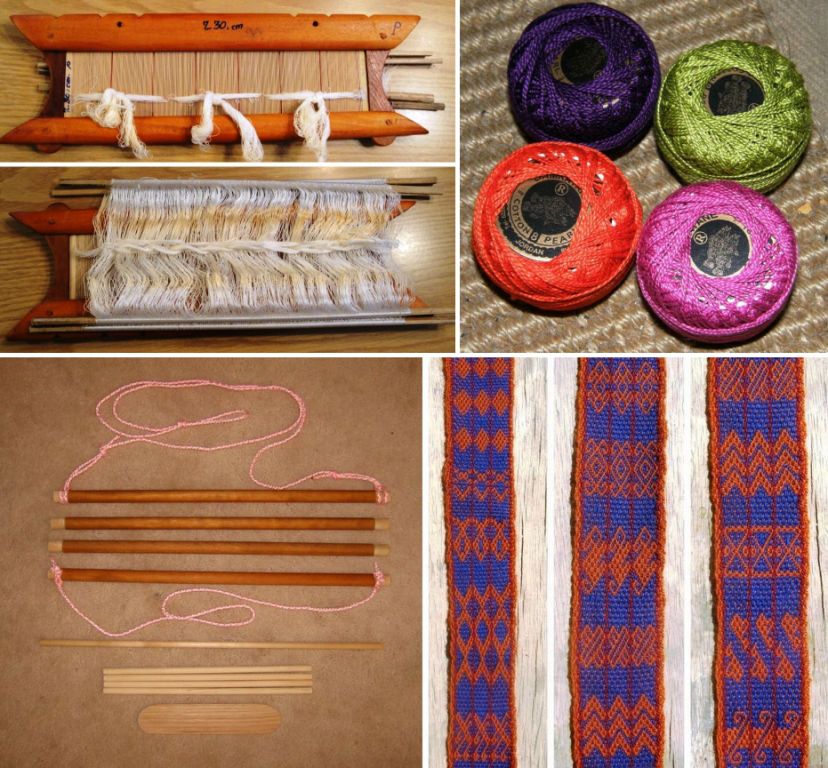
I made a video of Montagnard weaver Ju Nie making these heddles, at left, as she warped and, after watching it many many times was finally able to catch her quick movements and make sense of it. On the right are the heddles I made this way using thick yarn so that I could photograph the process for my journal. I have also made step-by-step diagrams and a video of my own showing the process very slowly just in case I forget! I doubt, however, that I will ever use this technique on my own warps as I am a big fan of the extra hitch on the heddle stick bteween heddle loops. From the inbox and the mail box...Quiltparalegal sent me this picture of a loom that her son bought for her in Laos with its incredibly fine bamboo reed and string heddles. It amazes me that these bamboo reeds are still being made. What a piece of work! Weave2, sent me a lot of thread made in Jordan where she lives. Here are some examples of the rich colors she chose. AJM showed me a backstrap loom he made for a friend even before he can get one for himself finished! Anna, who is cycling from Alaska to Ushuaia, is weaving on the road after having classes in Huancayo. She downloaded my book along the way and has been weaving some of the motifs from it wich you can see on the right. The designs on the left were woven with her Peruvian teacher. She is now in Santa Cruz and is coming to weave with me tomorrow!
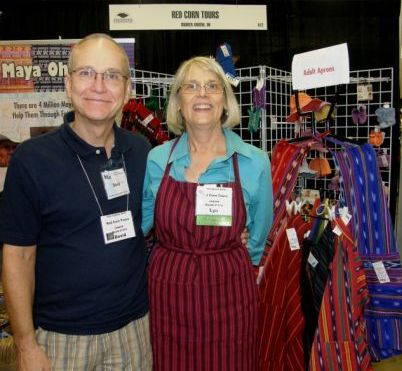
Above you see vivacious, no, REALLY vivacious Lyn Lucas and David Anderson of Red Corn whom I met at Convergence. I showed you one of the beautiful huipiles of Chichcastenango that they had on their stand in a previous post. Recently I discoverd their Facebook page and I highly recommend taking a look and “liking” their page. There they post two to three videos on Guatemalan weaving every week. It is a real treat!
And to finish, I have created a new tab at the top of the page named FAQ INDEX. That is all it is at the moment…an index. What you will find there along with the index is the following notice….
It will take some time to put this together but I am really looking forward to having all this information which I have posted in various places online all in the one place once and for all! Curious about the questions? Hit the FAQ INDEX tab at the top of the page. Maybe you have some questions to add.
Well, I had my suspicions but now it is definitely confirmed. I am all about process rather than product. It gets harder and harder coming up with that “excuse” to weave. My usual excuse is “I need such-and-such so I had better weave one” – a thin disguise I am afraid. The truth is I just like to weave. I like the whole process- charting, calculating, warping, heddle making, picking up the warps, watching the patterns slowly appear and take shape, beating and pushing each weft into place. At the end of it I am pleased if, after having taken photos of the piece, I can give the product to a good friend.
After all, just how many shoulder bags, purses, table runners and wall hangings do I need? As it is, there is hardly a patch of uncovered wall space in my tiny apartment. Mind you, I could do with a rug or two…hmm…
This is what came off the loom this week. My excuse…I found a new color in the mercerized cotton I use and there was one more Celtic knot I wanted to try from Kurt Laitenberger’s site. His site shows tablet-woven bands in a technique called Hochdorf.
I just can’t resist trying out a new color combination, reproducing a beautiful ethnic design that I have seen on the net, or attempting new structures. Now the explorations have extended to finding other looms on which the South American pick-up techniques can be comfortably woven – not for myself as I am very happy weaving on my backstrap loom – but for others who may not feel like being strapped into a loom. So I am developing a project stash as you can see above. There is also a pick up piece on my rigid heddle loom which wouldn’t fit into this picture.
One thing I wanted to do this past week was weave one of the pebble-like designs from the Russian Old Believer belts in the heavy duty sewing thread that I got in the US. Well, shock and horrror, that thread turned out to be polyester. Silly me not to have looked more closely. I was wooed by the beautiful colors and made a warp anyway but it felt awful. I guess it’s back to the doubled regular cotton sewing thread.
Russian Old Believer belts woven in supplementary warp and complementary warp techniques.
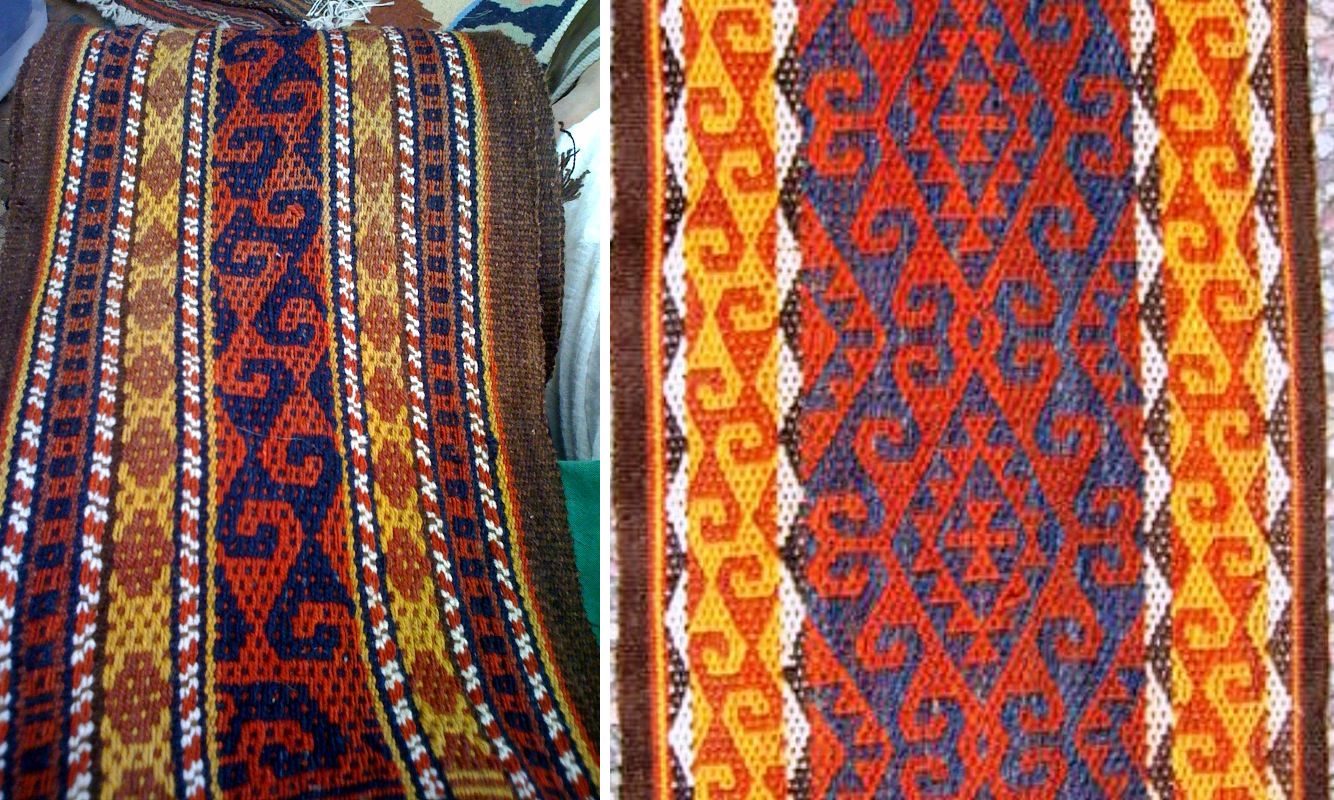
So that project got put on hold and I decided instead to chart all the designs from the pebble-like belts in Kathe Todd-Hooker’s collection so that I would have them ready once I got all the thread colors that I needed. I started looking at all the belts including the supplementary warp ones and there is not a single repeated color combination amongst the lot. However, it was interesting to see the repetition of certain motifs on bands woven in different techniques. As you can see above on the left the diagonal “comb” design woven with a supplementary warp is also woven as a border in the bands with the pebble-like structure. The “star’ border design also appears in the two pebble examples on the right as well as in the supplementary warp example on the far right.
And now I come to the “prejudice” part of the title of this post. I have to confess that I have never really liked weaving with supplementary warps. I am not a big fan of longish warp floats but I have decided that I really must get over this as I would like to weave some of the beautiful patterns on the bands below.
The Russian Old Believer bands in the central part of this picture have all been decorated with supplementary warps.
Annie McHale (aspinnerweaver) gave me an amazing book on Lithuanan sashes when I met her at CNCH which is packed with similar patterns. They are stunning and are just calling out to me to be woven!
I first learned this supplementary warp technique with my pebble weave teacher, Margarita in Huancayo in 1996. I guess I never really cared that much for the little motifs we wove and didn’t explore the technique much further. Pebble weave, on the other hand was a very different story!
At left is the first piece I wove when I returned to Chile from Huancayo. I combined pebble weave with the supplementary warp patterning in the one piece. I was new to all of this and way over ambitious and got my warping all back to front and mixed up and so what you see here is what I wanted as the upper face of the pebble weave and the reverse of the supplementary warp patterns – those little green creatures on the left and right borders.
Below are the bands that I wove with Margarita and you can see what the upper face is supposed to look like. They have been glued into my journal where I have documented the technique.
You can see that like any beginner I was very selvedge-challenged! We used orange weft which was exposed on the surface of the weaving adding an extra decorative feature. We could have created a smoother-looking single color background by using a yellow weft instead.
The following year I went to the Colca Canyon region of Peru and spent some time with a weaver in Cabanaconde. Together we wove the blue and white band on the right.
The motifs used in this area were quite different to those in Huancayo and the technique too had some slight differences.
As we used white weft, the background to the blue figures appears smoother.
Estela, in Cabanaconde used a very fine ground weave warp thread and a thicker supplementary warp thread. In Huancayo, both the ground and supplementary warp threads were the same. The fineness of the ground weave and the tightness of the weave made Estela’s band more atractive to me than those from Huancayo. I still wasn’t crazy about the technique, however, and although I carefully documented the differences in the weavings done in both areas, I was not motivated to incorporate supplementary warp patterning into my own work.
At the Maryland Sheep and Wool Festival I happened upon the old familiar supplementary warp motifs in this weaving from Ayacucho. I had been to Ayacucho in 1996 before arriving in Huancayo. Back then, only one year after the capture of the leader of the “Sendero Luminoso” group, it was a beautiful but very sad place.
Shortly after this trip and returning to my home in southern Chile, I visited a sheep “estancia” in the southern Argentinean town of Rio Gallegos. The owner showed me a belt that the Mapuche wife of one of his farm hands had woven and given him many years ago. It was yellow and decorated with motifs in many bright colors and I still remember how he snorted in disblief when I asked permission to chart it as I wanted to reproduce it. I couldn’t believe that I was there at the bottom of the continent seeing this very same technique. I am sorry I never got around to sending a photo of the reproduction to that doubting farm owner.
I chose a white ground weave and multi color pattern using the same yarns for both ground and supplementary warps as had been done in the Mapuche belt. It is a four-selvedge piece with the edges decorated with cross knit looping. This bag hangs off the side of my bed and holds whichever books I happen to be reading at the moment.
Since then I have found many gorgeous Mapuche designs in books which have been woven using this supplementary warp technique. I have an ongoing project which involves making a set of sashes to represent all the weave structures I have learned here in Latin America. I have gotten as far as making a yarn test for the sash I would like to weave using a Mapuche design and this technique. I much prefer using fine thread for the ground weave and a heavier and fluffier yarn for the supplementary warp.
LEFT: My sample band for a sash in this technique. RIGHT: Another yarn test using sewing thread as the ground warp. The pencil is one of the small IKEA ones.
AlthoughI learned this technique almost fourteen years ago, I really haven’t done much with it. Such has been my “prejudice”. I almost considered it “inferior”, being much more fond of complementary warp structures. However, quite recently I wove these little purses…
Here both the ground and patterning warp are the same weight and I am still not crazy about the longish floats. I think small and fine is the way to go for me.
Two women in Otavalo wearing the traditional “anaku”
I have certainly seen a lot of patterning done with supplementary warps in my travels. Ecuador is full of this technique. There it is used to make the “chumbis”, or belts, used by the women to secure their long skirts.
I particularly love the long wrap skirt called “anaku” used by the women in Otavalo. These are said to be the skirts that most closely resemble those used by Inca women with their long split sides.
In Otavalo two anakus are worn. A white one with the split on one side is worn under a darker colored one with the split on the other side. A pleat is made in the waist to fit the wearer and both are held in place with two chumbis – the “mama” and the “guagua”(pronounced wa-wa), the mom and baby. Some weavers I visited in the village of San Roque explained to me that the outer belt is the guagua chumbi and is the one which bears the supplementary warp patterns.
The guagua chumbi is woven on a backstrap loom with acrylic yarns and is extremely firm and stiff. The white ground weave warp threads are finer than the red patterning ones.
I believe that these are both guagua chumbis. Each measures around three meters. I have noticed a trend towards wearing the double woven belts from Potosi, Bolivia in Otavalo. These belts are narrower and only wrap once around the waist. I wonder if they are as effective for holding up the two anakus. Look at the car motif on the red belt.
Below are some of the motifs from the blue chumbi. Any large white areas need to be filled with spots or squiggles of design to avoid having very long warp floats on the back of the belt. This is one of the things that feeds my prejudice againt this technique. I love these motifs but sometimes the weavings are a little too “busy” for my liking having all their spaces filled in.
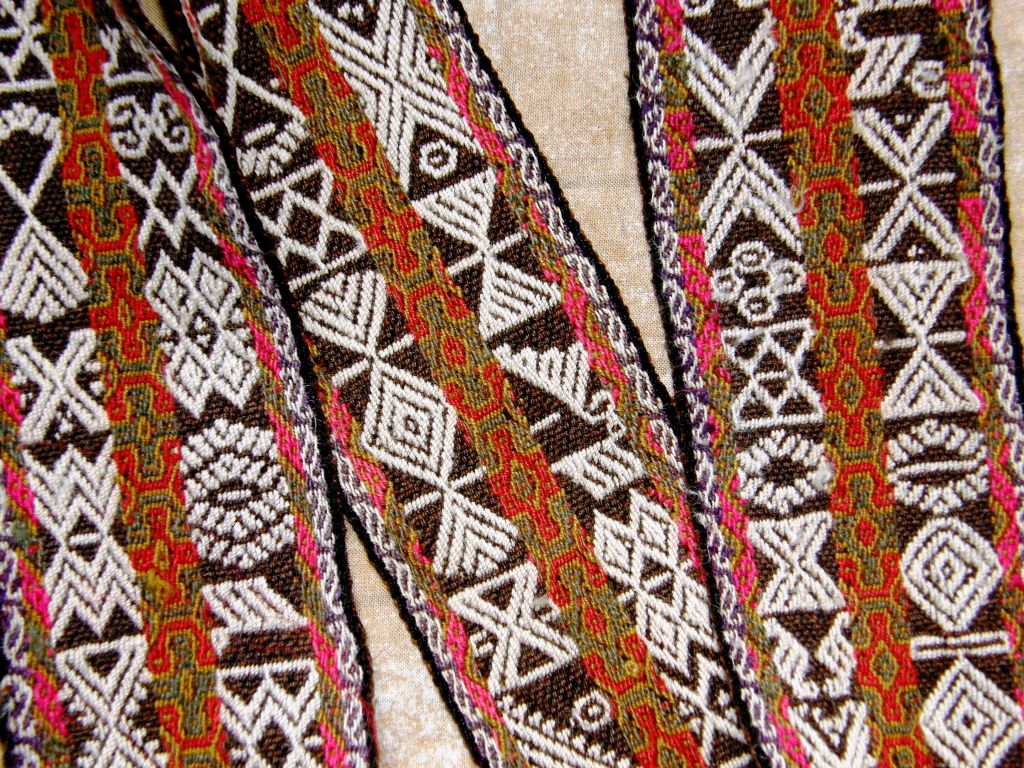
Similar figures appear on the belts from Salasaca.
When I went to Salasaca, I did not learn to make the belts with these little human and animal figures. My teacher, Felipe taught me to weave the geometric designs that they call “kingus” and “frutillas”.
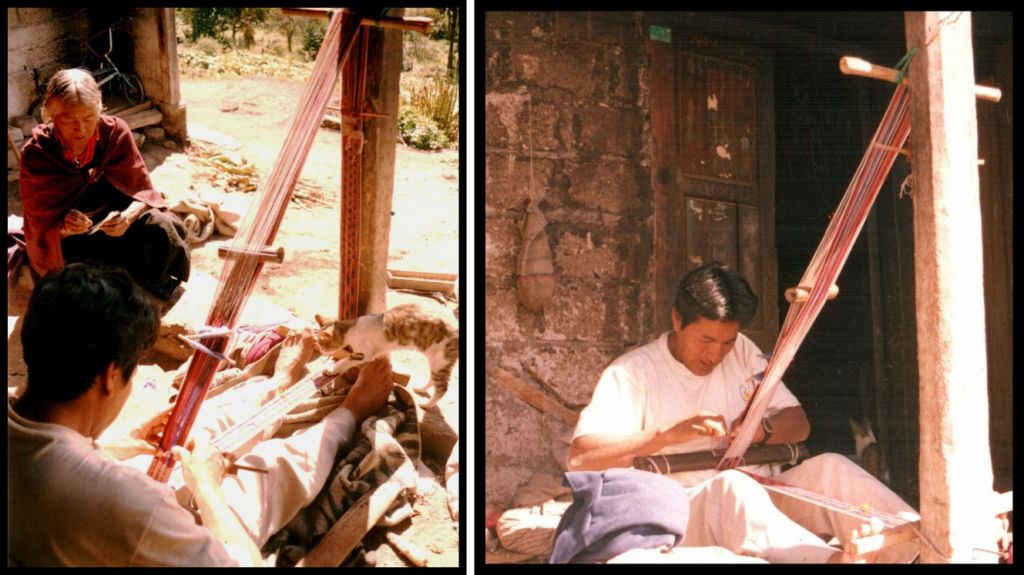
Felipe at work on his long continuous warp on his porch while his mother-in-law sits by. As usual there is a cat that wants to get into the act.
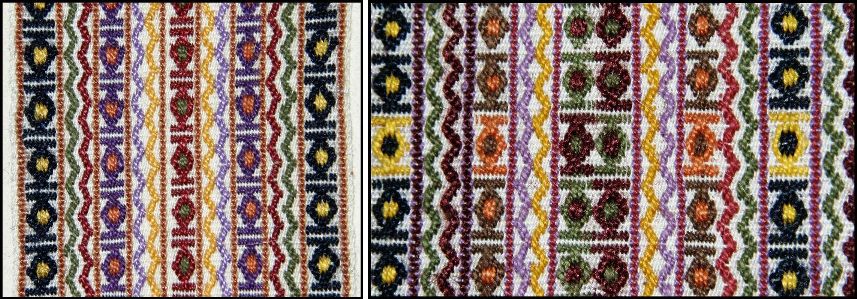
There are no over-long warp floats when weaving the tiny repeated motifs like those on the left. The example on the right, however, has long floats on the back as the colors in the motifs have been alternated. These are the pieces I wove when I got back home to consolidate what I had learned and enable me to take step-by-step photos of the process.
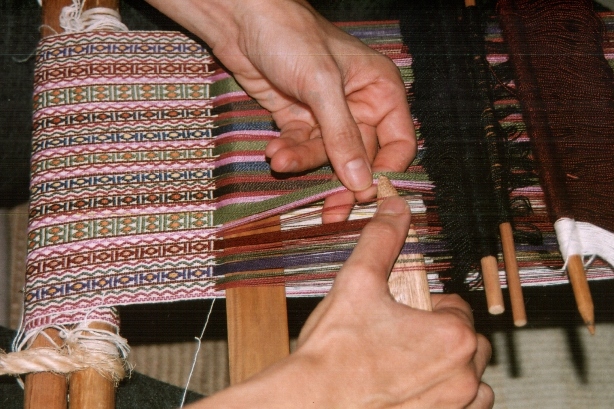
Above left you can see one shed of ground weave warps – white with colored stripes which separate the columns of motifs. On the right, I have picked up all the supplementary warps required to make the design and am about to add them to the ground weave shed.
At left I am picking up the pattern warps with the tiny Salasaca sword. The beater I used when I was learning with Felipe was an enormous heavy version of this sword which slammed the wefts into place. Needless to say, the resulting belt was firm and very stiff and my knuckles blue and bruised!
Warping for these belts was a little complicated and required six stakes.
We set up some stakes in the yard so Felipe could show me how to warp. Quite often two colors were being wound at once in different directions and it was quite confusing. I added stakes to one of my standard warping boards at home and managed to warp successfully for my practice bands. In Huancayo too, two colors were wound at the same time – full bouts of ground warp alternated with half bouts of the supplementary warp.
So, I am taking another look at this negelected technique. I learned it, I documented it and practiced it a little but I think it is time I gave it a bit more attention and learned to love it. Who could help but love it? Look above at the gorgeous belt I bought in Cusco. The brown sections are patterned with white supplementary warps.
I am going to weave a few of the Old Believer belt patterns to start and get a feel for those designs. The first part of the process will be the charting.
#################################################
You may remember the blue shuttle bag that I wove recently and which I was going to edge with a tubular band. In the end I decided that less was more and left it unadorned. I also thought it would be a good idea to practice that band first considering I hadn’t woven it for over ten years. Out came the chunky yarn and I chose colors that would photograph well – not the nicest color combination you have ever seen I am sure. This band is what I consider the “poor cousin” of the complex ones woven in Peru and was taught to me in Potosi here in Bolivia. Now I am confident about the process and need to find the “excuse” or product on which to use it!
#######################################
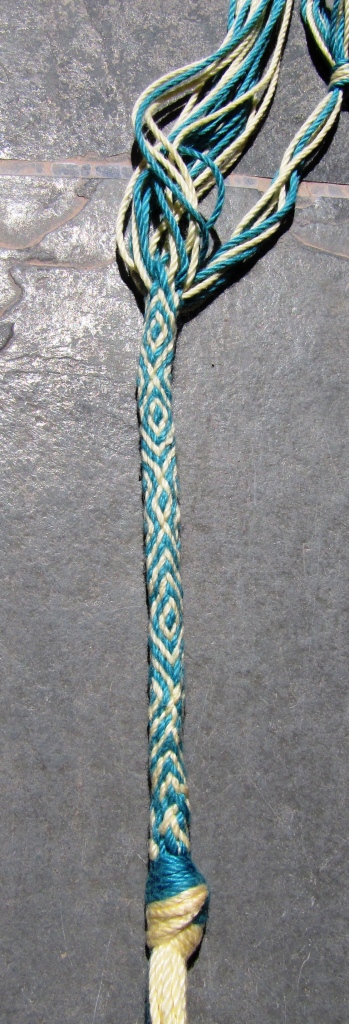
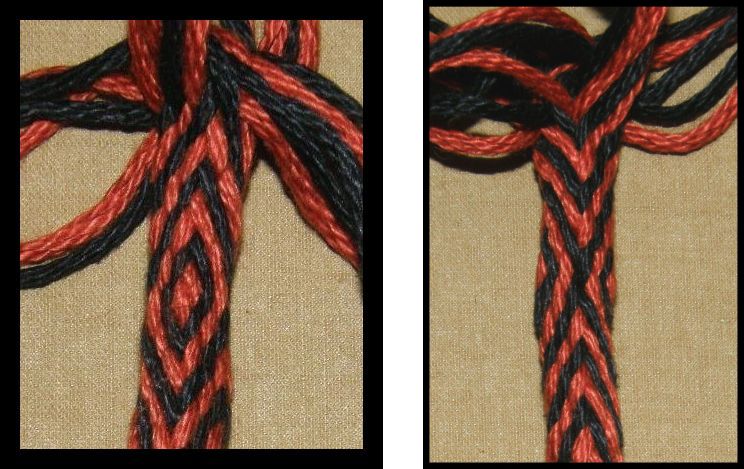
THE MARGARITA BRAID
Here are the instructions for weaving the Margarita braid as taught to me by my sling braiding teacher, Zacarias in Yanque, Peru. If you have watched the video I made on the Palma braid here (embedded in the post), you will be familiar with what I mean by “near side”, “far side”, “uppers” and “lowers”. You will have seen how the braid is held in the fist, how a warp is passed from one side and paired with a warp from the other side and anchored and how the entire braid is rotated once a part of the sequence is completed.
So all I need to tell you now is the number of strands, their color arrangement and the parts of the sequence.
Remember that lowers always pass over to pair with uppers.
Part one: (Always starting from the left and moving right)
Black near side to red far side.
Black far side to red near side.
Red near side to black far side.
Red far side to black near side.
Black near side to red far side.
Black far side to red near side.
Rotate ninety degrees clockwise.
Part two: Start at black far side.
Part three: Start at red near side.
Part four: Start at red far side.
If you continue like this, you will be making “V”s on two opposing “sides” of the braid and inverted “V” s on the other two sides.
If you reverse the parts of the sequence, the “V“s will invert to first form a diamond. The inverted “V”s will flip to form an“X”. In the photo at left you can see the diamond on the left and the “X” on the right.
To create a black diamond with a red center, stop when you finish part two of the sequence. Instead of proceeding to part three, do part four. Now the sequence will reverse. You will proceed with parts three, then two, then one.
Play around with it and have fun!
The version I learned in Peru allowed color changes. We used twelve strands of a third color, for example white, that were hidden as the core of the braid. The white strands would slowly be brought into action two at a time replacing the reds until eventually the reds formed the core and the blacks and whites were active. I will show you this another time! 🙂
###################################
Phew! This has gotten really long but I really have to show you what people have been weaving this week.
We are still weaving along at Weavolution following my e-monograph on Andean Pebble Weave and other folks are following the tutorials in the Backstrap Weaving Group.
Lydia finished her pebble weave piece on her four-shaft loom and has made a wall hanging with it. Karren wove some bookmarks for a guild exchange using the simple warp float technique. The colors in both pieces remind me of the American southwest.
Jennifer has begun to create her own motifs in Andean pebble weave on the left and Jeanne is gradually weaving wider bands with more complex motifs.
Lydia’s first experiment on her four shaft loom was made into keyfobs. Carolyn has designed a bee to weave in Andean pebble weave.
And Lisa has taken her loom to the beach to continue participating in the weave along. This next photo falls into the category of…
COOL PLACES TO BACKSTRAP WEAVE!
I will leave you all here with a couple of beautiful drawings by Guaman Poma de Ayala. I told you a bit about him in this past postand wanted to include these pictures of the Inca woman’s skirt as we have been looking at the elegant Otavalan anakus here.

 I have been kept from my loom at home this week. Normally this would have left me very agitated but it has been for a very good reason.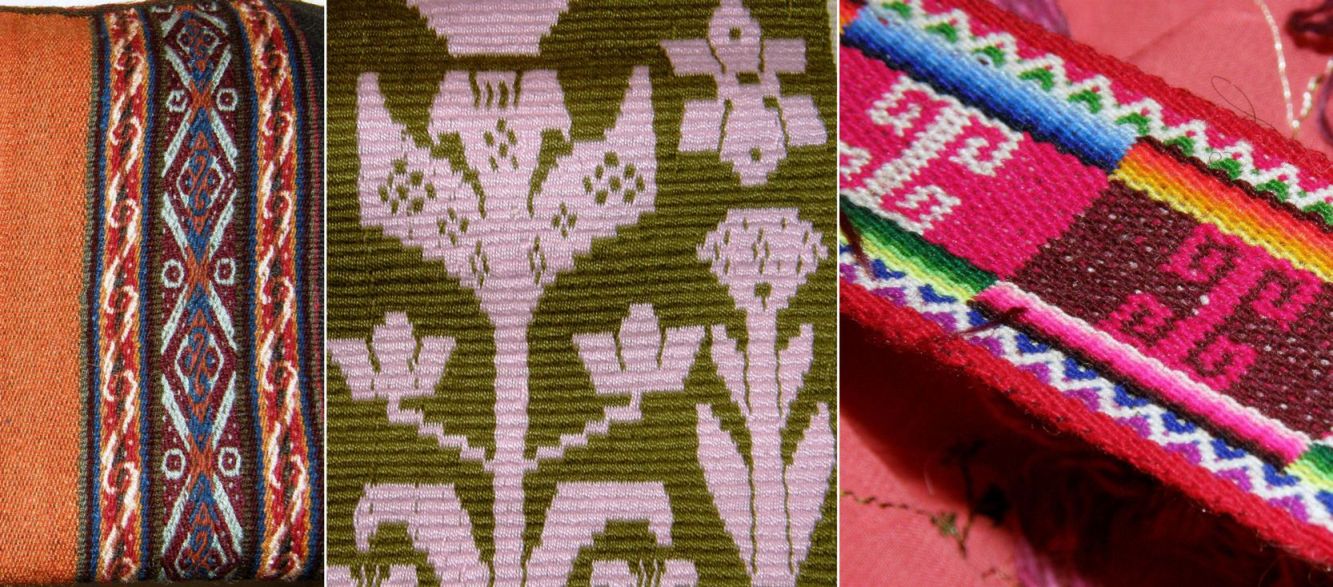
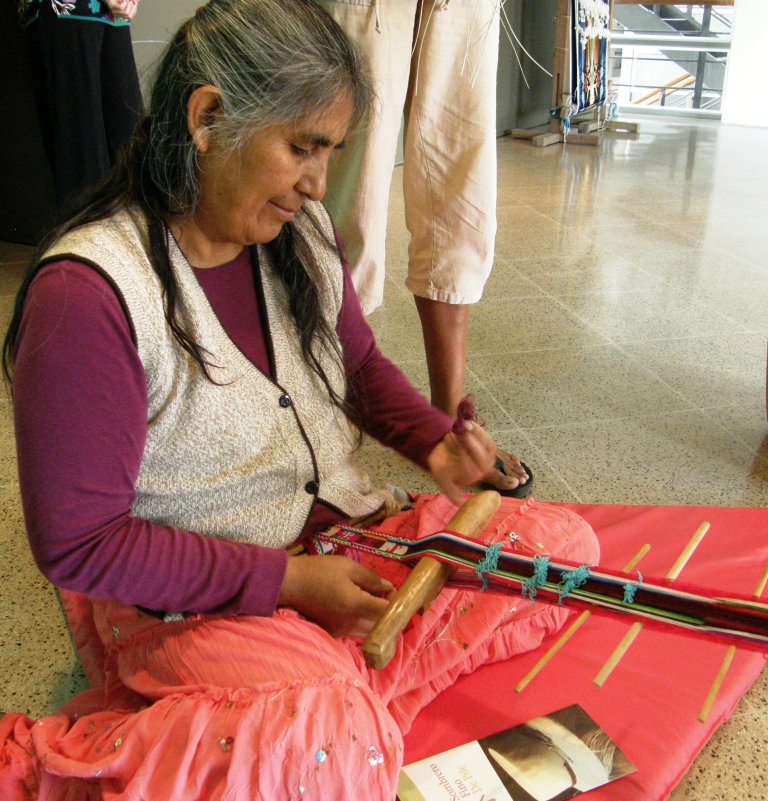 I didn’t have to worry too much about missing out on Celinda and Isobel’s (the Chilean weavers) instruction on day one as today Angela and I got to spend a lot of time with Celinda as she wove. I found her very tranquil and lovely to watch. Daughter Isobel, on the other hand, is a live wire! You will see and hear more about her next week.
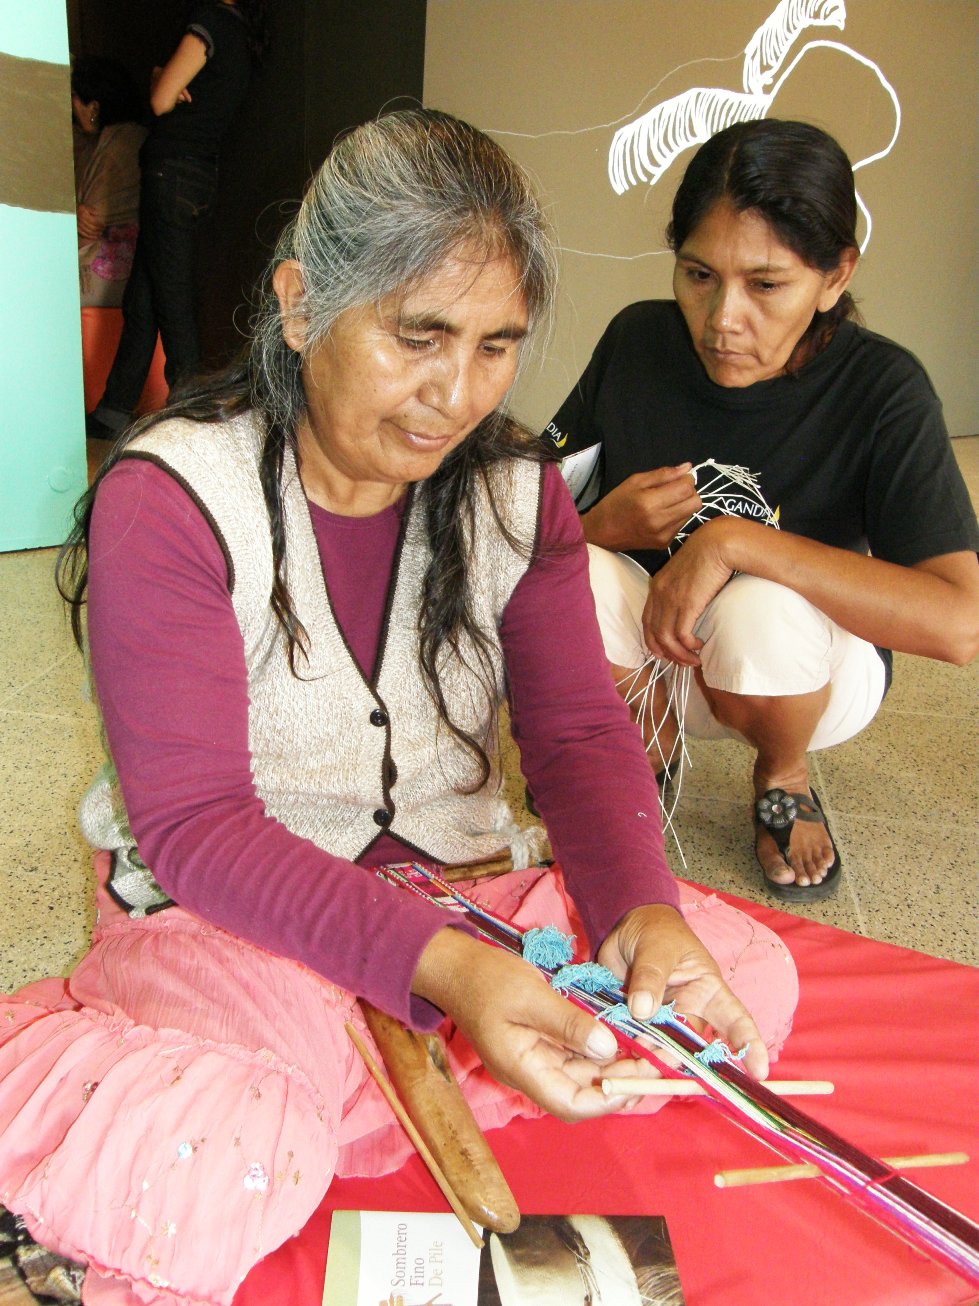 Well, I really must stop here as there are more events to attend tonight and one more day of this conference to go. No doubt there will be much to tell and show next week.