Backstrap Weaving – California here I come

The pre-trip panic is setting in! Actually, I find myself remarkably well-organized for this departure a whole two days before I leave but, even after all these years of traveling about, I still can’t escape that wee bit of unease every time I am about to step out of the comfort zone and launch myself into the great unknown. So, California and all my west coast online weaving buddies, the new places and the new people…here I come!

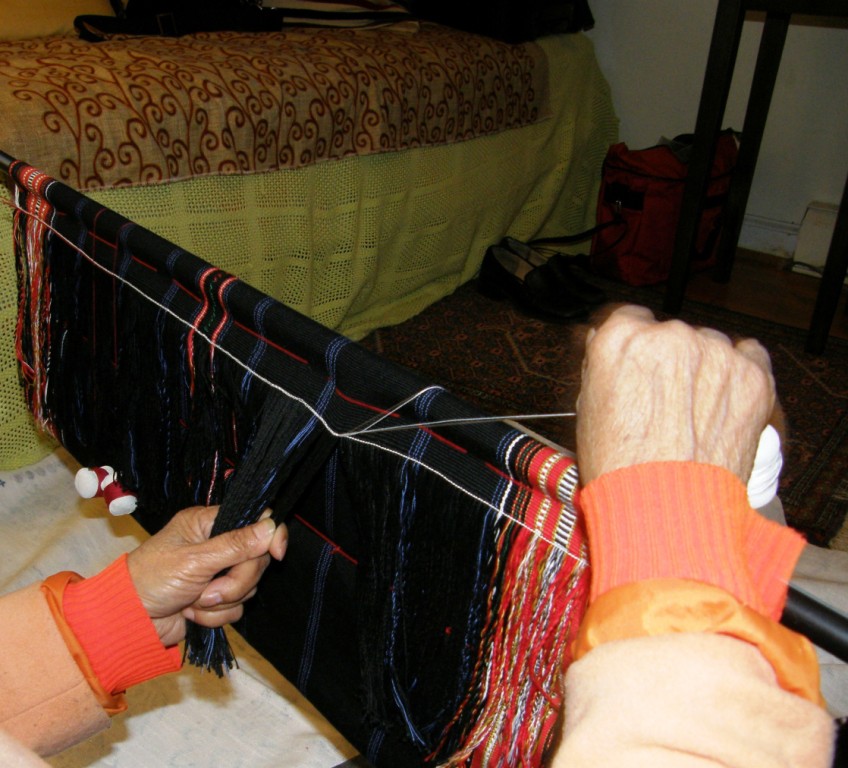
Spring seems to be fiber festival time in the US and I am looking forward to finding something to which I can tie up my loom, hanging out and weaving and chatting to people. I wound a couple of warps, one with a narrow tried-and-true pick up design on a field of plain weave. I have found that it is better to keep the pick-up narrow and simple as this gives people who have never seen this before more of a chance of following what I am doing and me more of a chance of chatting to them while I am doing it!
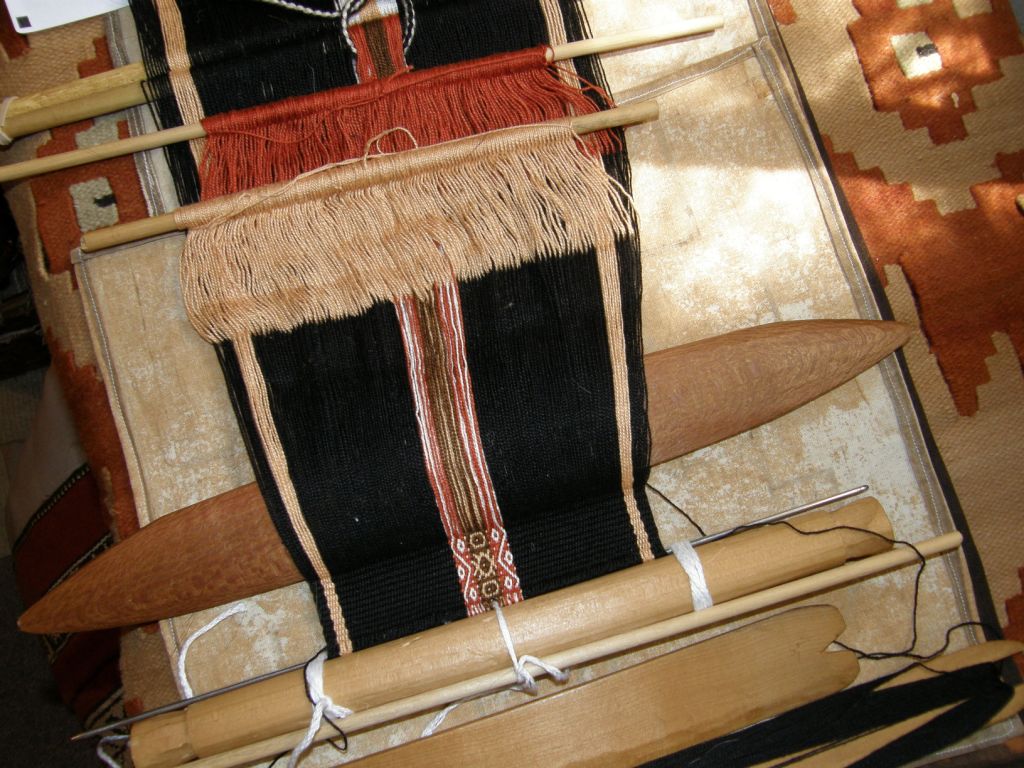
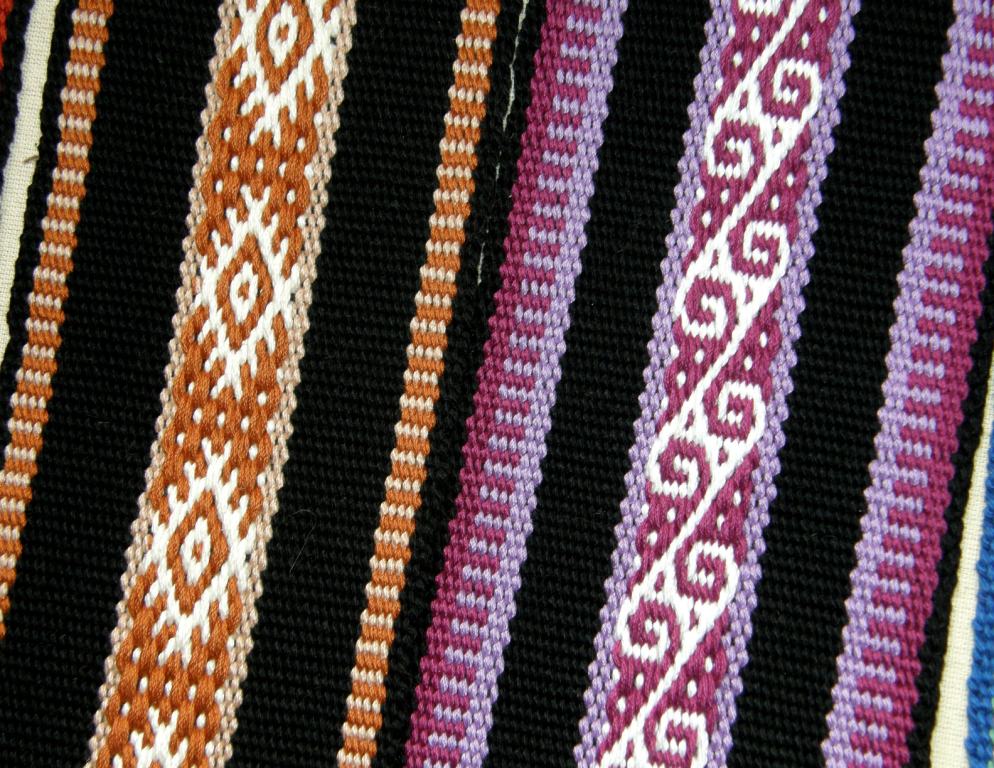
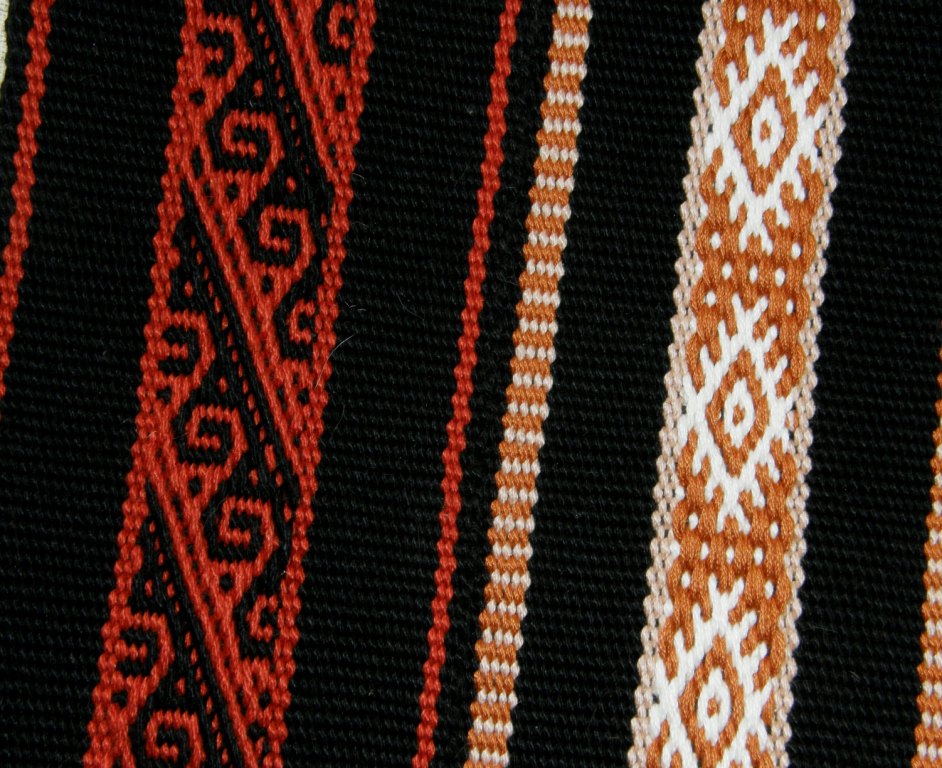
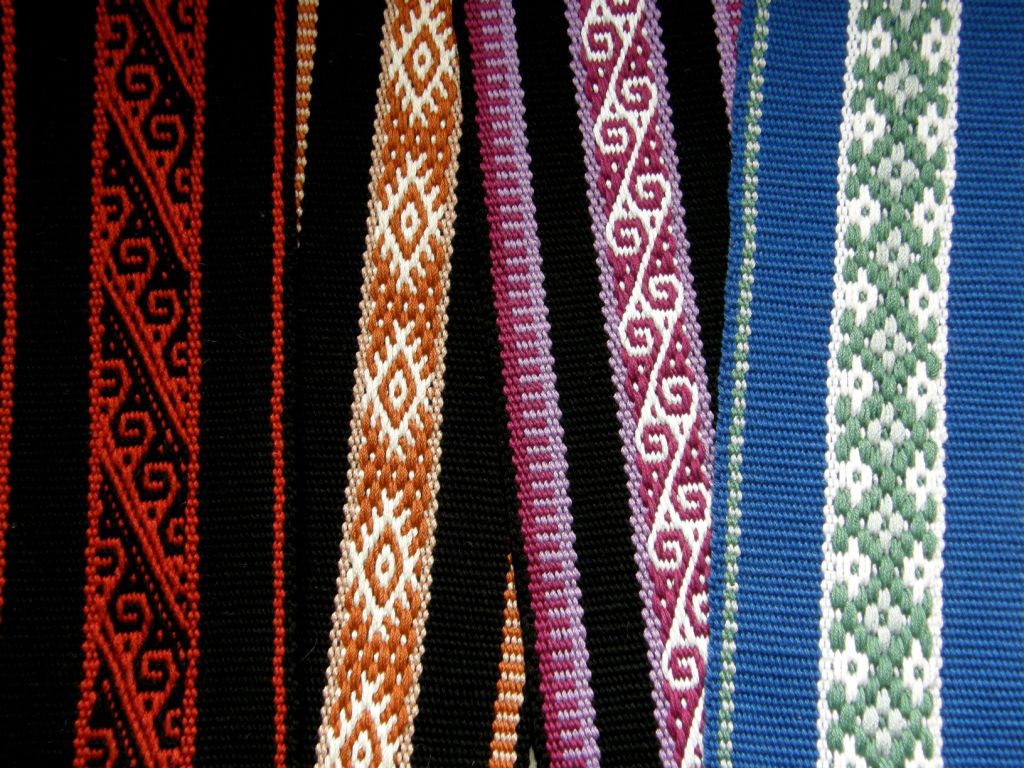
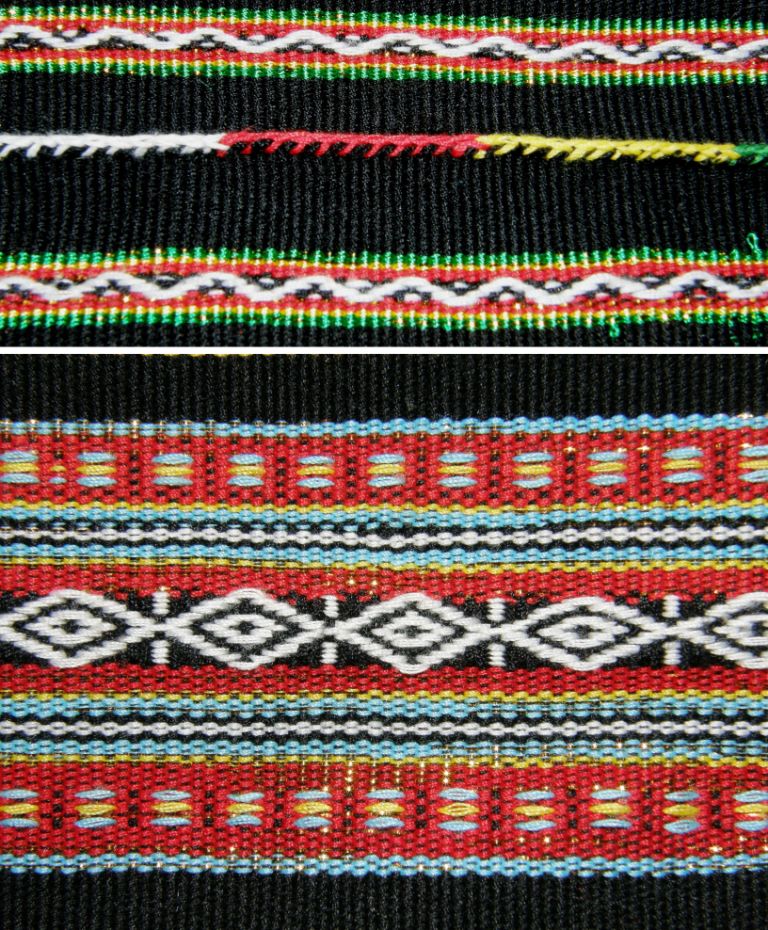
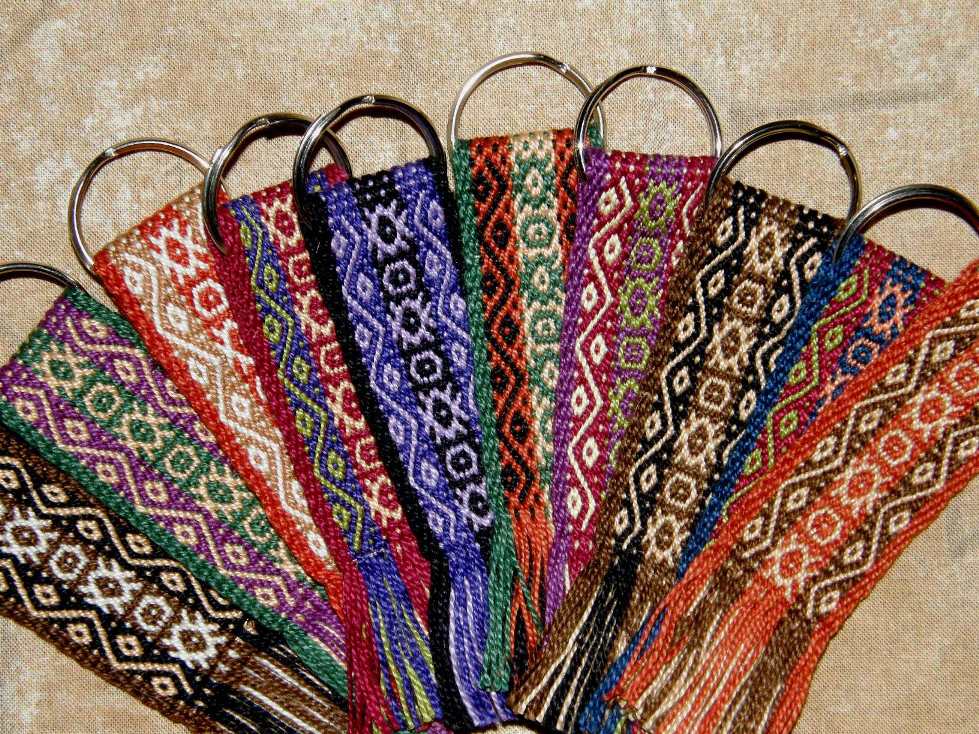
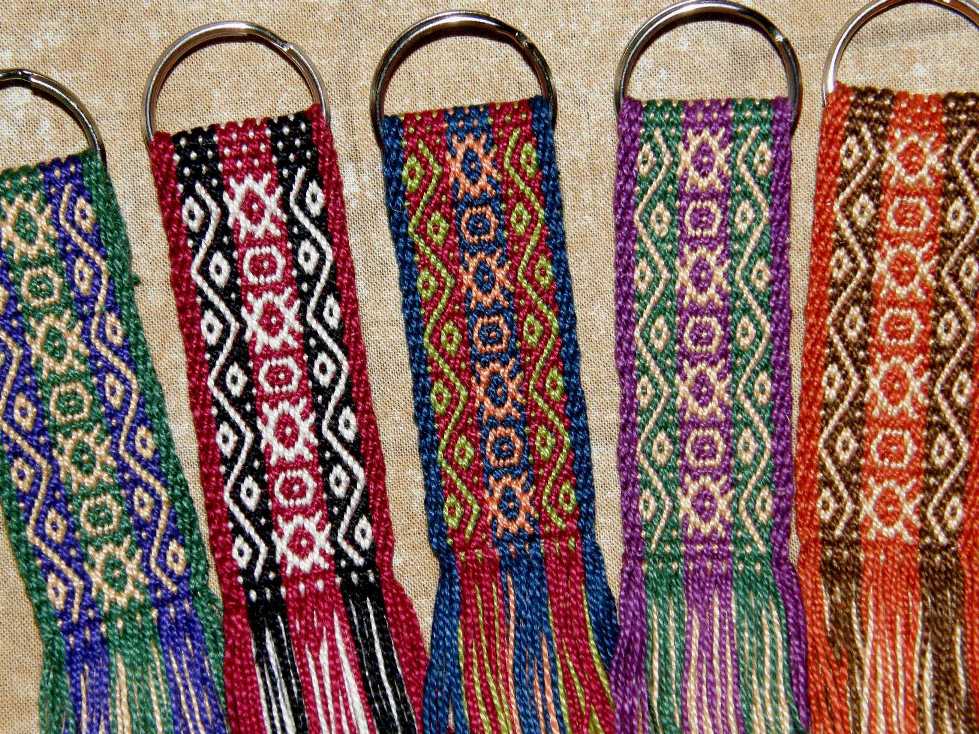
You probably recognize this design from the mass of key fobs that I made in pebble weave  last year. Yes, I know it is a bad idea to use colored heddles on a black warp. Yes, I know I will be ages picking bits of red and yellow fluff out of my black cloth but it is prettier this way for showing off to people, isn’t it? So, I have just gotten this weaving underway and now it is rolled up in my backpack. I made one other wide warp with fine thread so I can show people how I open the sheds with warps of this nature.
I really wanted to make a contribution to the Spin-Along in the backstrap group on Ravelry before I left too.

We are spinning yarn for warp-faced weaving as well as respinning commercial yarn so it will be smooth and strong enough to use on the backstrap loom.

I already cheated earlier by posting my discontinuous warp project in respun commercial wool which I had made prior to the Spin-Along (SAL). This was wool that my friend Claudia had given me when I was visiting with her last November and was not spun during the SAL. I did let everyone know that!

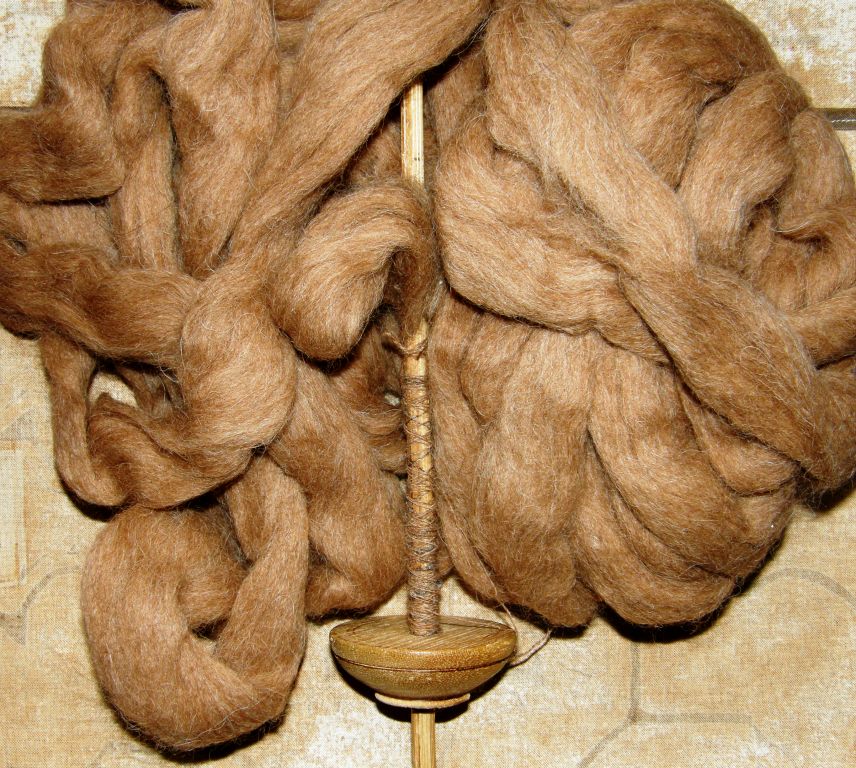
And I am afraid I cheated again by starting a band just the other day with some llama fiber that I had spun some years ago for dye experiments. I have small balls of various colors in a bag in the closet and was able to make a tiny warp for a double weave band.
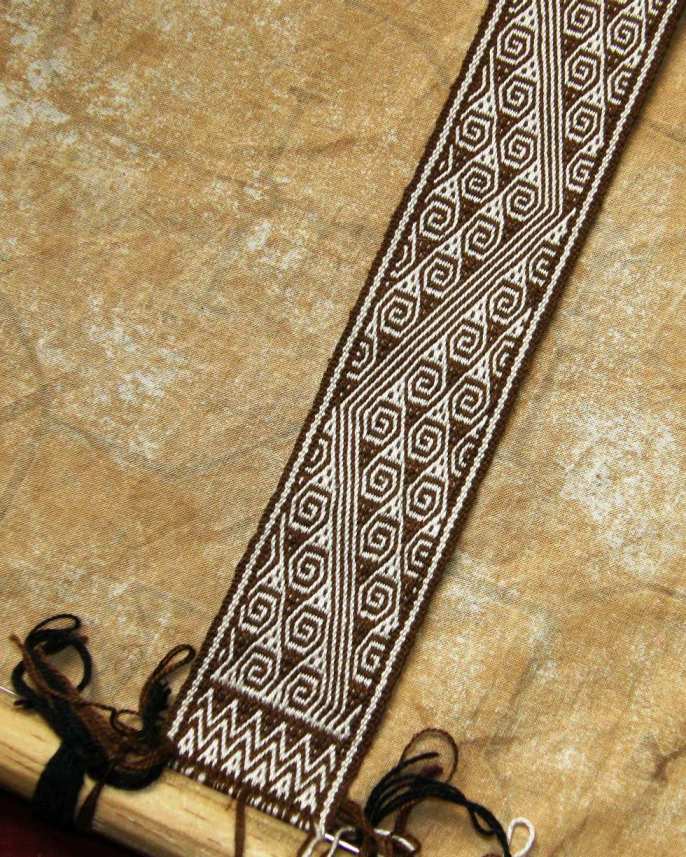
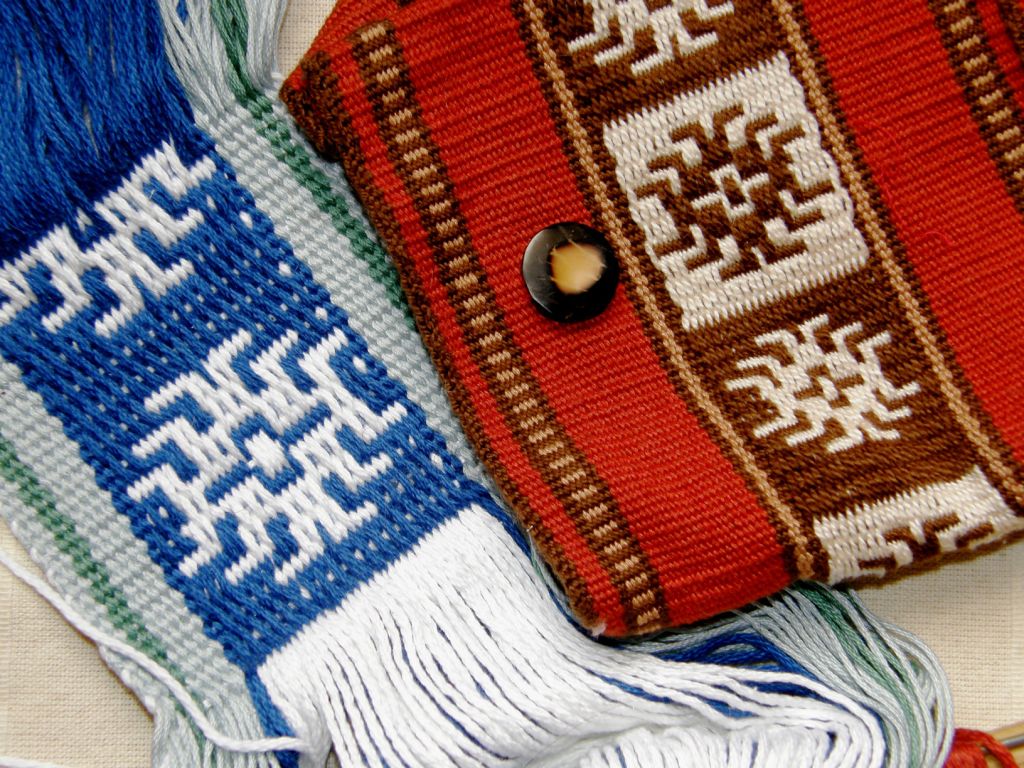
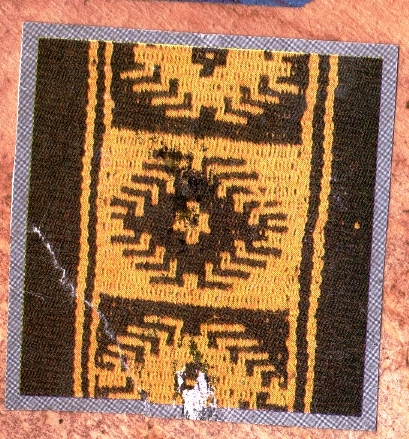
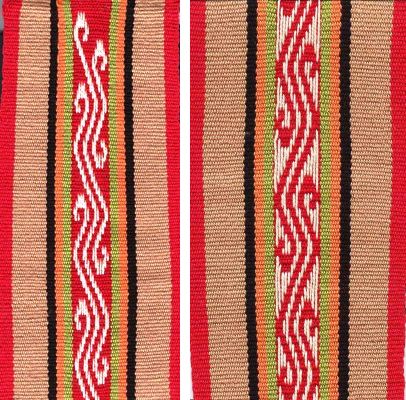
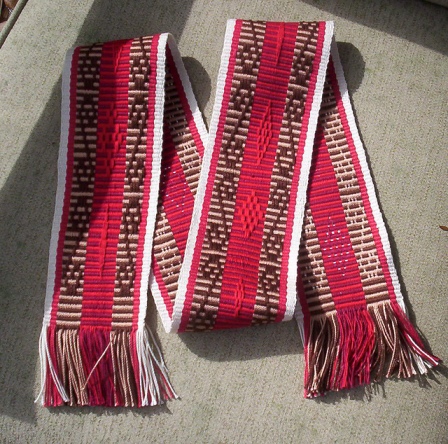
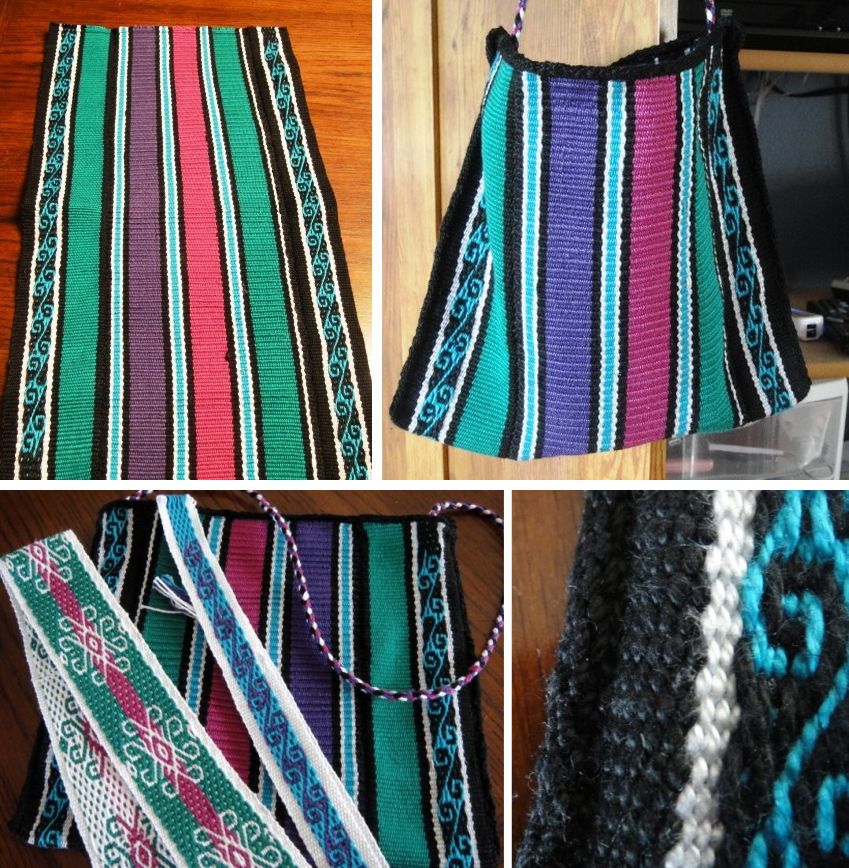
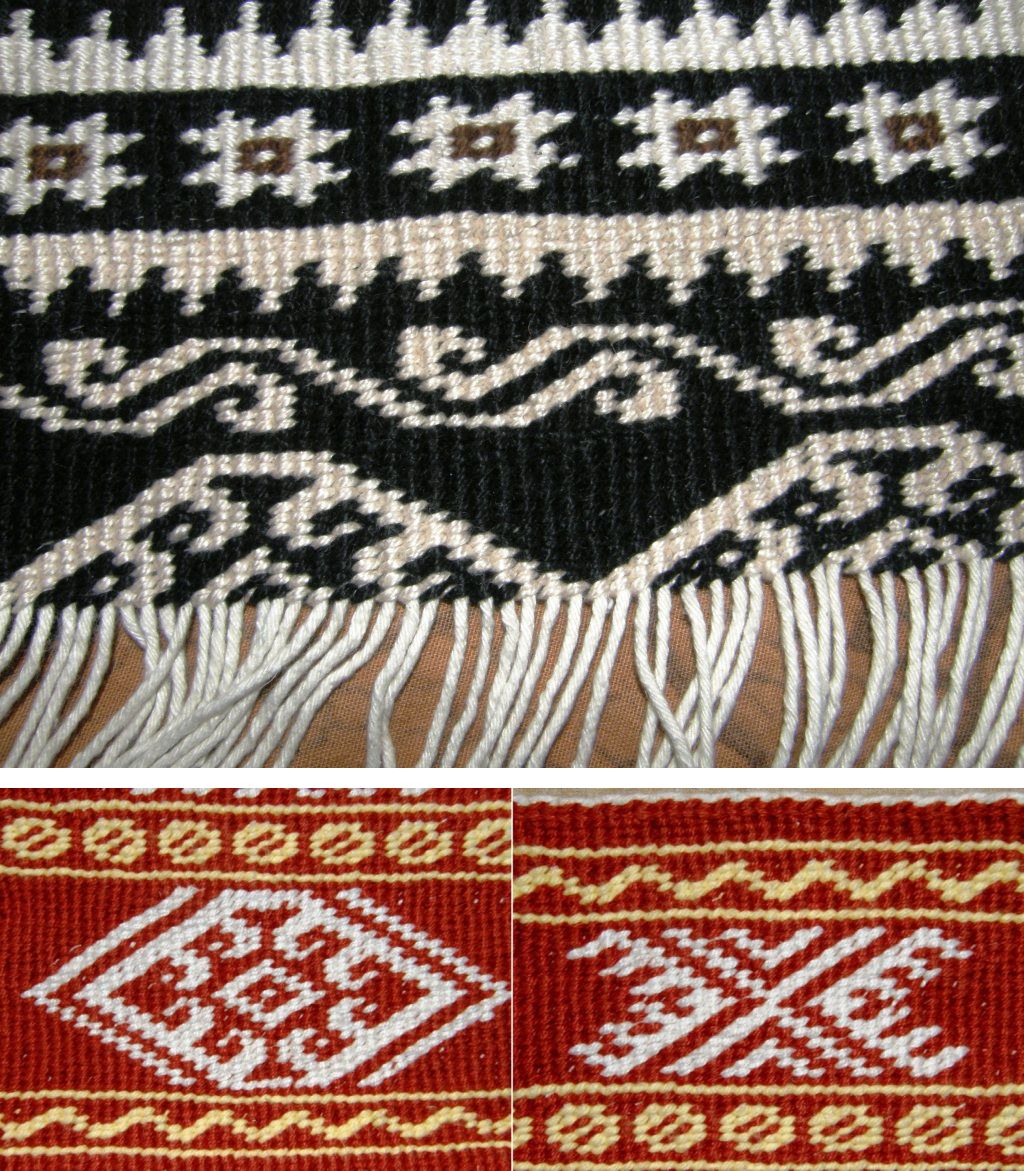
My plan was to weave a design based on a Tarahumara belt pattern that I had reproduced a long time ago in a pebbly float weave (at left).

It was easy to chart for double weave but, once warped up, I thought that the fine lines would probably get lost in the hairiness of the llama fiber and so I chose a simple solid pattern instead.

I guess I didn’t really put much thought into this little project. All I wanted to do was make a contribution before I disappeared on the road.

I have to say though that it was a lot of fun weaving with handspun, especially my very own, after all this time.

Pictures of handspun wool have been appearing in the SAL thread in the backstrap group and it is very exciting. I suspect we shall be seeing these yarns on the loom soon.

Jennifer has been hard at it on both wheel and spindle.

This is what Tracy has prepared….

Popsicletote prepared this nice collage of photos of her finished band entitled “Little Prayer”made with her handspun with pebble weave patterns on her backstrap loom…

And here below is my wee “cheat” contribution…
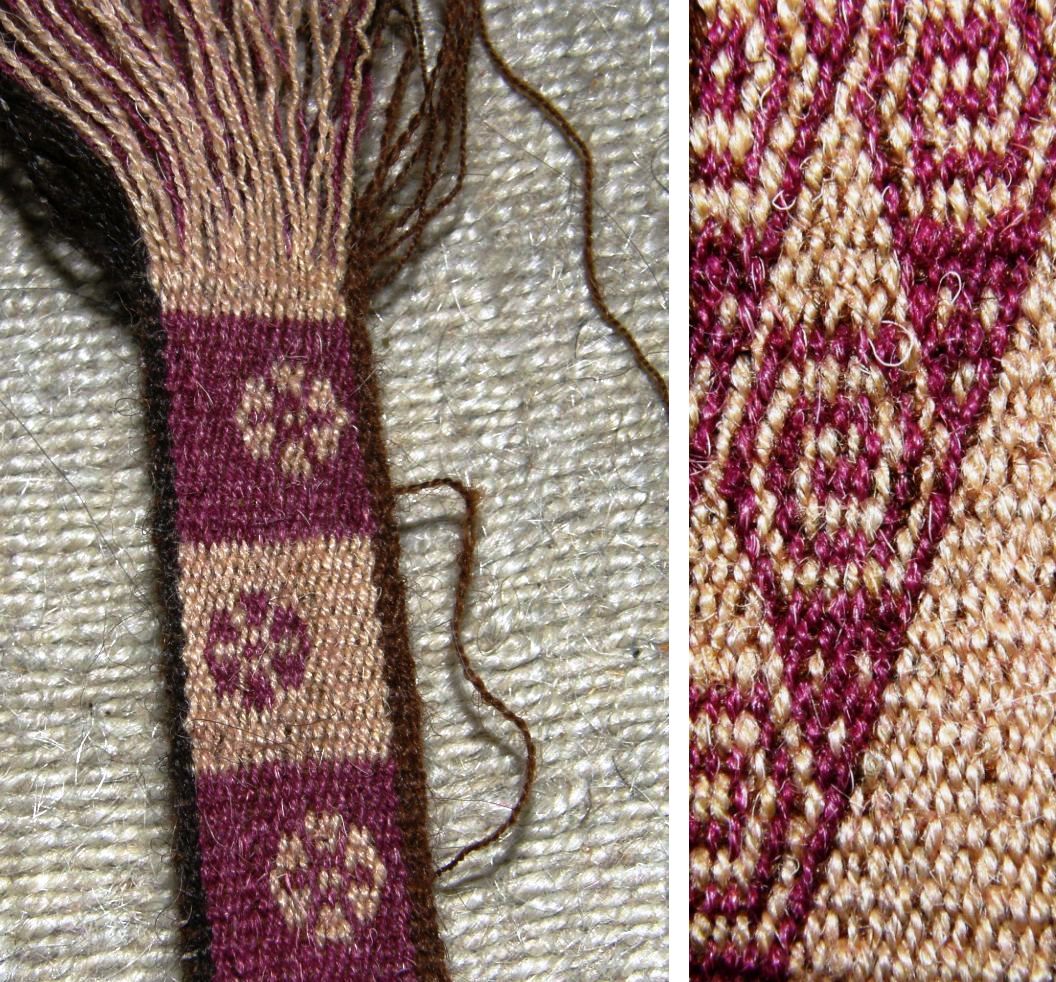

And you can see that I did try the Tarahumara motif in the end and the lines of single warp are not getting swallowed by the llama fiber. The colors are natural brown and black on the edges and cochineal and spearmint leaves for the pattern. I should be able to get two key fobs with each of the two designs from this warp.

This all reminds me of how easy it was get to get nice wool at the store when I lived in Chile…not to mention all the fleece there was on hand down in Patagonia.

There was a beautiful yarn made by Reginella that was a fine combination of wool and alpaca. I used to ply it with high twist and it came in the most gorgeous range of colors which had a soft natural look. Even the reds and oranges were sort of “dirty” looking, if you know what I mean.

I must get back to Chile one of these days to look for that.

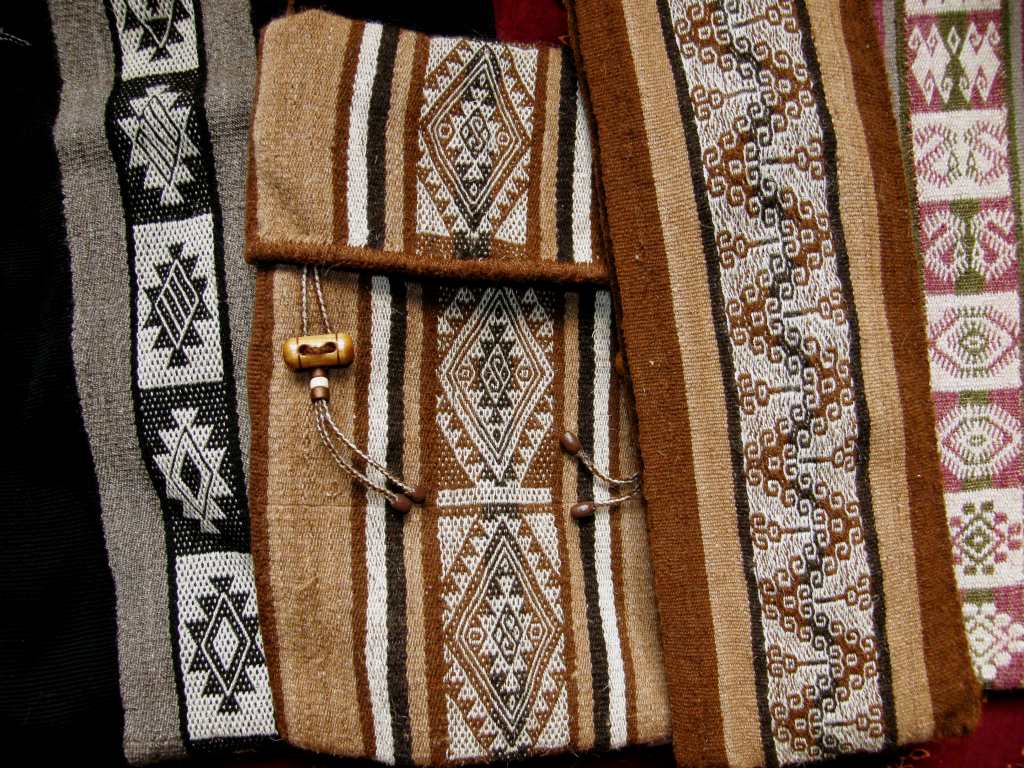
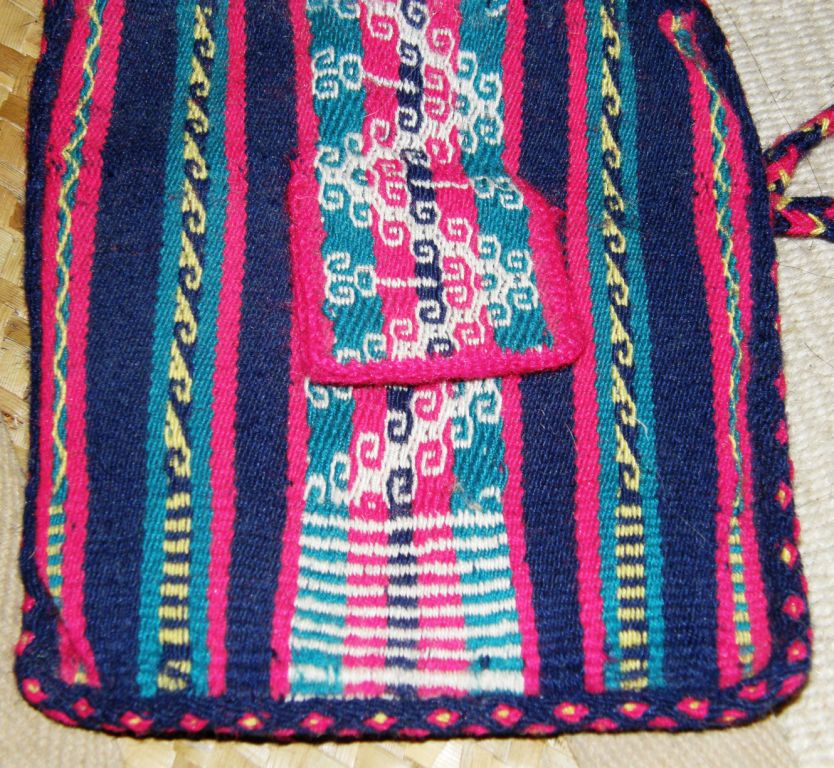
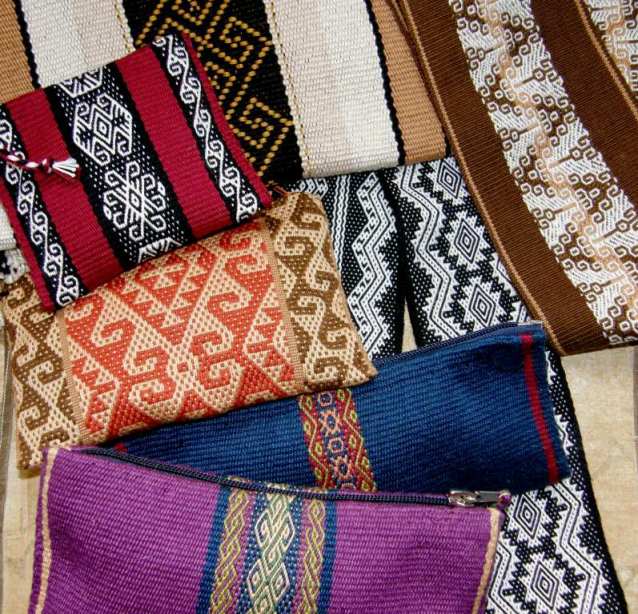
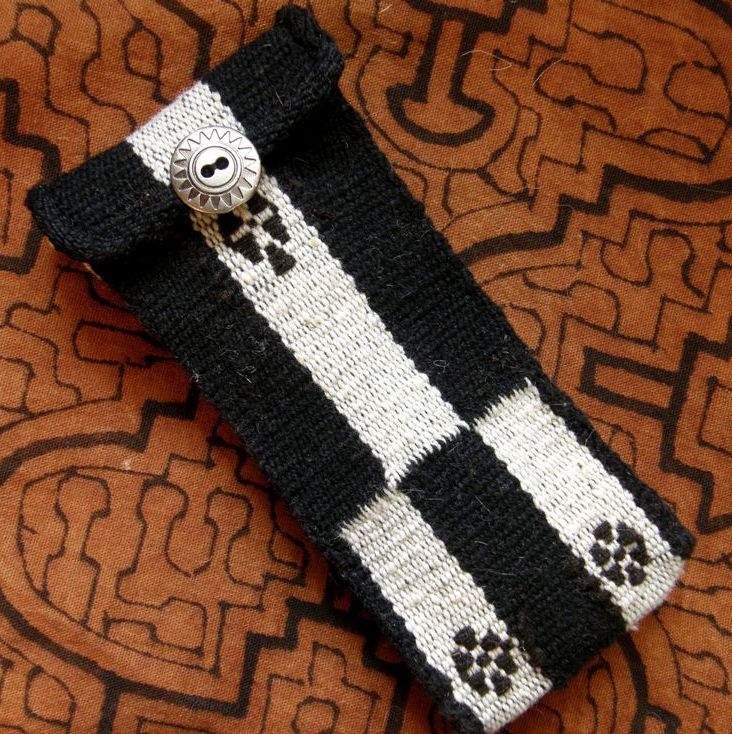
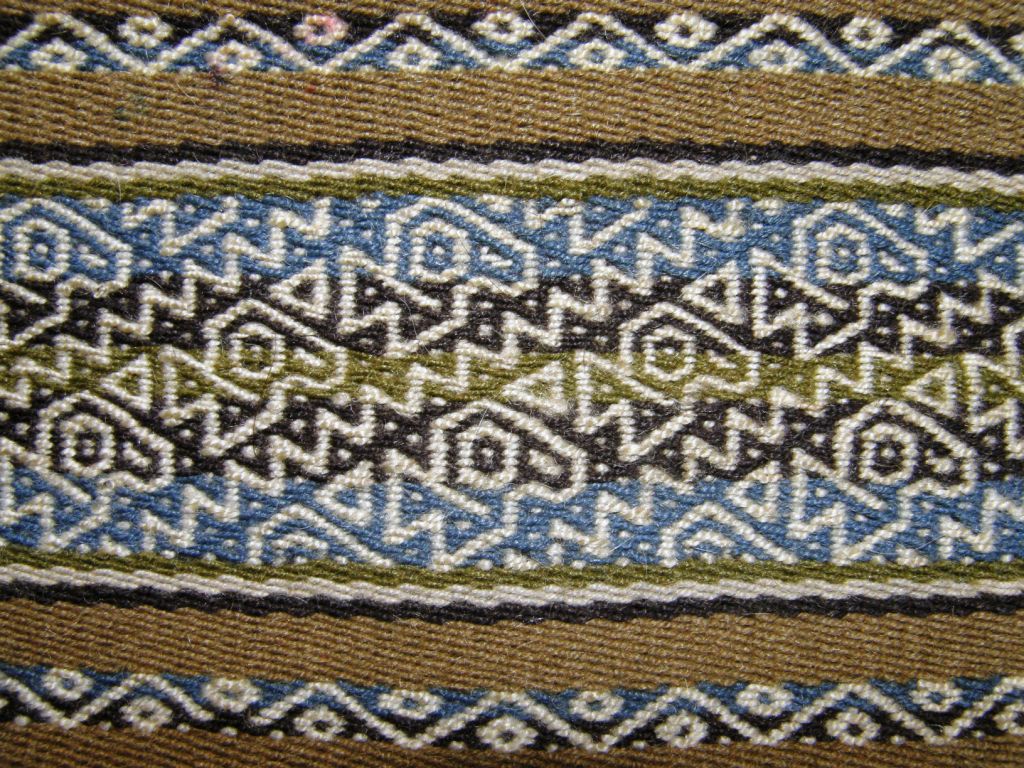
I made the triple color pebble weave band at left with what I had left over of this yarn when I came to live in Bolivia as well as the piece below which was made into a pencil case in my early English teaching days here.
###############################################

You may remember last week I introduced you to Dorinda Dutcher and the work she is doing with weavers through her PAZA organization in Cochabamba. Dorinda works out in the field with a very erratic internet connection but she was in the city recently and responded to my request to provide some photos and information in her own words about what she and the weavers of the township of Independencia have been doing…….

PAZA – “Weaving the Past and Present to Brighten Futures”
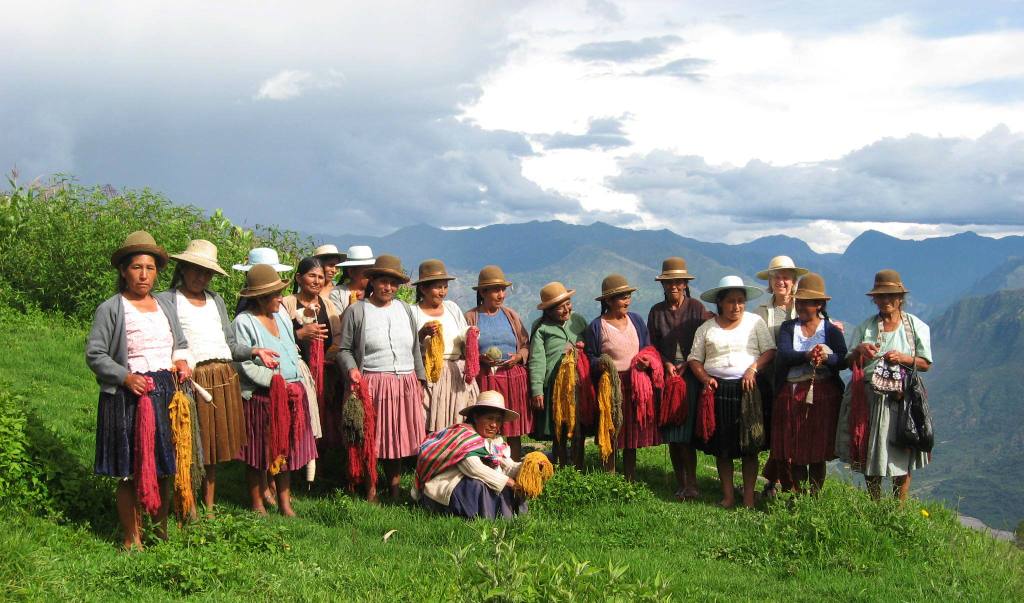
PAZA has evolved out of a Peace Corps project begun in 2007 to support the weavers of the community of Huancarani and lead the local movement to rescue, preserve, and market their traditional weavings. PAZA has helped the weavers to revive natural dye techniques and provided technical support to improve the quality of the finished woven items for an external market. The weavers are currently moving forward to become a legal weaving association and have taken the name “Centro de Artesanìa, Huancarani”.
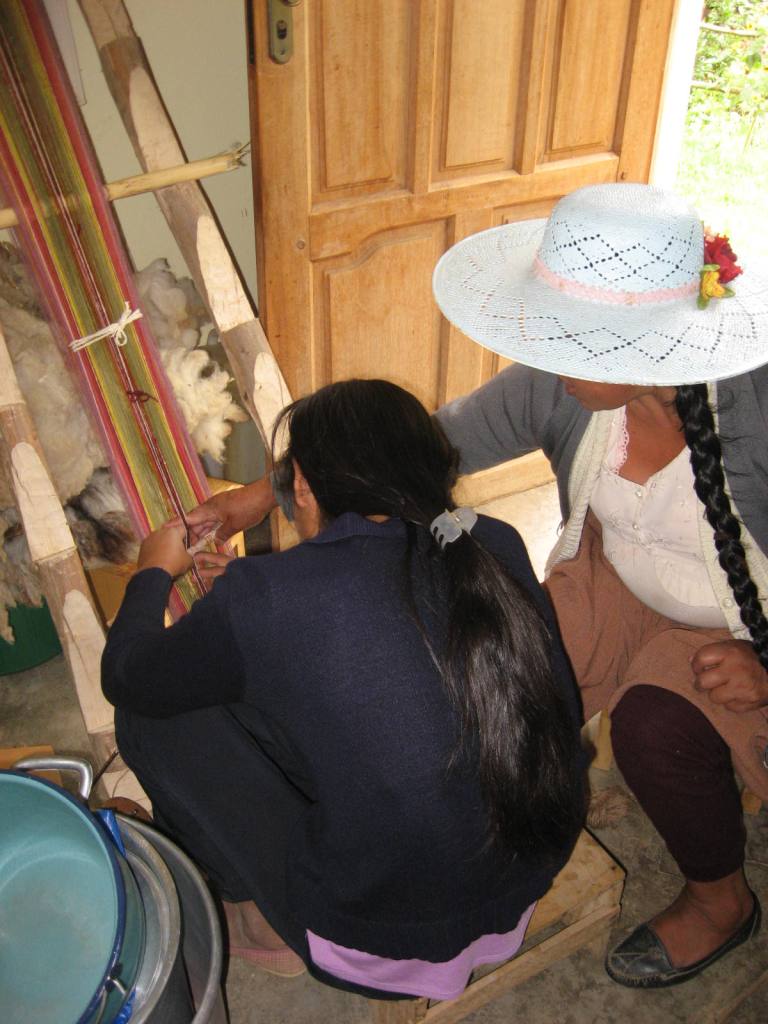
Youth have been involved to address the preservation objective. PAZA began the Club de Chicas in December 2010 during school vacation to help bridge the rupture in the passing of weaving tradition from mother to daughter when families migrate from their farms to town.

Many families migrate to provide education for their children beyond 5th grade. The Club de Chicas activities combine modern and traditional skills. The spinning and weaving classes are taught by Doña Màxima Cortez, the PAZA Coordinator. Dorinda Dutcher, former Peace Corps volunteer, teaches baking, computer, and basic business classes.

The PAZA volunteer program provides opportunities for fiber artists to enter the Quechua weaving world and take classes from Doña Màxima while offering their expertise in sewing, knitting, crocheting, or any creative activity they wish to teach.
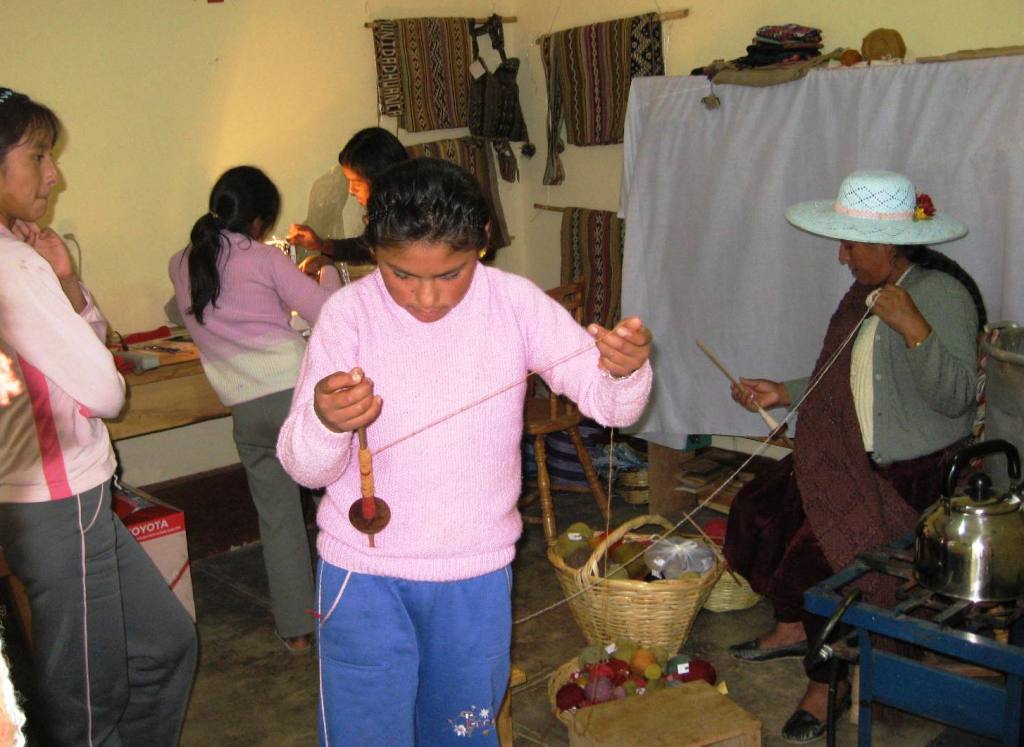
A variety of activities typical of Tuesday and Thursday afternoons in the PAZA store/workshop.


The sales of the weavings are vital to meet the growing costs as the modern world encroaches on the farmer subsistence lifestyle.

Doña Màxima will have to sell 11 ch’uspas at 150 Bolivianos (Bs.) each to pay for the school supplies and uniforms for her 3 sons for this academic year. The 150 Bs. ($22) is not a fair price for the lengthy process from shearing to final product including the weaving by a master weaver, but it is the current ceiling of the national market.
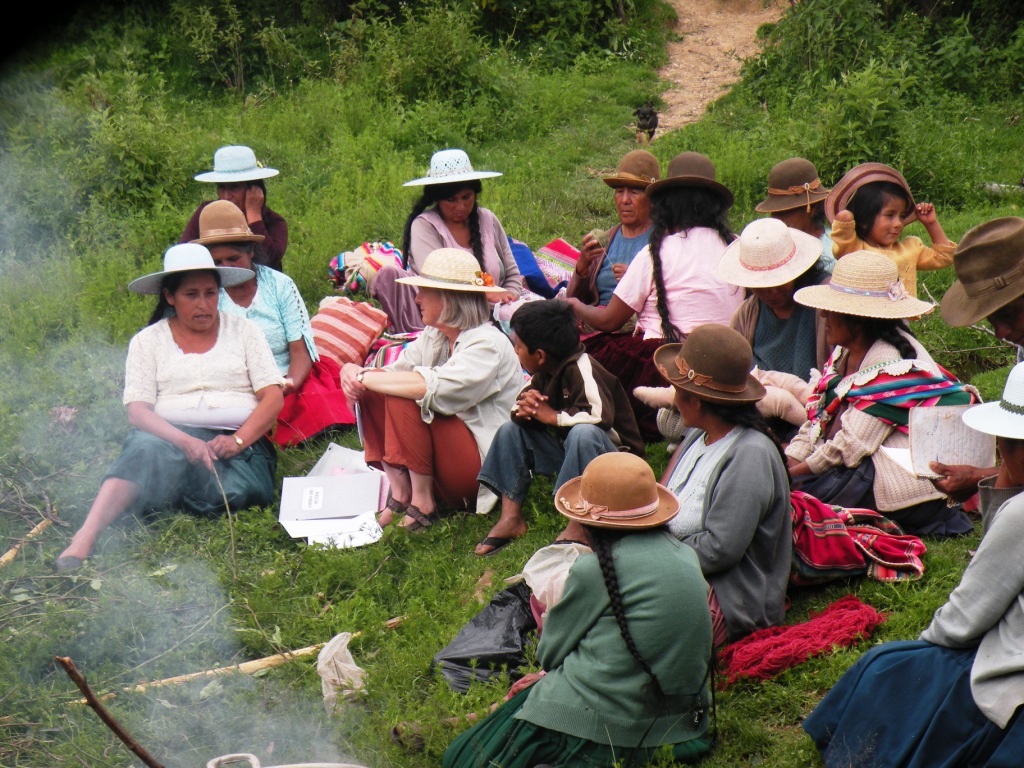
An open-air Association meeting.

For more stories from Dorinda in-the-field please visit the PAZA blog. I am sure that she will appreciate your comments and words of encouragement.

#################################################

Scratching around on Ravelry this week led me to this fun fun discovery.

You know how I love the drawings of Guaman Poma de Ayala. I have posted a few of them here before.

Well, someone on Ravelry in a thread entitled Peruvian Textiles as Cultural Crossroads provided a link to a site which contains Manuscritos de America en las Colecciones Reales which includes the volumes of images by Martinez Compañon which he made from 1782 to 1785 in the area of Trujillo, Peru.

These provide detailed graphic information about various aspects of both Spanish and indigenous life at that time including textile production.

Here is a sampling of some of the pictures…


This is just a taste…go check out the fabulous site linked above. There are wonderful pictures of costumes and more.

##################################################

You may have read a lot here on my blog about my friend Lisa in North Carolina. Lisa and her family always open their home to me when I am visiting the US. Lisa’s blog is full of her Fiber Addiction Adventures. We met online via a Central Asian yurt band and have spent time together felting, spinning and backstrap weaving and experimenting with pebble weave on her four-shaft loom. As usual, she is currently into something interesting….

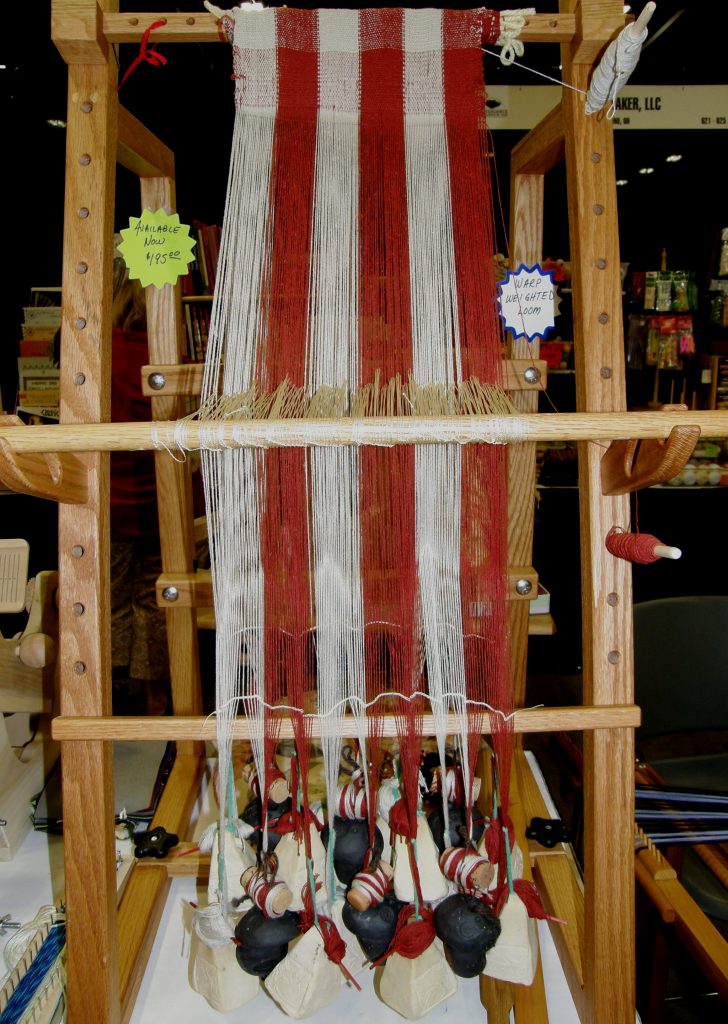
The first time I saw a warp-weighted loom was in the picture above which is the cover of my copy of  Elizabeth Wayland Barber’s Women’s Work The First 20,000 Years.

This picture was taken from a Greek vase dating back to about 560 BC.

I then ran across one of these looms (at left), thanks to Deb McClintock, at Convergence last year and even met the owner by chance at the Tinkuy de Tejedores in Urubamba.

I have to say that I am not drawn to building one and weaving on it myself but I certainly find it interesting as Lisa always puts a lot of time and effort into researching her projects and we get to benefit when she shares all the information and activity with us.

So here is a little of what Lisa has to say about her new weaving adventure…

I’m really excited to be learning to use a Warp Weighted Loom.  One of my favorite areas of interest is how to make and use low cost fiber tools to get people interested in spining, weaving, and felting by showing them that it can be fun and inexpensive.

My family and I are involved in the Society for Creative Ananchronism with is a historical reenactment group as well as the Piedmont Fiber Guild.  This gives me an outlet to find others who are interested in both historical fiber traditions and modern day applications.

Learning to use my Warp Weighted Loom has been one of those wonderful projects that brings in research with actual practice.  To prepare I found several wonderful books about Norse and Medieval fabrics as well as some very helpful webpages and groups,  then set up the goal to make a low cost loom based off that research.  Using just a few tools like a saw, ruler, and drill we were able to construct the loom for between $30 and $35.  When added to my backstrap loom and homemade Charhka/Spindle wheel I feel like I am prepared to take on many different types of complex spinning and weaving projects with tools that will serve me just as well at my current skill level as they will as I gain more experience and ability through practice with them.

The Warp Weighted Loom has several interesting differences from other looms I’ve used in the past.  Instead of weaving from the bottom to the top you weave from the top down.  The loom itself can also be used as a warping board which is very handy.

To begin with I used cardweaving to create a band.  My weft in this band then becomes the warp for the loom itself.  I found myself really enjoying this novel part of the warping process.

When the band was done I then sewed it onto the upper beam and used weights to tension the warp.  I found that the higher the tension the greater tendency to be a weft faced piece but I need to experiment more to find out it that bears out with other yarns.

Right now I am working on a small rug inspired by the Sami tradition of warp weighted loom woven rugs called “Grener”.  I’m using Lopi style yarns both from stash and spun at home from local wools. My actual goal for this loom is to weave Viking Era style cloth which I hope will conform with extant finds discussed in “Woven Into the Earth”.  I’ve sourced local Romney wool from a sheppardess in the Piedmont Fiber Guild, have scoured it, combed it, and am in the process of spinning high twist worsted singles.  When I have enough singles yarn for warp and weft I’ll be ready to start my next project on the loom which I plan to be a simple twill shawl made of my handspun.

#################################################
Here is an update from some of the friends I have introduced to you here on the blog over the last year or so…

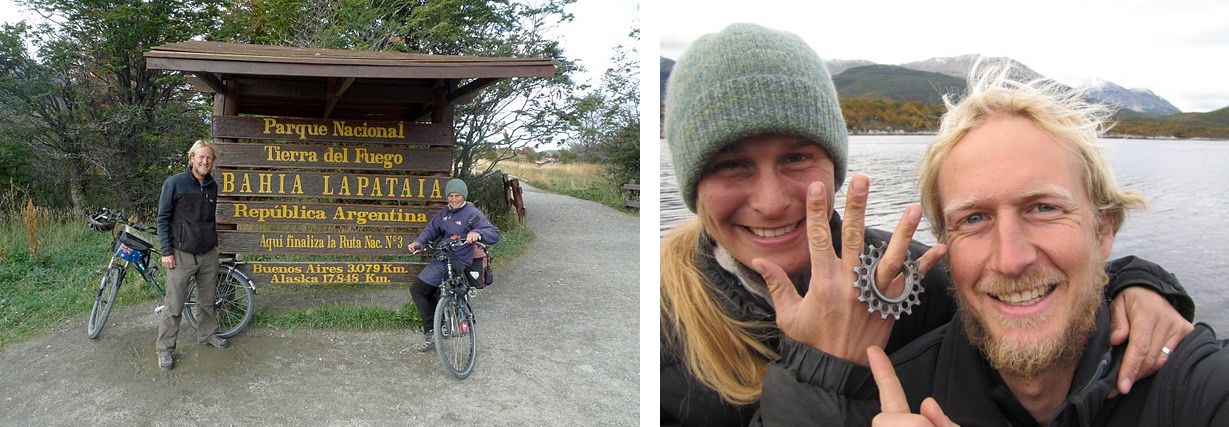
”Bicycle Anna” and boyfriend Alistair are back home after their almost-three-year trip by bicycle from Alaska to Ushuaia. Anna took weaving classes along the way in Guatemala and Peru and then came to Santa Cruz to weave with me. Since then, she has been unstoppable and even told me that she was finding excuses for rest days on the road just so she could weave.

I have shown several pictures of her bicycling and weaving her way down south since she came to visit me last August.

Here is picture of her and Alistair at the end-of-the-road. I am disappointed she didn’t tie her backstrap loom to the sign post! And there is another picture of a surprise happy ending. I leave it up to you to guess what happened!

My friend and anthropologist Kathleen Klumpp, whom I accompanied on a research trip to coastal Ecuador in 2007, sent me this next picture of little Melina, whom we have seen learning to spin in Kathleen’s videos, holding one of the family’s latest weaving products.

As the market for the traditional patterned cotton saddle bags is now virtually dead, they are weaving beautiful satchels with zip pockets using traditional motifs as well as adaptations of other regional designs.

Kathleen is presently in Ecuador and I hope to receive more news of this on-going project and the progress they have been making in the next few weeks.

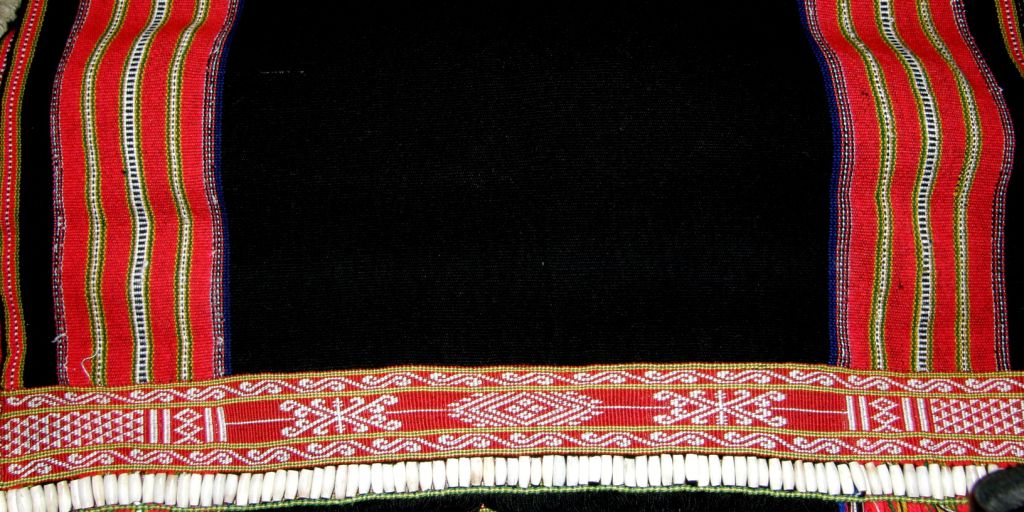
Betsy Renfrew, who is working with the Montagnard weavers in North Carolina sent me a picture of Rhade weaver Ju Nie’s latest project. Ju specializes in weaving the fine cotton panels that go together to make the traditional Rhade skirt. These skirts have strips of pick up patterning in various techniques and are quite often finished with a band of intricate weft twining.

It will be fun to see pictures of this as Ju progresses and get a sense of how long it takes a weaver to complete such a piece. You can read a lot more about Ju and the Montagnard weavers in these other posts here, here and here and about Betsy’s project on her blog.
Finally, a couple of finished projects from some Backstrap Group weavers…

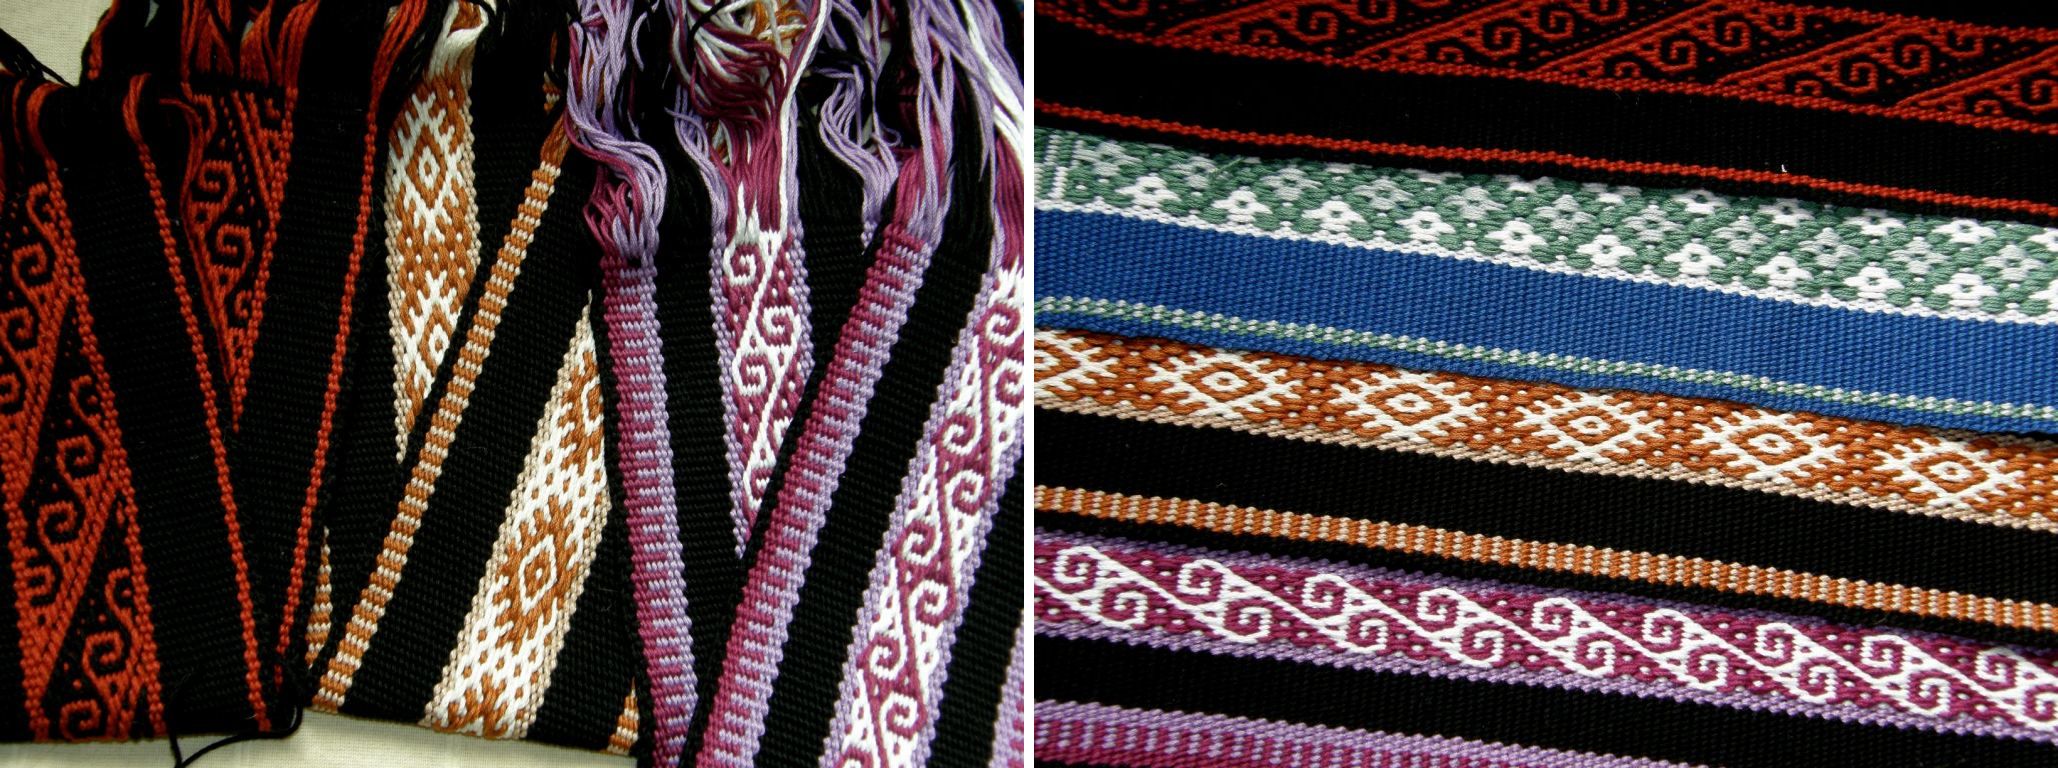
Look at all the gorgeous warp faced bands that popsicletote has turned out recently. While her handspun wool band earlier in this post was woven on her backstrap loom, I believe all these were done on her inkle loom using one of my tutorials for one and my pebble weave book for a couple of the others.

She enjoys using a variety of yarns and says that it is a shame that the photo doesn’t quite capture the different textures of the hemp, silk, linen, wool and cotton she used.  In her words… – each has a different feeling and surface texture and I find I don’t prefer any one over the other. Maybe the wool was a little more fussy to weave but not much.

And that’s Marsha’s band on the right. She says that a warping mistake had her reversing the horizontal bar colors halfway through the warping process but she turned the mistake around to make nice stick figures that complement each other in simple warp float technique.

Well, I will be in California next week, all going well. Hopefully my flights will get me all the way through in one go on Saturday. My blog posts may be erratic as a result from now on. I am sure it won’t be from a lack of stories to tell but rather from the want of time in which to tell them. Maybe you feel like some folks I met last year at Convergence who asked me to stop posting for a while so they could catch up! But, there is plenty of stuff back there in the archives worth re-reading. I can barely remember some of it myself!

Ca-li-fornia here I come…..


Backstrap Weaving – Big Bang and Big Thread

BIG BANG AND BIG THREAD

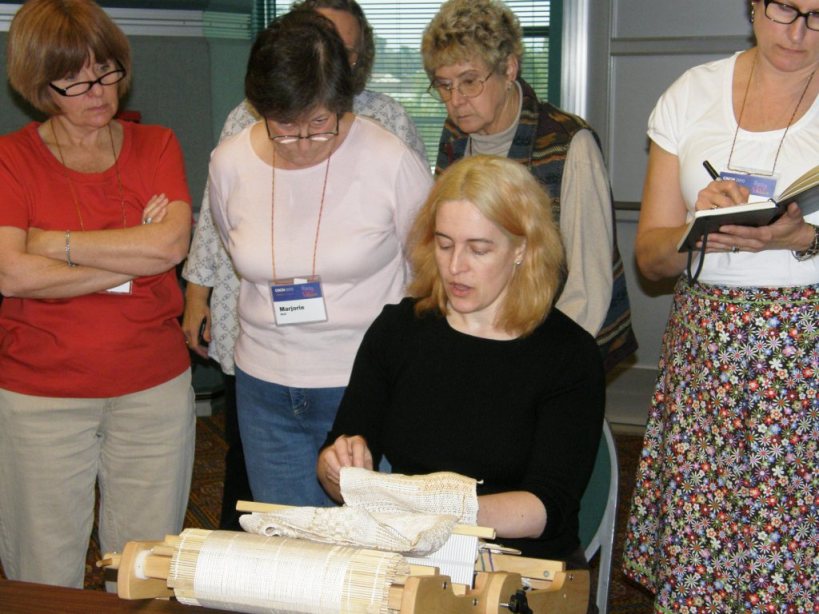
Syne Mitchell teaching her rigid heddle class at CNCH 2010

Time is running away and in the not-too-distant future I will be on the road again for another US spring visit (US spring, my fall).

Last year, at my friend Janet’s suggestion, I signed up for CNCH, the Conference for Northern California Handweavers, and had a great time taking classes with Robin Spady and Syne Mitchell as well as demonstrating backstrap weaving at the education booth along with Annie MacHale and Yonat Michaelov on their inkle looms.

I met so many fun people, online friends from Weavolution and Ravelry as well as made new friends with people like Kathe Todd-Hooker and Pat Spark who shared all they knew with me about the weaving of the Russian Old Believers.

I will be going back to hang out with Annie, Yonat and other southern Californians and then heading up to see the northerners in Janet Finch’s

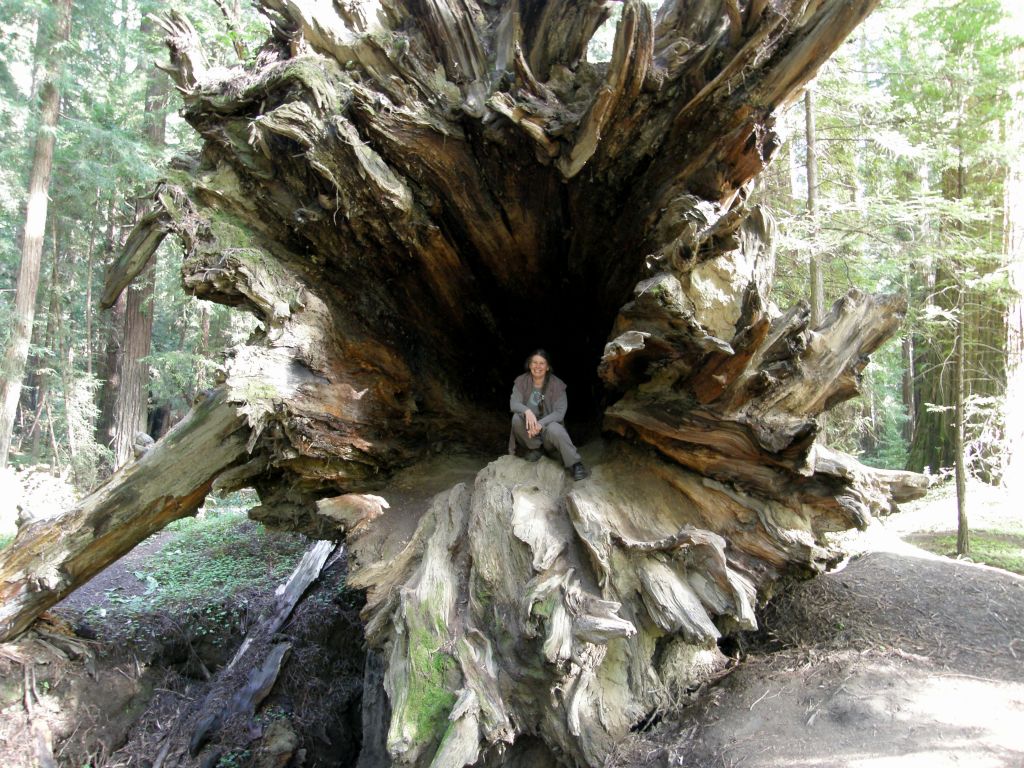
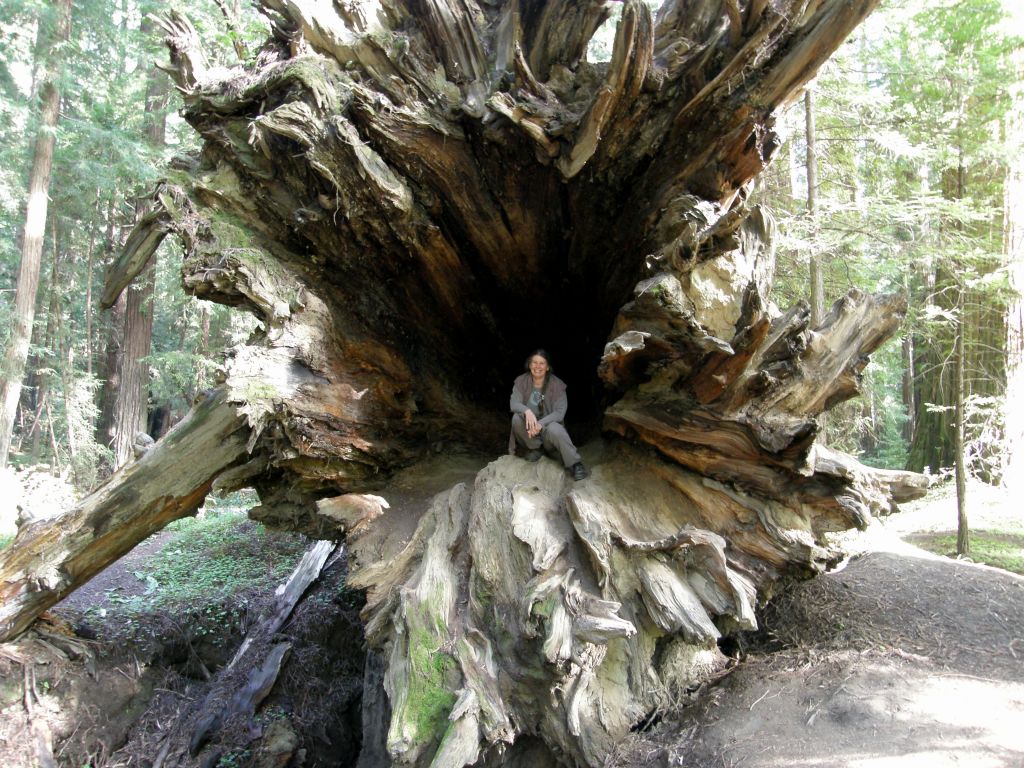
My friend Janet’s organic farm and mill is in Redwood country in Humboldt County


territory amongst the majestic Redwoods and on further north to spend some time with some weave-along buddies as well as Betty Davenport and Linda Hendrickson.

Then I will zip over to the east side which I also visited last year with a memorable two days at the Maryland Sheep and Wool Festival.

Unfortunately, the festival is not in my plans this year but I will be seeing my good friends in Maryland and doing lots of backstrap weaving along the way.

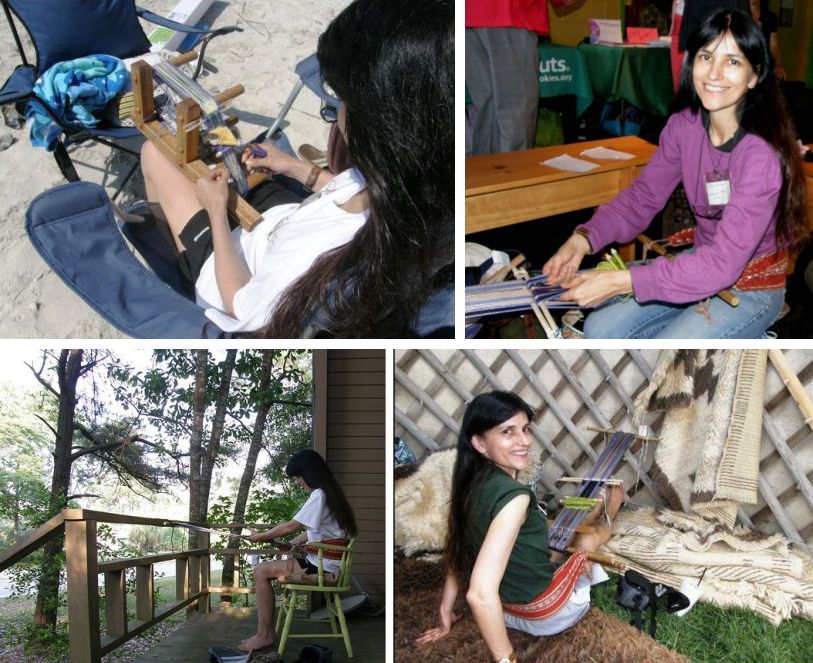
Last year had me weaving pebble weave on an inkle loom at the beach, demonstrating backstrap weaving at an Earth Day event, backstrapping on the porch of Lisa’s beach house as well as escaping the heat to weave in the yurt at Maryland Sheep and Wool. I wonder where my loom will find itself this time around.

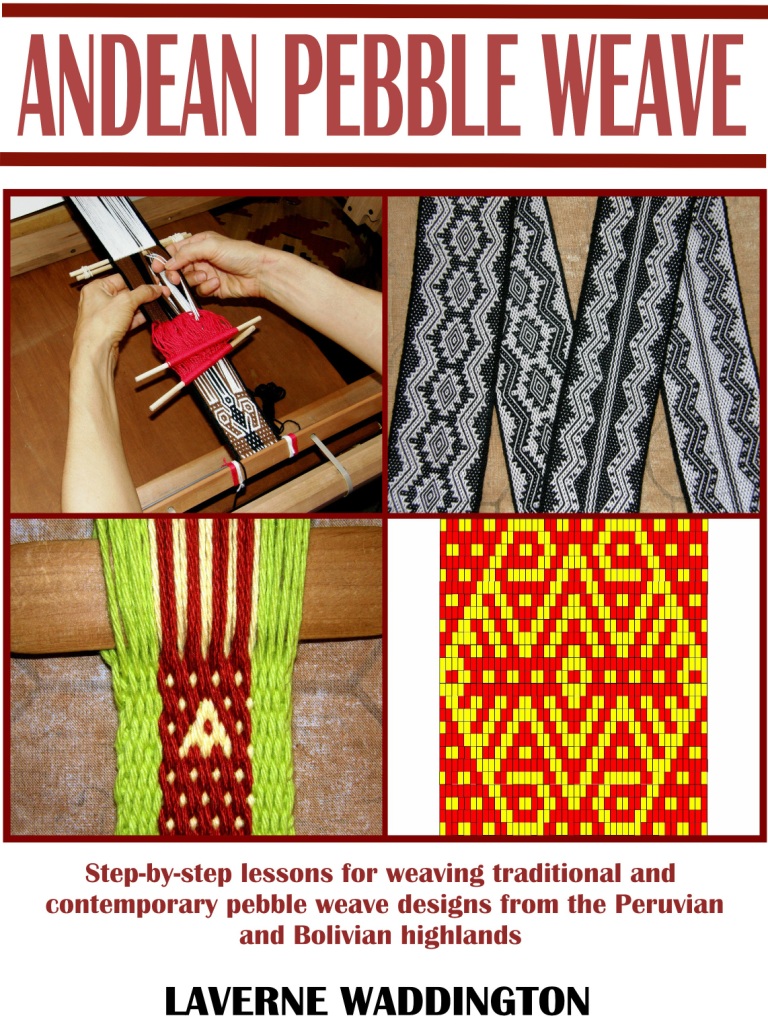
During the spring visit last year, my e-book Andean Pebble Weave went up for sale on WeaveZine. It was a very exciting event in the middle of this wonderful trip. Almost a year later, the time for change has come as Syne Mitchell has had to scale back her online activities to make way for a new day job. Andean Pebble Weave had to hit the road and with the help of Syne has now set up camp on Julia Grunau’s Patternfish site along with Syne’s bookmark patterns.

I couldn’t have hoped for a smoother and easier transition and I want to thank Julia and especially Syne for making this happen. This has kept me very busy behind the scenes updating all my links!!   Facebook, Flickr, Ravelry, Weavolution, Yahoo, Weaving Today….you name it!!

You may have noticed that I try to sneak in a link or two to the book in every blog post.. Well, all those links need to be changed. Thankfully Syne once again came to my rescue and put together a redirect page and link on WeaveZine with the whole story which will smooth things over until I can go through every blog post and update.
So here I present (click on the following text) Andean Pebble Weave’s new home.

You will find the logo and more links on the sidebar and at various places on my blog.

Well, the extra online time kept me away from the loom a bit this week but I still managed to get four things off the loom and have started a fifth. How did I manage that? By using BIG thread, that weaves up super fast.

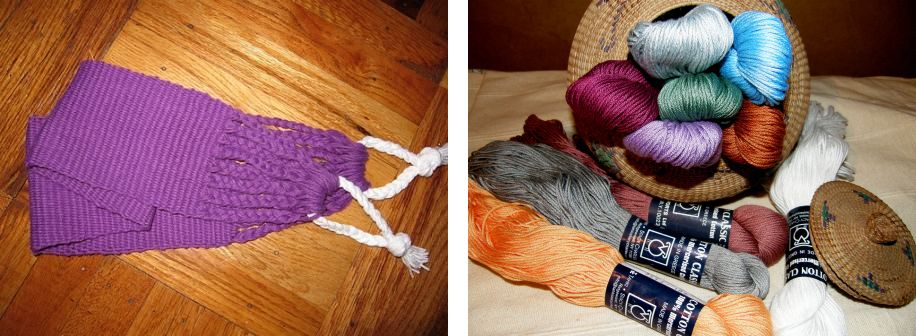
Cathyz on Ravelry wove her backstrap using Tahki Cotton Classic and said she loved this thread. So, when I was in the US in November and WEBS announced a sale of grab bags, my friend Claudia and I ordered a twenty-piece bag. I must say I was a bit nervous about how we would divide up the colors. I was imagining a frantic grabbing session in keeping with the item’s name but, as it turned out, our taste in color is vastly different and we chose our colors in a very orderly fashion!

So, with the new trip looming I decided to weave up some stuff that I had promised to friends on my last trips to the US, that is, some backstraps. They should weave their own…isn’t that what you are thinking? Well they are mostly into very narrow bands and so I offered to make them backstraps. The Tahki cotton is actually roughly half the weight of the cotton that I normally use for backstraps and so I doubled it.

First I did a couple of pebble weave bands. I can get loads of black and white thick mercerized cotton here in Santa Cruz and so I combined that with the Tahki colors. The Tahki skeins are small and once you double the thread there is not a whole lot to work with.

Then I made one with alternating colors of simple warp floats. This is the yurt band border design that I included in a tutorial here. The blue thread is from Plymouth Yarn Natural which is exactly the same as the thread I get here. I got this one skein to sample from the Mannings last summer.

Next came another complimentary warp pattern with a twill-like rather than pebbled background.

Here they are all together. I haven’t braided any of the ends yet. I am leaving that for Friday which is my official goof-off day!

They will end up looking like these…

I was running low on the blue at this point as well as colors to combine and so the fifth backstrap is narrower. I also didn’t have enough light green for weft and am using white. The little white spots on the edges look okay. There is a little trick to hiding that white dot that appears on the right hand side of the pattern area but, as I only warped three ends for the blue border next to the pattern rather than four, I can’t use that little trick (poor planning there). This technique is the one used in the Tarabuco area and is the one that was taught to me when I stayed in Candelaria. A short story about that visit is here.

The weavers in Tarabuco use a very fine thread for their background color and a heavier one for the pattern. I prefer to use the same weight for both threads.

Here is a larger version of the same motif in a 24wpi thread. Here I got to hide the spots on the sides.


This motif has been with me for years! Way back when I was living in southern Chile and knew little to nothing about weaving, I built myself a wooden frame, hammered in some nails and made a cardboard rigid heddle to mess around with. The first woven piece looked like an hour glass and through trial and error I managed to improve on that.

I was making little tapestry pieces just adding in colors here and there with the ends left hanging out the back. I made it up as I went along as there was no one to ask, no books to consult and no internet. As I got better I yearned to be able to do some kind of ethnic motifs. And then I found a picture of a Mapuche belt in an Argentinean knitting magazine and I adapted and wove the motif in tapestry technique. I so wish I still had those little experiments from all those years ago. They got left behind when I moved up here.

I still have the little scrap which I cut from the magazine, now quite battered. My motif is a much smaller version of this. Imagine how excited I was when I got to learn the technique used to weave it.

The only problem with these complimentary warp weaves is deciding which side you like best when you are done. Weaving alternating blocks as I did on the red bag helps with that problem!

There is no need to choose  a side for a backstrap. The blue simple warp float band is not double faced as the weft shows on the back.

##############################################

From big thread to big bang…the Backstrap Group’s Weave-Along came to its end last Sunday. We called the final day the “big bang” wanting to end with a bang rather than a whimper, you see. Here are some products…


Jennifer, after having made several pebble weave and a double weave project during the course of the weave along, chose to use a colorful plain weave band to make a zippered pouch. She got to learn and practice several finishing techniques this way, such as, the single cross knit looping/Van Dyke stitch to cover the place where her two panels joined, braiding for her zip pull and a plain weave tubular band for the edges. Among many other things Popsicletote contributed this fun picture of her loom bar lodged behind her feet.
Bobbie learned and practiced pebble weave, simple warp floats and supplementary weft patterning during the weave-along. She made a bag from one piece of colorful plain and pebble weave and added a braided strap. She also used a tubular plain weave band to edge it.
Barry focused on pebble weave for this weave along after having made himself a backstrap. He is sampling a new-to-him yarn called Patons Smoothie which I believe is acrylic and hopes to make a belt. I like the way he has sewn the end on the diagonal to finish it.

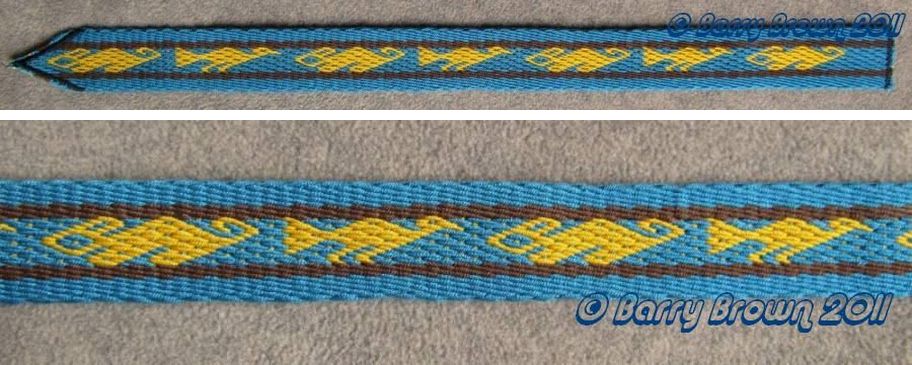
We agreed that the bird motif, which I charted in my book from a band I bought on Taquile Island, Peru, looks like a rocket- powered Warner Bros. roadrunner on roller skates.

Marsha is weaving on her Gilmore Mini-Wave loom and completed this beautiful band with some motifs from here as well as many of her own. She even adapted a double weave motif that I used on one of my mug rugs to simple warp floats.

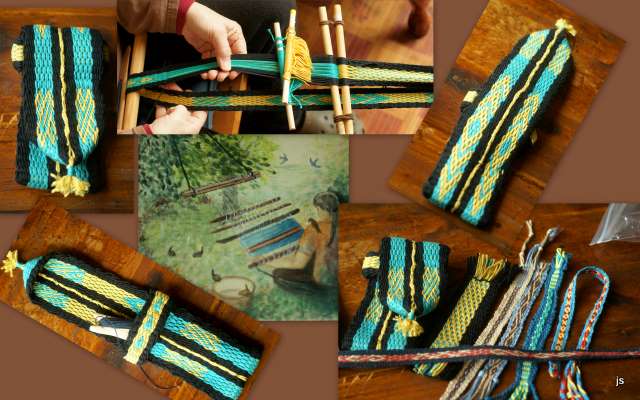
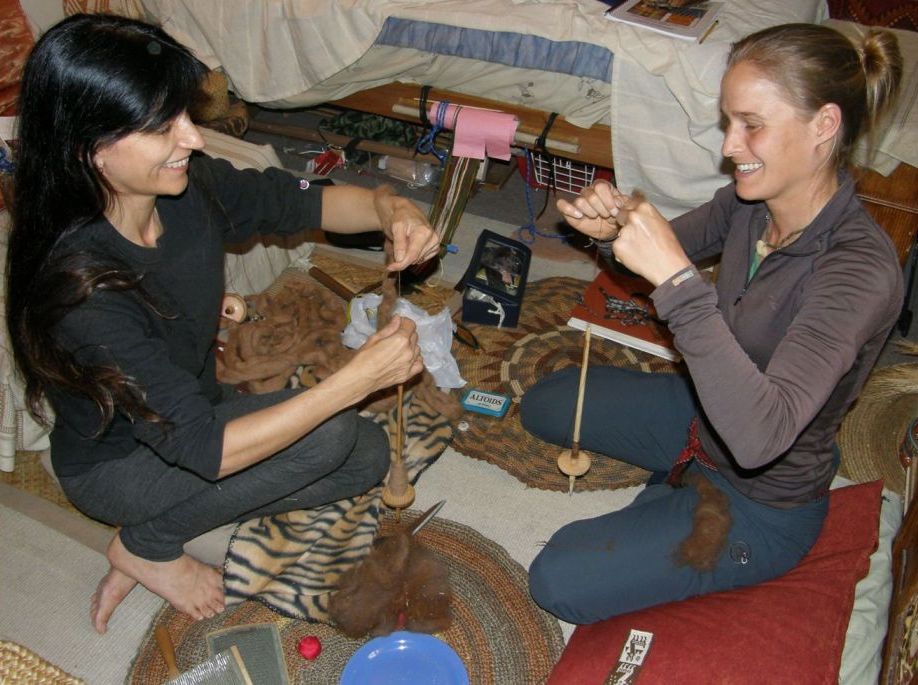
Popsicletote put together this lovely set of photos showing what she learned on this weave-along. She did the watercolor painting in the center many years ago as it has been her dream to learn backstrap weaving. She says that even though the person in the painting has dark hair and hers is now white, she is happy to be able to finally call herself a backstrap weaver. I love the shuttle pouch she has made.

Tracy didn’t finish her big bang project but she made a very special contribution with a couple of videos of herself at the loom instead.

Outside the weave-along, Helena in Brazil sent me pictures of her latest work. She took one of the designs from the weft twining that the Montagnard weavers use to finish their pieces and adapted it to the warp float technique that they use. This technique can create some long-ish warp floats on the back. The technique is shown in this lettering tutorial. I am so happy that someone has used the instructions in this tutorial. Helena is the first one that I know of to have done so and she has been very creative with it.


I asked Helena about the thread that she uses. As the thread I use here is from Brazil, of course I wasn’t surprised to find that she uses the same. The brand is Circulo and I use the Clea variety, which is about 35wpi and Anne which is about 24wpi. The heavier thread that I use for backstraps and tutorials in the same brand is called Naturale. I found out recently that this brand is available in the UK as well as in Canada and the US through a site located in Vancouver. I guess I am really lucky as I didn’t have to go around here trying all sorts of thread to conclude that I liked the Circulo thread the best. The Circulo is pretty much all we get here and it just happens to be really good stuff.

We were all a little saddened by the end of the weave-along and then Tracy came along and got us all swept up in the idea of spinning for warp-faced backstrap projects and it turns out that most of the people in the group have a whole lot to say about spinning.

This has led to a SAL…Spin-along for warp faced weaving and popsicletote is leading the way already with this contribution today…this gorgeous photo at left.

Some people are spinning cotton and Lisa is joining in spinning yak.

I, on the other hand, do not have a whole lot to say about handspun for my backstrap weaving. I have stuff to show but lack the jargon to explain to people online what I do so I am looking forward to following this spin along and acquiring the relevant vocabulary. I know how my handspun yarn should look and feel if it is to behave well on my backstrap loom and that’s pretty much all I can tell you!

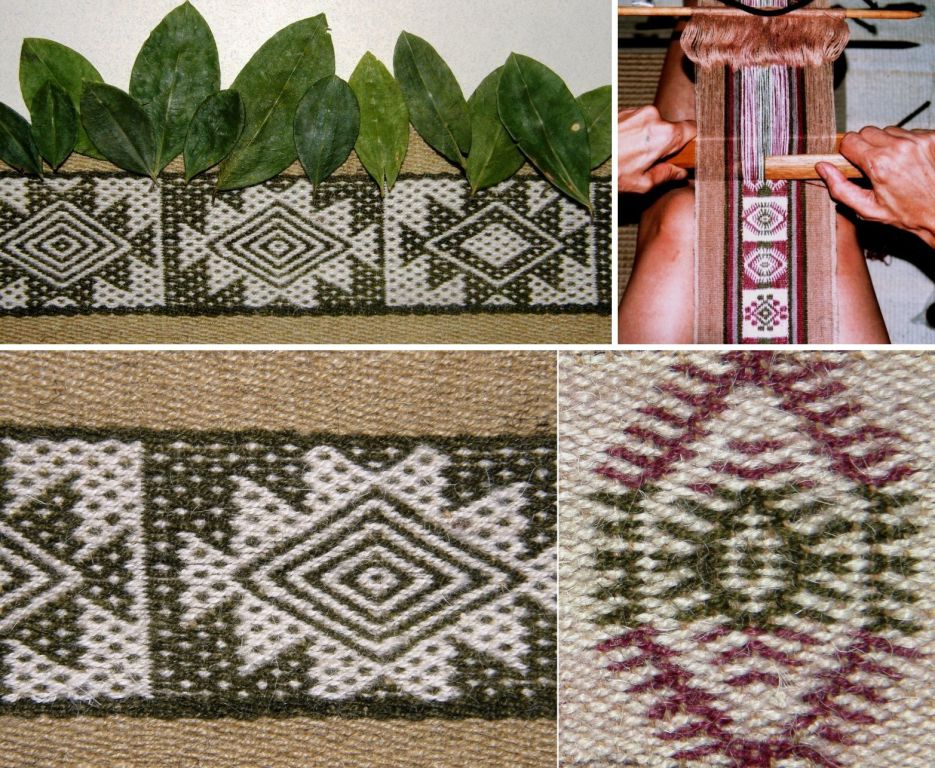
So let me show you some things I have made with my handspun llama fiber…

I used natural dyes in these next ones…coca leaves, spearmint leaves and cochineal.

Not a whole lot considering all the years I have been backstrap weaving. My first pieces made with my own handspun are actually in little frames on my living room wall! – so proud was I of this first attempt. Now with Tracy’s spin-along proposal maybe I will get more done. I should make Friday goof-off day a spinning day.

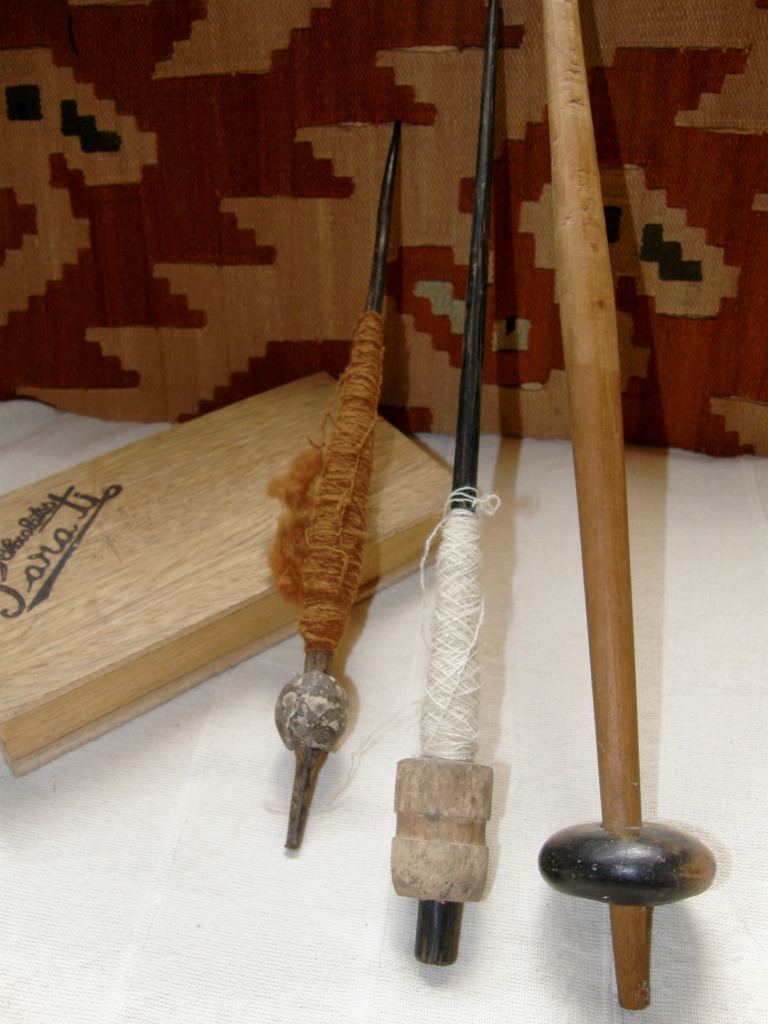
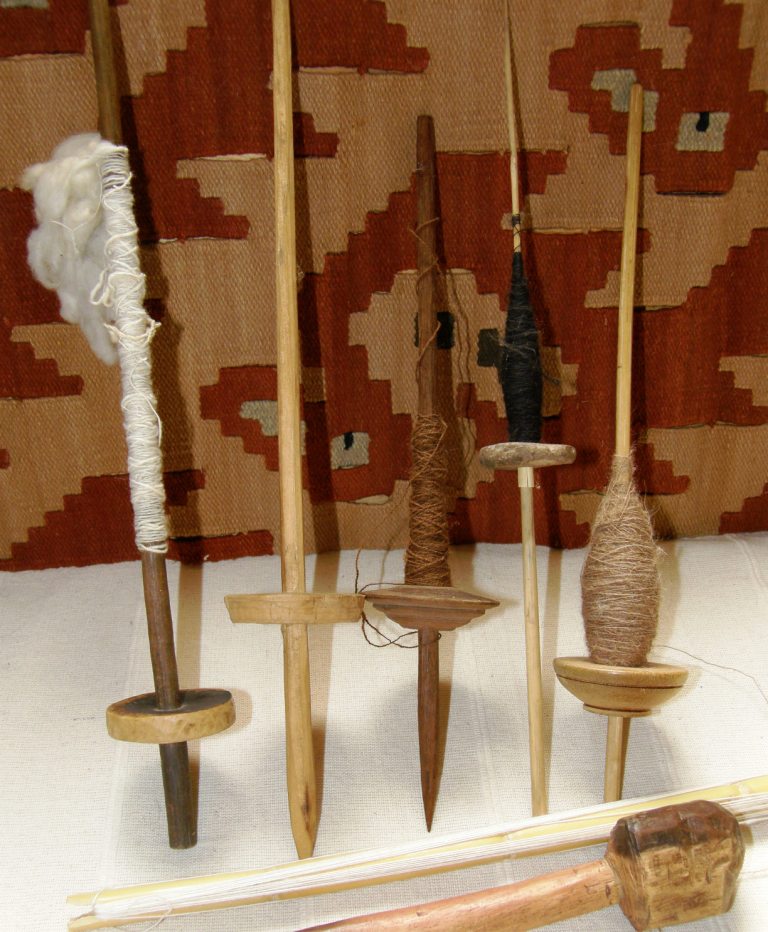
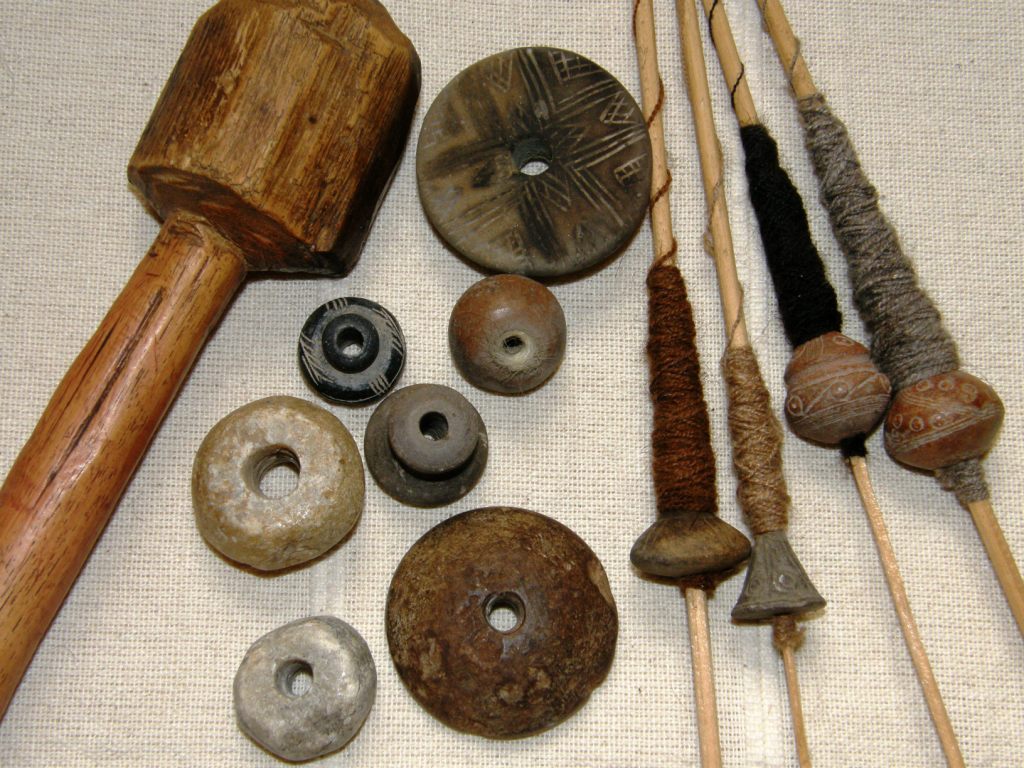
As we are on a spinning theme, I thought I would show you some of the spindles that I have gathered over the years in my travels here.

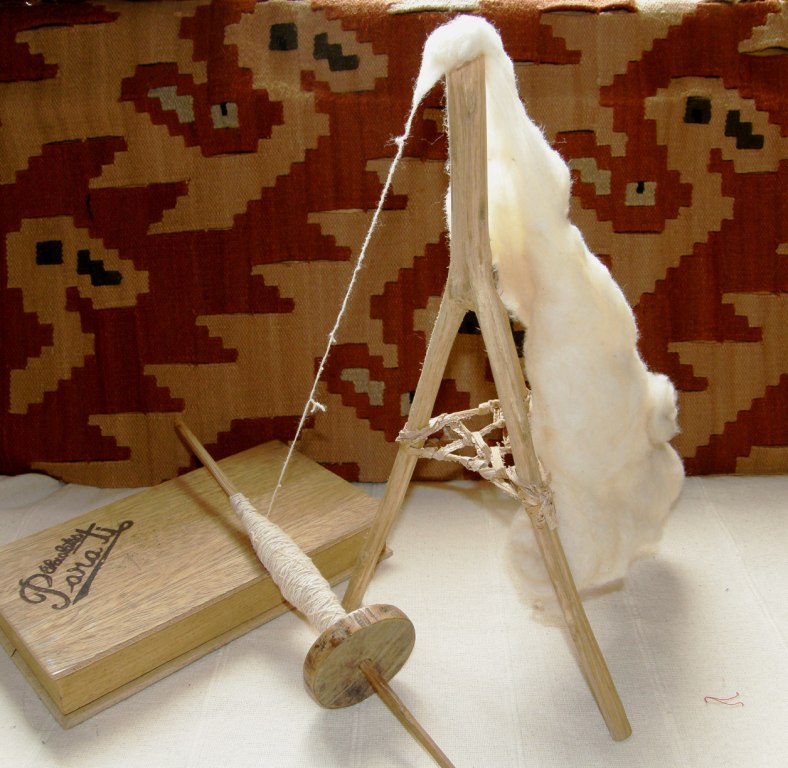
This is a spindle and rueca that I brought back after my stay in coastal Ecuador with cotton spinners. The rueca is a miniature one which we made while I was there. The spinners use a much larger and heavier version of this. I put a big weight in the little basket underneath to hold it down while I spin.

From left to right, a Guatemalan spindle with some of the highly prized natural brown cotton called cuyuscate, the spindle from one of the walking wheels in Otavalo Ecuador and a Mapuche spindle.

From left to right, a spindle used by the Guarani people here in lowland Bolivia for spinning cotton, two Bolivian spindles from the highlands, a spindle made from the sigsig (pampas grass) stem from Salasaca in Ecuador and one from Cusco. The Cusco one is my favorite for wool and llama fiber. The Bolivian ones have sharp tips and, as I tend to rest the tip against my belly as I wind on, they can be kind of “ouchy”.

These are various whorls that I have bought in markets, from my weaving teachers or been given.

To end… I posted a tutorial last week on plain weave tubular bands like the one being woven by this little girl at the Tinkuy de Tejedores last November.

Some of you may not have seen it as there was a glitch with the video shortly after posting and I had to try to re upload that and then I took that opportunity to redo the photos as I hated the colors I had used.

It is up and running now and you can see it here.

The tutorial is on “plain weave” bands and we know that plain weave doesn’t necessarily have to be plain. I want to edge more things with striped and more interesting multi colored plain weave bands to provide more examples but have yet to find anything to edge. Maybe I will come up with something next week.


Backstrap Weaving – Weft twining with the Montagnard backstrap weavers.


But first a look at gorgeous rural Maryland where I am currently staying with  friends on the first day when it has felt really cold out. There has been talk of snow on Friday…I hope so as we are putting up the Christmas decorations here that day! while Santa Cruz Bolivia in the meantime experiences a “cool” change with temperatures dipping below 30C  (86F). Most of the leaves have fallen here and it’s interesting to see the turkey vultures perched in the gaunt leafless tree across the street every morning.

Last week I was down in North Carolina where the weather was mild and the neighborhoods were still awash with red, gold, yellow and brown.

I was down there revisiting the Montagnard (Vietnamese hill tribe) weavers whom I had met on a visit last August about which I wrote in this previous post. I had discovered Betsy Renfrew’s videos and photos on her blog about the group of Montagnard people in her community and her project to help them integrate and find sources of income by teaching them English and making it possible for them to gather the materials and resources necessary to build looms, buy thread and practice their traditional weaving skills. Betsy was more than willing to extend an invitation to visit. She has also allowed me to use some of her photos in this blog post.


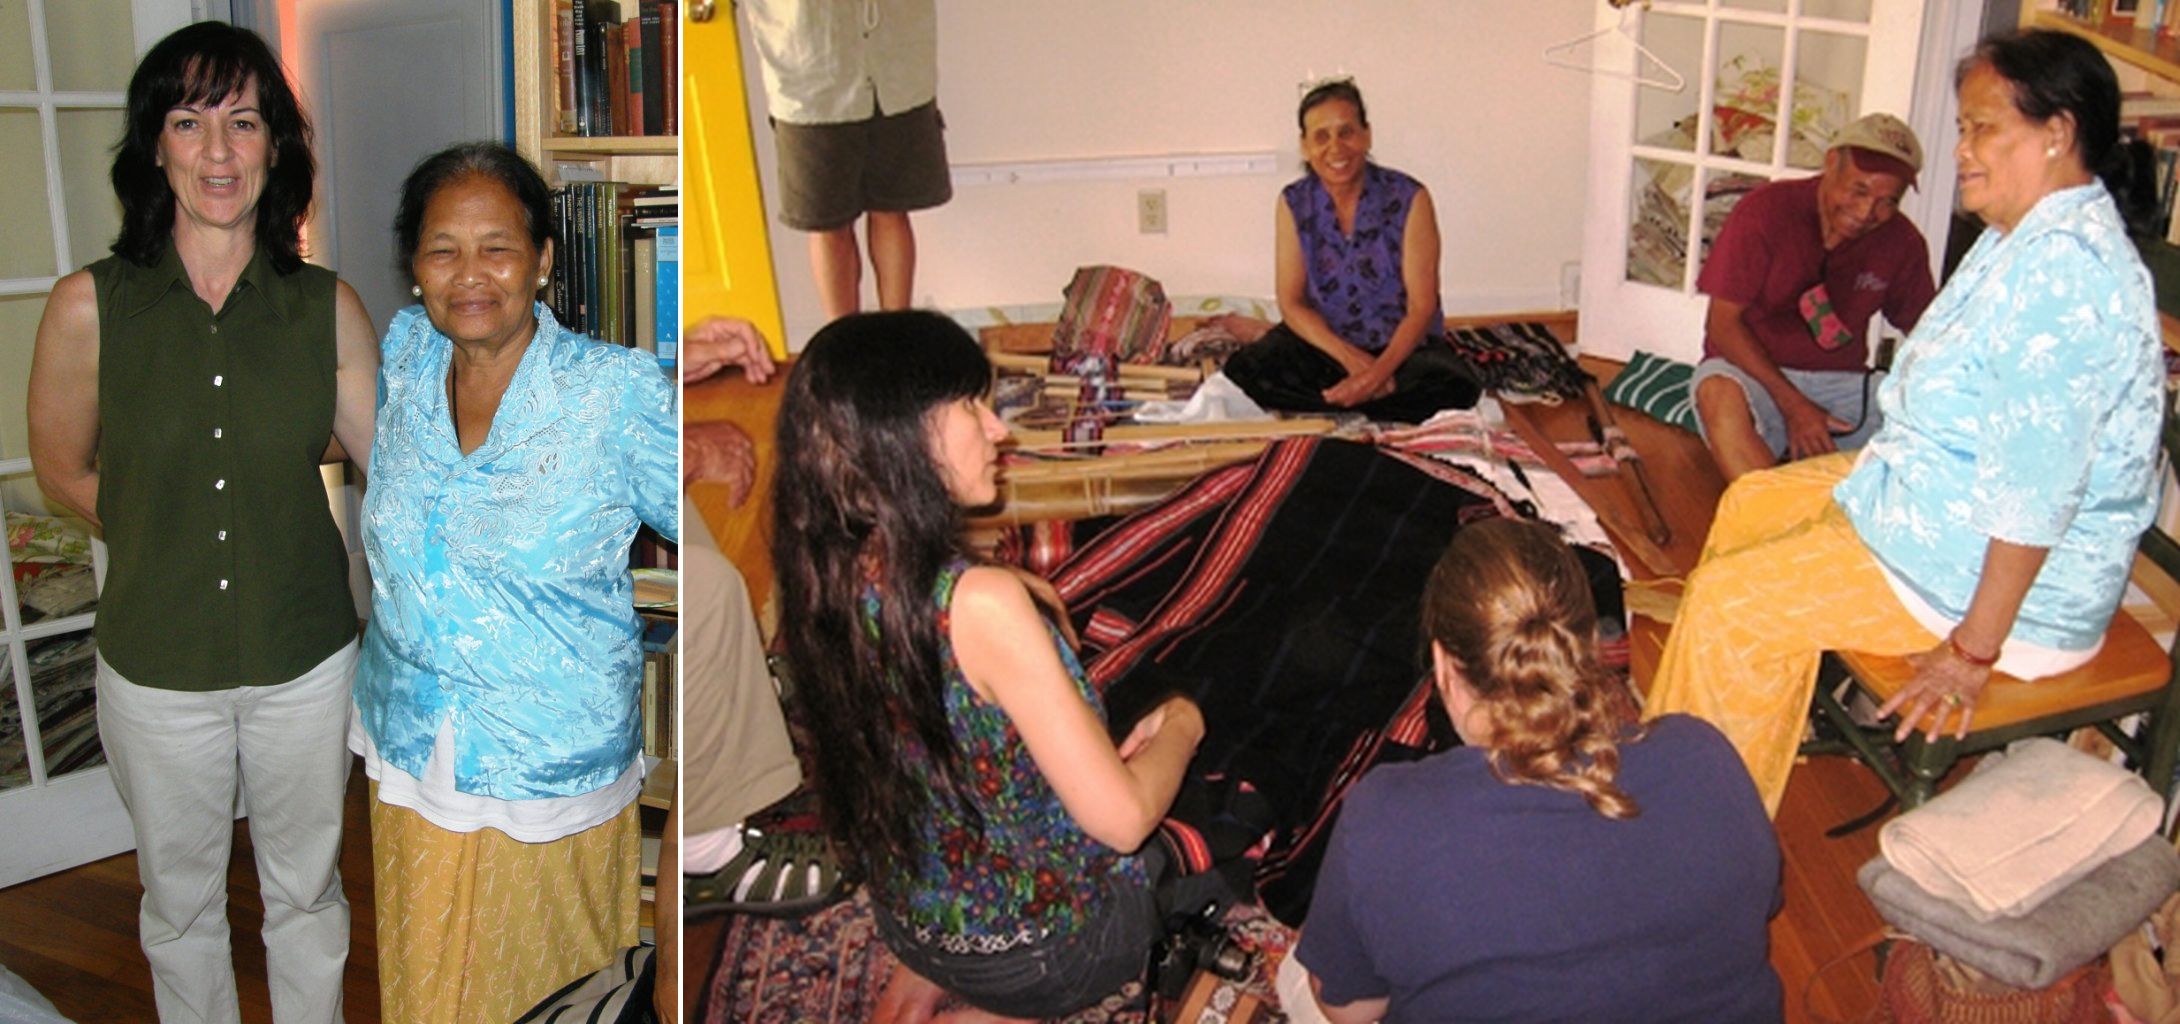
Betsy and weaver Ngach together on the left during my first visit. On the right a scene from my first visit with Lisa and Maurice in Betsy’s home with weavers Ngach, Ju Nie and her husband Thomas. It was a chaotic afternoon with lots of chatter, sharing and interaction which cleared away all  language barriers.  Backstrap looms and textiles covered the floor of Betsy’s front room and, as this was my very first encounter with these kinds of textiles, it was impossible to wade through and take it all in during our short visit and I left with many unanswered questions knowing that I would simply have to return one day.
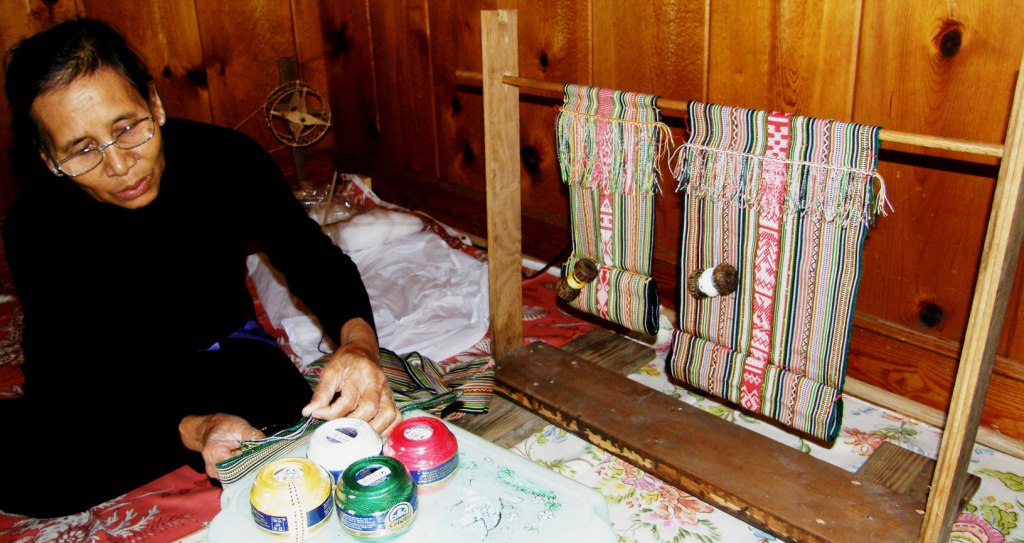
We got to see Ju warping and setting up her loom and Lisa and I both got to try out her warping technique where she adds string heddles as she winds the warp as well as weave on her backstrap loom. I tried to photograph as many woven pieces as I could – skirts, blankets, baby carriers bags and belts so that I could figure out the woven structures when I got home. Ngach put on skirts for us and Ju modeled the baby carriers. Many of the structures I immediately recognized and it was fun to show Ju and Ngach pieces woven with the same techniques in South America. In fact that was the most fun part of the visit…comparing and sharing our different experiences with the textiles, patterns, tools and looms and seeing for what purpose the textiles were intended. I was able to study and figure out some of the other less recognizable techniques when I got home.

Some of the different patterning techniques which include simple warp floats, cross knit looping, supplementary warp and weft can be seen below…

I like the supplementary weft patterned piece on the right as it reminds me very much of some flower motifs that I recently wove using Guatemalan supplementary weft and warp wrapping techniques. The similarities in the designs across cultures are astounding.

If you have been following my blog, you will know that the technique which really grabbed my attention was the following one which both Ju and Ngach, who are from different tribes, call kteh.


Above you can see two pieces with the kteh weft twining technique that Ngach has worked around the warps on the edge of  her woven blankets. The upper left picture is a loin cloth which Susan Stem showed me when I made inquiries about this technique on the Tribal Textiles forum. I think that Ngach’s pieces are every bit as fine as the example photographed by Susan.

So this was the technique that I really wanted to learn more about and I got to see even more amazing examples on this most recent visit.

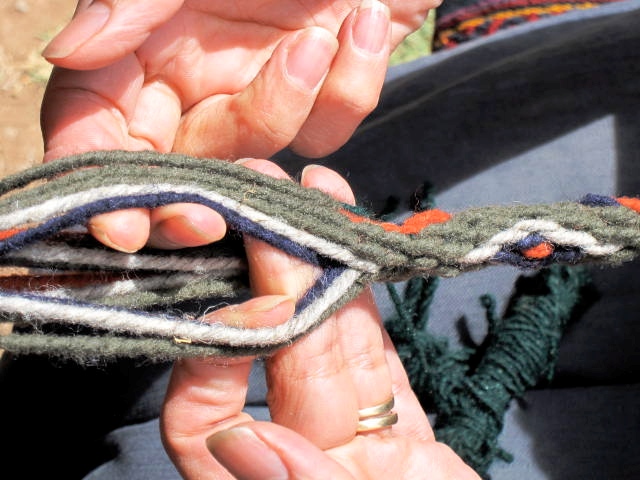
When I got home I was keen to try weft twining and made examples in different colors using Montagnard designs that I had photographed and seen online. (at left)

I learned a twining technique from books on Maori Taaniko..You can read more about this here and here.

I was surprised on my visit last week to see the use of yellow in the main design in one of the pieces as, by coincidence, I had chosen it to use in my own experiments at home.

All the pieces I had seen on the previous visit as well as in books and online had been patterned in only red and white with only the stripes done in green and yellow.

In weft twining, strands of “weft” are twisted around warps. When weft strands of two colors are used, patterns can be formed by controling which of the two colors appears on the upper surface of the piece after each twist.

Here are some more examples of Ngach and Ju’s work in kteh technique.

The above piece of kteh adorns the edge of an extremely fine skirt which Ju wove and which H Ni Buonya modeled for me.

Instead of being wrapped and tucked as traditional skirts are, this skirt had hooks sewn into its waist band which held the folds in place.

The twining was flawless and the selvedges impeccable. I think this was the finest of all the pieces I saw.

Eventhough I was able to reproduce the designs in my bulky cotton thread, I couldn’t feel convinced that I was on the right track until I could compare the reverse of the kteh pieces to my own twined work.

Besty sent me a picture of the back of a piece and  I was finally able to see for myself on my visit.


What I really wanted to do was learn how to do the twining alongside Ju and Ngach and Betsy was able to organize classes for me with both ladies. Ju and Ngach, as I said before, are from two different tribes, the Rhade and the Jarai and both Betsy and I thought that it would be interesting to see differences in the way the two ladies did their twining.

LEFT: Twining class with Nagch at Betsy’s house. At right, Ju shows me how she gathers the warps in groups and sizes them before twining.

I first met up with Ju at Betsy’s house where a collector was coming to see and possibly purchase one of Ju’s woven pieces. Ju, who I gather never likes to have idle hands, had brought along a finished piece of weaving that was to be sewn into a bag. She was busy twisting the fringe dragging the warps through a wad of sticky cooked rice that she carried in tissue and then rolling them on her leg to set the twist. She would select four warp ends, divide them into two pairs and then, with one quick movement, roll the two pairs away from her on her leg and then swiftly roll the two twisted strands back toward her to unite them.

She used this same kind of sizing to twist and group the warps ends together for twining which, as a beginner, I found very helpful . Ngach on the other hand does not size the warp ends.

The first class was with Ngach. After having seen pictures of Ngach warping outdoors on Betsy’s blog it was nice to see the enormous tree where she does it in her front yard right on the edge of a very busy street.


Here you can see the different set ups that both ladies use. Both fold and tack the woven cloth so that it can be suspended on a rod or bar with the weft ends, or fringe hanging down.  Ju, at left, has a lovely stand built by her husband especially for twining. Ngach suspends her work on a metal rod which she has supported on two chairs. Ngach is twining the end of a child’s skirt while Ju is twining  the ends of two small bags, something which she is only doing in order to be able to teach me on a small piece.

Here are pictures of Ngach twining on warmer and brighter days courtesy of Betsy. The pictures we took this time around tended to be somewhat darker unfortunately.

The wefts are stored and carried on bobbins. Ngach says that they are made of clay in Vietnam while Ju used to use wooden ones. Both ladies have had to improvise their bobbins in their new homes.

Ngach has lovely bobbins fashioned from cement.

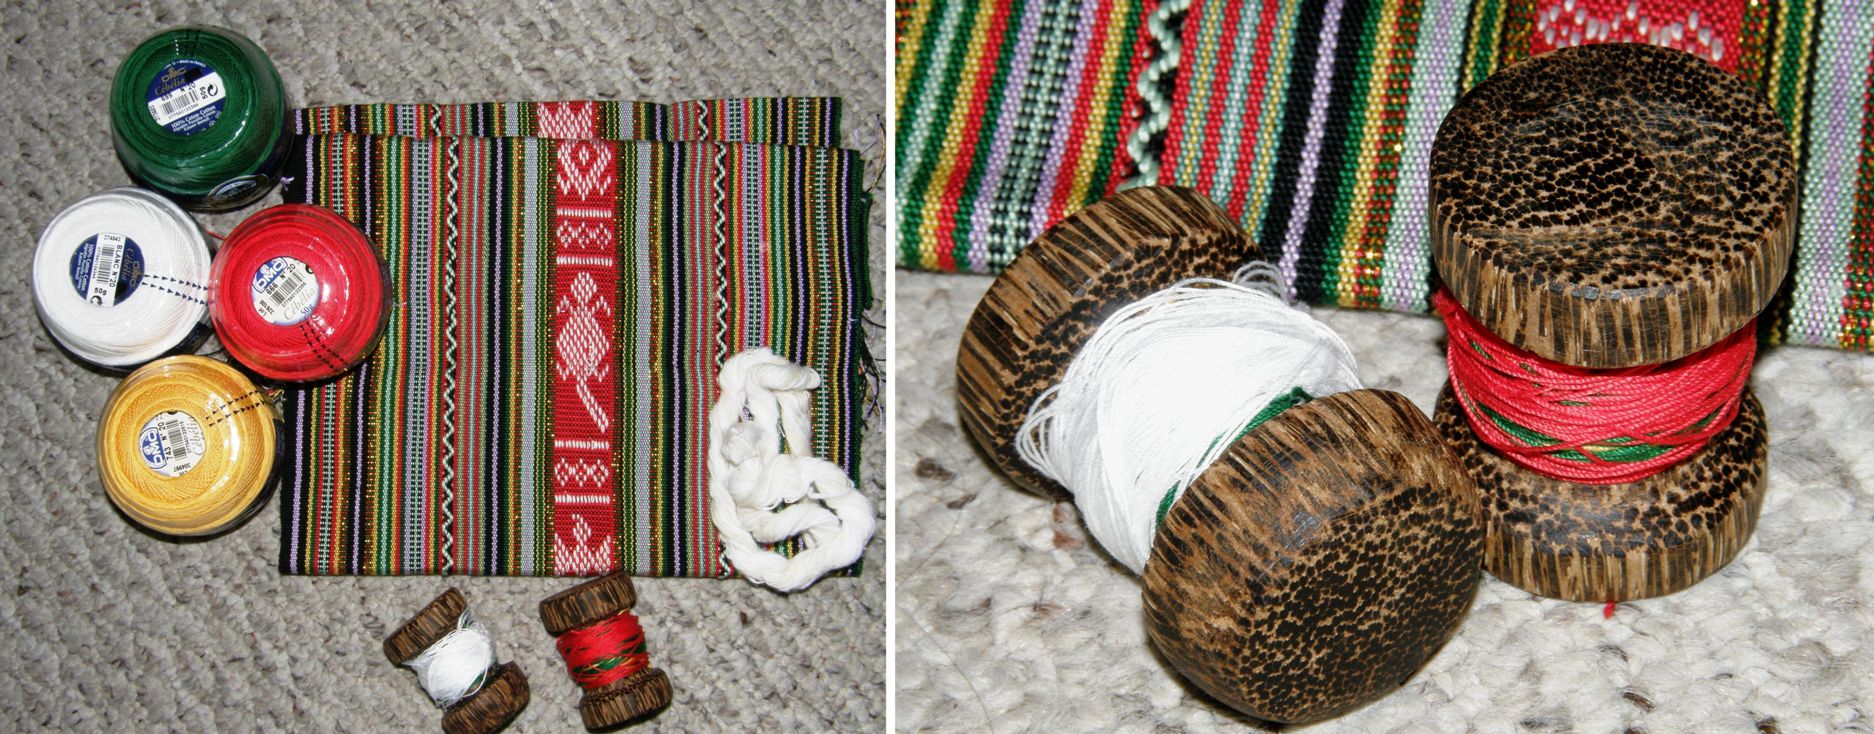
Ju’s were heavier and made from wood. Her husband bought a pestle from a Laos store from which he carved them. I bought a pair from her. Both use Cebelia size 20 thread.

Below you can see Ngach at work holding the warps under tension with her left hand while she twists the wefts on their bobbins with her right…one twist to change color in the pattern and two twists to continue with the same color.

Her movements are so fluid, graceful and rhythmical and she uses her one long thumb nail to separate each group of warps around which to twist the wefts. This was the part that really slowed me down…separating the warps into correct groups of three. What was nice was that Ngach and I could sit side by side and work together. I would struggle along trying to match her rhythm. We could both work simultaneously on different rows of pattern.

Here is a rather dark piece of video which will at least give you an idea of the movements. Ngach is making a pattern in red and white. Her movements are very graceful and I love the soft “clack clack” of the bobbins as she works. You will see her doing double twists when she wants to continue with the same color and a single when she wants to change colors. I have brighter but longer videos which need to be edited when I get home so I can upload in another post.

Above, Ju is twisting warps on a piece so that I can take it home and practice. I really think both my teachers enjoyed showing me this. Ju, even with her very limited English, was very talkative and eager to show me the entire process while Ngach was very keen to make sure that I learned it just right, constantly correcting and adjusting the way I was holding the warps and not letting me get away with anything. At one point when I had made a mistake and untwined to fix it, I asked her if she always undid her errors. She looked at me over the top of her glasses and said “no mistakes!”. I am not sure if that means that she doesn’t tolerate them or that she doesn’t make them but there was definitely a twinkle in her eye. I liked Ngach!

Results:

We finished a tiny design on Ju’s small piece but didn’t get as far on Ngach’s larger one. However, I enjoyed working more on Ngach’s piece for some reason. I think sitting and working alongside Ngach made all difference as I was able to watch closely and try to follow her movements and rhythm.

Each twined row always starts on the left and moves to the right. When the right edge is reached, the weft ends are knotted and cut leaving a small “fringe”.  This was something I had been very curious about as the instructions in my Taaniko book indicated that one needed to ambidextrous and twine in both directions back and forth across the piece.

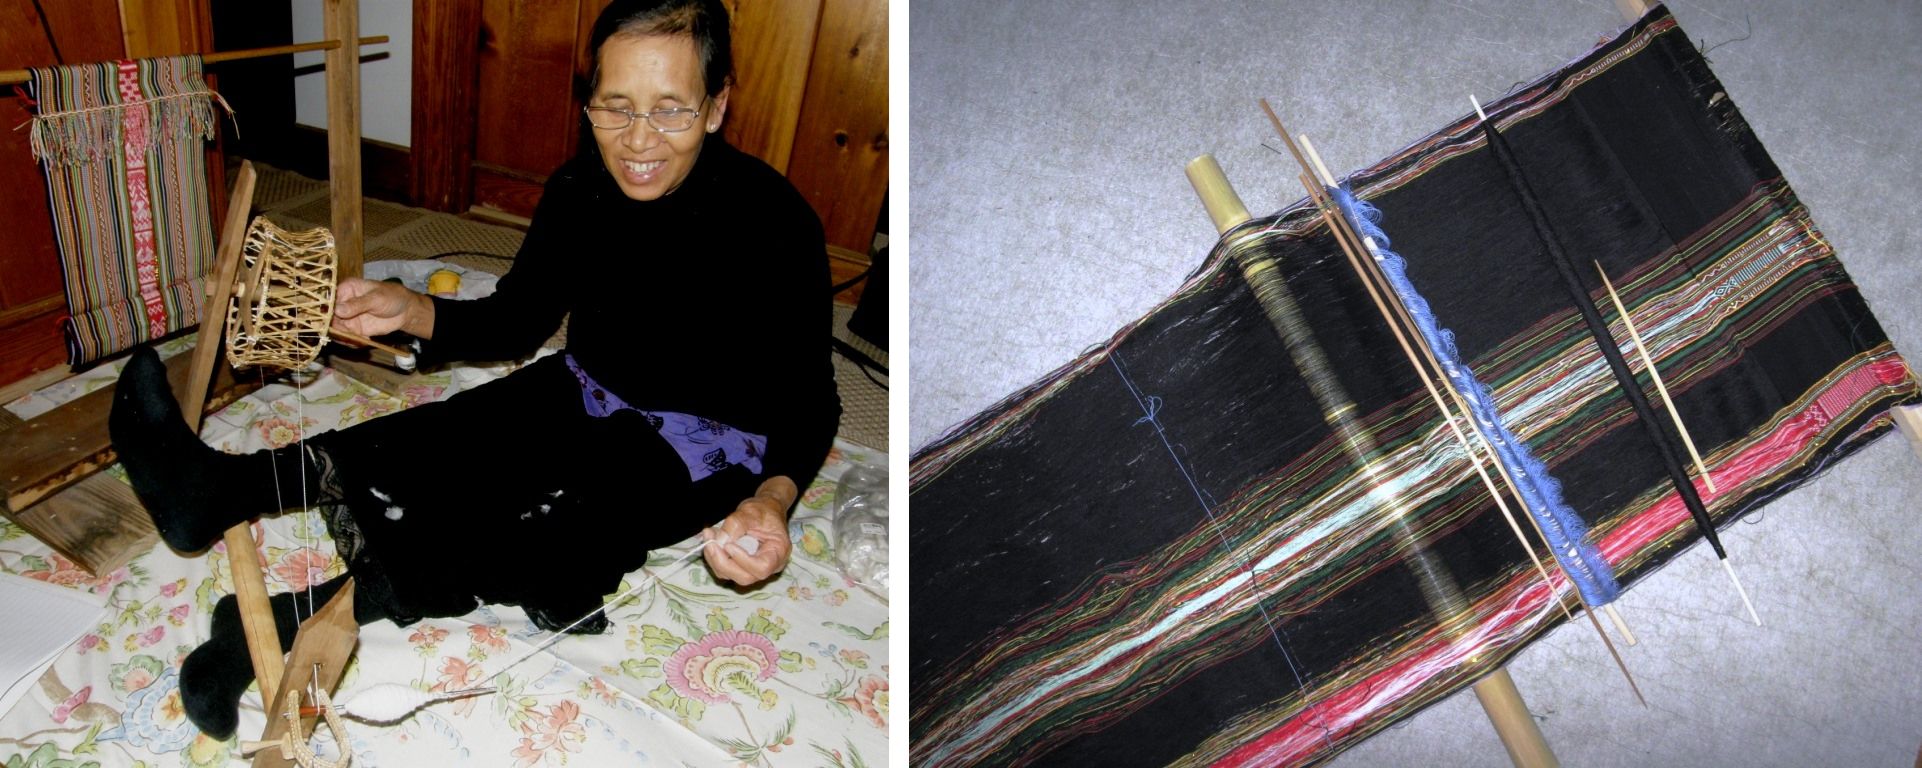
Ju’s enthusiasm for showing me all about the weaving arts from her home in the hills of Vietnam didn’t stop at twining. After I had become tired from twining and the concentration it required, she brought out a wonderful spinning wheel that she had had sent over from Vietnam.

What a sweet little spinning wheel this is. It is made from simple bamboo wood and wicker and all held together with hand carved wooden pins.

Ju set to spinning cotton, which had also been sent over from Vietnam, with her foot thrown over the beam of the spinning wheel to anchor it down. She really seemed to be enjoying showing this to us.

Once she had finished with her small quantity of prepared cotton, she brought out a funny little tool that looked much like an archer’s bow to prepare more. Below you can see this tool and Ju skeining on a niddy noddy.

The following video will show you how it works. I would love to show this to the cotton spinners that I stayed with in coastal Ecuador.

On another day, I got to see a bit more of Betsy’s work with the Montagnard ladies. A few weavers gathered with their looms in a local church. Its congregation has kindly allowed its space to be used for possible weaving demonstrations. The idea was to see what would be required to enable the weavers to set up their looms in those facilities . Not only would they need a strong and stable place to tie up their looms but also a way to set up the foot braces against which the weavers push to tension their warps as they weave.

Ju and H Ni attended and finally managed to get their looms set up and foot braces in place. While I find a foot brace nice to work with, I am glad that I am not dependent on one and, therefore, have more freedom to set up my loom easily in different places.

H Ni is weaving two bands at once on her loom which will be straps for shoulder bags. Weaving two straps at once helps balances out the very wide loom.

H Ni’s set up was a bit awkward. We had to improvise adding books and bits to her bamboo poles in order to have her foot brace within reach.

I am thinking that one of those wonderful ergonomic benches designed by Synergo Arts with its built in foot rest/brace would be a solution to this problem. I wonder if they break down in pieces for transport.

A close up of H Ni’s two straps.

Ju was weaving a narrow pick up patterned piece which will be  a scarf – not one of her typical woven pieces but it has occured to her that scarves may be popular small items that visitors to her demonstrations may like to buy as opposed to skirts and blankets.

Ju and H Ni enjoyed seeing pictures of the designs from various Montagnard tribes in books that Betsy brought to the meeting.

The other purpose of the meeting was to give the weavers booklets which Betsy had put together with pictures and weaving vocabulary in English.

Khin attended the meeting to act as translator and it turns out that she too is a weaver. The problem is that many of the ladies in the community who have these weaving skills simply do not have the means to have looms made and buy thread to get started.

Betsy also made tapes for each weaver to go along with the booklets with the pronunciation of the English words for them to listen to and practice at home.

The idea is to have the weavers eventually feeling confident enough to be able to give presentations and demonstrations of their weaving to small groups in the future. I would love to return for the day when that happens and see these ladies enjoying sharing their skills with even more people with same good humor, generosity and enthusiasm that they showed me.

###########################################

Back to what I like to call the World Wide Cyber Weaving Guild….

It seems that the cold weather has brought on a flurry of weaving activity and so I am able to show you some finished projects from online friends who have visited my blog.

Anna (who is cycling from Alaska to Ushuaia and who is currently in Santiago Chile) sent me this picture of her latest pebble weave bands and Kim, whom I met at Convergence wove the pebble weave keyfob on the right. Both used the instructions from my Andean Pebble Weave book.

These are more of Kim’s bands on the left, again in pebble weave with one in simple warp floats in the middle, and Lavitaaj made this amazing supplementary weft sampler on the right using the pattern charts from my blog. There is also a section with a yurt band design in simple warp floats.

And finally, here is Marsha Knox’s band made with simple warp floats using two color combinations in the same piece while Helena in Brazil has taken the Bedouin patterning one step further with a large strip of diamond pattern bordered by the classic triangle motif. I will definitely add a tutorial on this technique to the blog soon.

UPDATE: Marsha uploaded a picture of her finished band. She reversed the scrolls and did them in brown. It looks super!


Last Sunday I got to quickly pass through the Central Asian ikat exhibit, which was stunning, at the Textile Museum in DC before attending Ann Rowe’s talk on ikat rebozos and ponchos in Latin America.

I hope to return next Saturday to take the guided tour of the exhibit, use the library where I want to look at David Fraser’s book on weft twining, and maybe pick up a few more Textile Museum journals in the gift shop.

There is hardly a journal there that doesn’t have something of interest to me. I think that eventually I will own them all.

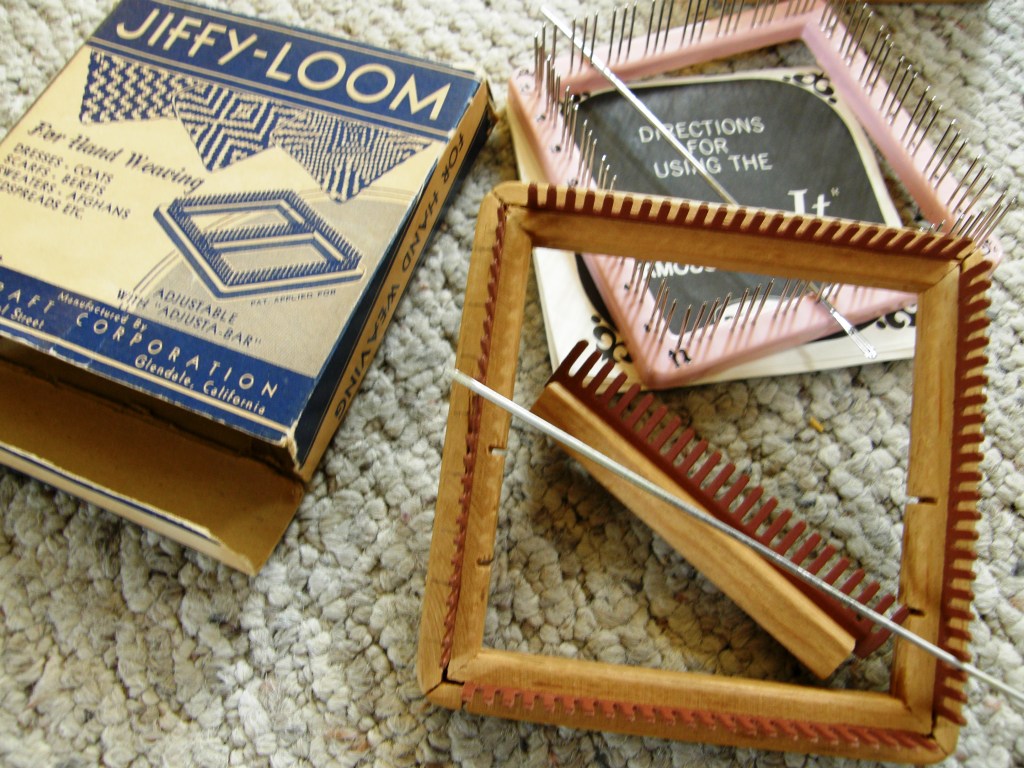
This week Claudia and I had  skills exchange. I taught her to make the tubular woven bands that I learned at the tinkuy and she introduced me to the wonderful Weavette. Yep, this was the first time I had ever seen one of these little marvels and Claudia even has an old Jiffy Loom in its original box and a plastic Weave-It. My eye was immediately caught by the cool long weaving needles that come in the kit. Aha…just the thing for weaving in the wefts for my four-selvedge warp faced pieces and so I ordered some online.

These would be just the thing for making little amulet bags…love them!

And speaking of learning new skills, here is DY, still in Peru, picking up some new techniques – drop spindling and backstrap weaving. I think she has been taking Spanish classes too.

Finally, a very happy Thanksgiving to all. I spent it Claudia and family and friends…only the third Thanksgiving I have ever had. We watched the Macy’s parade this morning and  I declare the sweet potato casserole with butter, brown sugar and pecan topping my favorite dish of the day.

Backstrap Weaving – The tail end of the Tinkuy tale.

MORE FROM THE TINKUY DE TEJEDORES

I have been busy since the last post on the tinkuy – weaving, packing and traveling! Yep, I am on the road again…can you guess in which country?

Golden leaves and pumpkins…a common sight for many of you I am sure but certainly not something we ever see in Bolivia especially not as we roll into summer. More about this trip in next week’s post.

For now I will finish off my tinkuy report and show you what I managed to get up to on my loom in my brief stopover at home in Bolivia.

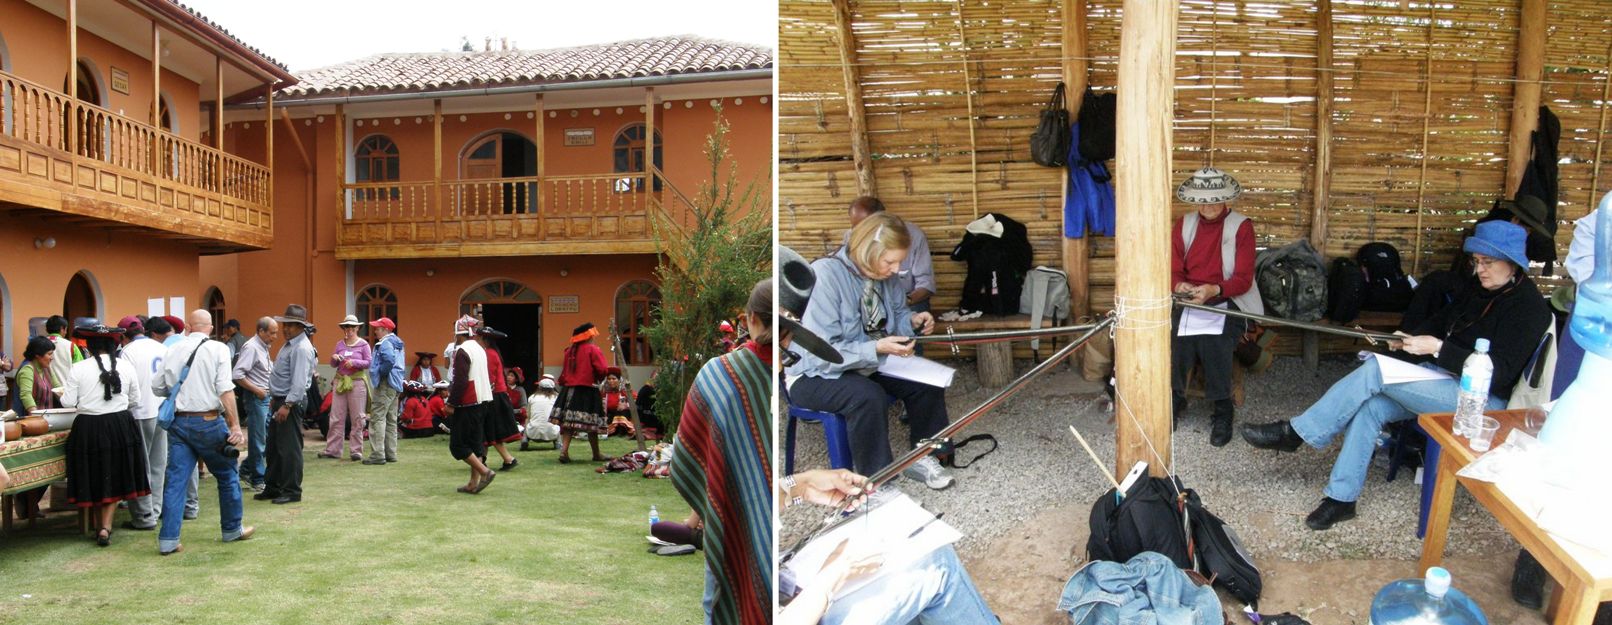
I arrived home with tubular woven bands and discontinuous warps on my mind. I finished off the tubular band that I had started in the tunkuy workshop with Nilda. Nilda was an excellent no-nonsense teacher, commanding our attention and clearly demonstrating and explaining the moves to her twenty-eight participants!. She prepared excellent handouts and got us all up and running on what was a fairly complex sequence of moves which involved, picking up, twisting and diverting warps. We were turning out lovely tubular bands by the end of the session and enjoying ourselves.

The CTTC has a beautiful center in Chinchero with large courtyards for weaving, warping and dyeing displays, workshop rooms, a store and exhibition area. We were blessed with a gloriously sunny morning and entertained by a sudden and violent change of weather in the afternoon as a storm converted the grassy courtyard to a blanket of white hailstones.
The courtyard where we worked was also alive with the colorful skeins of yarn which had been dyed in the previous day’s workshop.

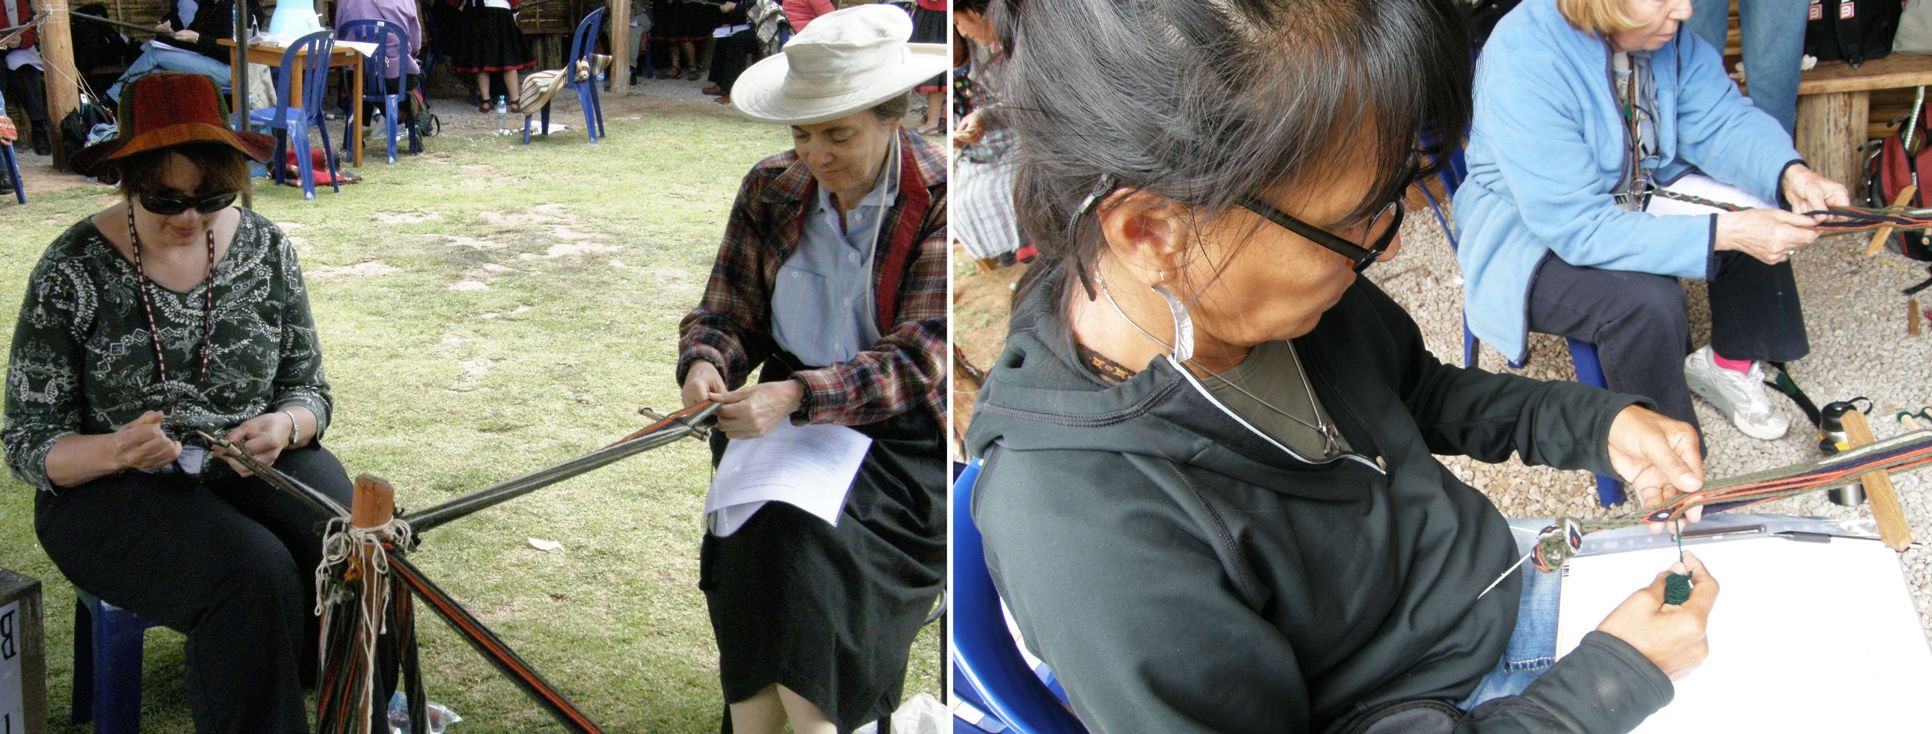
With the aid of four helpers from the Chinchero weaving community, we all hitched ourselves to posts in the lovely courtyard of the CTTC Chinchero complex and wove away with always someone on hand to help if we got ourselves into trouble and, believe me, we did! Despite Nilda’s clear instructions I managed to start with my warp upside down but, with Jessica’s help, soon got that sorted out and then it was just a matter of following the steps in the well prepared handout.

All were quiet at first as we concentrated on our work only interrupted now and then by pleas for help but, as we became more familiar with the moves and, more importantly, understood better why we were making them, we could relax, chat and compare our progress.

Linda Ligon gets a few tips from one of our good humored helpers.

We started out making bands with very thick yarn – easy to see and handle while we learned the moves. D Y Begay took this picture of me at work and sent it to me.
Some of the weavers from Guatemala and Bolivia were among the participants.

Above left you can see our thick practice band and at right a finer one which we warped  in the afternoon session. After lunch we had the choice of weaving a finer tubular band, which I did, or learning to weave and sew a much simpler tubular band to a piece of fabric. The simpler band’s design was contained in its warps and so did not require any pick up, twisting or warp diversion. This was an excellent sample to use for learning how to manage the simultaneous weaving and sewing. Nilda was wise to give everyone a simpler task in the afternoon with all of us feeling a wee bit snoozy after the delicious lunch spread. The storm woke us up though!

Anita Osterhaug, Ann Rowe, Judith Crosbie and DY Begay at work on their bands. 
Betty Davenport was one of my “pole buddies”.

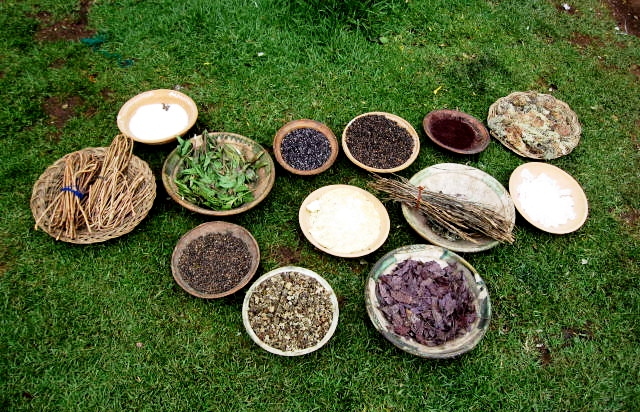
As for the previous day’s dyeing workshop, I saw the dyestuffs, the drying skeins and all the gorgeous colors and that is about all I can tell you for now…sorry! I am hoping that Dorinda will be able to fill me in on what they used to achieve that beautiful collection of colors. Each participant took home seven skeins.

My roommates Dorinda and Maxima participated in the dye workshop as this is precisely something on which Dorinda has been working in Cochabamba in her PAZA project.
And here are the principal dyestuffs that were used.

Another interesting part of the workshop day for me was seeing different warping methods.

I was tickled to see this warping board which is the same as the one I have built for myself at home. This is the one we used for warping our tubular bands.

I was tickled to see this warping board which is the same as the one I built for myself at home. We used this one to warp our tubular bands.

This lady is warping a narrow band around nails driven into to the ground. I noticed that she had the two outer nails leaning very noticeably to the outside to compensate, I would say, for their tendency to lean in as the warping progresses. That is the problem with this kind of warping set up. I am sure that from her vast experience she knows exactly how much to angle the nails when she drives then into the ground.

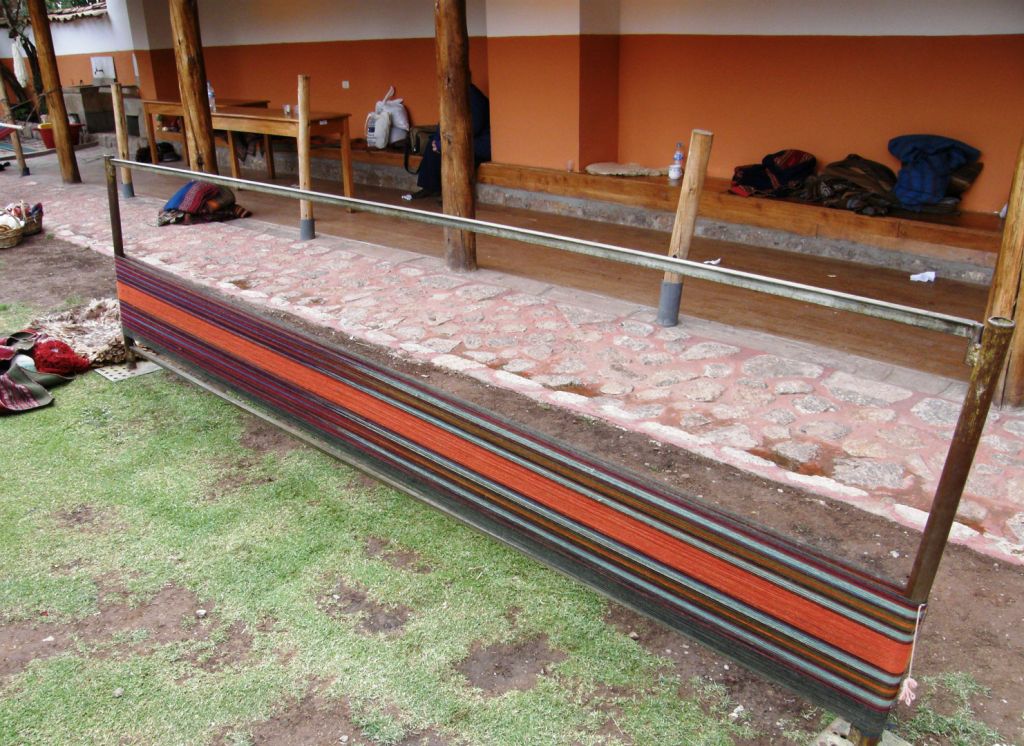
And then there was this large warping set up. Notice the metal bar which extends from one post to the other to stop any possible leaning as the warp is wound up the posts. Judith was watching the weaver warping on this set up and called me over to look. She drew my attention to the fact that the weaver was turning the warps at each end post around a piece of thicker plied yarn. In this way the warps were locked into position and this thick piece of yarn I imagine would be lashed to the loom bars in order to create the third and fourth selvedges.

Judith had been watching long enough to learn how to do it and was then able to help the weaver. I was able to make a short video where Judith shows and explains how it is done.

I am thinking that this would be a great way to wind a warp for ikat.

Here’s a shot of what the warps look like wrapped around this “starter” cord.

So, tubular bands were one item on my weaving list this week and I warped up a few to take away with me. These require nothing more than a string to attach it to your waist while the other end could easily go around a toe. You don’t even need to make string heddles as you work directly from the original cross.

The other thing I was determined to do before I hit the road again was experiment with the discontinuous warp technique. You may have seen the amazing piece being woven by a weaver from Pitumarca in last week’s blog post. She had warped panels of four different warp colors.

I wonder if this technique was born from weavers’ boredom with their warp colors in long pieces. I know what it is like being locked into certain limited colors for the entire length of a warp-faced piece. That is why supplementary weft patterning can be so much fun as you get to change colors as you please.

I got a pretty good idea about how this was warped by looking at the above piece. I also got a good look at Antonia’s piece at Convergence which you can see below and got to talk to her a little about it. This piece is an absolute marvel! She has panels within panels.

This, combined with a very nice photo of warping in progress in Nilda Callañaupa’s book, gave me just enough information to get a project started.

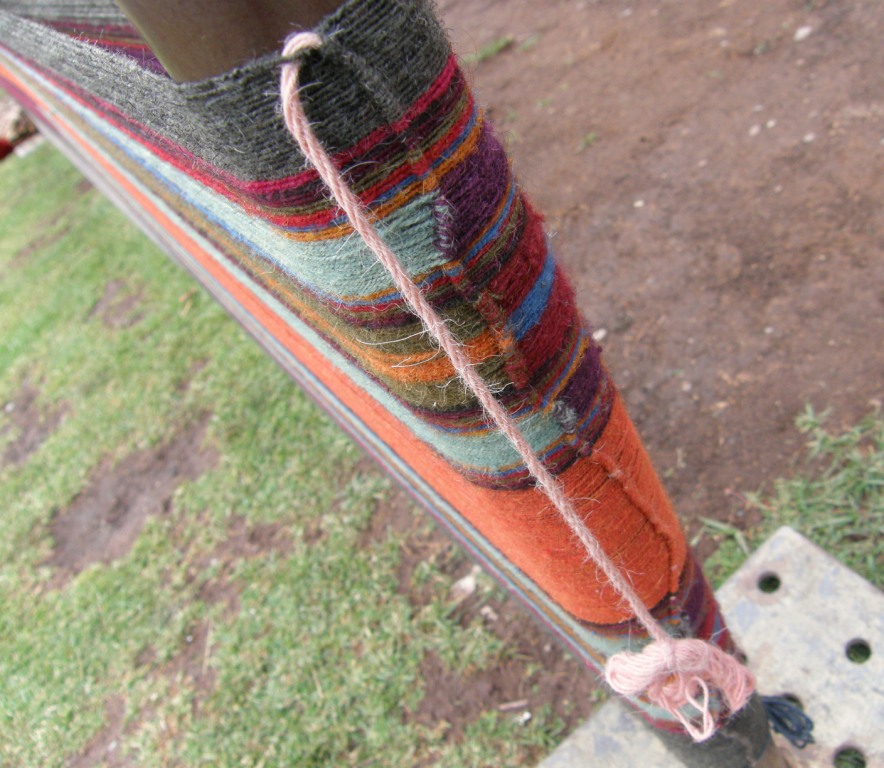
I just happened to have this rough wooden framed which had been abandoned on the terrace of my apartment block about two years ago. Stashed behind the fridge all this time it has finally found its calling! I put nails in it behind which I lodged and then tied the loom bars. I cut a groove into the wooden frame into which I could place a metal rod. This looks very roughly like the frame shown in Nilda’s book. From there it was just a matter of winding two separate figure-of-eight warps which dovetailed around the metal rod. Two people were shown warping in the picture and I must say that I could have done with an extra pair of hands.

Above is my two-panel warp with crochet cotton.

D Y ,whom I met at the tinkuy, went to Pitumarca to check out the warping process after I left Cusco (how I wish I had stayed longer and gone with her!!) and, knowing how interested I am in this, sent me pictures and has kindly allowed me to use them here.

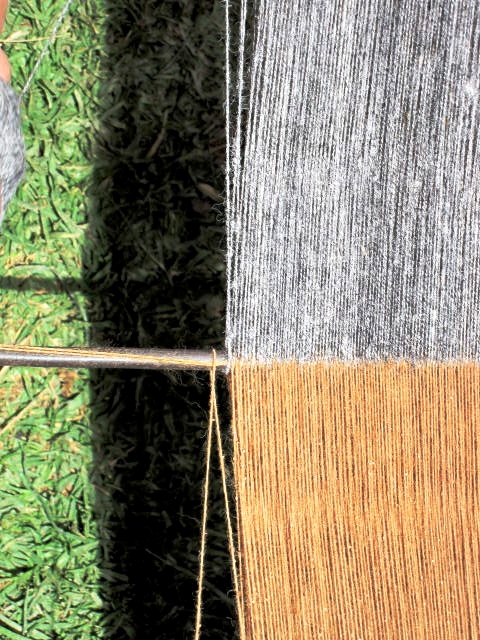
Her picture shows a wool warp in natural colors. You can clearly see how the two yarns take turns encircling the metal rod.

Now here is my piece on the loom…

I was just fumbling around trying to figure it out as I went. It turns out that the winding of the discontinuous warp was not really difficult. What was hard was creating the four selvedges, something which I have not done in years and I have to tell you right now…DON’T EVEN THINK ABOUT DOING IT with cotton!! Creating four selvedges with cotton is horrid!

Just to make clear what this entails, I have made a rough sketch….This is the way I was taught by my teacher in Potosi.

A: You have your loom set up with heddles and shed rod in place.

B: You lash your warps to the two loom bars. I always put a metal rod through the warp ends and lash that to the loom bars.

C:  Weave half to two thirds of the piece.  I have found that the amount woven varies a lot from place to place.

D & E: Turn the loom around so you can start weaving from the other end. You will have to move your shed rod to the other side of the heddles before you do this.

F: Keep weaving with the heddles and shed rod until the space is too small to allow you to continue. Then remove the shed rod and use the heddles to form one shed and needle weave in the other shed. Eventually you will have to remove the heddles and needle weave the last few weft passes.

G: Phew! Finished! Make that a double “phew” . Those last few weft passes are agony!

I had forgotten that the only three times I have ever woven a piece with four selvedges I used hard spun acrylic and wool yarn. These yarns can take the abuse of having the heddles wrenched around when trying to squeeze in weft passes in those tiny spaces and these warps are not so easily pierced and shredded by the needle. Using cotton was a disaster with serious pilling, shredding and breakages. I managed to finish it but it wasn’t pretty. A friend has since told me that over twisted and hard spun wool tends to relax once you take tension off the piece and this better fills out the spaces in the terminal area. Lessons learned.

So, at left is a photo showing only the pretty parts…!! My terminal area is rolled under the loom bar. You can see that I have removed the metal rod and have yarn in its place.

I wove in a pattern using a supplementary weft – a bird which is standing on its head in the picture. The bottom panel has been finished and I have started on the upper one. Of course I didn’t have to make this a four selvedge piece. I could have woven it with fringe at either end. This is perfectly possible with only two panels. With three panels or more you have no choice but to make the center panel/s with four selvedges.

Let’s look at the other more successful four selvedge pieces that I made in the past with sensible hard spun yarns.

My teacher in Potosi is putting in the final wefts in this piece that I wove under her instruction. This was a particularly difficult piece to finish as it had bands of double weave which meant that we had twice the regular number of warps to needle weave. I wove this with the brightly colored overspun acrylic which is the yarn of choice in this area.
The next project with this teacher was a chuspa, again in overspun acrylic, and I stopped weaving the pattern early in order to make the finishing process a bit easier. The horizontal bands show where I started to close the two ends of the weaving. My teacher left me on my own with this one!

My Bolivian teachers told me that the skill of a weaver is evident in how small she can make the terminal area. The challenge is to continue weaving the pick up patterns as long as possible before having to resort to those final rows of plain weave. My terminal area on the chuspa is enormous. I have seen pieces with mind bogglingly small terminal areas. Weavers in Tarabuco, on the other hand, often weave only one side of their chuspa with pick up design and leave the entire other side in plain weave.

The example above was woven with tightly spun Navajo wool warp. I was weaving a supplementary warp technique. It is a looser weave and was a little easier to finish.

Okay, lessons learned….the next discontinuous warp piece I do will be in cotton with two panels and only two selvedges! It will have fringed ends. Then I will get down to spinning some llama fiber or respinning some commercial wool in order to attempt a four-selvedge piece. Maybe I will do three panels with only the center one having four selvedges. I will ease into to the process this way. For now I will stick to plain weave and supplementary weft patterning and slowly build up to do doing warp pick up patterns.

I would love to do a sold color panel with a pick up patterend panel within it as Antonia was doing above.

Here are some more of the pictures that D Y sent me…

The finished two panel warp with natural wool colors.
A gorgeous warp with multi-level panels.
A closer look.

The metal bars around which the warps dovetail are removed at some point leaving a thick piece of yarn in their place.

D Y told me that the yarn lies alongside the metal rods during the warping process so that when the rod is removed the yarn is there to take its place. You can actually see this in the photo in Nilda’s book. I also received a comment on my blog from Janet Willoughby from Ends of the Earth who made a dvd documenting the discontinuous warp process and other weaving in the Cusco area and she also confirmed that this is the way it is done.

I used the umbrella ribs pictured above (yes, I destroyed my umbrella for this) to pull the yarn through as I didn’t know at the time how else to achieve this.  I also used them to help pull the wefts through the sheds in the needle- woven finish. My umbrella wasn’t destroyed in vain. The umbrella ribs have convenient holes on their ends through which you can thread yarn. I just have to taper the ends somehow so that they are more needle-like and then they will be very handy tools. (Thank you to Gladys Miller who told me about using umbrella ribs years ago).

Of course my visit to Cusco area would not have been complete without a trip to the city to visit the CTTC store and museum. The store is a feast of color and gave us yet another opportunity to watch weavers at work at their backstrap looms.

D Y and I spent a day in Cusco together visiting the CTTC, the plaza and the market to buy spindles as well as strolling around the relatively quiet Sunday streets.  The museum at the CTTC is nicely put together and there we got to see the textiles that had been woven as reproductions of the garments worn by the famous Ice Maiden, the young girl whose frozen body was found in the mountains near Arequipa in 1995. It is believed that she was sacrificed and buried on top of Mount Ampato around five hundred years ago. The story of the weavers’ quest to reproduce these textiles was told in detail  at the tinkuy. A tremendous amount of work went into that project and the weavers told of often being reduced to tears as their early attempts to reproduce the structure of the weave failed. They persevered and succeeded and it was amazing to see the results in the museum. There are pictures of these pieces in Nilda’s book.

And now to finish with a few more videos. There probably isn’t anything here that you haven’t already seen in several YouTube videos but I have edited a few snippets together just to give you an idea of the variety of skills we got to see in action during the course of the tinkuy. They are very short as I was concerned about eating up my memory card.

SPINNING AND PLYING…The first group of women is from Patabamba. In the second and third sequences you will see spinners from Chinchero.

MAKING TUBULAR BANDS AND OTHER WOVEN FINISHES AND A SEVEN STRAND BRAIDED ROPE…. The first weaver from Tarabuco is weaving and sewing a plain weave band to the edge of a chuspa. There is no pick up patterning in this band and so she is simply alternating her heddle and shed loop sheds. You can see that one half of the chuspa is decorated with pick up patterns while the other half has simple stripes.

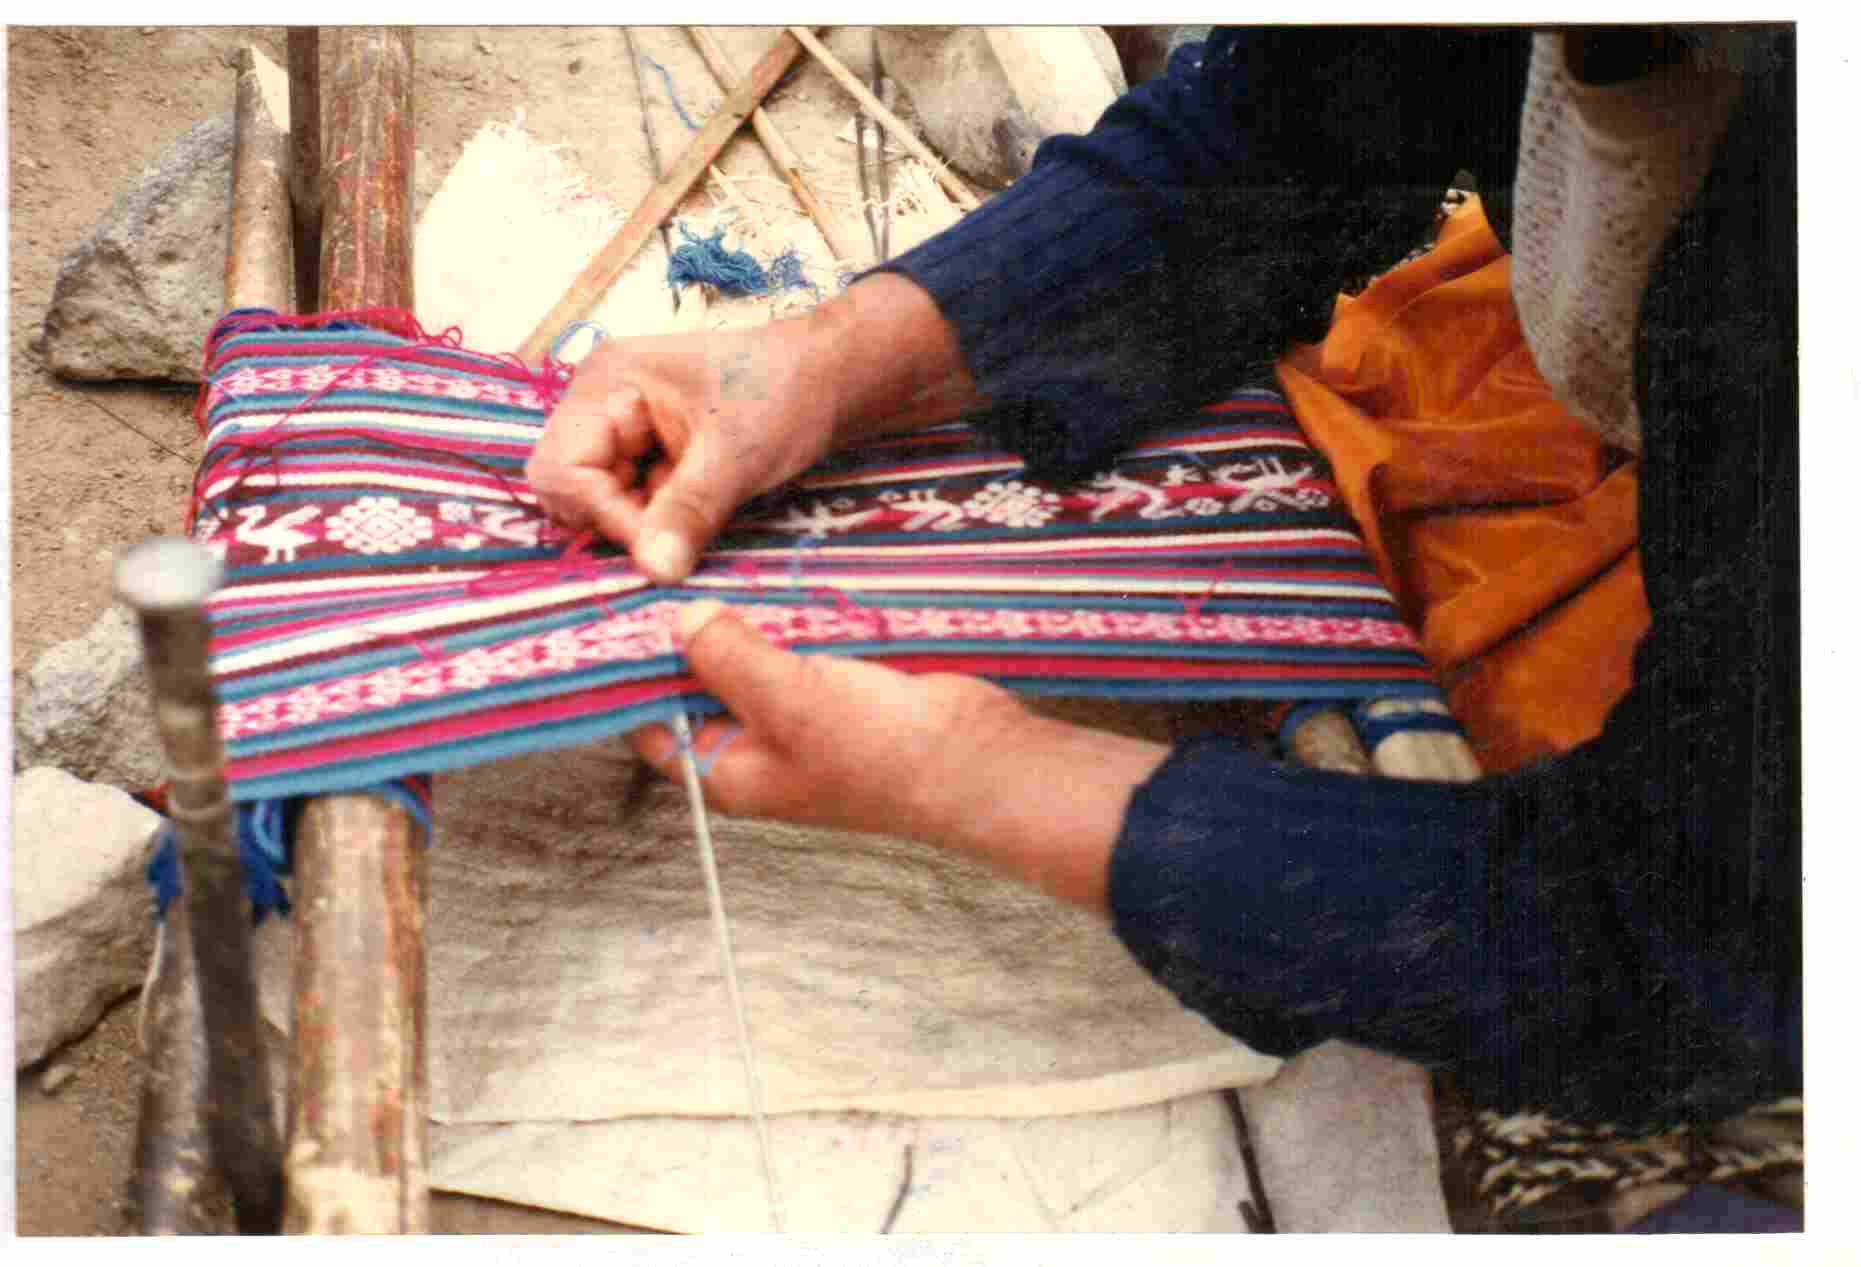
The second weaver is weaving and sewing a patterned tubular band to a finished weaving. She works from a cross which is held on a forked stick where she picks up, twists and diverts the warps to form the designs. She also uses an auxiliary shed stick which you will see in the video. Look at the speed with which she moves the warps!

The third segment shows a lady braiding a rope using seven strands.

DOING PICK UP…three weavers are seen here showing the different ways they pick up their warps to form patterns. The first weaver from Accha Alta picks up warps to form her patterns at the weaving line. She picks with her fingers to help transfer the warps to a stick as she progresses across the warp.

The second weaver from Potolo, Bolivia creates a temporary picking cross at the weaving line. She has a stick under all the black warps and has opened the shed with all the red ones. She picks up the warps using a stick while reading the pattern right at the weaving line.

The third weaver from Tinkipaya, Bolivia works at a permanent cross which is held by cords up beyond the heddles. She picks using her hands while glancing down at the weaving line to read her pattern.

So many different ways with so many beautiful results!

And last of all, here’s ten-year old Juan Miguel weaving next to his grandma. I love this sequence and like to try to imagine the conversation. I imagine grandma is giving her little grandson some tips which he doesn’t seem to be heeding! I love the obvious amusement and pride in her expression and attitude.

In the second sequence, everyone around Juan Miguel is packing up to go into the conference room and I imagine grandma telling Juan to pack up too. Maybe his response is…”Just one more row abuelita, the lady is filming”.  Juan Miguel continues to concentrate and weave away with a quick glance up at me – a true weaver enjoying his work!! At the very end you hear a commanding voice just as I stop filming. That was mom and, at the sound of her voice, Juan Miguel drops everything and hurriedly packs up.

Helena (Telarahna on Weavolution) in Brazil has been weaving yurt band designs following the tutorials here and here and pattern charts here on my blog. She has put the red and blue, as the yurt band weavers do, very nicely together. Helena never ceases to amaze me. English is not her first language but she has searched the net, bought books and used the information on my blog to teach herself to weave. Most of her resources are  in English and she has been a great source of information on indigenous weaving in Brazil for me too.  I hope she will inspire you all!

Part One of this Tinkuy Tale can be seen here.

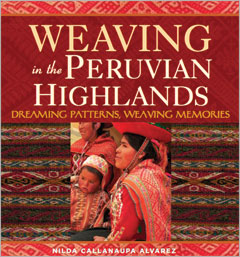
If you have enjoyed reading about the artisans in the Cusco region of Peru in my report on the Tinkuy de Tejedores and are interested in the work of the Centro de Textiles Tradicionales de Cusco, I urge you get a copy of Nilda Callañaupa’s book….

Backstrap Weaving- On the Road Again!


A short post this week as I get my sticks, strings, shuttles and spindles together for another trip to the US flying out tomorrow  (Friday the 16th).


Andean Pebble Weave is now in print! It will also be available for purchase in its e-version on the WeaveZine site. (UPDATE: Now it is available in 4 languages at Patternfish.com along with the follow-up book, only in English.)

With all the loose ends that needed tying up  and the time spent working with Syne Mitchell to get the print version of my monograph ready, I didn’t expect to get any weaving done this week. But then I had an idea and ended up weaving a bunch of keyfobs. I thought it would be fun to give a keyfob away with the first 20 copies of Andean Pebble Weave. So I sat with my basket of cotton thread and had a great time combining all sorts of colors to make the 20 keyfobs to accompany the books. I combined several small pebble weave motifs and now I can definitely see the benefits of weaving the same design over and over as some indigenous weavers do. I could probably weave this with my eyes shut now!! As long as there were new colors to combine it never got boring. Only one or two color combinations are repeated as I made tiny warps and wove one at a time.

And I didn’t stop at twenty as I thought that these fobs would make nice gifts all year round. I will be weaving these where ever I can find a spot to tie up my loom – in the Vendor Hall and probably to my bunk bed in my hostel!! as I am packing my mini warping board and crochet cottons.

I am also taking my wobbly Bolivian drop spindle and some of the alpaca fiber that my friend Janet gave me on my last visit. I just spun a little to get it started on the spindle and it is so so beautiful to spin! This is not the first alpaca I have ever had to spin. I bought some many years ago in Peru and it was in a dried-out, brittle and filthy state. I lost a good third of it in the cleaning process and I knitted rather than wove with it. Now I have this prepared smooth luscious fiber to work with – what a dream! It almost feels like cheating! I’ll be spinning it to weave with on my backstrap loom.

I am hoping to squeeze some of my smaller weavings into the backpack to show people who drop by the Weavolution booth at Convergence. I am also taking them to show some folks in North Carolina. I found out about a  group of Montagnard people who have a small community in North Carolina. This is wonderfully convenient as North Carolina is on my trip route on my way home after Convergence. My good weaving buddy Lisa lives there and we have been invited to go visit the Montagnard community as there are backstrap weavers among them. What’s more, it seems that they have been recently joined by Karen and Nepali weavers. We hope to share our textiles and backstrap techniques and I am so excited about this opportunity. You can read a bit about the Montagnard people here and watch a video on one of the weavers in the North Carolina community here.

Betsy Renfrew who has been working with the weavers, and who extended the invitation to me after my initial enquiries, has started a blog about the group’s activities.

My backpack will also be full of sticks as I will be staying with one of the Weavolution founders in Washington and she may have some friends over to weave. I have loom bars and backstraps for several people so we can all weave together.


So…come and visit me at Convergence!! I will be with Weavolution founder Alison at the Weavolution booth or wandering about most likely with a bunch of sticks protruding from my tote bag. I would love to meet you and show you my weavings and loom. You can check out the new print version of my book. I hear that there will be a weaver from the Textile Center in Cusco demonstrating backstrap  weaving too so I will definitely be there watching her.

Hopefully next week’s post will be full of Convergence events to report and stories of all the wonderful weavers I have met.