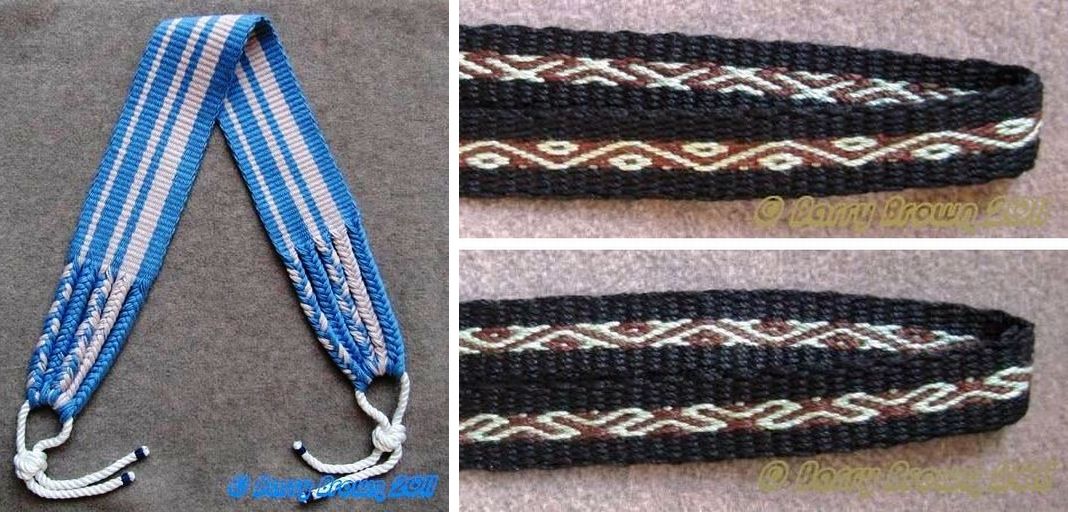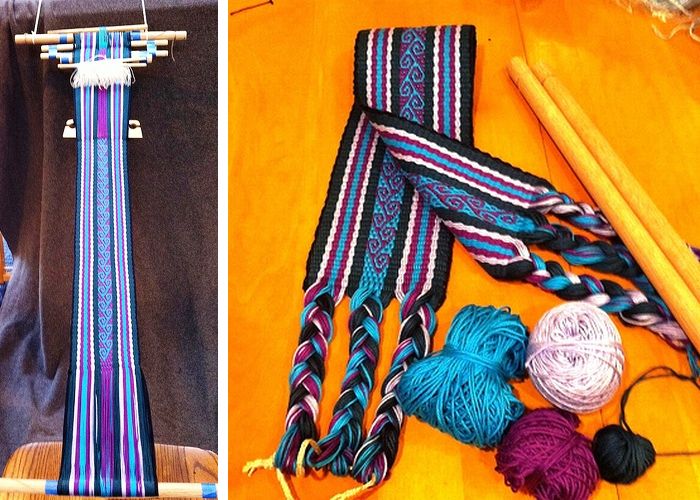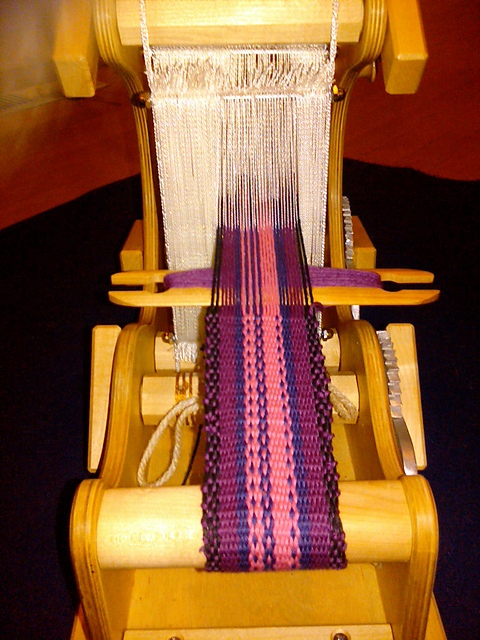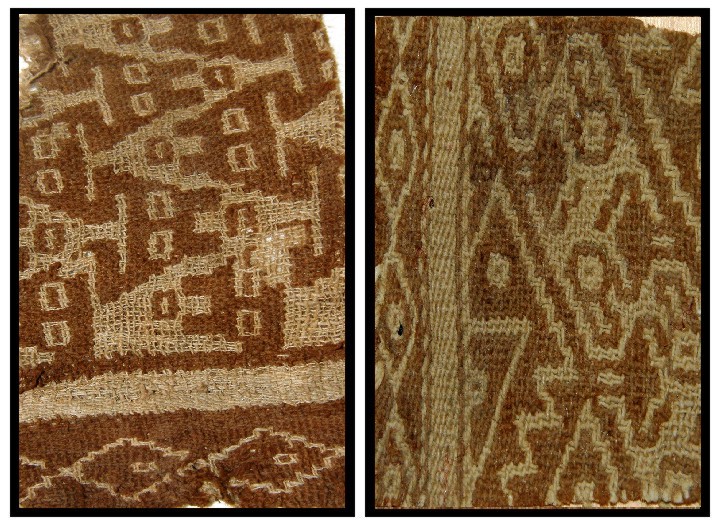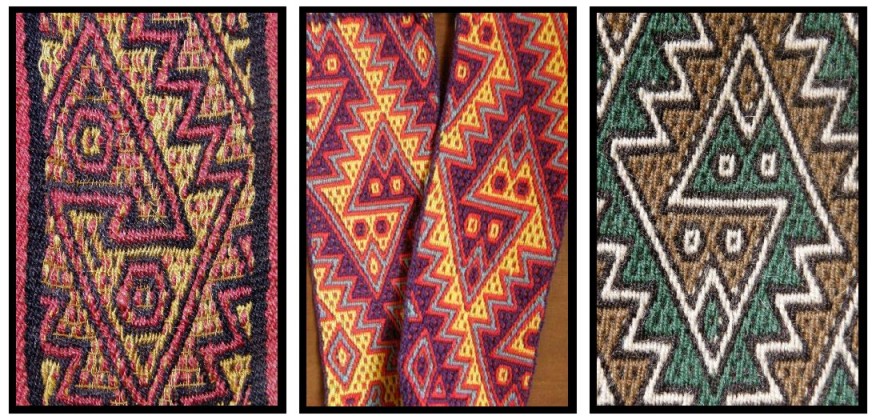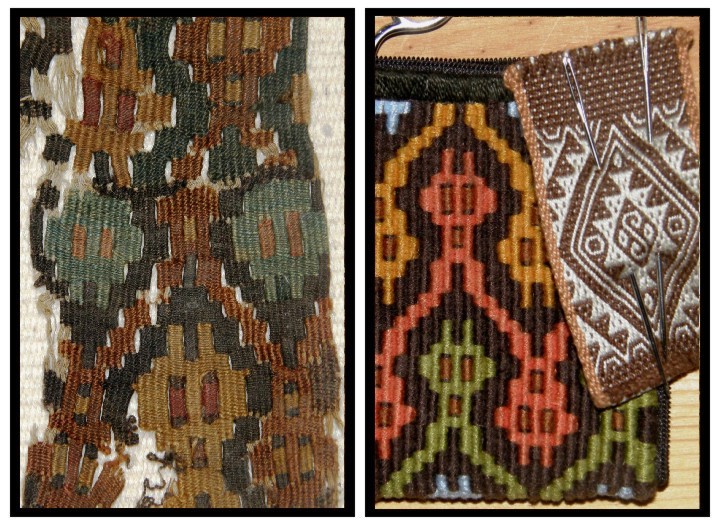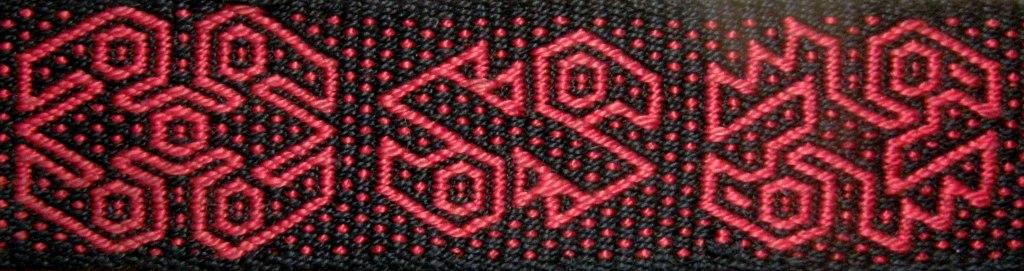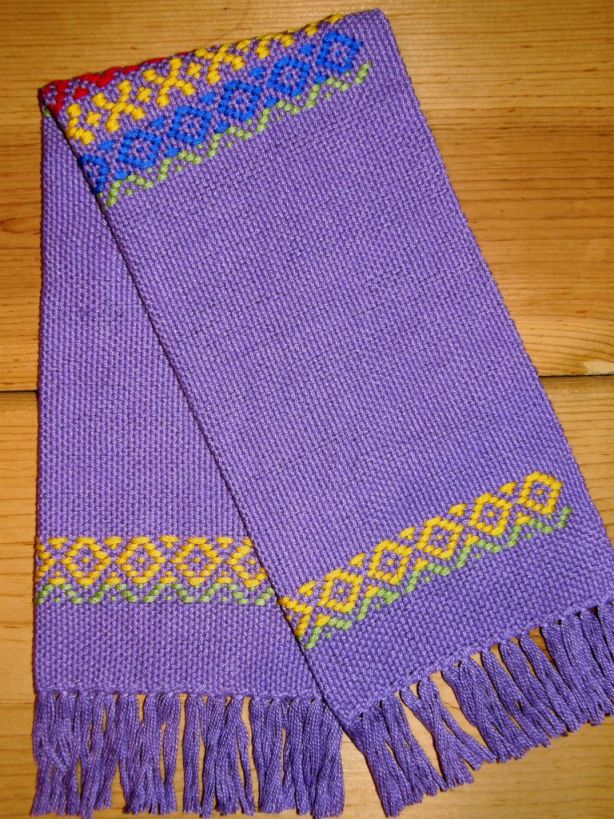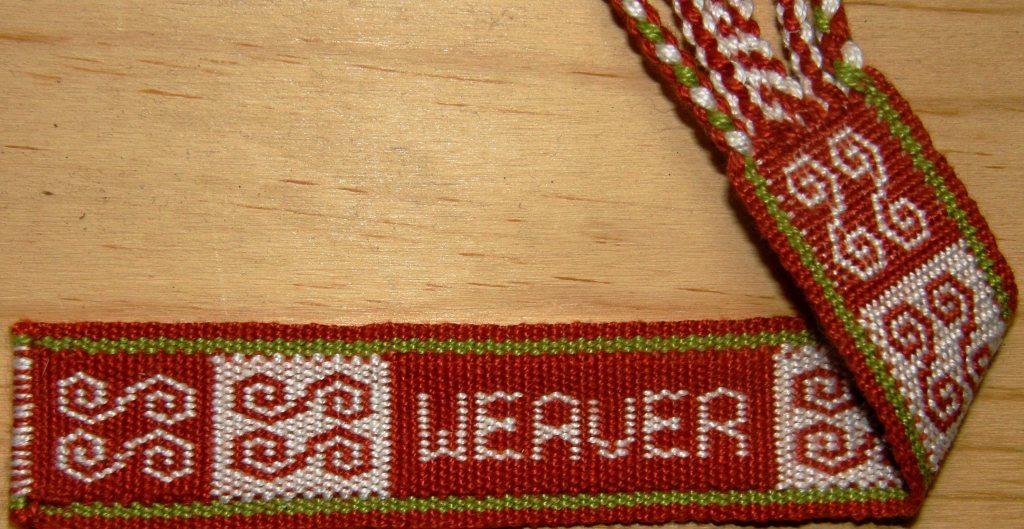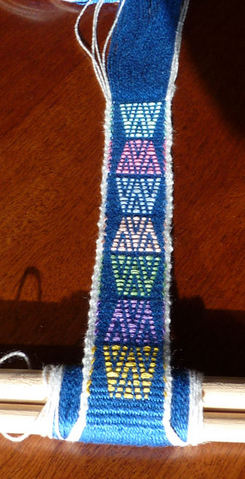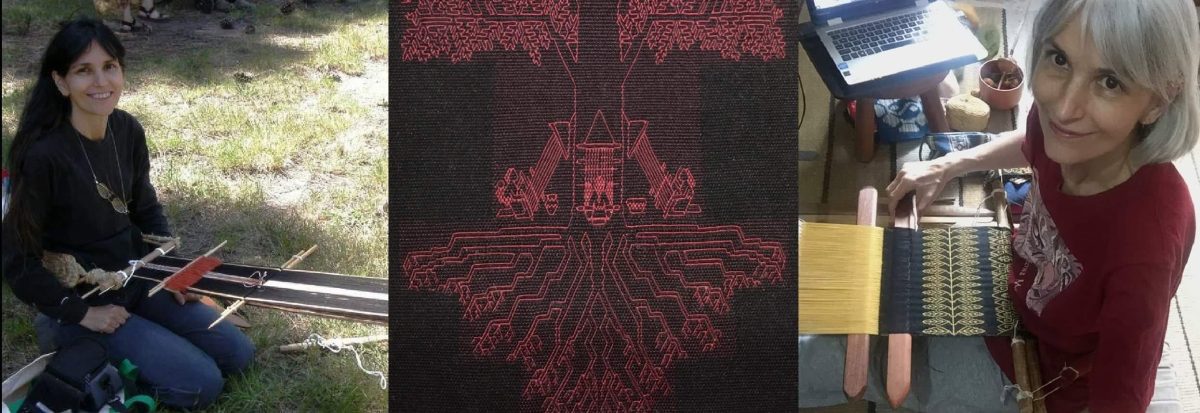
Backstrap Weaving – Colors from Camelids and Cotton

This week’s blog post is brought to you by these fine fellows…

and their beautiful fiber but also by…

my friend Janet in northern California who gave me a ton of alpaca fiber last year, Celinda, an Aymara weaver who swapped some of her handspun alpaca yarn with me for one of my woven keyfobs and the weavers of Peru who got me started in spinning on drop spindles back on my first visit to Peru in 1996. I also have to thank Gladys Miller in Colorado who encouraged me to spin while she taught me about Navajo weaving in 1995.
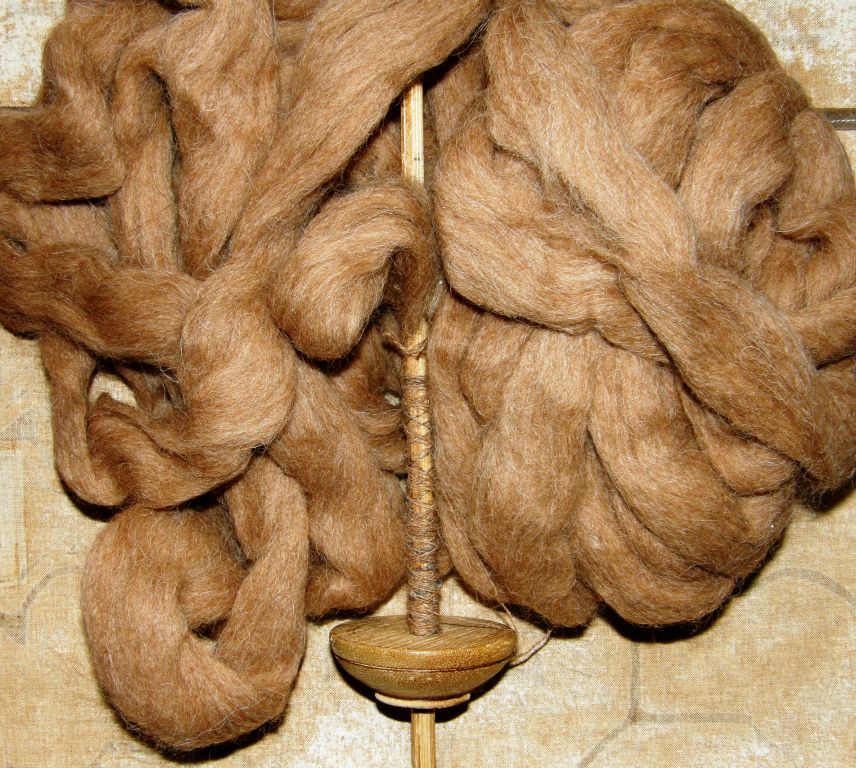
Now I am thoroughly spoiled with this gorgeous alpaca fiber that Janet gave me. A lot of it was already beautifully prepared by Janet herself in her mill. For the stuff that hadn’t been prepared, all I had to do was tease the tips open using my hand carders.

Until now, all I had spun was wool that was readily available from the farms where I lived in Patagonia and llama fiber that I bought from  little villages outside of Uyuni, Bolivia many years ago…bags and bags of it which I have cleaned and carded, spun and even dyed to weave with as the years have gone by. I thought it was pretty good but now that I have had the experience with the alpaca fiber I look at the poor old llama stuff with a very critical eye…dry, coarse and filthy!

Nevertheless I did manage to weave some nice things with it…
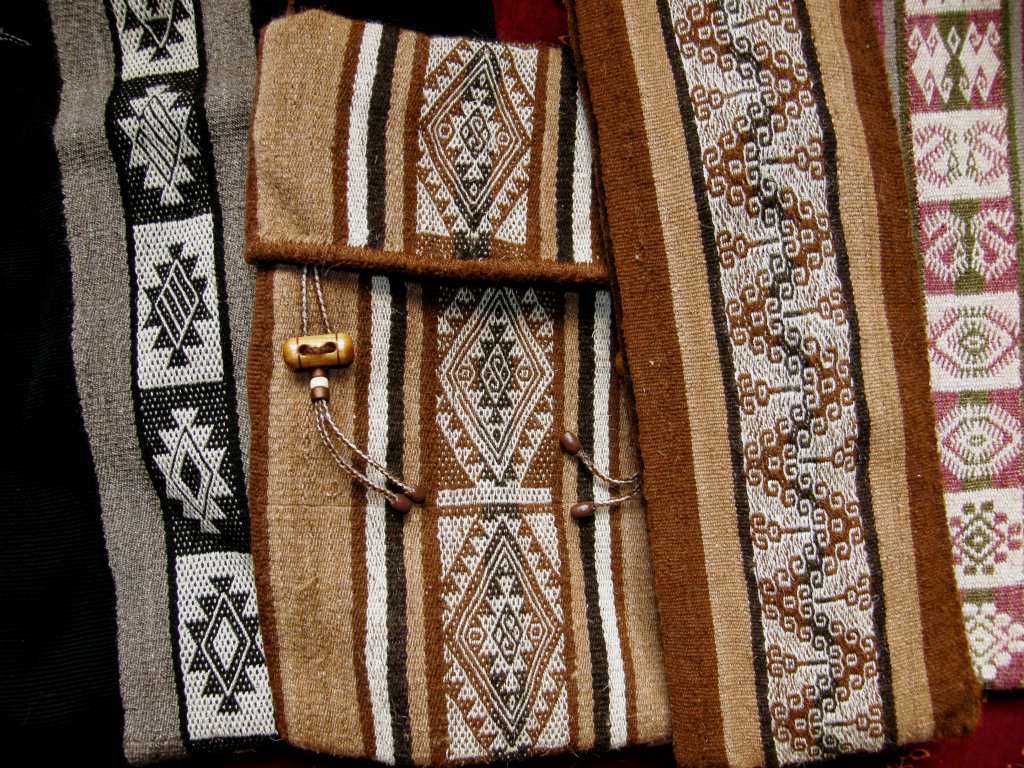
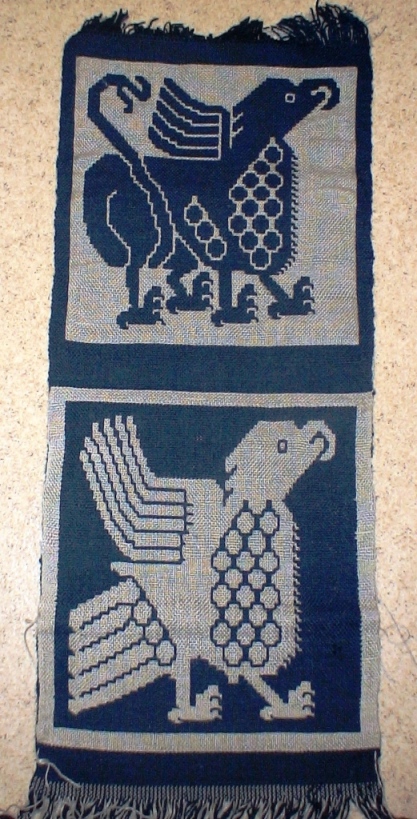
And I also like to weave llamas although these guys were woven in cotton…

I still have tons of llama fiber left so I don’t want to get too spoiled!

So, I have spent some time lately spinning the alpaca mostly because we have been having a Spin-Along in the Backstrap Weaving Group on Ravelry with a lot of discussion about just how much over twist one needs to put into the yarn to make it suitable for warp-faced weaving on the backstrap loom. And this is where Celinda, the Aymara weaver from northern Chile came in. The yarn that she gave me was quite hairy and not heavily overspun. I wove with it and it was soft and luscious. That is how I wanted my yarn to be, not like the hard severely twisted llama thread I had been making.
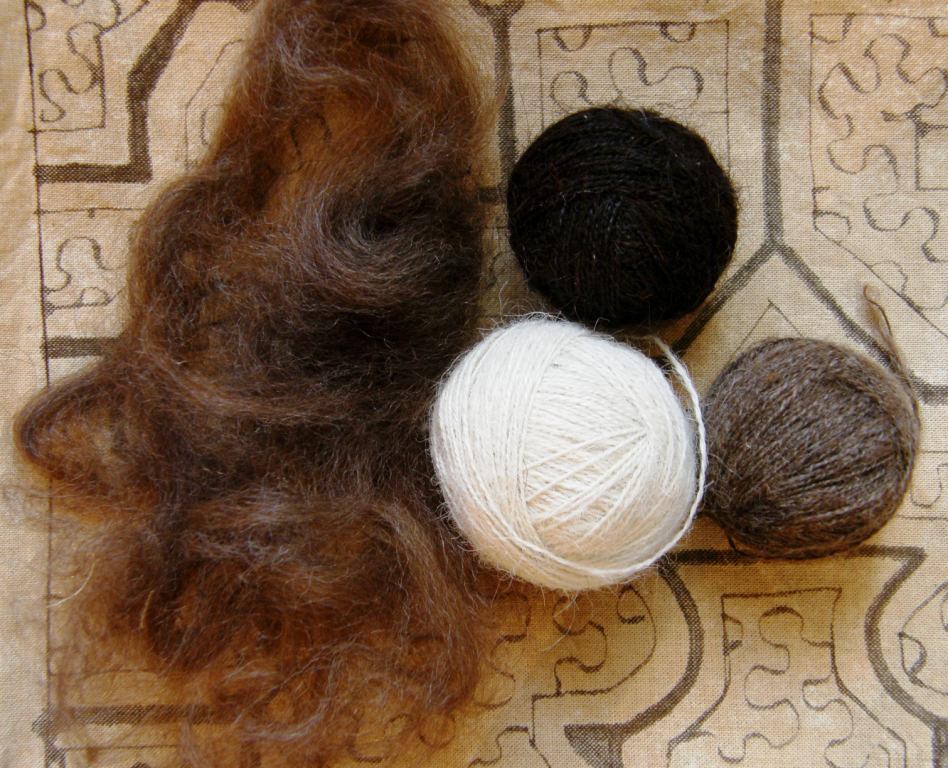
And then it was down to the all-important sampling. Would it be too hairy to work with? Would it be a lot of really hard work clearing the sheds? Would it shred and would I have broken warps because the yarn couldn’t stand up to the abrasion of warp-faced weaving?

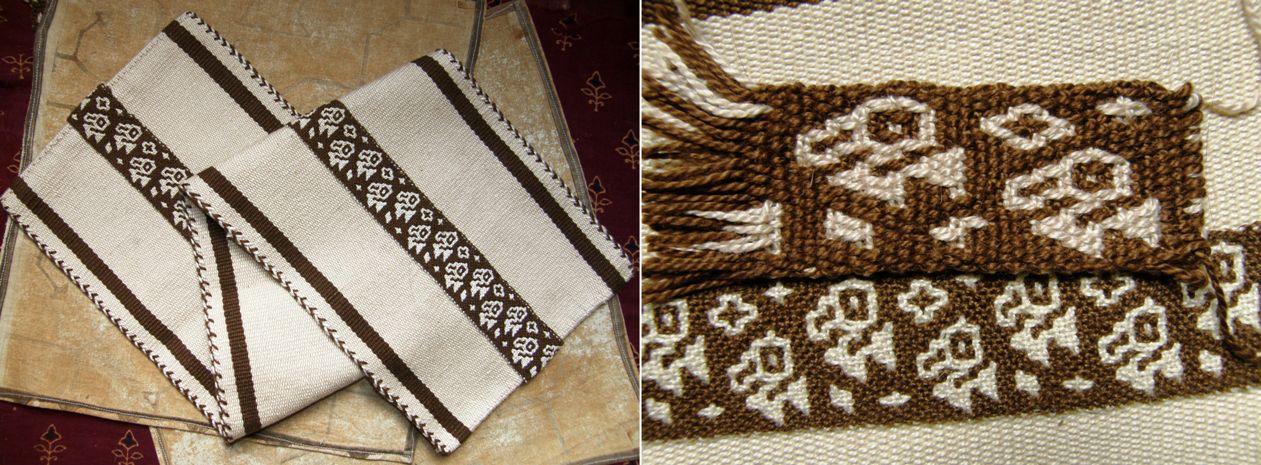
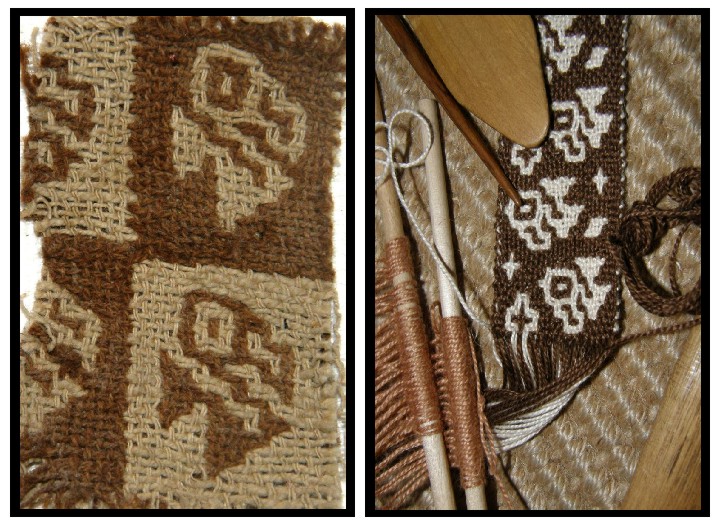
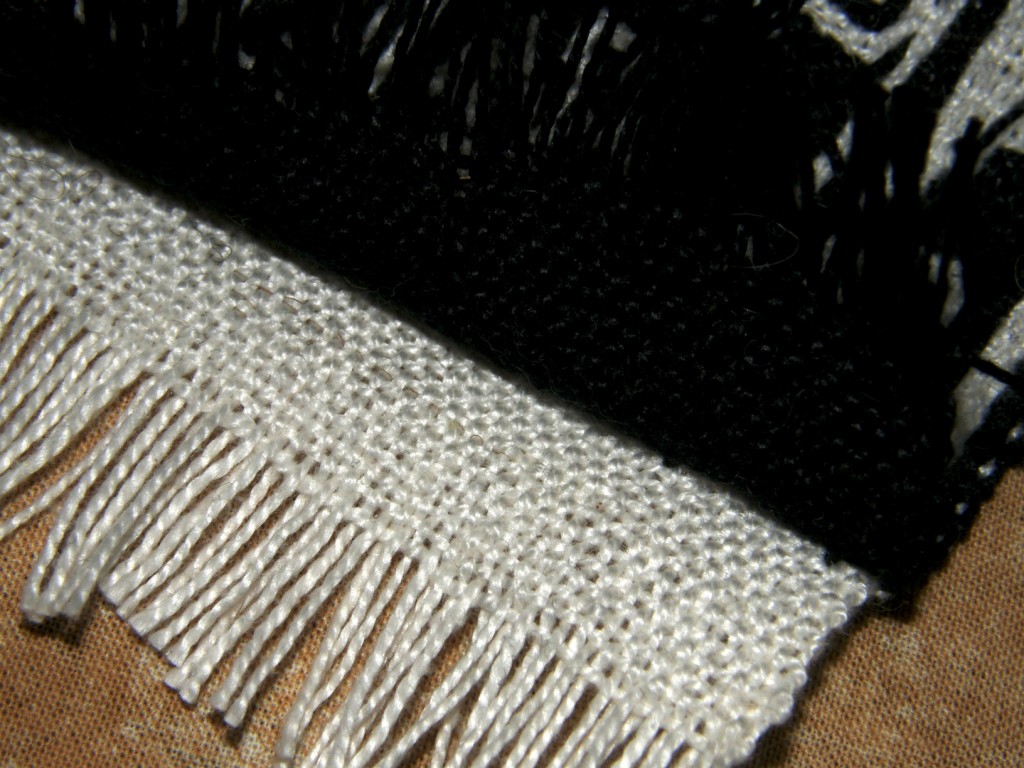
Thankfully, I didn’t get a “yes” response to any of the above questions. Of course, the sheds were more difficult to clear than those in a mercerized cotton warp but they were manageable. You can see the warp at rest above and the yarn is not curling up on itself. One thing I regret is my decision to use white weft as it did show through the brown a bit. I didn’t mind it showing at the edges as I knew that I was going to cover those with a tubular band. I used an alpaca weft that was balanced.

None of the warps broke but, then again, my warp was only 24″ long. The only problem I had was with some of the knots at the color changes which slipped undone as the yarn was so silky.

This is the alpaca warp for the tubular band and there it is being woven and sewn to the edge of the piece.

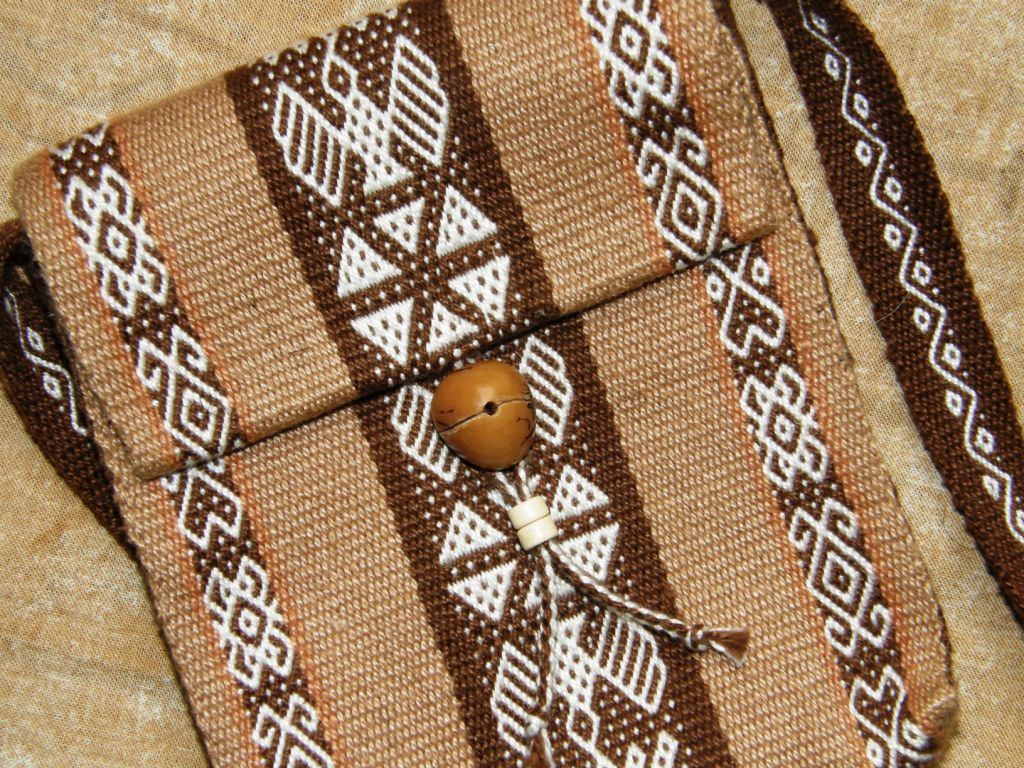
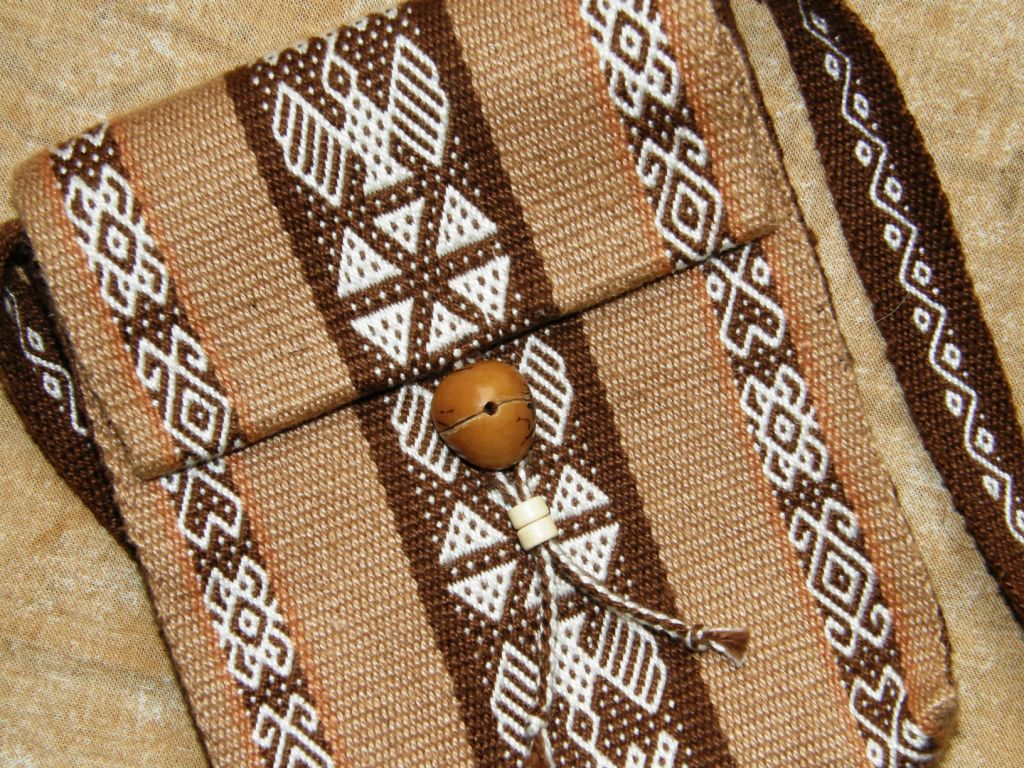
Now my passport gets to travel in first-class luxury even if I don’t. I made this sample piece into a passport pouch which is a vast improvement on the plastic wallet I have been using until now. It feels lovely!

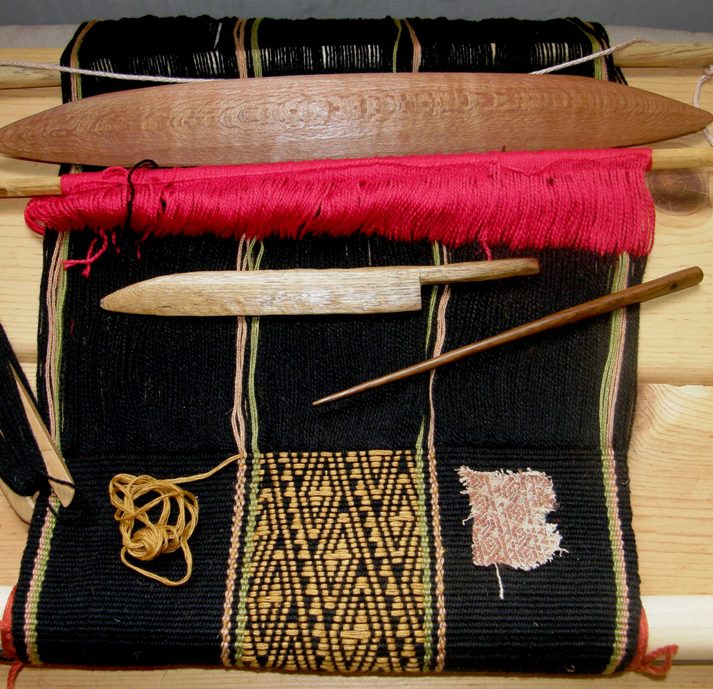
Cutting the piece off the loom was the hardest part! There was still enough warp there to weave a little something. This was my precious handspun and I didn’t want to waste a bit but then I got the idea of using the leftover bits as supplementary wefts in another project and, with that in mind, I cut away.

Now with the Tour de Fleece approaching do I keep spinning the alpaca, go back to the nasty llama or take up the cotton?  Decisions…

Actually, I am thinking of spinning some heavier yarn from the llama fiber to use, as it often is up in the mountains, to make slings. Well, I probably won’t make a whole sling, although I have made one before with a teacher in Yanque, Peru using llama fiber. It would be nice to have yarn suitable for making the braids rather than the whole sling. This will be challenging as I have been aiming for fine thread all along and now I am not sure if I can spin thick.

When I was in southern California, Martha shared her collection of South American textiles with me which included a number of beautiful Andean slings…
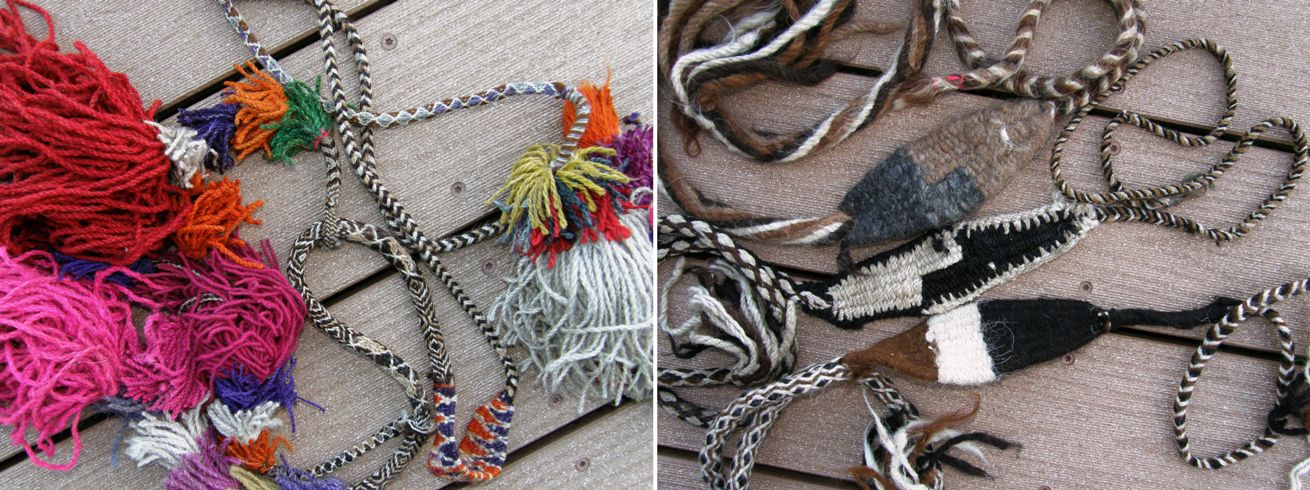
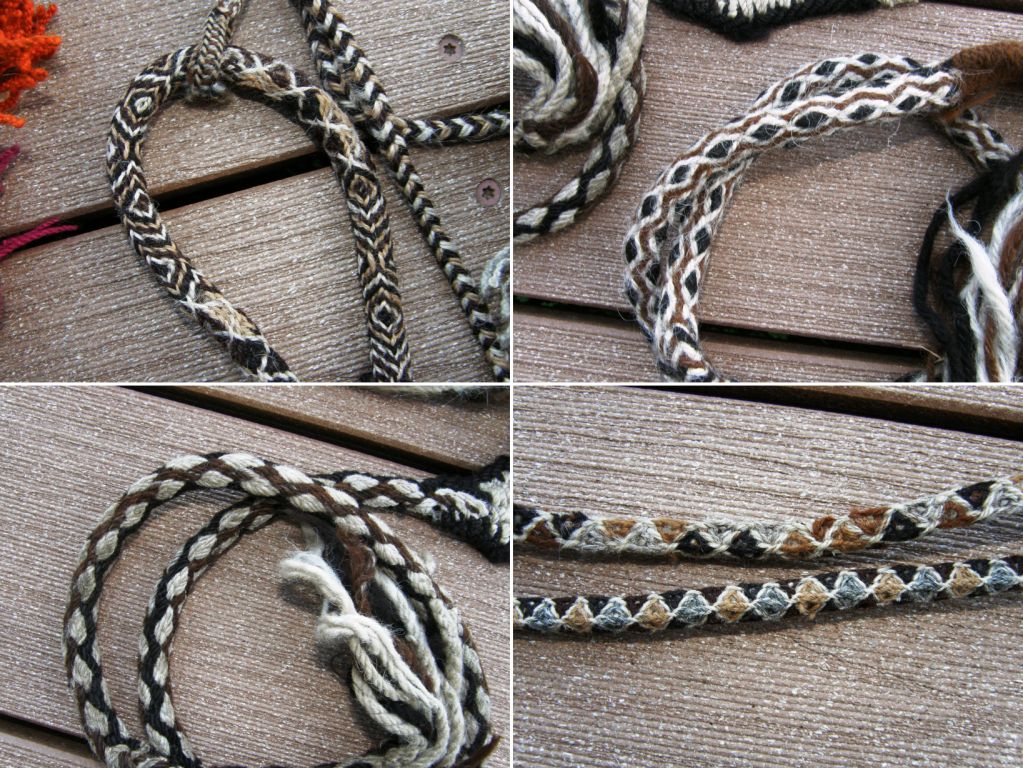
They have been made with such a variety of gorgeous braids and with the beautiful natural colors of the llama…
Ben Turner in Australia showed me two Tibetan style slings that he has constructed. While the cradles of the Andean slings that I have seen have been woven weft-faced, Ben tells me that Tibetan slings usually have twined, braided or felted cradles. The cradles of his two examples here have been twined.
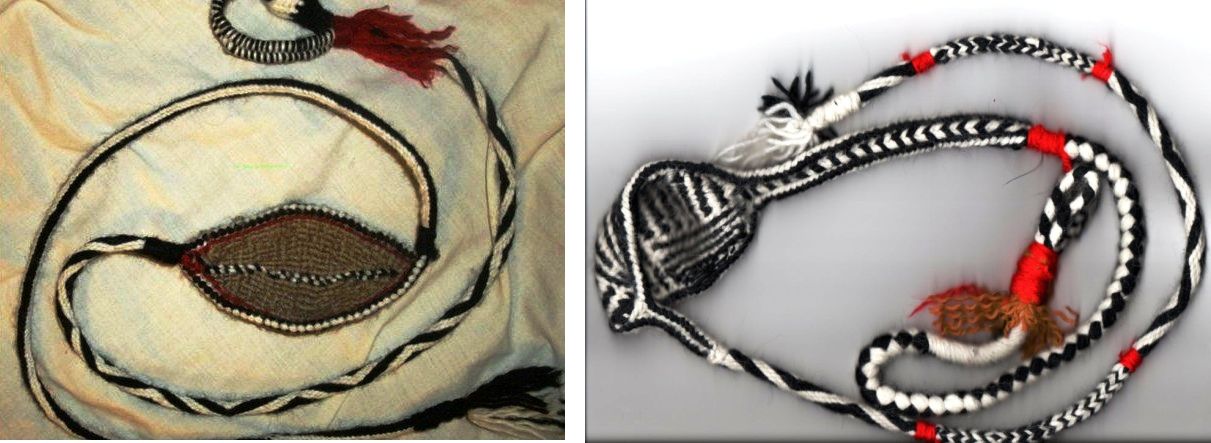
I must ask him what yarn he uses for these.

And now on to cotton, the material most available to us “lowlanders” in Bolivia…

Another piece of sampling I did this week was using the bamboo reed on my backstrap loom. This was extremely clumsy especially with such a narrow piece but I will eventually come up with some kind of system for this. I am tenacious with these kinds of things and I am determined to make this work. I so rarely weave plain balanced cloth and I get ridiculously excited about it! I have a cotton shadow weave project in mind and later I would like to use some 10/2 tencel that I received in a swap to weave something.
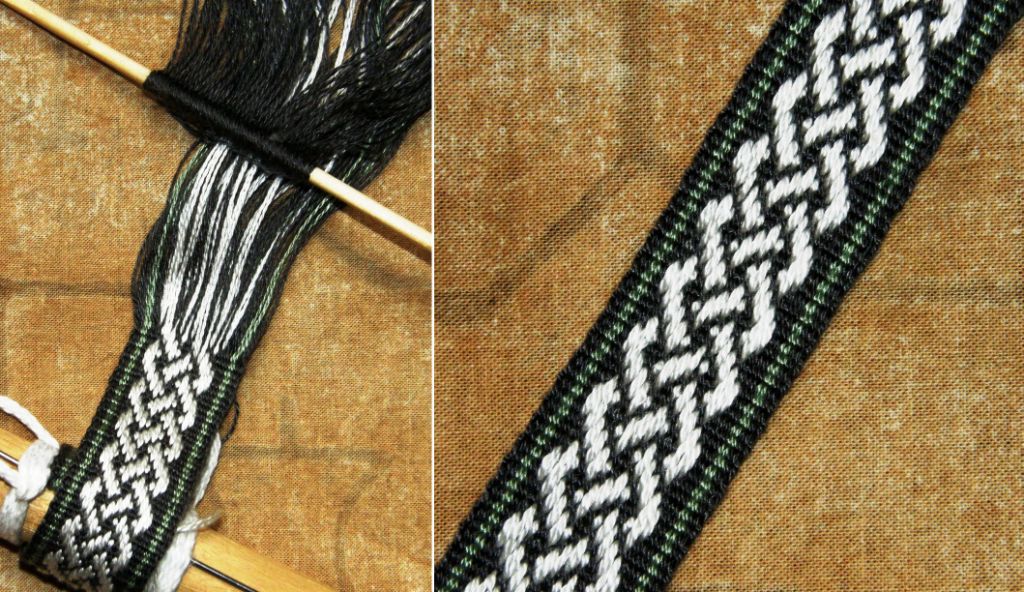
This is all I have used the tencel for so far…a supplementary warp band, but I am hoping that there is enough contrast in the green and grey for shadow weave (I don’t have all that much of the ivory).
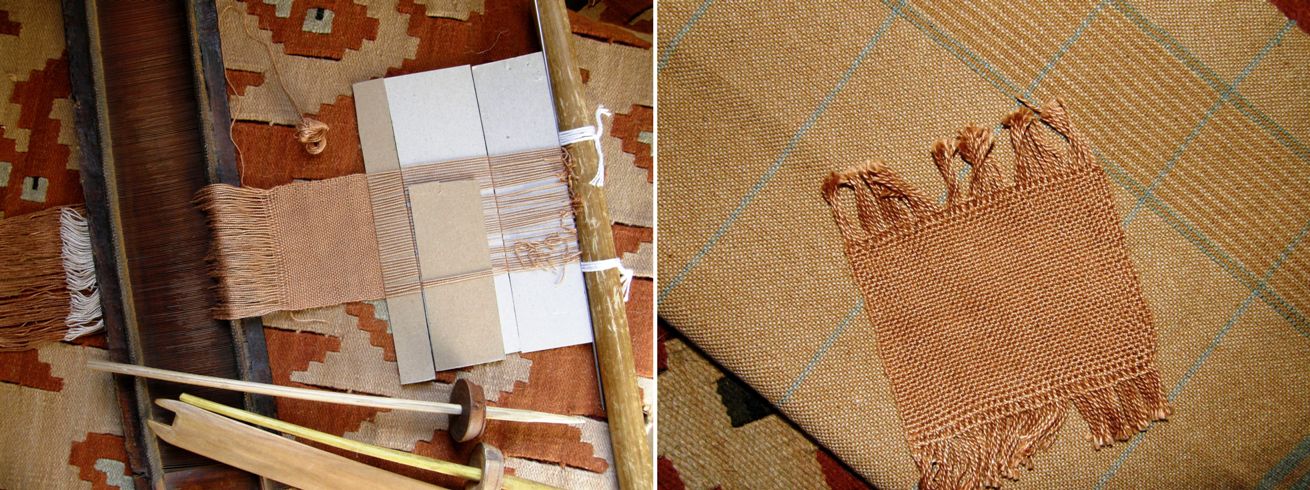
This experiment is with the cotton that I usually weave my warped-faced pieces with, more or less equivalent in size to the #10 crochet cotton that is available in the US. Above right you can see it wet finished and lying on top of a beautiful cotton dish towel that Betty Davenport wove. That towel is my inspiration and I can tell you right now that it won’t be going anywhere near a dish!

Betty wove this towel using cotton from Sally Fox Vreseis Ltd line of 10/2 in camel, coyote and green…all natural cotton colors! I had not heard of Sally Fox until Betty told me about her and her experiments with developing colored cottons (which reminds me that I did a spindle swap with a lady in the US who sent me natural green and caramel cotton sliver…must get down to spinning that).

Betty has a collection of small skeins of cotton in an incredible range of natural colors…all kinds of browns, greens and even a mauve from Peru. Some of the skeins come from Sally Fox’s experimental supply when she first started developing her standard colors. There are reddish-browns from Guatemala and dark browns from Peru as well as colors from some of the US southern states.

So, a four-shaft shadow weave with my nifty reed in place will be an up-and-coming project.

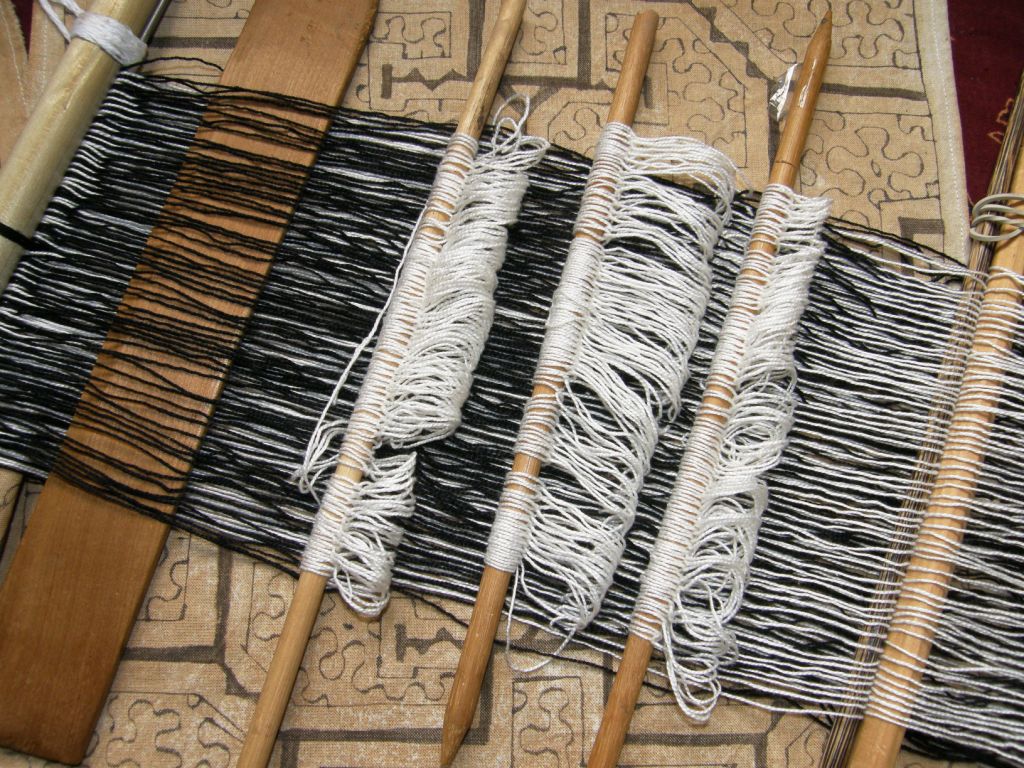
Well, until someone comes up with a natural terracotta-colored cotton, I have no choice but to dye some. So, this week I dyed some of my crochet cotton with the Dylon Terracotta Brown dye. The color is perfect! It is exactly what I was wanting for my Shipibo piece so that will be on the loom this weekend too.

That is the color below on the string heddles…yummy!
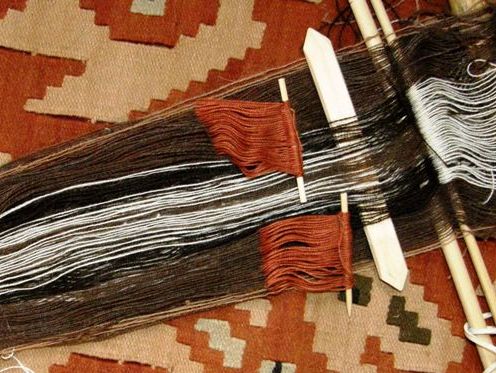
The Ravelry gang continues to weave and spin…
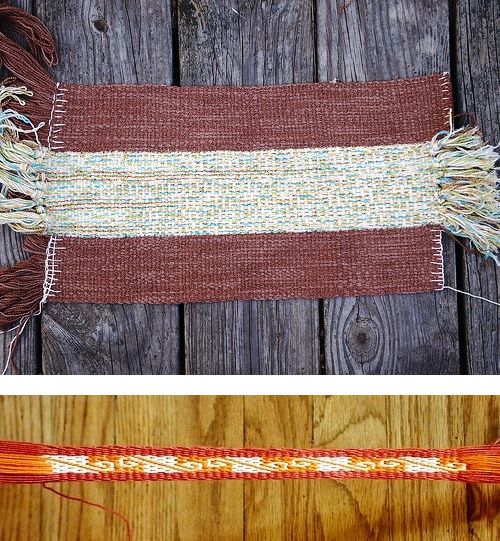
Naomi has tacked three plain warp-faced pieces together for cutting and sewing into a zippered bag. She is also weaving a pebble weave strap for another bag project.

Amber finished her pencil pouch. She wove the fabric for this using the simple warp float technique. Jennifer is piecing together a bag patterned with pebble weave motifs.

Tracy wove a sample band for the traditional Bedouin al’ouerjan technique which is simple and stunning. I have added some information about this to the warp substitution tutorial page which will be more meaningful to those of you who have already followed the initial instructions on that page. Helena in Brazil kindly provided a link to a pdf by Joy Totah Hilden, author of the book on Bedouin weaving pictured in Tracy’s picture, in which the draft for the al’ouerjan structure is provided on the last page.

After Jennifer and Tracy’s beautiful weavings I have no more fear of putting red and blue together! They have given me the courage to get that red and blue Central Asian piece I have been planning underway soon.

####################################################

And finally, I have a wee favor to ask of you all…I just started a page on Facebook for my Andean Pebble Weave book and would love it if you would take a moment to go there and hit the “like” button. Things like this could really help me in my future publishing endeavors.

I have a few exciting things on the drawing board. 😉
#####################################################

Backstrap Weaving – Smoothing out the rough.

SMOOTHING OUT THE ROUGH.

SAMPLE! My own words are ringing in my ears….if you are using a new yarn or a new technique on your backstrap loom….sample, sample, sample. And don’t trust your first samples for making width measurements for future projects. You have yet to settle into the new technique and things are still bound to change. Keep practicing while you slowly smooth out the rough bits. Sample away happily knowing you can probably make something from the samples, no matter how small or silly! If not, put it in your notebook with lots of notes beside it…believe me, you will forget if you don’t write it all down.

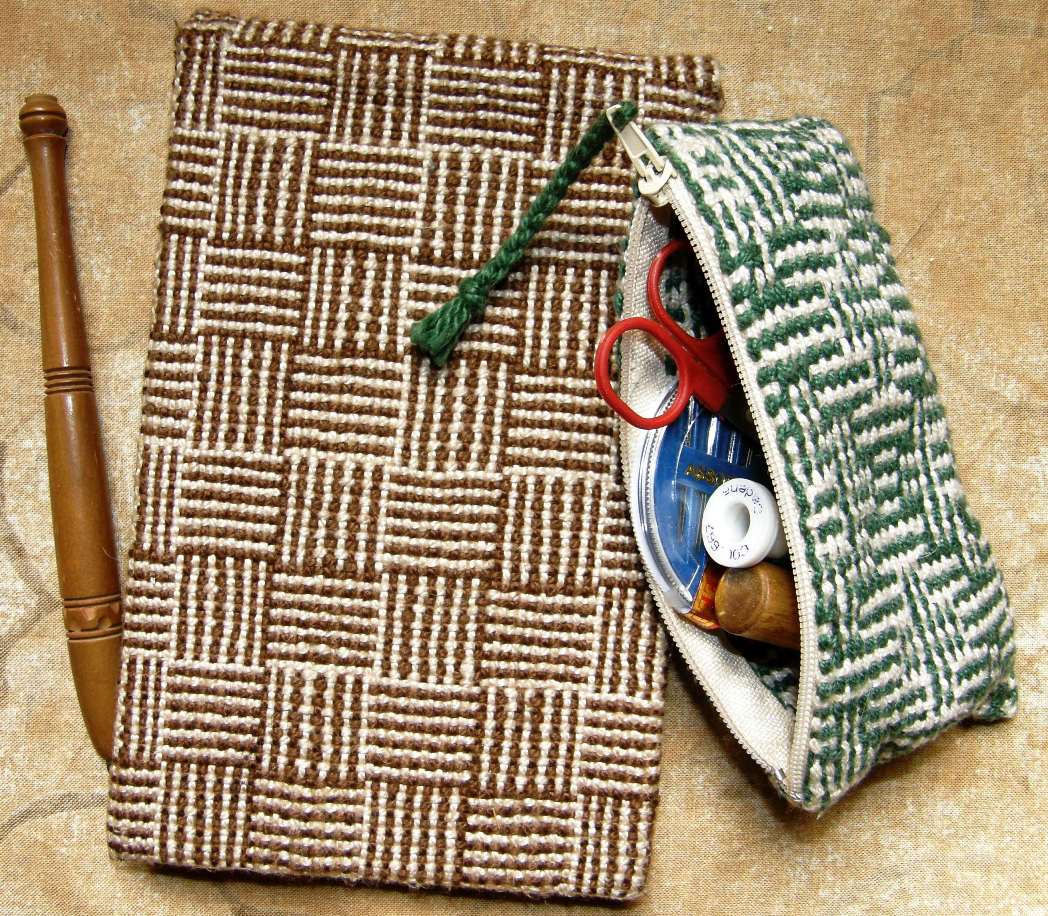
Here are a couple of small samples that I managed to make into decorative and useful things. My log cabin sampler got used as the cover of a flip notepad that always goes with me on my travels. This notebook is now full and I need to get the cover off so I can somehow fix it to another notepad. My first ever shadow weave sample got pulled off the loom as I was satisfied once I saw that it was working and I didn’t really care for the color combination. It got made into a small sewing kit purse which also goes traveling with me.

And never mind if your sample ends up with wonky selvedges and you don’t know what to do with  those pesky raw edges. There is usually a way around all that. The edges of my log cabin piece were turned around the ends of the notebook cover and glued down. Another piece of fine cardboard glued to the inside covered those edges for a neat finish. The zip took care of hiding and protecting the raw edges of the shadow weave piece.

I thought I would show in this blog post some of the finishes that I have used for my pieces, uses I have found for samples and different ways that I have dealt with raw edges.

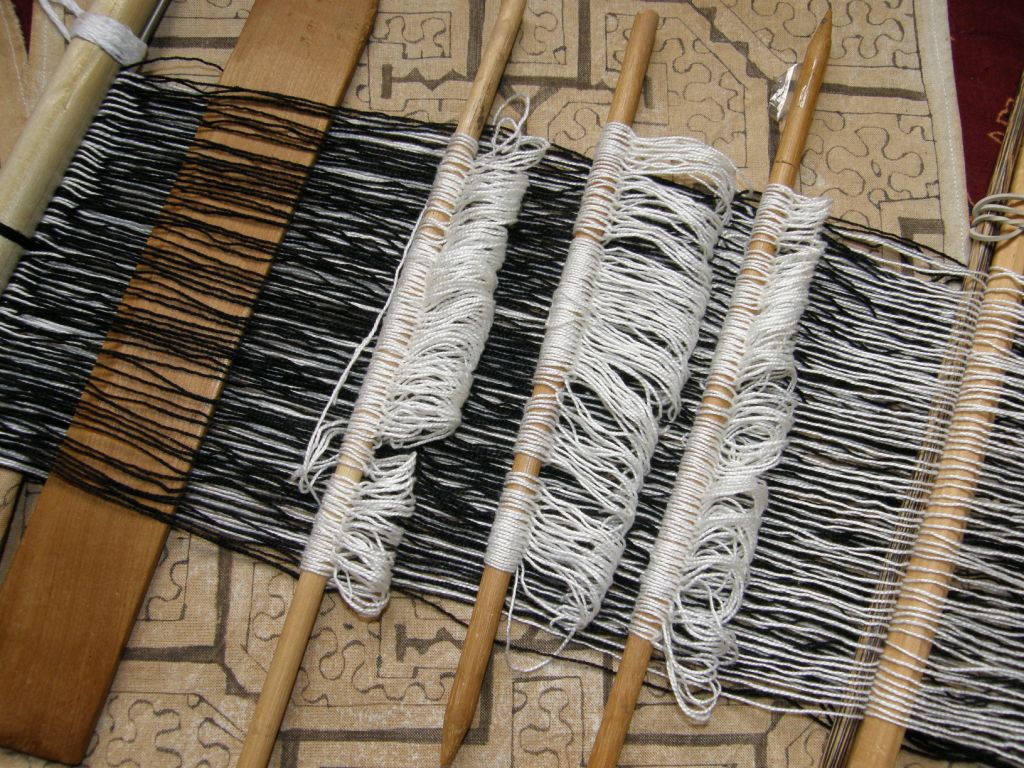
You may remember from these previous posts here and here that I have been trying out finnweave on my backstrap loom. My first samples did not prove trustworthy for calculating the dimensions of my next project and so, what I had hoped would turn out as squares, ended up being more rectangular. Here is my warp set up for my square design samples…

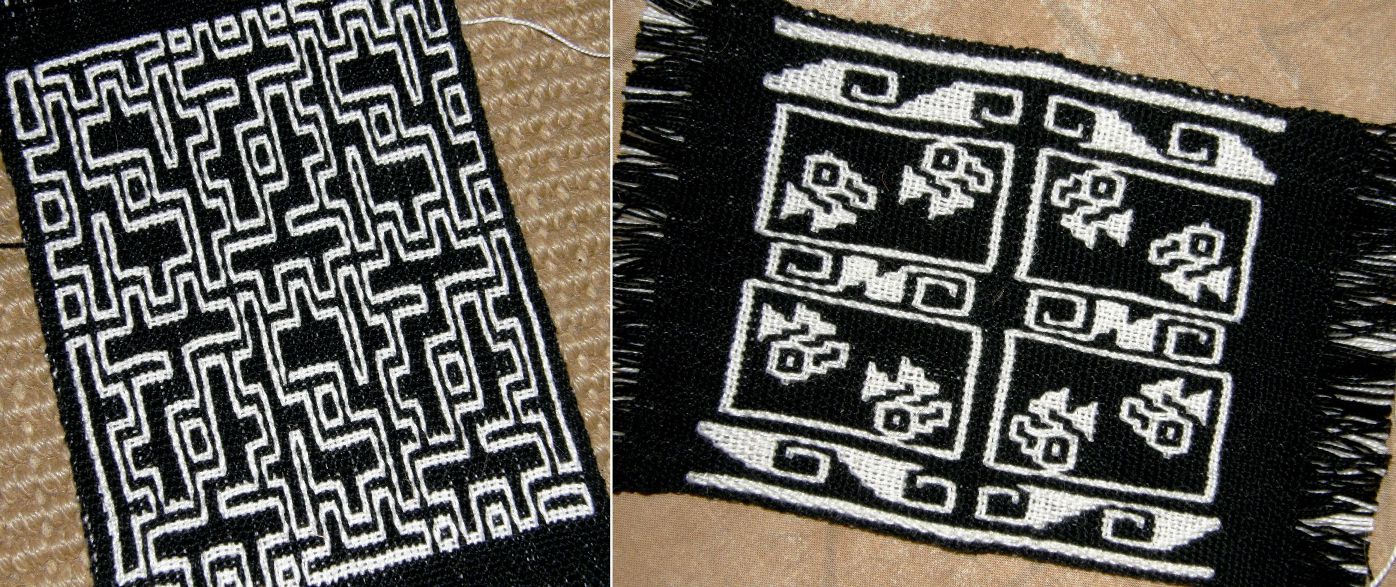
And here are the rectangular results…

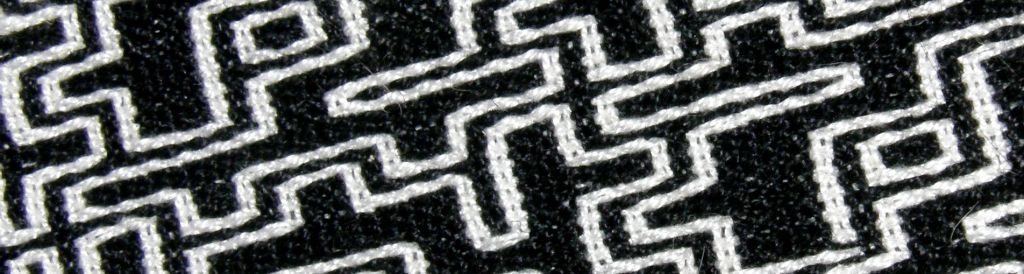
Width needed some adjustments and I learned to beat a bit harder as I progressed. I learned a lot about how to read from the weaving rather than from the chart with the design on the left. This is from one of the Prairie Wool Companion 1982 issues. There is a Chinese lattice work design charted and then three variations provided so that one can weave a set of four placemats. The version I chose is the one furthest removed from the original Chinese design. The design on the right is one I invented using the little pre columbian birds that I wove before and gave me more practice with filled-in shapes.

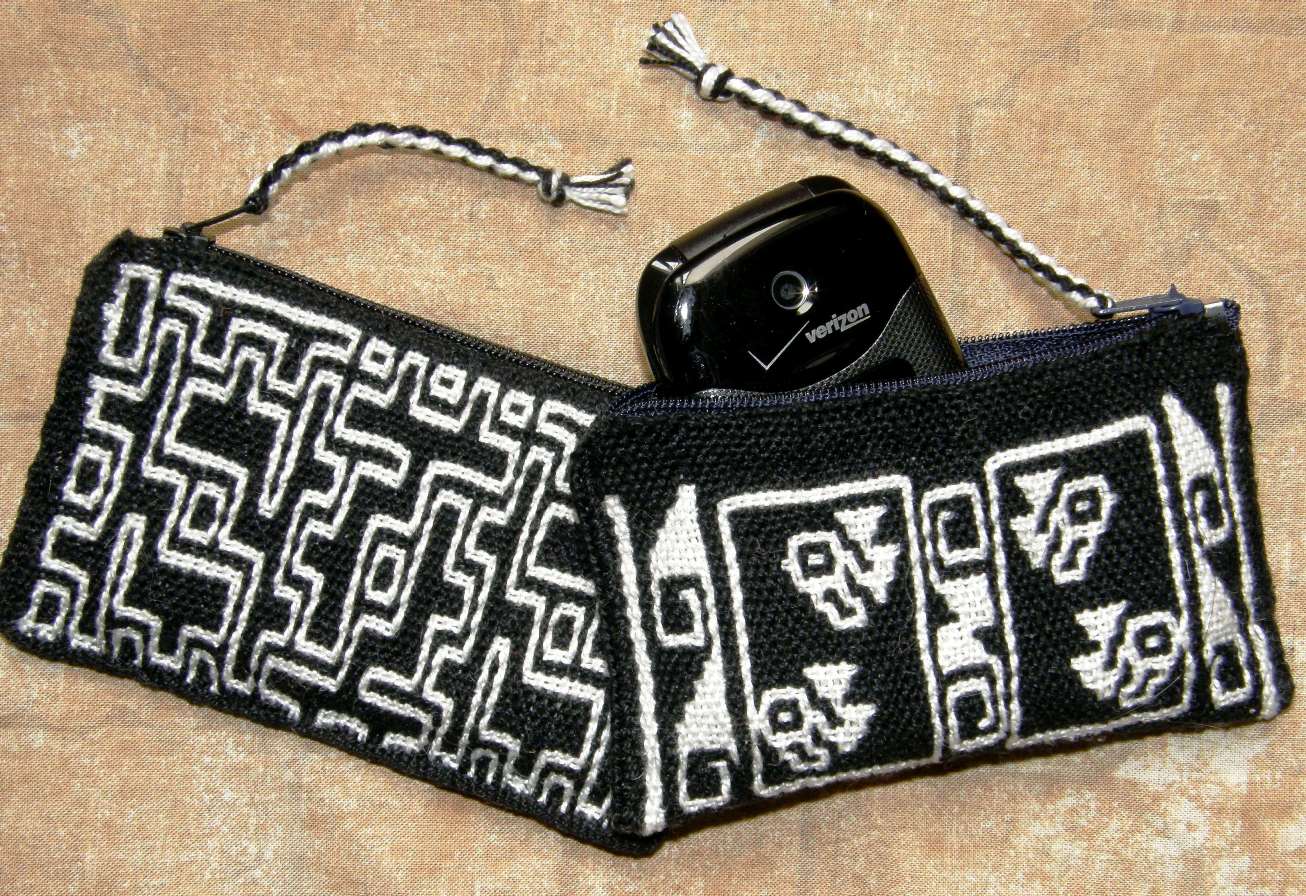
I was able to make something cute from the two samples…

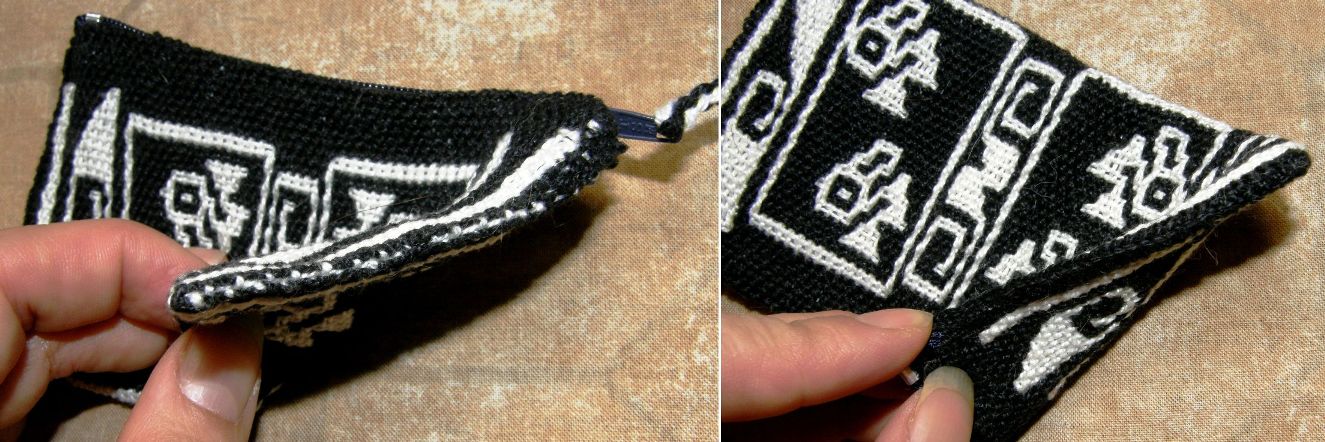
This is a double weave and it is particularly tricky dealing with its raw edges. Folding over two layers to hem is bulky and unsightly and so I followed the advice that I read in an article and wove the start and finish of each piece as two separate layers with open edges.


The idea is to turn both edges inward and sew them together like that. However, I didn’t do that. As I was going to sew in a zip, I cut the white layer back as far as I could and then simply turned the black layer over it. The black turned edge got sewn down and hidden under the zip so all is well and protected and nice and neat to boot.

One thing I was not so happy about was the edges…

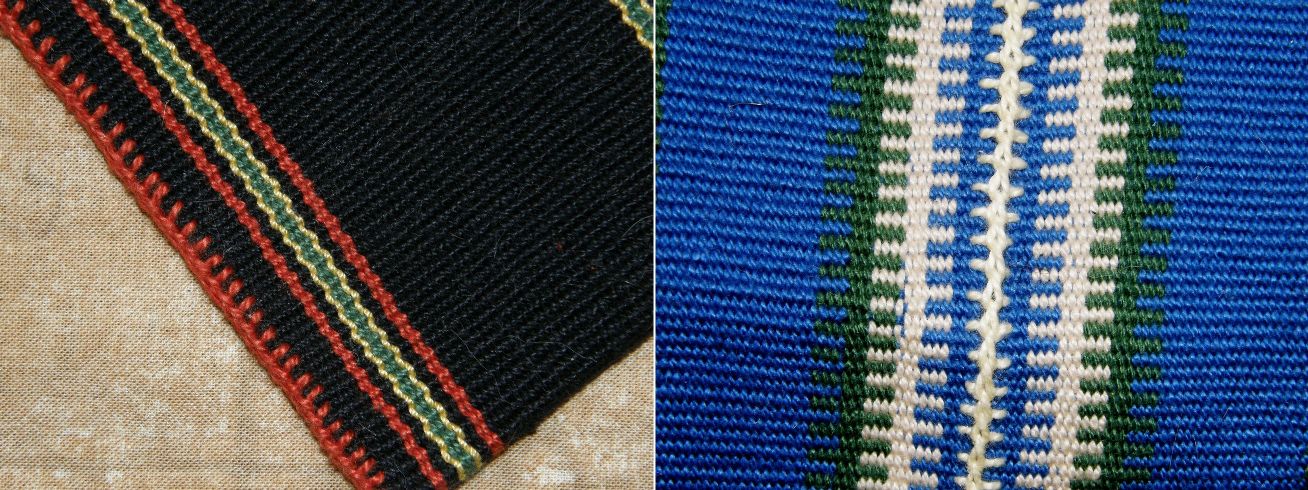
This may just be something that I am goofing up, but to my eye, the edge is ugly as you can clearly see how both layers of contrasting colors come together. A row of single cross knit looping covered that up nicely as you can see on the right. However, my eyes just about fell out…black on black. I had to stand right by the window in good light to do this.

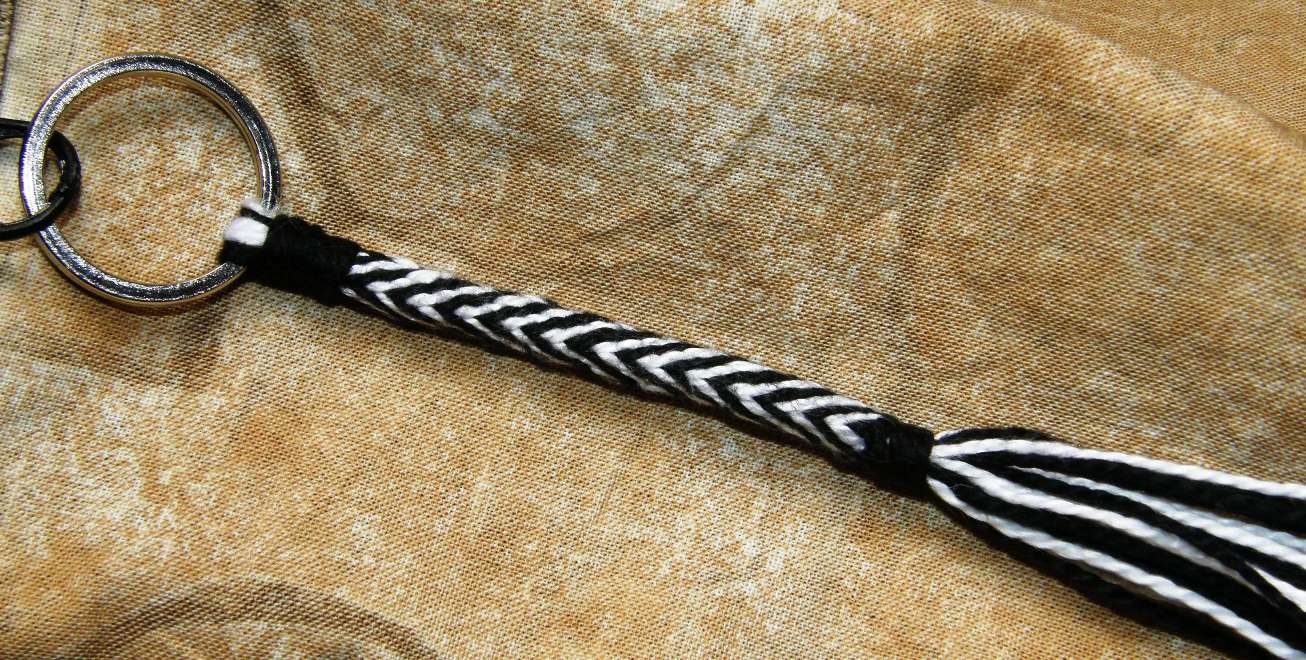
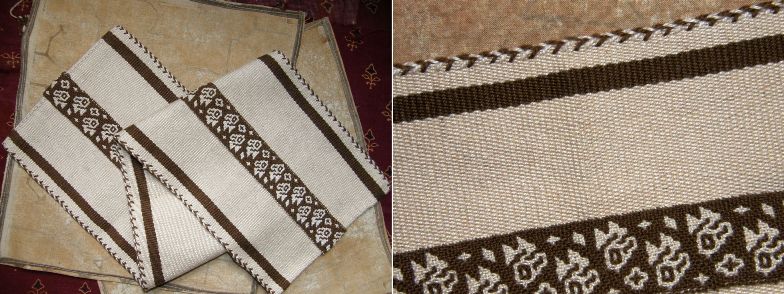
So that was one solution to the ugly edges. On the other little bag, I added one of those woven bands that are woven and sewn simultaneously using the weft as the sewing thread. I used it down the side and along the bottom and it broke the design up nicely between the two faces. A four-strand braid for the zipper-pull was the finishing touch.

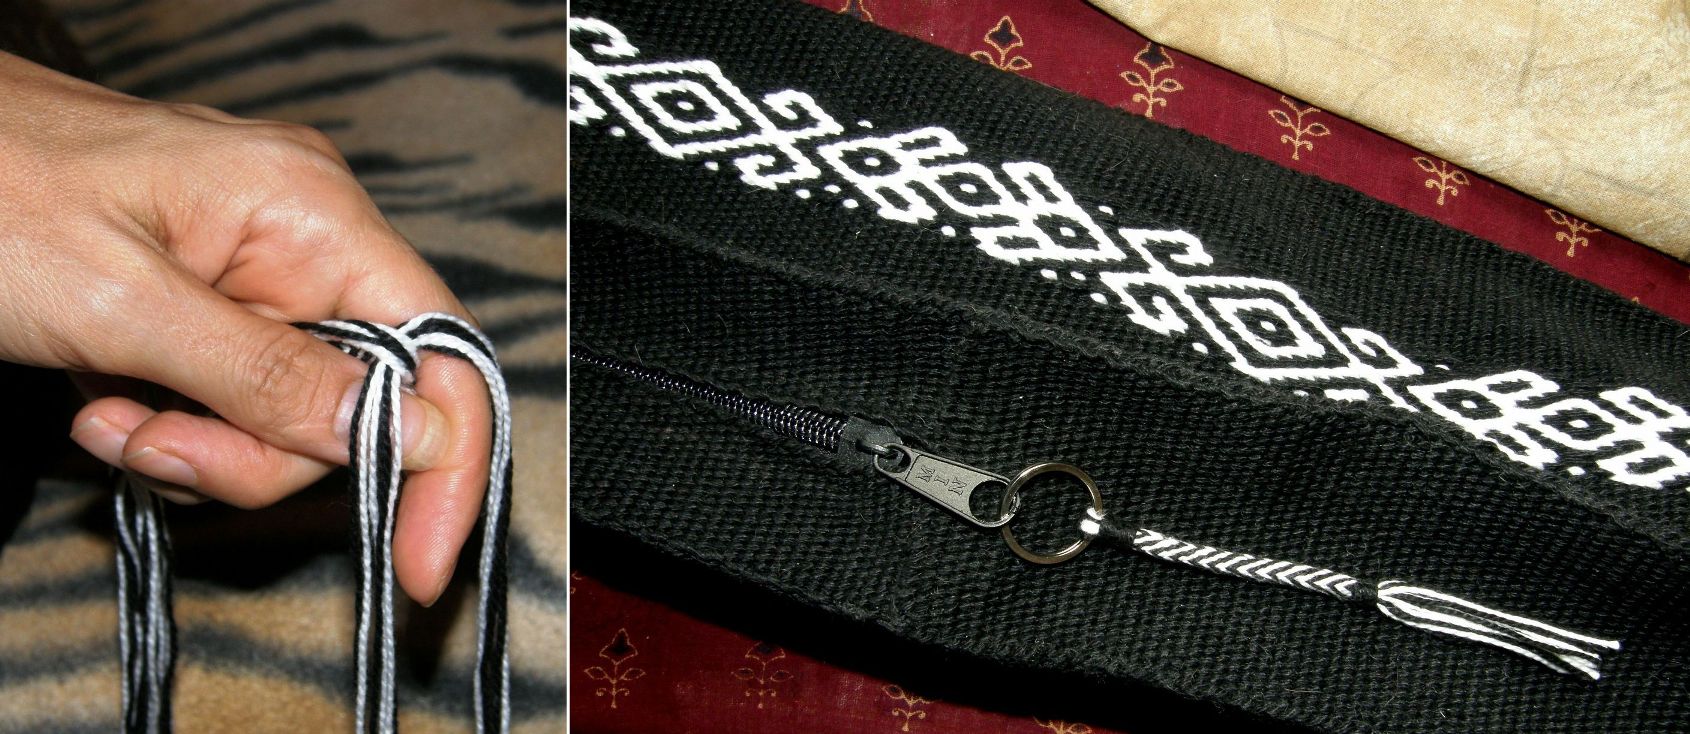
Speaking of braids I made the zipper-pull for my loom bag project…remember? – woven bag, braided zip-pull and twined strap.


It’s a 24-strand braid worked in the hand as my Peruvian sling braiding teacher had shown me.

I had not done this kind of braid in this size yarn before and so it was a bit of a challenge.

This is the base of the Margarita braid but as, I was so focused on just keeping everything in order while muttering the moves to myself, I did not venture into doing the changes in sequence that produce the diamond designs on the Margarita-style braid.

The cross knit looping that I used to hide the ugliness on my finnweave piece can sometimes be added to perfectly good looking selvedges as an extra decorative feature or it can be used to draw attention to or hide the place where two pieces of fabric are joined. This is also known as Van Dyke stitch in embroidery (see the video embedded in this blog post).

Other things that can be used to disguise a less-than-perfect edge or brighten something that is a little too plain are braids.

A two-color stitch can look good on the edge of a very plain one-color piece or hide its wonkiness if necessary!


This was a sample I made for a plain warp-faced weave weave-along. I sewed a four-strand braid around the edges which also served as a strap. Again, the zip handily hides and protects the raw edges.

This little pouch was started with a third selvedge which you can see on the right. I sewed across the raw edge with very visible stitches as neatly as I could by hand and then sewed that edge down.


Then there’s good old hem stitching which I only learned fairly recently from this video. I got such a kick out of learning and doing this the first time, I wanted to go around and hem stitch everything!

Teeny tiny “invisible” hand stitches seem to work well at the bottom of book marks and keyfobs. Warp ends can also be braided. I like to dab the ends of the braids with diluted white glue and squeeze them into a tapered shape as they dry. I think it looks better than having knots in the ends.


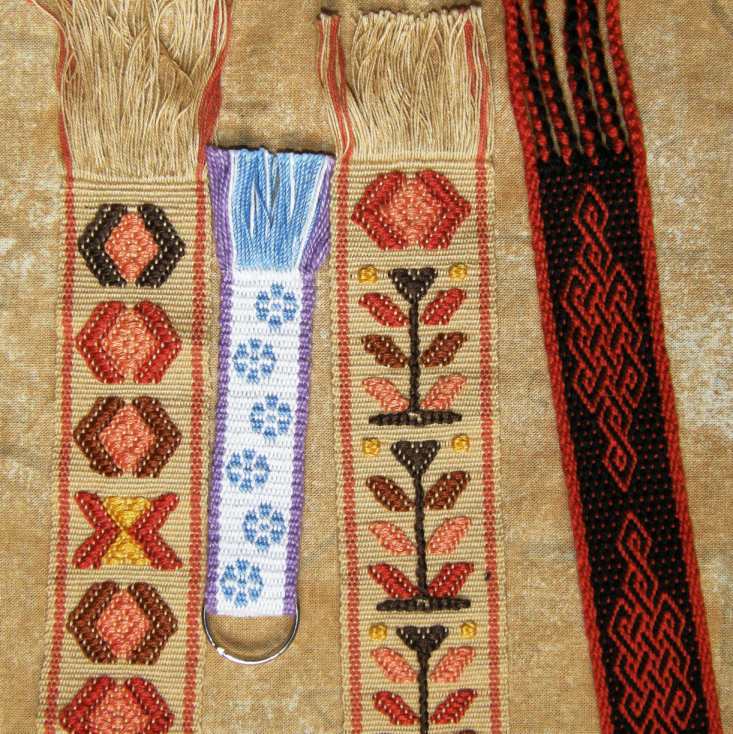
Above are some bookmarks decorated with Guatemalan supplementary weft designs, a double weave key fob and a pebble weave Celtic knot pattern.

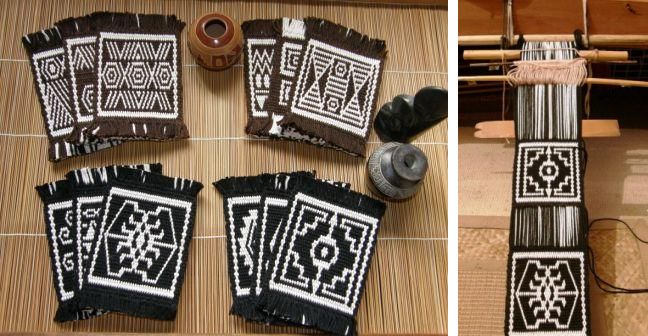
I am not so convinced about the way that I chose to deal with the raw edges on these very thick double weave mug rugs.

This came after many attempts to sew them neatly and invisibly. They are too thick for the method I suggested earlier where you weave the two layers separately and turn them in on each other.

I figured if I couldn’t make the stitches invisible I would go for very visible and decorative, and something in keeping with the ethnic nature of the design.

This is the back side. The brown thread cannot be seen on the front.

I sewed these while they were still stretched out on the loom and had to put a mirror in my lap so I could see how the stitches were being placed on the back.

I am open to suggestions for improving this!


Montagnard (Vietnamese hilltribe) weavers often finish their weavings with weft twining. They then add beads and often a few more rows of weft twining. I wasn’t convinced that the weft twining would stand in place on its own and sufficiently “finish” a piece until I tried it myself. It is firm and sturdy and there is no way those twined wefts are going to work their way loose. Here is some twining I did in a traditional Jarai design on the end of a warp-faced piece…

On the Bedouin design wall hanging that I did on the right I also twined the edge and finished it off with wrapped warps.

Warp wrapping, braiding and other finishing techniques are covered in Finishes in the Ethnic Tradition by Karen Searle and Suzanne Baizerman.

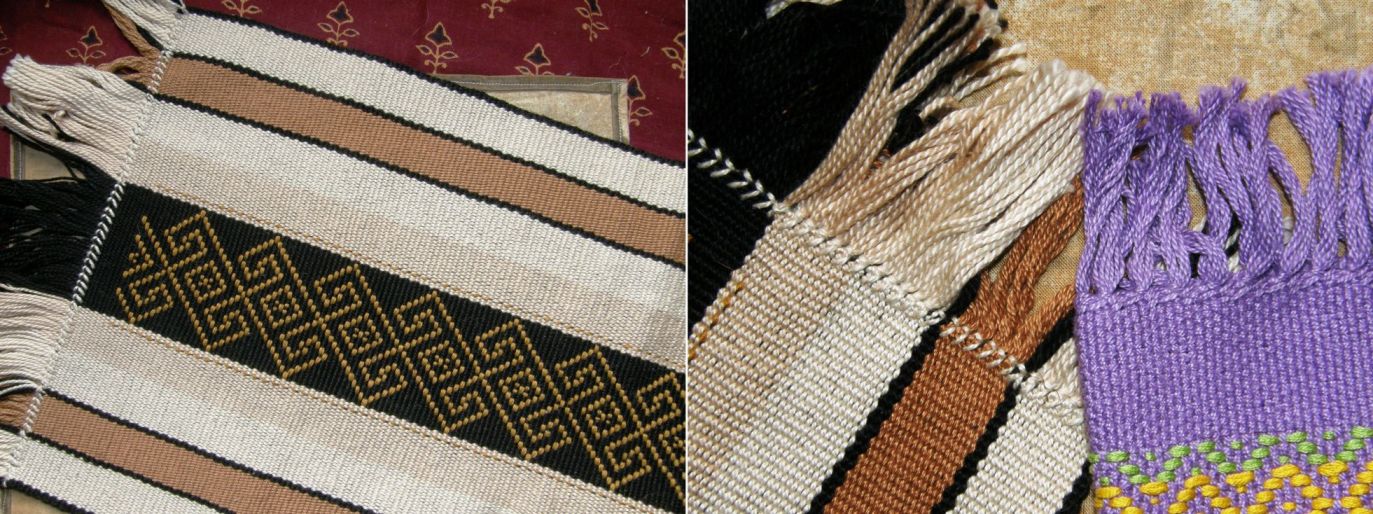
My latest favorite edging which I learned at the tinkuy de tejedores in Cusco last November is the tubular woven band which is woven and sewn simultaneously to edges shown below on the right. This is another one that totally grabbed me. I had to stop myself from tubular banding everything in sight!

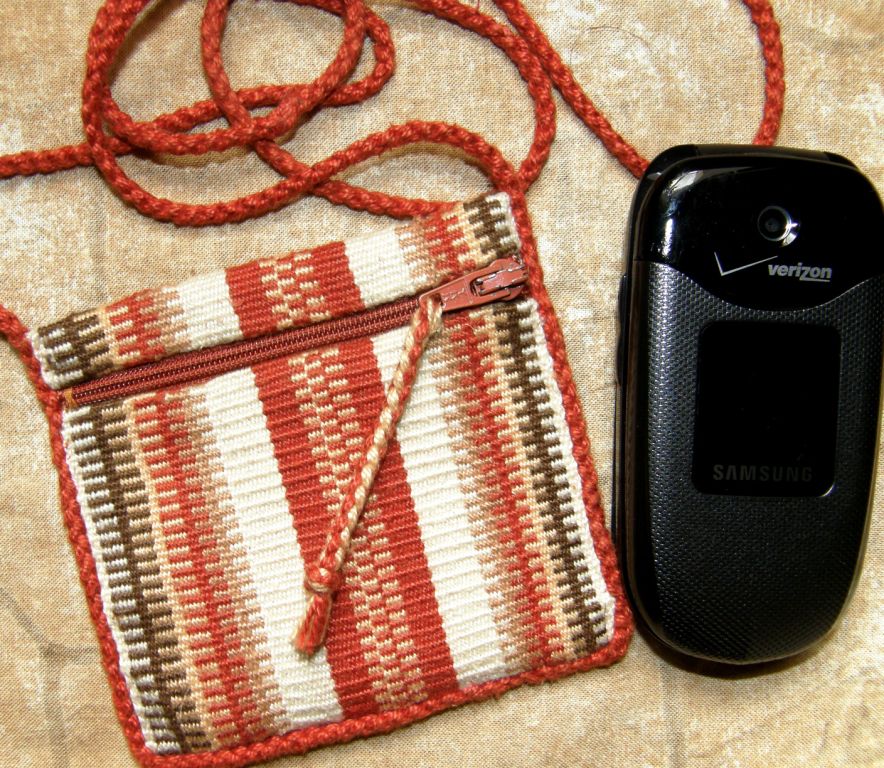
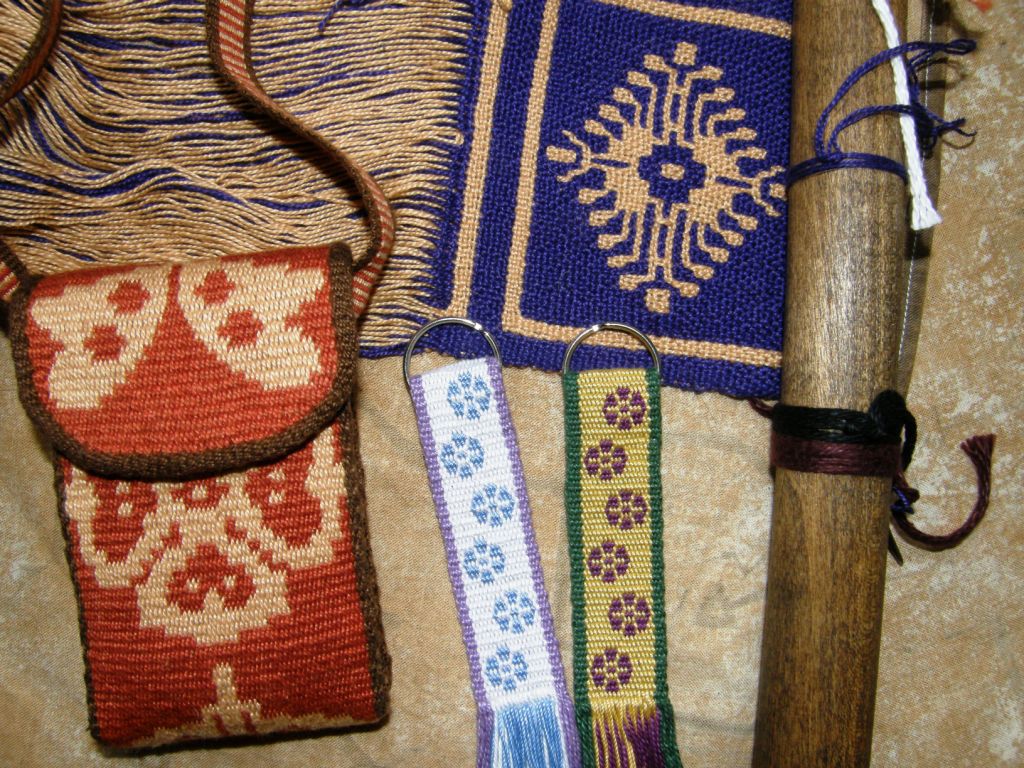
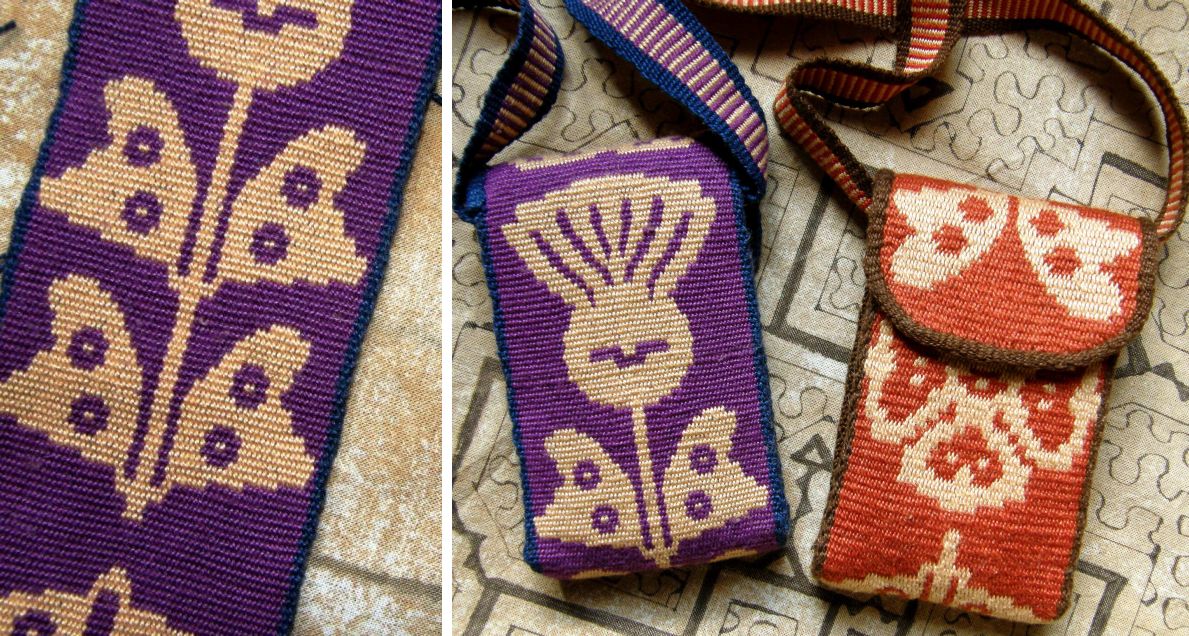
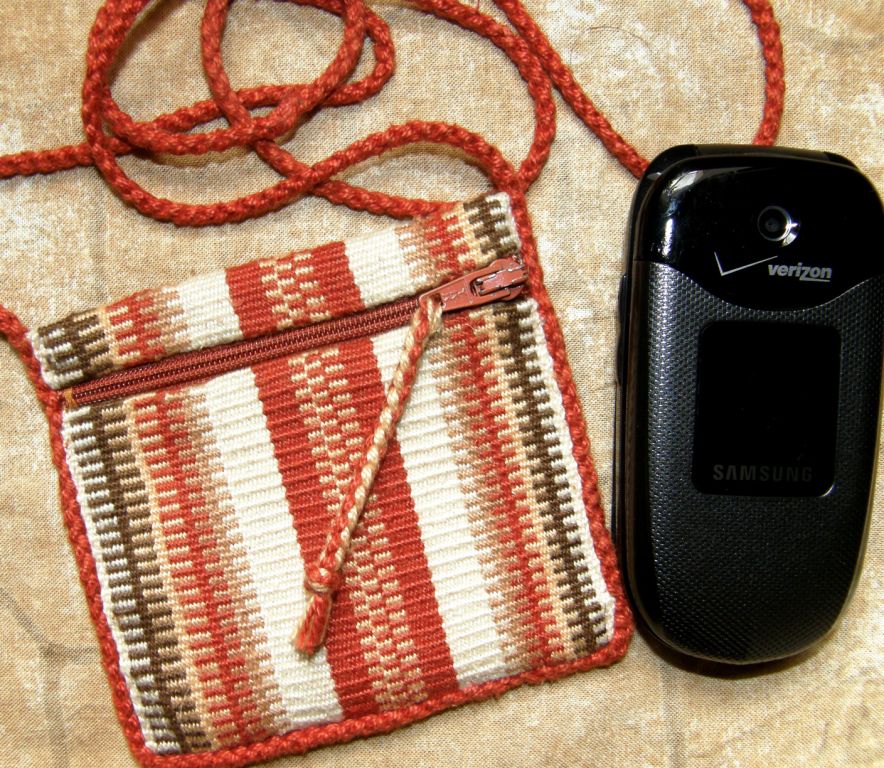
I decided to try a plain weave single-color band as an edging after seeing how Guarani weaver Angela edges her pieces and I used it on the cell phone pouch above. It very nicely covers and protects the raw edge where I cut and shaped the flap.

Well, enough about smoothing out the rough, brightening the plain and taming those wild warp ends. Back to finnweave. I am still enjoying the Cora and Huichol pieces and traditional Scandinavian patterns and have just learned that another Mexican group, the Otomí, also practice this technique. However, I am returning to my original goal now and am about to chart my first pre columbian design based on one of my textile fragments. This will be another sampler and I will wet finish this one.

#############################################

What have the weave-alongers been up to?

Linda wove her first band with horizontal bars getting warmed up for simple warp floats. She also made supplementary weft samples so she could learn about the scale of her charted designs against the woven fabric before launching into a project. Bobbie finished her piece with the central supplementary weft pattern. The chart for this design is here. I really like the effect of the different colored horizontal bars design that she used on the edges.

After finishing another pebble weave piece, Jennifer shifted to double weave and enjoyed sampling the technique in #3 crochet cotton. The llamas are charted here.


Tracy is back from her trip and back at the loom doing pebble weave.

Tracy’s latest band is on the left and Jennifer’s finished piece is on the right. You can see that her knitting needle is not standing up to the task of creating her third selvedge. You can read some tips about starting with a third selvedge here.


Both Marsha and Jennifer tried double weave in #10 thread but decided it was too fine to tackle yet. Marsha is doing a double weave band, her first with a pattern, in #3 thread. She is writing the name of her roommate on what will be the strap for a camera bag. Jennifer made a keyfob as her first attempt with #10 thread and is happy to continue sampling with #3.

And just wait until you see this…

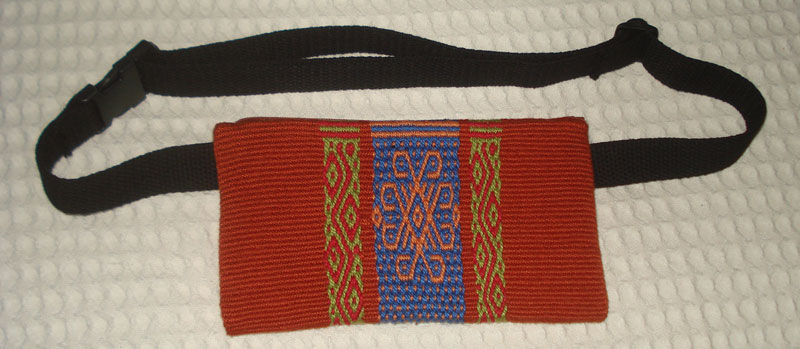
Helena in Brazil finished her pouch and has attached an adjustable band with buckle for her sister to use on her trip to Australia. I love that orange! There are ideas here for fun ways to combine colors, right?

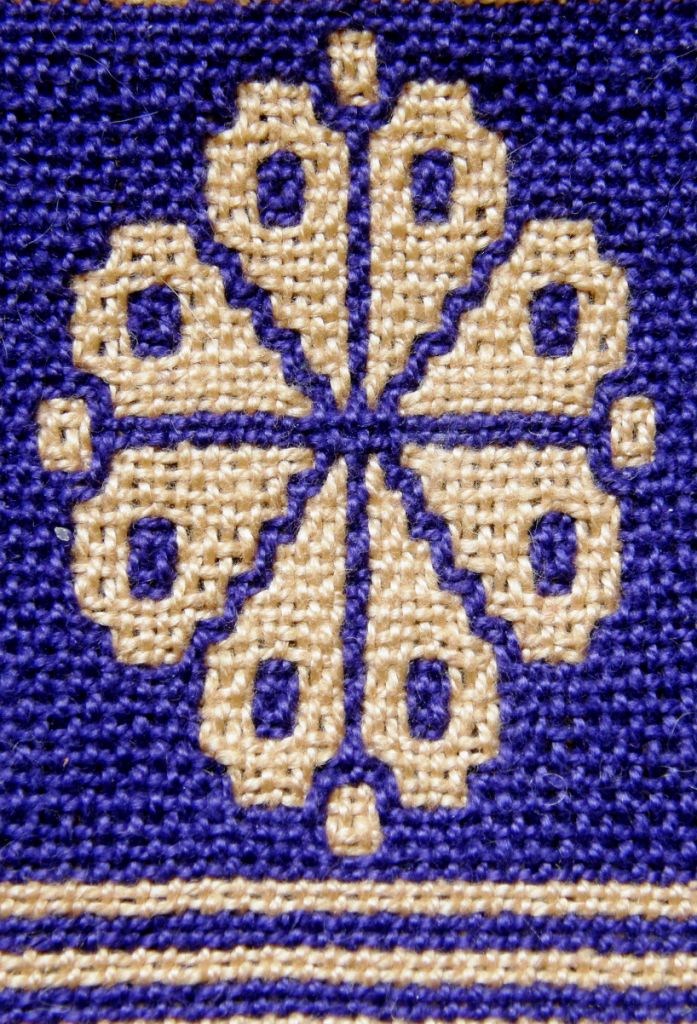
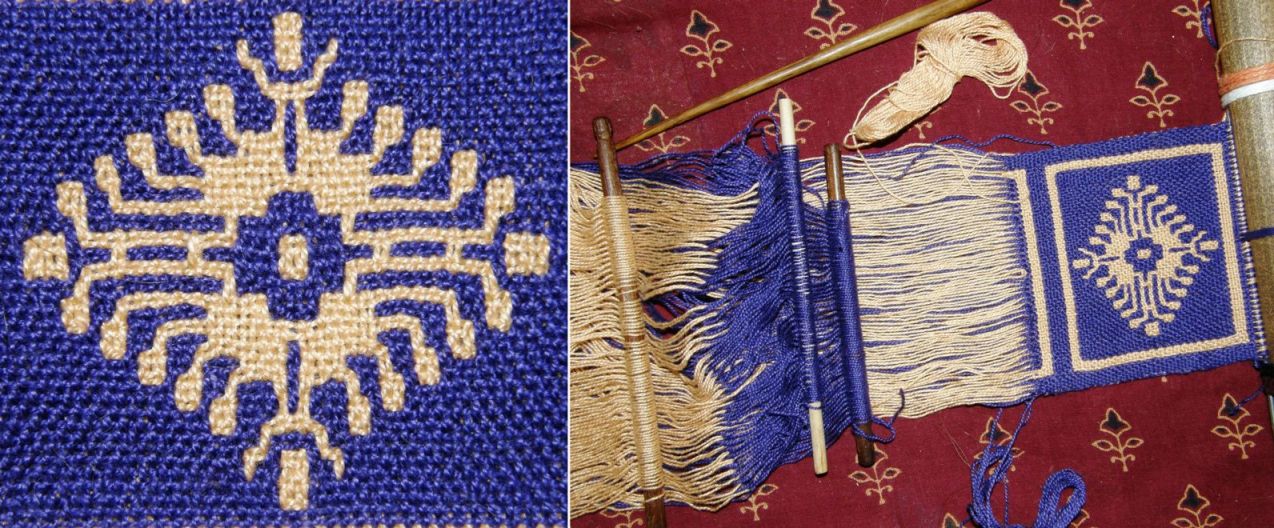
The central design is one I invented and include in my book. I made it to go in a wall hanging along with the adaptation I made of a Huichol motif. This design includes the diamonds, spokes and curls that were also elements in the Huichol pattern.

I will leave you with our Weave-Along group’s learning mantra:

Short, Narrow Warps and Sample, Sample, Sample!


Backstrap Weaving – Care Packages

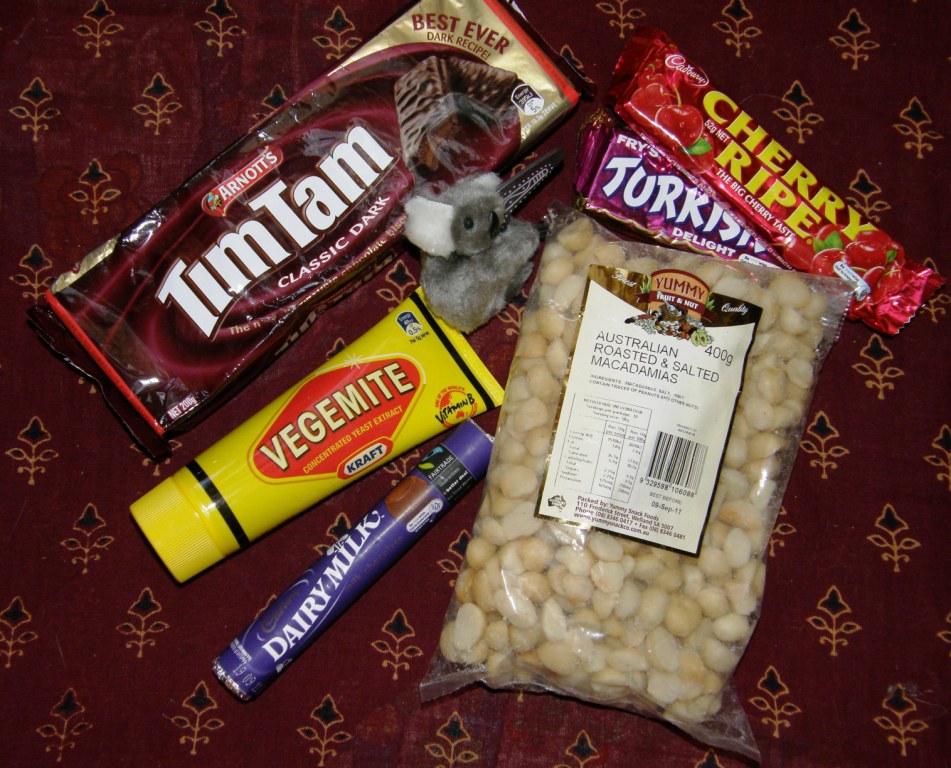
Mmmmmm 🙂 Care packages….this is part of a five-kilo box that showed up in the mail this week…

A huge cliche, I know, but I do like to have my Vegemite and Tim Tams. I have tried the gourmet cookies but nothing tops good old Arnott’s biscuits. This is just a fraction of what was in the box!

I suppose if I ever go back to Australia I will be having care packages sent from here….dried cuñapes, pots of dulce de leche,  facturas, alfajores and “Sublimes“! I must gather them all up so I can show you what they are.

It has occurred to me that I get care packages all the time…not necessarily cartons of stuff in the mail box at the post office, but rather, emails from people all over the world with links and photos and information about things that they know will be of interest to me…notes of concern if they hear of a new outbreak of social unrest or natural disaster in this area….words of comfort if life throws me a little disappointment on a more personal level. Nothing says more clearly “I care” than all that.

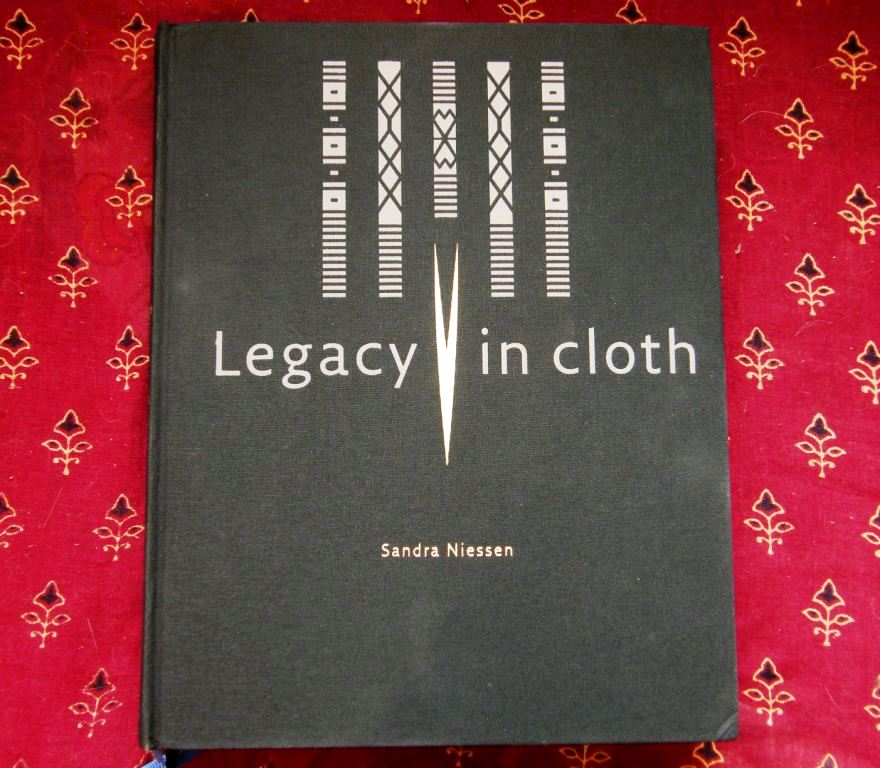
A certain person’s exceeding generosity has helped me to be the owner of this….

“Legacy in Cloth” – this book contains the results of Sandra Niessen’s thirty years of research on the weaving techniques and textiles of the Batak people of Indonesia. Five hundred and sixty-eight pages of text and luscious photos!

I am not even going to touch it until I have quality time available to give it the attention it deserves. This is not something to just flip through.

Sandra writes a fabulous blog packed with stories about her time spent in Indonesia with the Batak people, writing the book and then taking the book back to the villages.

She is currently in Indonesia making a film on Batak weaving inspired by a Batak poem, a project about which you can read here. Many thanks to Pamela Cross who gave me this information and sent me the link. You can see photos, also generously provided by Pamela, of Batak textiles with their twined edges in this previous blog post.

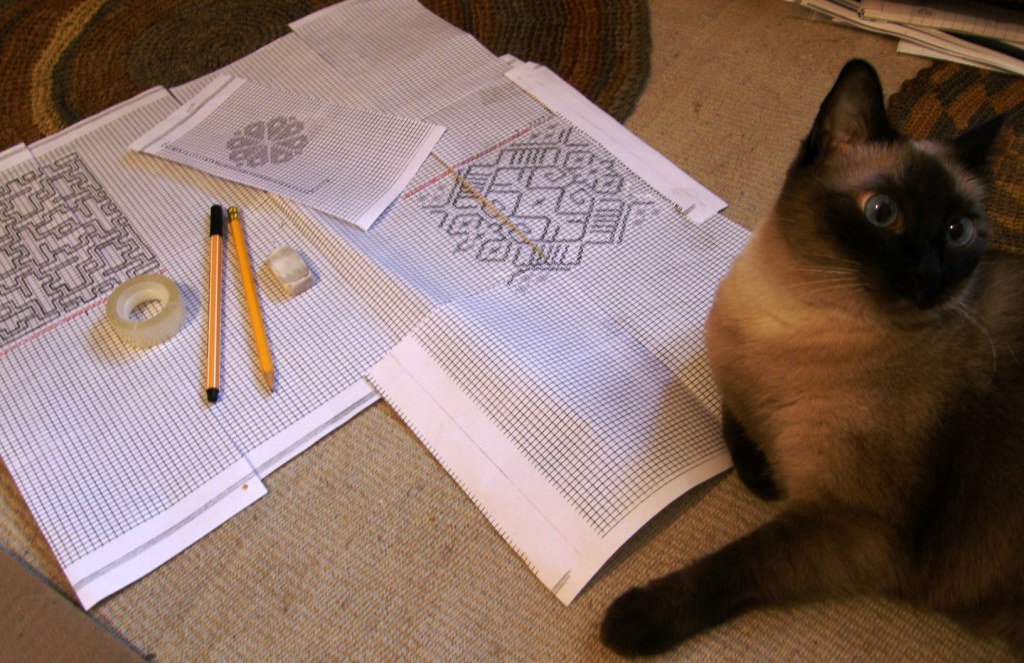
This week there was some time spent at the loom and a lot of time spent at the drawing board, the drawing board being my bedroom floor.

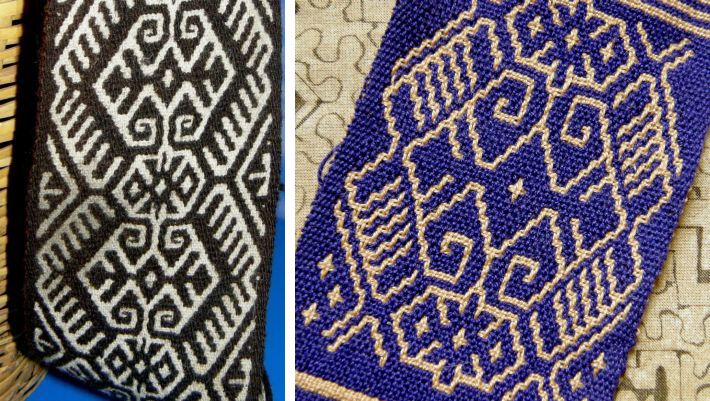
I love charting! I am still in finnweave mode and made an attempt at reproducing the design on a piece of Huichol weaving that I was able to photograph at the National Museum of the American Indian in DC. This was a great learning experience as I can really see now how my lines on paper transfer to cloth, how much space is created between rows of charted squares etc so that next time I should be able to make this a precise reproduction rather than an “adaptation”.

I knew from the get-go that this was not going to be faithful to the original. I couldn’t get the spacing of the outer “spokes” right, for example, but there was really only one way to figure it out…go ahead and weave it. Certain parts came out quite well while others obviously didn’t. Without the comparison I think it stands up as a nice design.

I read in one of Mary M Atwater’s articles in Handcrafter (a free download from the arizona archives..thanks Jeannine and Helena) that large areas of solid color should be avoided (much the same as in warp faced double weave) as, in these areas you end up with two separate layers that can tend to bulge and billow.

For that reason I wove the three small crosses at the bottom of my replica  piece to help fill in that negative space and bond the layers. I omitted them from the top corners so I could compare and found that the crosses made very little difference. I think the design looks less cluttered without the crosses and that it is nice to have areas of solid color if you can get away with it.

I then returned to the Xenakis article in the Prairie Wool Companion on which I had been working last week and wove the traditional Scandinavian design, for which a chart is provided, at left…

How amazing is the close resemblance it bears to one of the motifs on this other Huichol piece that I photographed in the museum in DC.

And then I was tidying up my bookshelf and was about to shift my copy of Verla Birrell’s The Textile Arts to another spot when right there on the cover I see a tiny image of a  loom and textile with a flower motif that even more closely resembles the Scandinavian one.

I guessed that it was a Huichol piece but it turned out to be a double weave piece of the Cora Indian culture of Mexico. So much to learn!!

Speaking of books, I managed to find a copy of Atwater’s The Finnweave and the Mexican Double Weave at Amazon. The search for this dates back to when I first started playing with finnweave back in 2008. Can’t wait to read it!

I had been thinking while trying to chart the Huichol piece that perhaps I had made an incorrect assumption and that the Huichol pieces are not, in fact, woven in finnweave technique at all. This world of balanced double weave pick up is very new to me and so the article in the latest Handwoven (Jan/Feb 2011) by Doramay Keasbey couldn’t have been better timed.

Many thanks to Caroline for pointing this article out to me. Doramay Keasbey writes about five balanced double weave pick up variations which she has woven in bookmarks showing how both faces of one design look when woven in each of the five techniques. What a nifty article! It has helped me, who has so little experience in this, to see what elements can identify a piece as having been done in finnweave.

It also helped that Hans Christenssen, who has authored a book on finnweave, confirmed the technique used for the Huichol pieces.

He also gave me some background on the piece I showed last week that was woven by Weavolution member Manicgirl. Manicgirl has disappeared from Weavolution for the time being and I hope she comes back soon to find out why her ears are burning so!

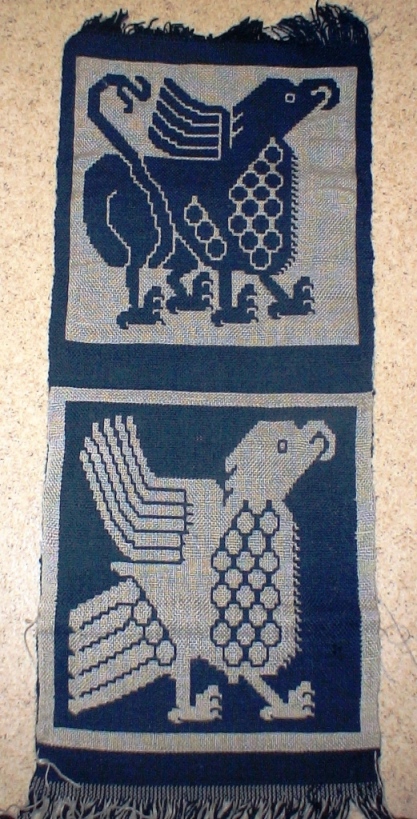
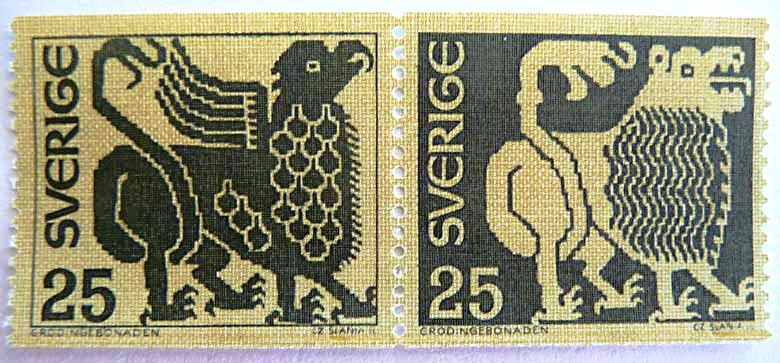
On top of giving me this link to the original piece in a Stockholm museum (click on the image in that link to see a much larger view), he told me that it is a 15th century piece from Grodinge, Sweden that has been analysed and reproduced in part by Ulla Feltzing, THE expert in finnweave in Sweden..

Two motifs from reproductions that Ms Feltzing made were the subjects for these two beautiful Swedish postage stamps and instructions for weaving some of the motifs appeared in an issue of Vavmagasinet.

Now you see how I have wandered off again. This all started with a desire to reproduce some textile fragments of pre-columbian Peru and now here I am in 15th century Sweden.

Back to Bolivia to my studio a.k.a my bedroom floor. I have decided to weave up a set of squares with some finnweave designs I have been collecting here and there hopefully with something to represent each of the cultures in which I have found a traditional use of this technique. I want to do something along the lines of the warp faced double weave mug rugs I made some time ago. (pattern charts here)

These were made in a 12wpi cotton and are super thick. In order to get the detail I want in the finnweave designs I will need to use finer cotton and make larger squares, around 5 1/2 – 6″ and so I will call these “table toppers”…something on which to pose a small pot plant or a bowl of candy or whatever. And if you are thinking that this sounds like just an excuse to weave something you are right. I don’t actually have a clear table on which to put these!

I have prepared the warp which may end up being a sampler…


And now to chart the designs and make adjustments to my first reproduction attempt.

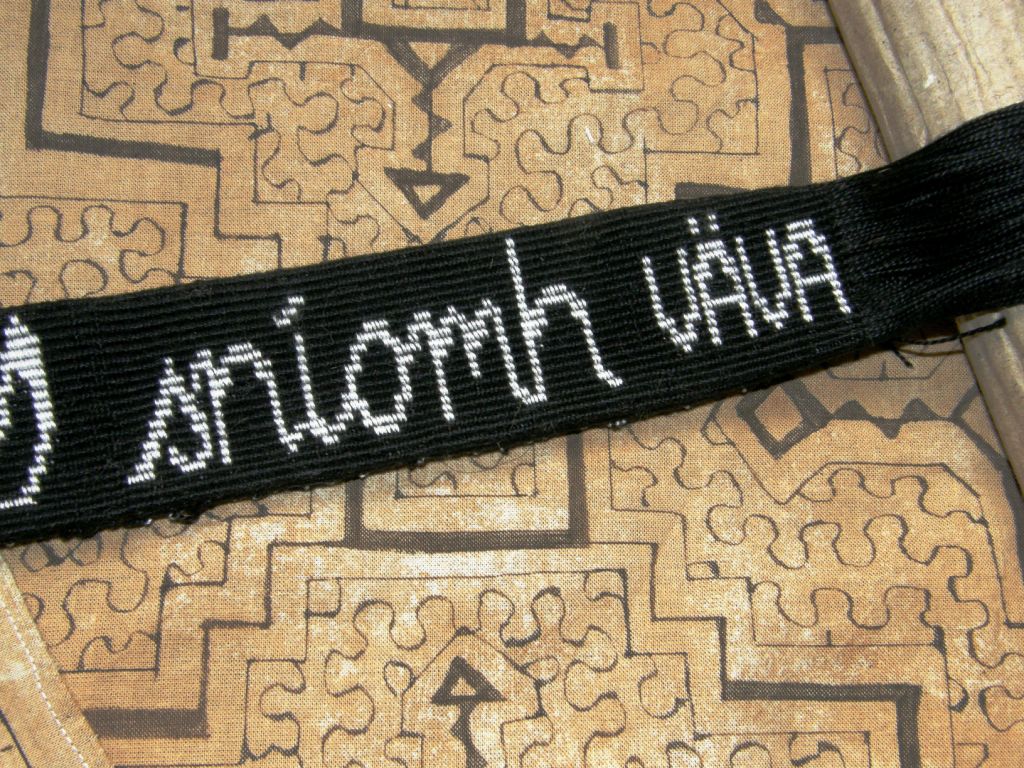
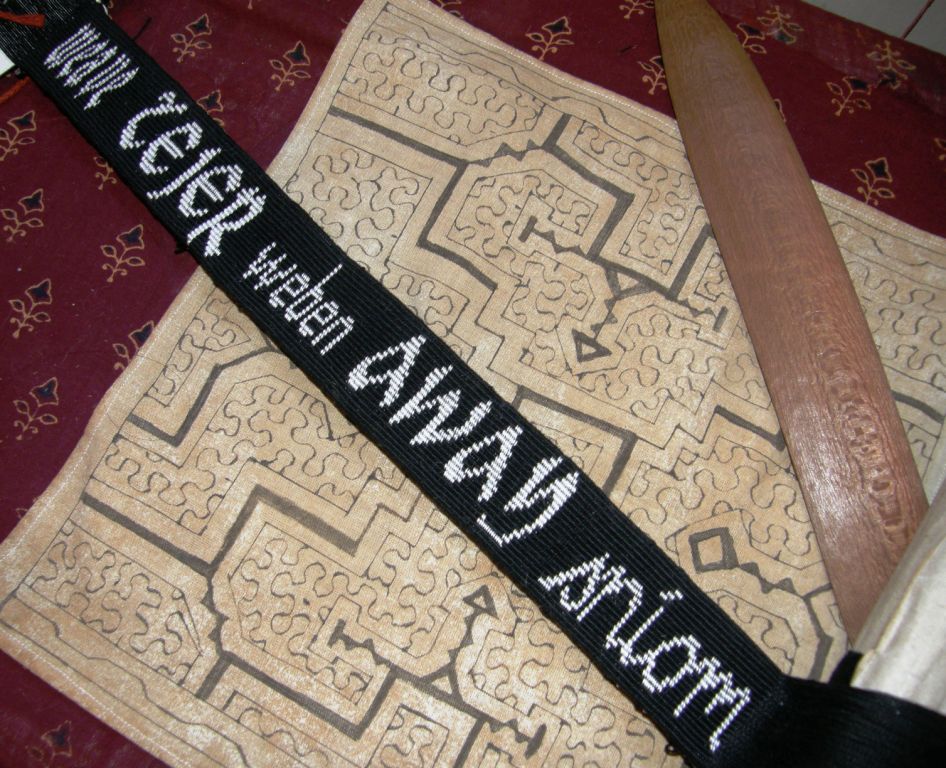
At left you will see that I finished twining the Gaelic word for “weave” on my bag strap and have added the Swedish one. Next stop…Nigeria.

I didn’t get a start on the Margarita braid for the zipper pull – maybe this week.

A Weave-Along update….

A small group of members in the Backstrap Weaving Group on Ravelry have been participating in a weave-along. I suspect many more are doing a watch-along…

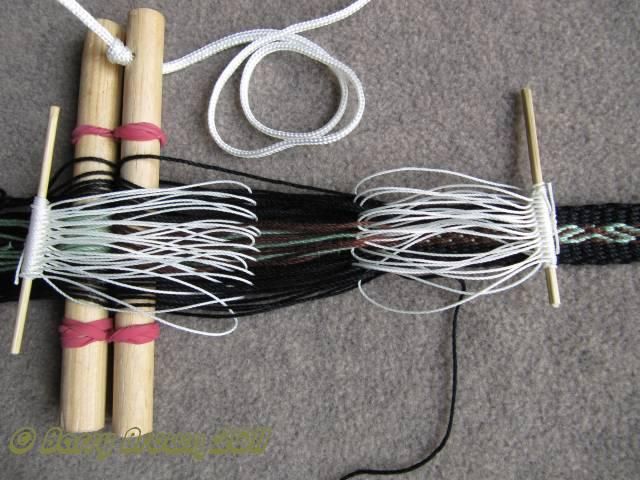
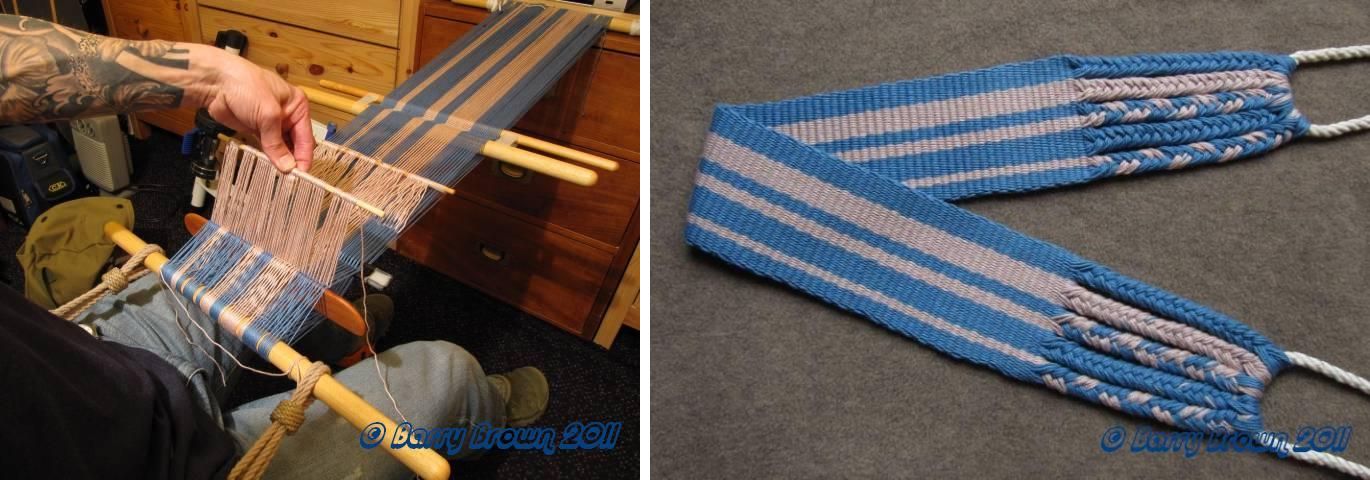
Something I learned this week from weave-along participant, Barry: there is such a thing as bonded nylon and apparently it makes great heddle string. All the weavers I saw in Guatemala use nylon for their heddle string. None of the weavers I have encountered here do. They use their warp yarn for heddles and I do too. I hate nylon…it’s slips around on the heddle stick and won’t hold knots – horrid stuff. But, apparently this bonded variety is very cool.

This is the picture from the Memphis Net and Twine Co web page. Barry has been using size#6 which he says works well with the #3 mercerized crochet cotton thread with which he is weaving. Using nylon cuts down on possible abrasion of the heddle string on the warp which can cause pilling. Excessive pilling will be a problem as warps will eventually start sticking together. Those who have been backstrap weaving for a long time will have learned to open their heddle shed with the minimum of abrasion but for those just starting out, this pilling can be a very annoying problem. Apparently this bonded nylon holds knots well…yay! Below you can see Barry’s loom with bonded nylon heddles nicely gripping the heddle stick.

And here is his backstrap with finished five-strand braid (link provided by Barry) and first pebble weave project following instructions in my book…

Linda sent me these pictures of a supplementary weft patterned band she is making which has been inspired by a design on a Guatemalan huipil.

She built herself a mini warping board and, wise woman, is making short pieces suitable for keyfobs and bookmarks while she learns the techniques.

Last I heard, the blizzard has kept her at home and she is trying horizontal stripes and four-stake warping.

Marsha wove her dog, Wiggles, into her simple warp float band. She was inspired by a dog she found charted in one of Mary M Atwater’s books.

I have seen that dog and Marsha’s is way cuter.

Helena in Brazil wove this piece and showed it on Weavolution. It is destined to be a waist pouch for her sister. The center pebble weave design is charted in my book. Wanderingskopos (Reetta from Finland) is using the practice patterns that I provide in the one-weft double weave tutorial to make her first double weave band.

#####################################

There is an online workshop on the traditional Sami band weaving of Scandinavia being run in the Yahoo Braids_ and_ Bands group this month of February. Sue Foulkes is presenting the workshop and, if you follow the second link, you can click on the image in the top right hand corner and see some examples of Sami bands. Although they are warp faced, they are traditionally woven with a small rigid heddle on a backstrap loom.

The files will remain in the group’s archives if you are unable to participate in the workshop this month – always more fun to do the workshop though. Last November Sue presented a workshop on Baltic Bands, also done with a rigid heddle, in the UK Online Guild of Spinners, Weavers and Dyers. You can see some images of the bands members produced on their public web page.

Kimberly Hamill, a wonderful backstrap weaver whom I met at Convergence last year, is giving a backstrap weaving class March 11-13 at Weaving Southwest in Taos. You can see one of her backstrap woven artworks at left which has been accented with a little embroidery.

##############################

Finishing off here and going back to the loom…. I would like to give a big thanks once again for all those behind the scenes, too numerous to name, for all the wonderful “care packages”.


Backstrap Weaving – In the Mood for Finnweave

I am back into fabulous Finnweave after a very long break.

I was trying to think back to when this Finnweave adventure all started and I believe it was in the early part of 2008. I wanted to try and reproduce the structure and motifs on some pre columbian textile fragments that I have which were woven in what Suzanne Baizerman calls balanced double cloth.

Here are some of the fragments that I have collected….

All these pieces were attached to Chancay doll replicas like the one you see above that I have bought in various markets here in South America. I wrote a lot more about these and other textile fragments in this previous blog post.

In  Double Woven Treasures from Old Peru (by Adele Cahlander with Suzanne Baizerman) instructions are given for weaving this technique on a treadle loom rather than on a backstrap loom. I have had this book for over fifteen years and had always skimmed those instructions without paying much attention because I had never used or even touched a treadle loom and I assumed I would never be able to understand them. The notation and charts meant nothing to me. However, something made me go back in 2008 to open the book again at that page and take another look. Nope, nothing new had appeared… it all still looked like a mind numbing maze…so frustrating!

Who else did I know who knew about backstrap weaving and these kinds of structures who might have a clue? I had just made contact with Carol Ventura online through WARP. I had her book on Jacaltenango hair sashes and so I wrote to her. She hadn’t tried this particular structure herself, but she suggested I join a thing called Ravelry where there was a backstrap weaving group where I could ask. Ravelry? What in the world was that?!

I also wrote to Ann Rowe as I had met her on a trip to the Textile Museum in DC and she sent me a picture of a Huichol loom saying that I may be able to figure it out from that. The Huichol people of Mexico still weave this technique. It is no longer woven in Peru.

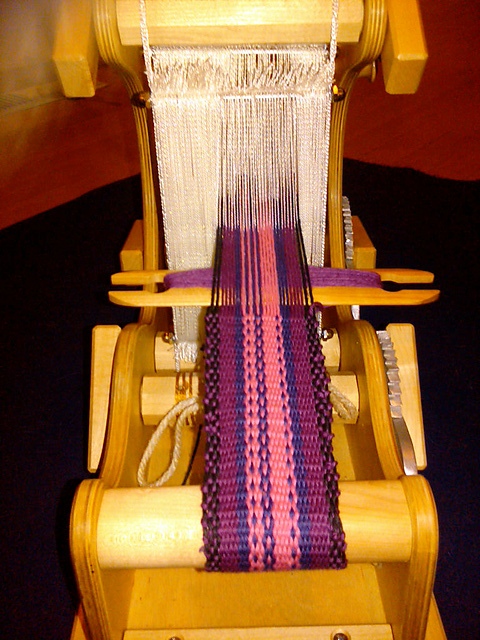
I don’t know what it was in the end that suddenly turned the light bulb on but the next time I went to the book…click!…and I was able to weave the above band. I have to say that the technique is not that difficult. You need to use three sets of string heddles and a shed rod which holds the warps for the fourth shed. That is not as bad as it sounds as it is a balanced weave which means that the heddles can be raised easily and cleanly. What I was having difficulty wrapping my head around was the charting system which takes some getting used to.

It is a technique for those who love pick-up. It uses two different colored wefts and has more steps than warp faced double weave…two weft passes for each layer… but I love the result!

So what happened? Where are all the lovely pre-columbian textile replicas that I had wanted to weave?

“Ravelry” is what happened! But even more importantly, I joined Weavolution, where I started my own backstrap weaving group, and was hit with a tsunami of weaving ideas!

Thanks to Ann Rowe I have two goals now for this structure… to reproduce the motifs on my fragments and to weave traditional Huichol patterns. Actually, the picture that Ann Rowe sent me was not my first encounter with Huichol weaving. It is a funny coincidence that back in 2007 while visiting the National Museum of the North American Indian in DC my eye was caught by a beautiful textile piece. I had no idea what the structure was and did not retain what the label had said but I roughly adapted the motif to pebble weave and used it in a hanging.

And again here…

Well, you probably have guessed that I now know that that is a Huichol weaving. That will be number one on my list of reproductions.

I was feeling uncomfortable by the end of 2008 about this abandoned project and so made it a resolution for 2009 and there it sat for another year as I wandered off on all sorts of weaving paths. Now I have returned but not with the pressure of a resolution weighing on me. I am simply in the mood for Finnweave! What put me there?….THIS!….

Last week Ane Lisbet posted the above image on Weavolution of a wall hanging she made in Finnweave using a floor loom. How beautiful!

And if that wasn’t enough I was inspired to return to a discussion we had had on Weavolution last year about Finnweave and was able to get reacquainted with this amazing piece at left woven by Manicgirl on a floor loom.

Hans Christensson also participated in that discussion and was very helpful. At that time he was taking part in a project to find new designs, usage and materials for Finnweave. The project concluded with an exhibition at the Museum of Bohuslan in Sweden and now I see that he has written a book on the future of Finnweave with his new computerized way of designing and interpreting patterns. He has plans to translate it to English.

I will have to be patient waiting for the translation. So, out came the instructions from Double Woven Treasures again, the pages now covered with my scribbled notes and, you know what?, it looked like a mind numbing maze all over again only messier this time with all my notes!

Back to square one. Well, not really. I warped up to make the same design as last time and after one repeat, remembered, and  felt confident enough to move onto something else.

I wove it this time in a heavier yarn and it should be much wider. You can see that the brown areas are more warp predominant than balanced but it helped to refresh my memory and got cut off the loom very quickly.

Thanks to some kind Weavolution buddies I got an article from the Prairie Wool Companion April 1982 issue which introduced me to the wonderful world of weaver and author A. David Xenakis. His article is not a project, not a lesson, he calls it an “Etude”. I love this! Only the other day in one of the forums someone compared sampling to the scales one has to practice when learning the piano and so we can go back to the music lesson metaphor now. I love Mr Xenakis’s writing style…so very proper! He amuses me by saying please when he gives his instructions…please wind the warp…please wind two stick shuttles.

He shows the same charting system as that used by the authors of Double Woven Treasures from Old Peru. Thank goodness, I didn’t feel like learning another! After giving detailed instructions for one half of the motif, we are given this piece of advice…

Take a deep breath, stand up, pace around a bit and relax. Nothing in finnweave will ever be as hard as this first small woven figure. New things always take a bit, do they not? But if you’ll persevere, I truly believe you’ll be rewarded with a sense of accomplishment second to none you’ve ever derived from your weaving.

I am sure the folks in the backstrap weave-along on Ravelry will smile if they read that! The result…

He then gives pattern charts for some lovely traditional Scandinavian designs. So, I am doing my warm-up, my scales and my etudes for the final goal…finding myself comfortable enough with the charting system to be able to chart directly from a textile and reproduce the motifs. I need to experiment a bit with how I turn the two colored wefts at the edges. As always, one edge is neater than the other.

It wasn’t long ago that I knew of only one pick-up technique that enabled one to produce a motif on a solid color background, that is, a background without pebbles, speckles or horizontal bars and with no long floats on the back. Now I know three…

I also finished the warp faced double weave cell phone pouch with the Guarani designs…

And managed to twine most of another word…

There’s an “h” yet to be twined and that will be the Gaelic word for “weave”.  I received the Navajo word from DY and  the Slovak one from Alexis. This is the strap for my woven loom bag. I am planning the zipper pull. As I have a woven bag and a twined strap I am probably going to braid the zip pull…maybe I’ll do the Margarita braid.

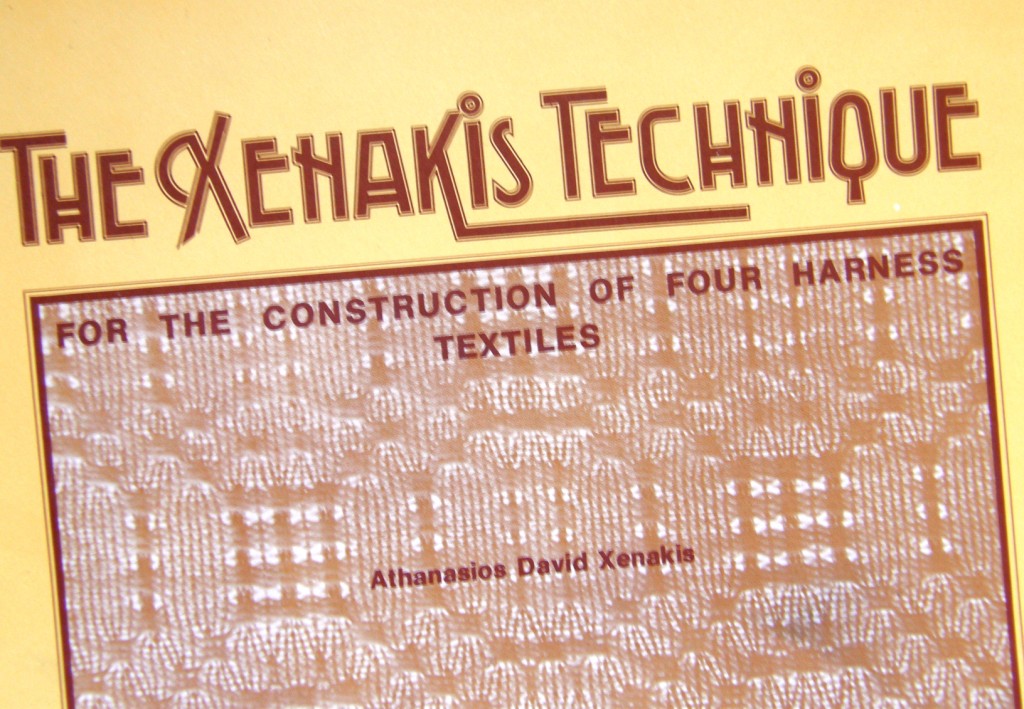
I remembered after finishing Xenakis’s Etude that, on a whim, I had bought his book on weaving four harness textiles on a rigid heddle loom a long time ago. I had done nothing more than flip through it and admire the Finnweave cat on one of the first pages. Here, once more is the very proper writing style. I flipped through it again the other day and his amusing description of string heddles caught my eye. I am a big fan of string heddles. He is obviously not. He says…

“I find the sight of this stringy paraphenalia unappetizing.”

But he goes on to say that if you don’t have a third rigid heddle, you should use a string heddle “without hesitation and appetizing be damned.”

Cracks me up!

So, what’s been happening in the backstrap weave-along this week?

Warping arrangements have been designed and built…

This one was designed by Jennifer and built by her husband.

New places to tie up looms have been found and wool has been prepared…

Phil has moved to his sunny kitchen to weave and has spun a good amount of wool for his next project. He has placed a snake motif on his woven band using a supplementary weft.

New structures have been learned to make thicker, sturdier fabric and a backstrap has been made…

That’s Barry. He finished his backstrap with a five-strand braid.

Pieces were started and finished…

Marsha has started her widest piece ever on her Wave loom. Linda, who is not in the weave-along, has been sharing pictures of her projects with me by email (thanks Linda). She has finished her backstrap.

Jennifer also made a backstrap using a pebble weave motif from The Art of Bolivian Highland Weaving.

Jenny has been very much inspired by all the beautiful things that Marsha has been producing on her Mini Wave loom so, she ordered one and has just joined us to make her first warp faced project.


Another week of progress with encouragement from all when things went wrong…the reminder that mistakes are learning opportunities…the fun of seeing Anja’s “mistake” turn into a new pretty pattern.

I will leave you here with Mr Xenakis’s take on mistakes…(which comes in the middle of an explanation of tie-ups and sequences)…

Probably nothing is ever truly an error.  …….it is worthwhile to note that an error – in the words of America’s premier knitter-designer Elizabeth Zimmerman – when repeated, becomes a pattern. Which, were we of a philosophical turn of mind, might be the key to whole new vistas of thought. Think about it: at the very least, the regular repetition of an error indicates persistence.

Your pardon, a freely associative mind hath led us astray.

I think that I will have to drag out my rigid heddle loom just so I can enjoy this author more!


Backstrap Weaving-balanced weave, double weave and balanced double weave

BALANCED WEAVE, DOUBLE WEAVE AND BALANCED DOUBLE WEAVE….

I made some New Year weaving resolutions. What about you? One is to weave at least one balanced weave on my backstrap loom per month. So I got one done in January which I’ll show you later and I am planning February’s project. You will see that I am all about process rather than product for this project as all I know is that I want to weave a shadow weave piece but I have no idea what I want the piece to be. I am counting on an idea developing as I go through my yarn bags.

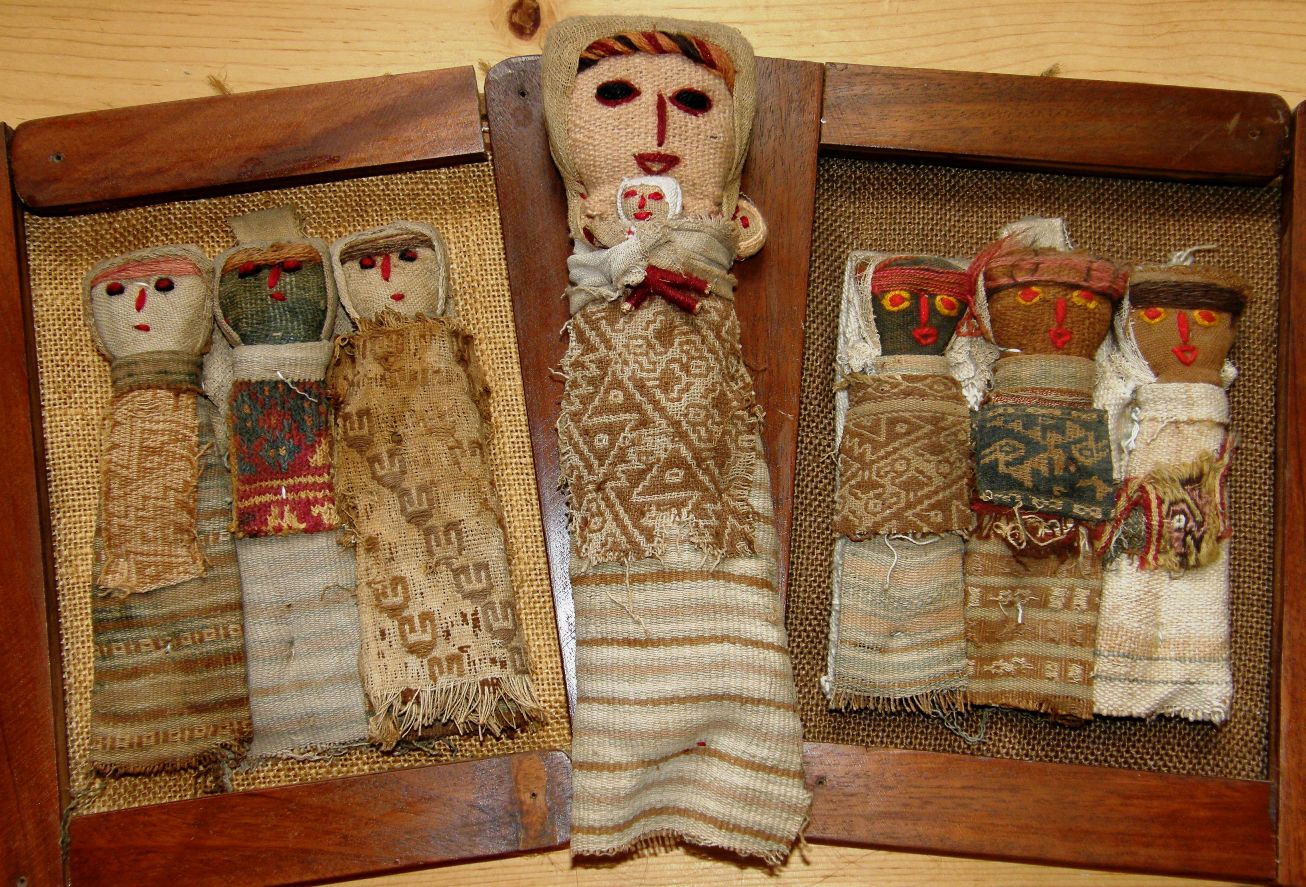
Another resolution is to weave reproductions of the designs on some pre Columbian textile fragments that I have gathered over the years. How did I get hold of these tiny scraps and fragments? Well, some industrious Peruvian artisans have been recreating Chancay dolls and dressing them in bits and pieces of old textiles.

Sets of Chancay doll reproductions

The Chancay culture existed  on the Peruvian central coast from around AD 1000-1476. It is believed to have been conquered and incorporated into the Inca Empire in the mid to late 13th Century. The people of this culture were prolific weavers and, as the central coast of Peru is a particuarly dry area, many of their textiles have survived remarkably well preserved  and are kept in museums around the world.

I was dubious for a long time about the authenticity of the textile pieces. However, it just didn’t make sense that someone would weave structures, some of which are no longer woven in Peru, take all the trouble to stress the fabric in order to make it look old, tear it up, sew the pieces onto dolls and then sell them for very little in the street market.

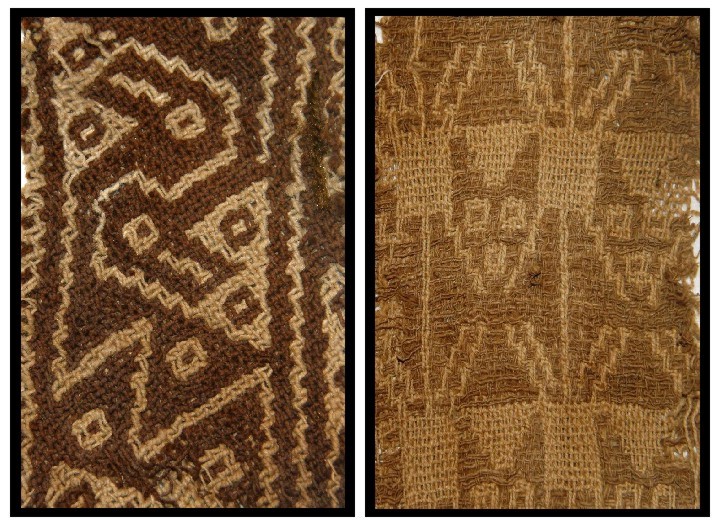
A close look at a couple of the fragments with bird and bat motifs

I have yet to find a good image of an authentic Chancay doll to make a comparison but apparently the originals did not have embroidered faces. Rather, the facial features were woven into a piece of cloth which was wrapped around plant fiber to form the doll’s head. As with most things, I imagine these dolls started out as quite faithful reproductions of the originals and that the quality of the work has since deteriorated.

Two more pieces with bird and snake motifs

The original Chancay dolls have been  found in tombs and were possibly funerary offerings. Recently I found an article online which, not only confirms the authenticity of the ancient textile fragments used to dress and decorate the dolls, but also gives information abut the Chancay culture and speculates about the dolls’ purpose. It just gives me chills looking at and touching these pieces-something the museums won’t let you do! and wondering about the weavers, their looms and their lives.

Snake motif in pebble weave

I have been weaving the designs I have seen in photos of museum pieces for years. The two pieces above  center and right were made by me in the 90s. Imagine the thrill when I found a fragment, on the left, with a very similar snake design some years later.

A piece in slit tapestry that I copied on my backstrap loom

I copied the slit tapestry piece at left on my backstrap loom without the slits and made it into a small sewing kit purse with a zip on three sides.

This little purse goes with me on all my weaving safaris. Some people tell me that the design looks like figures from a 1980’s video game!

This was a very slow and tedious weave using split embroidery floss for the weft. I was quite happy to see the end of this one!!

Bird motif in pebble weave

Again, I had woven this little 4-color bird motif many years before finding the little fragment almost completely in tatters on a doll at the Otavalo market. I had to work hard to hide my excitement while cooly bargaining with the vendor-bargaining at the Otavalo market is expected. Although my bird is a little different and was copied from a book, it is still thrilling to see a  similar original piece.

According to the aforementioned article, birds were highly esteemed in these cultures “because of their ability to cross between earth and sky” as well as due to ” their association with water…..and source of guano for fertilizing crops”.

Pre Columbian bird motifs

I love these birds and they find their way into a lot of my weavings.

Balanced double weave bird figures

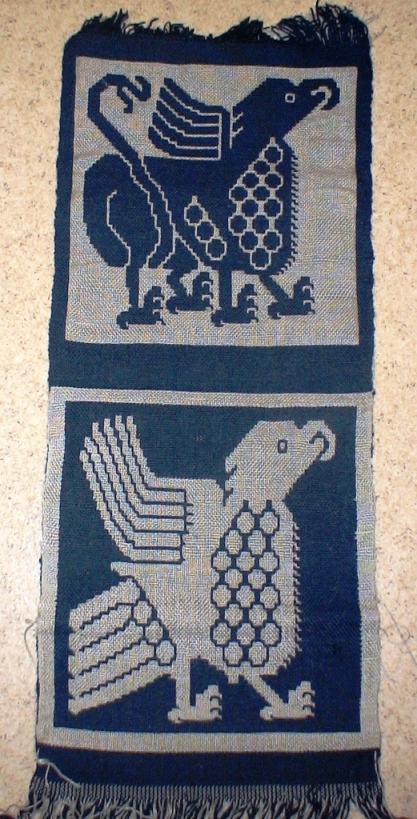
Which brings me finally to balanced double weave and my weaving resolution for the year.  This structure is no longer woven here so there is no one around to teach it to me. I found out that the Huichol people in Mexico weave it and recently got Chloe Sayer’s Mexican Textile Techniques which has pictures of some examples. I had dismissed the instructions by Suzanne Baizerman in Double Woven Treasures of Old Peru as they were written for the treadle loom but recently returned to them to find, to my delight, that I understood them. So I set to and wove the above band using the pattern chart in the book which just happens to be the very same bird motif that I have on a doll fragment.  I used four sets of heddles for this weave and kept the cross sticks in to help spread the warps. This was just a narrow band.  Now I hope to make a large wall hanging incorporating bits and pieces from several of the fragments.

Something that is on the loom at the moment….supplementary weft patterning. You can see the tiny fragment from which I am copying the design on the right. This was another exciting find as, at least here in Bolivia, I have not seen this technique used for anything other than hat bands and on one old chuspa in a book. I would love to know the original use for this piece.

You can find the chart for this design here. I have also put the chart for the Abba Yohanni double weave design from last week’s post here.

This is just a small selection of my fragments. I am sure that more will show up in future blog posts as I strive to reproduce them. There is one technique that I as yet have not been able to identify.

Now what about those balanced weaves? I am still very much into my recently gifted rigid heddles and have been using them to make samples and a few useful pieces.

"Strawberries and cream" pinwheel mats

The rigid heddles arrived while I was in the middle of this “strawberries and cream” pinwheel piece. Rather than struggle on with my multiple stick spacers, I added the rigid heddle to the backstrap loom and finished it in no time.

Last month we had a WAL at Weavolution weaving rosepath motifs so I used my rigid heddle as a spacer and beater and used four sets of string heddles for the motifs.

Spring garden table runner
A small log cabin sample

Sometimes I just mess around and make samples trying to discover what is comfortably possible on my backstrap loom. The above log cabin piece was the first balanced weave I tried before my rigid heddles arrived. I thought the squareness of the design would look good as a notebook cover. I’ll take this little notebook along for my next weaving classes wherever that may be. It is nice to find a use for even the smallest of samples. You can see my test piece for the llama bookmark has been padded with foam and made into a pin cushion saddle cloth for the ceramic llama!

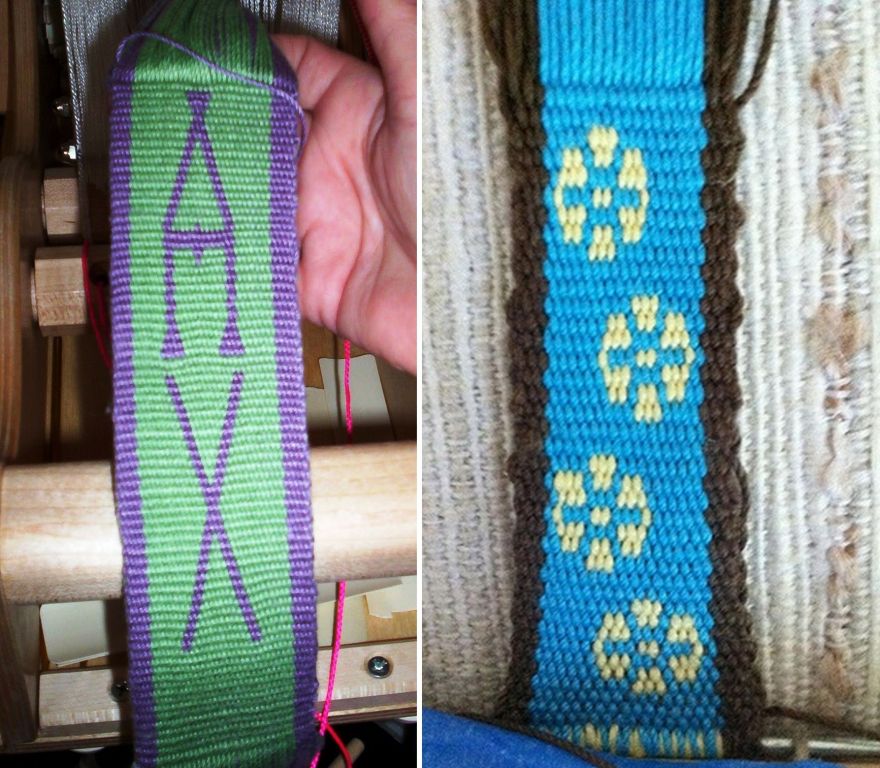
As the title of this post suggests, there is also some warp faced double weave to talk about. The last of my weaving resolutions is to design some nice letters to weave in double weave. I have been very much inspired by Linda Hendrickson’s beautiful book Please Weave Me a Message where she has designed alphabets to weave with tablets. You may have listened to Syne Mitchell’s recent interview with her at WeaveZine. I hope to come up with something like that for double weave. My stick alphabet above looks very humble next to her beauties.

Lastly, I would like to show off some work by one of my blog readers. Ann Littlewood wove a supplementary weft patterned  band using embroidery floss for her supplementary weft. It is a great way to “paint” in designs and play with colors. It absolutely makes my day when I hear from people who have  used my instructions. 🙂

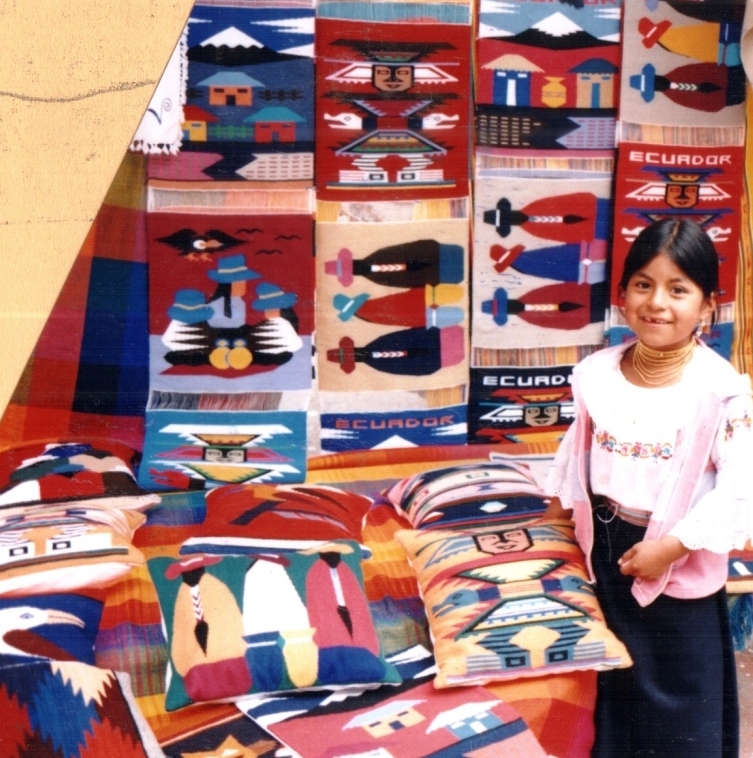
I will leave you with a cheery little Otalavalena, below, at her brightly colored market stall at the enormous Saturday market. Otavalo is a town in Ecuador which has a lively and popular craft market every Saturday and is where I bought some of my dolls. Goods from near and far are sold there such as braids and beads from Peru, molas from Panama and Colombia and belts from Bolivia and Guatemala as well as an enormous variety of weavings and crafts from all over Ecuador. While the market largely caters to tourists, locals also shop there for clothes, footwear and beads.

Thank you for the nice comments last week. I am glad you found the videos useful. One of  the visitors from Argentina, who has a limited understanding of English, had one of those “aha!” moments when she watched the double weave video. I hope to be able to show you one of her weavings soon 🙂

A girl from Otalvalo in typical dress-embroidered blouse, "anku" secured by a woven belt, beads, woven hair wrap and alpargatas