Backstrap Weaving – Time

finished baackstrap woven wall hangingsA question I am very often asked when I show my woven work is….. “How long did it take to weave that?”

I am trying very hard to think back to a time before I started weaving to see if perhaps I would have asked this question myself to a craftsperson and what might have motivated me to do so. Would it be because I was thinking of trying to make the object myself and needed to see if the time involved was worth my effort? Or perhaps I would want to know if the asking price for the object reflected the amount of time that had gone into creating it.

In any case, I find it a very difficult question to answer. How long does it take?…As long as it takes! I honestly don’t keep track. I don’t sell my work and so I need not consider time in order to fairly price an item. I am not weaving to a deadline. There is no exhibit for which the work has to be completed. I would probably have to go back to my blog posts if I wanted to give an accurate answer in terms of the number of weeks on which I worked on a project. However, I would be at a complete loss when it came to the total number of hours.

I met a craftsperson last year and witnessed his response to the question…

“How long did it take to make that?”

His response:

A    l  i  f  e  t  i  m  e

I can only imagine that he very rightly considers that a lifetime of his accumulated knowledge, experience, skill and inspiration went into this and every piece that he has completed. I love his response.

So, I am willing to pour as much time and effort as is required into every piece I weave. What I don’t like, is making silly mistakes and wasting time. Okay, I will admit that a mistake is always a learning experience and valuable for that reason but sometimes you just turn around and do the same old thing again!

Like… breaking my coil rod on my latest piece. I did it once…I learned. I did it a second time…I cursed…but then I learned some more.

purple sacrf project backstrap loom

You can see the coil rod in the above picture. The stick is rather thin but it looks about the same size as coil rods that I have seen in use by weavers that I have observed.  In the above picture the coil rod is a fair distance from the shed rod and cross stick. As weaving progresses and the cloth gets rolled under the loom bar, the shed rod and cross sticks just naturally work their way up  the loom so that they are always at a comfortable distance from my body. The string heddles also follow along. Eventually, the shed rod and cross stick will have wriggled their way all the way up to the position of the coil rod and further progress will be blocked unless the coil rod is also moved.

coil rod and other tools

Above you can see how the distance between the cross and the coil rod is closing.
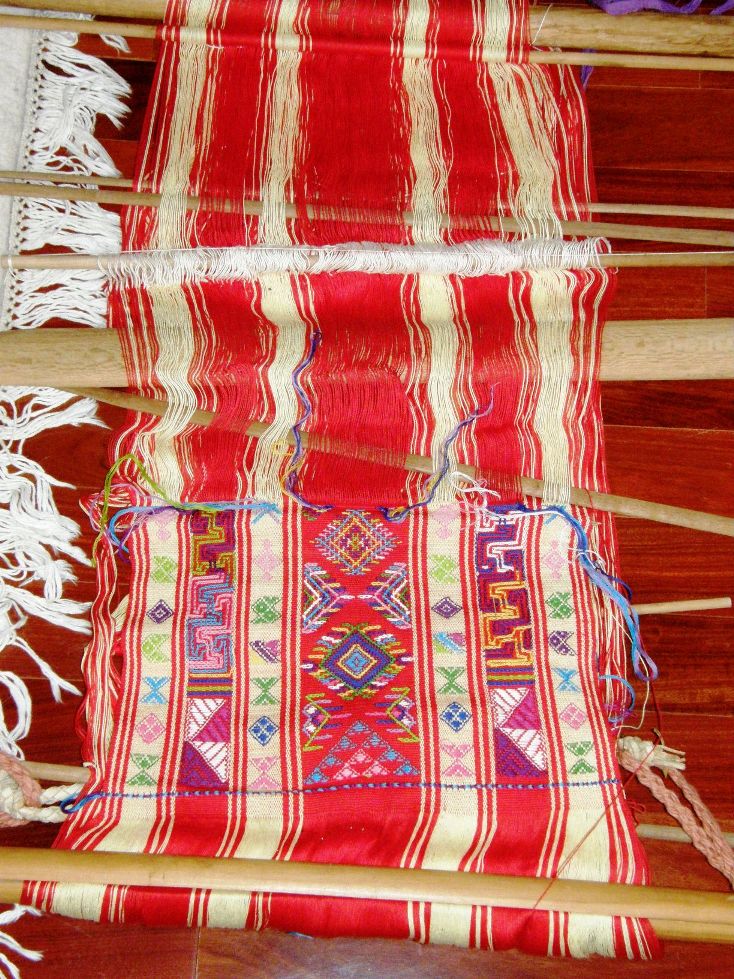
backstrap loom BhutanThe problem is that it is a heck of a job trying to move the coil rod! I moved it a couple of times sucessfully. Saying that it “inched” its way up the warp is being extremely generous.I could only move it the tiniest fraction of an inch at a time.

As far as I am concerned, the main purpose of the coil rod is to clamp the warps in place and maintain consistent warp tension between it and the weaver. This very characteristic of the coil rod is what makes it so insanely difficult to move! I wouldn’t want to be able to just smoothly and easily roll it up and down the warp. Its very purpose would be defeated if that were so.

It was the third time that I came to move the rod that I got over-confident and forced it too much. Then came a sound that you don’t want to hear when you are weaving…a sharp “snap!” The warps that were so tightly coiled and bunched on the rod leaped to freedom and went cascading into space. I didn’t stop to take pictures.

Fortunately, the stick broke about an inch from one end of the warps and, as the stick is much wider than the weaving, I was able to carefully pick up all the fallen loops and get them back on the now shorter stick. Hmmm….should I replace this with a heavier stick? No, it will be okay. I learned my lesson. I will just be more gentle from now on.

Yeah, right….A day after….”snap!” And this time right in the middle. You knew that was coming, didn’t you? The more I tried to retrieve the coils on one side, the more the coils on the other side would tumble off.

Out came the stick. I am still not quite sure where it landed when I flung it.

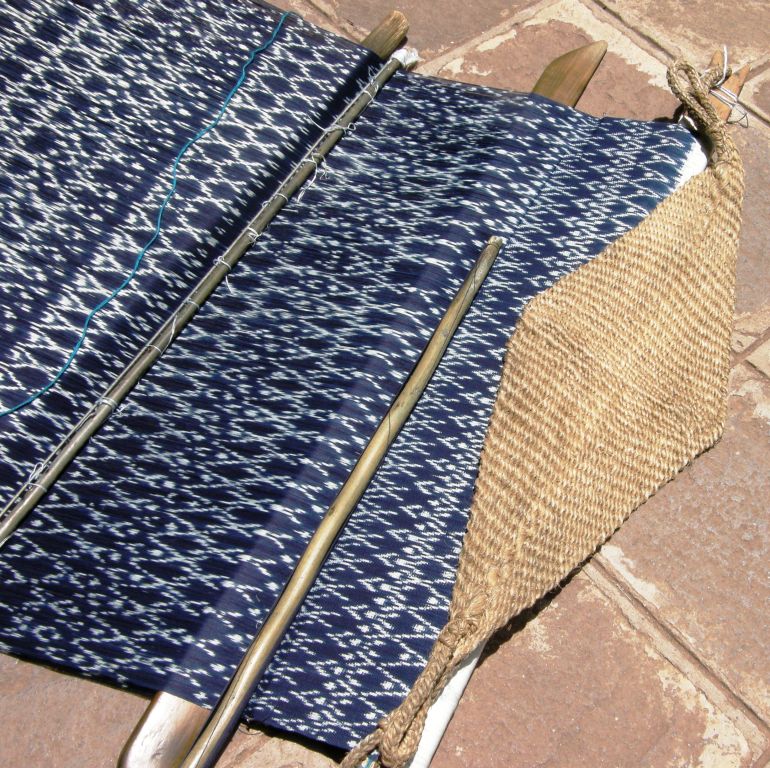
Ikat patterned shawl weaver of Ecudor setting up his backstrap loom. Picture courtesy of Agaath Theiken.
Ikat patterned shawl weaver of Ecuador setting up his backstrap loom. Picture courtesy of Agaath Theiken.

Actually, I did learn things as a result of the second accident. I wove on without the coil rod and found that I much preferred having one in the warps. After all, this was actually supposed to be part of the coil rod experiment.  Without the coil rod in place I found that I was having to hitch up certain loose warps with every single weft pass and I didn’t think that was good use of my time.

From there I went on to learn how to insert the coil rod when the warp is already off the warping stakes. Dennis Penley reports that this is how the weavers of the ikat paños in Ecuador put the rod in place.

So, I picked up each and every one of the 772 ends, twisted them one by one (rather than in groups of ten as the weavers in Ecuador do) and placed them on the new thicker rod. How long did that take? I don’t know! Don’t ask.

Maybe this is something that we don’t consider when we ask the craftsperson how long it took to complete the project. Do we want them to include the time used to fix “oopsies”? After all, the fixing of the oopsies adds to that lifetime of experience about which my craftsman friend was speaking.

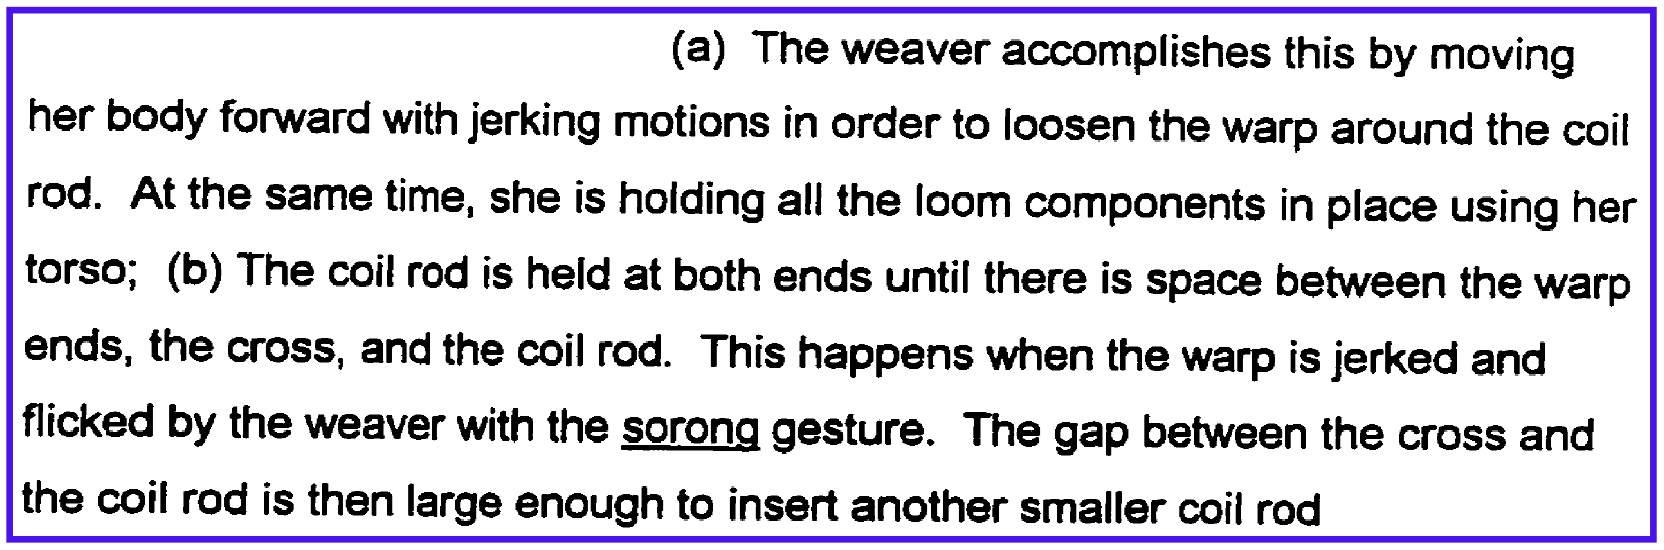
Obviously there is a technique for moving the coil rod that I have yet to learn. I turned to Maria Christou’s paper on the Sa’dan Toraja weavers of To’barana’. She describes how the coil rod is loosened so that it can be replaced with a thinner stick as weaving progresses and the space within which to open the sheds becomes increasingly smaller. I imagine that the movements she describes are the same as those that are used to move the rod along the warp.

She writes…
text

Christou explains earlier in the paper that the sorong gesture is the act of leaning forward to release tension on the warp and is used when the weaver wishes to open the heddle shed. I am wondering if the word sorong simply translates to “lean forward” or whether it is a word specific to backstrap weaving that describes the entire motion and how it relates to the operation of the loom.

There is still warp left to weave on my scarf project and so I will try what Christou describes the next time I need to move the rod. I am not sure I quite get it, but I will experiment.

While the amount of time needed to weave a piece is not important to me, I am always interested in learning about techniques that weavers have developed to help make the whole process more efficient.

For example, the use of backstrap weavers in San Ignacio de Loyola of multiple sets of string heddles so that patterned weaving can be carried out without having to do any pick-up. Of course the pattern threads need to be picked up once, but only once, before they can be placed within the heddles.

First Araceli has to make the twenty-four sets of heddles on this fresh warp. The pattern has alreday been picked up and saved on sticks.
Araceli is making the twenty-four sets of heddles on this fresh warp. The pattern has already been picked up and saved on sticks.

I did this myself once (with only four sets of heddles) when I was making a pebble weave guitar strap. I was on a deadline for that project as it was a birthday gift and so, speed was important.
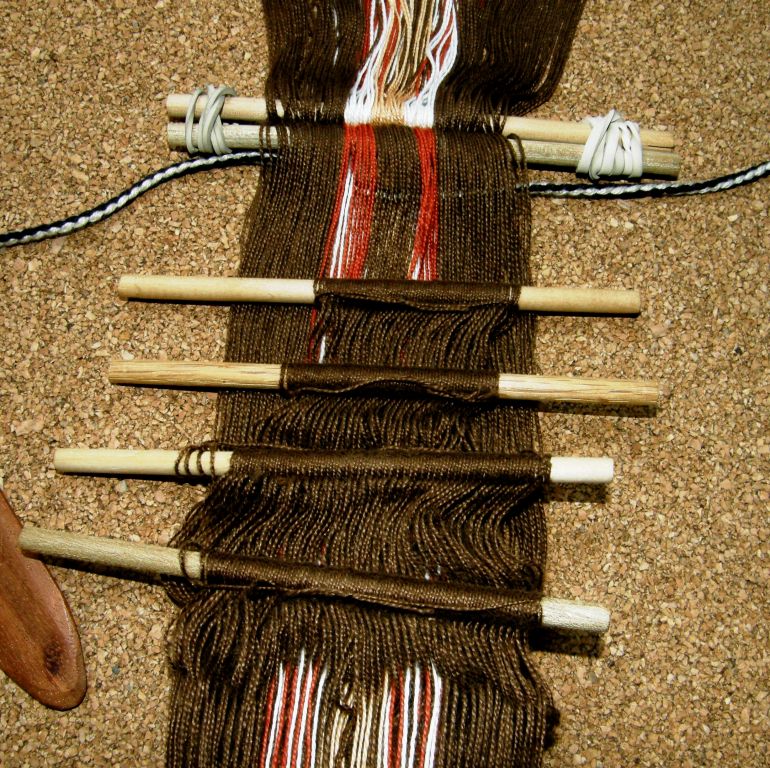
four sets of string heddles

In Manabí province in coastal Ecuador, weavers on vertical looms also use multiple sets of string heddles to program the pattern so weaving can proceed without having to do pick-up. This means that that a weaving elder who knows the pattern can set up the loom while younger, more able-bodied weavers, who haven’t thoroughly learned the pattern, can carry out the more strenuous task of weaving the cloth.

coastal Ecuador use of multple string hedddles

???????????????????????????????

In Bajo Urubamba, Peru, backstrap weavers place multiple patterning sticks in the warp which hold the warps which will float and create the patterns.

ju-warping

Adding heddles while warping adds time to the warping process. However, it is almost impossible to cross warps and make mistakes while installing heddles this way. This saves the weaver from having to fix the heddle-making errors that can so easily occur when making heddles while seated at the loom.

The Montagnard way of installing the coil rod while warping seems to me to be a wonderful time-saving technique. Having had the experience of installing the coil rod both ways now….on the warping stakes and off…I can tell you which way I prefer!

coil rod cross on loom

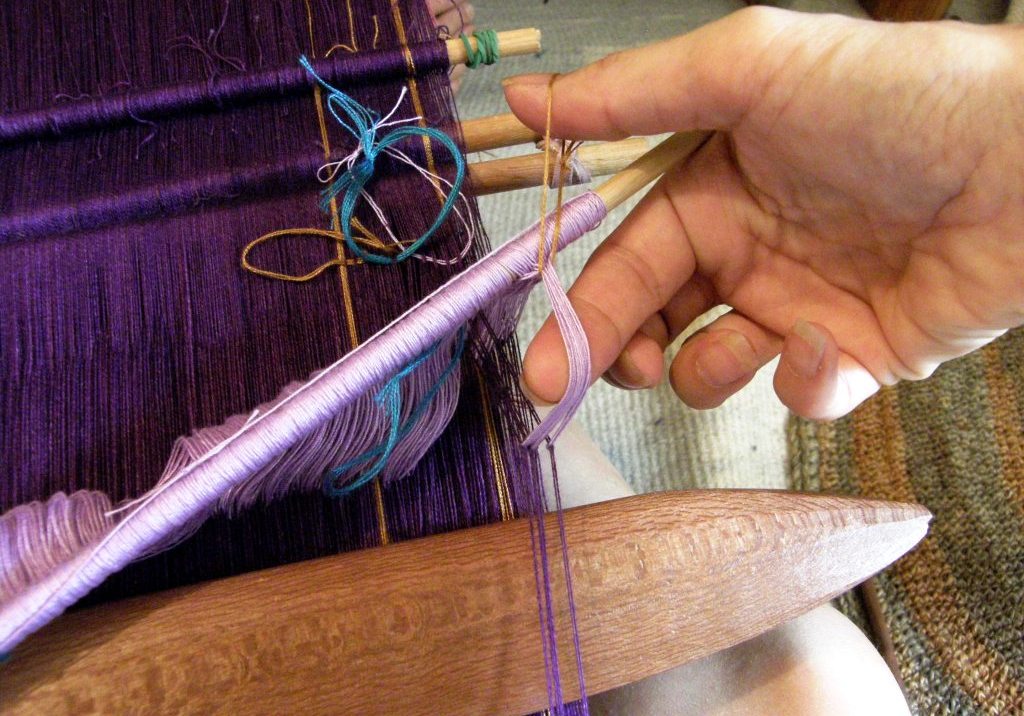
Even little things like the pattern warp loops that I installed on my current weaving can make a big difference.
???????????????????????????????

I can simply pull on a loop which draws forward a certain group of heddles which I can then raise to lift the warps needed for my pattern. My leaf pattern is very simple and requires only five sheds…three in the shed rod shed and two in the heddle shed. I have one loop in the heddles which raises warps from which I select the ones needed for that particular shed. It was more eye strain than time that I was trying to save in this case as the warps are so fine.

This little system is simple enough and I got the basic idea from a visit with weaver Deb McClintock in Texas last year. Deb has spent a lot of time studying with weavers of Laos and she showed me the pattern storage system that is used by Tay Dam weavers on floor looms. The weavers create complex patterns with supplementary wefts using this system. Deb has adapted the system to a floor loom in her studio. She is writitng an article for the Complex Weavers Journal on the method and how she uses it on her loom.
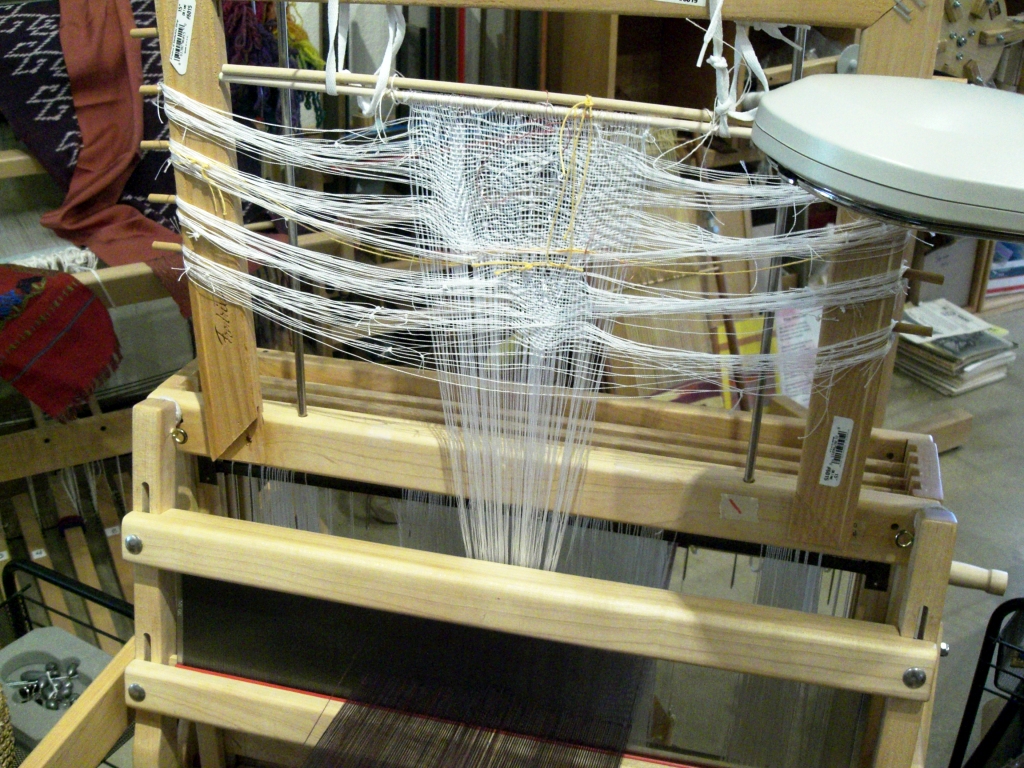
deb mcclintock adapted pattern storage system

Basically….Those vertical strings are really long heddles. The horizontal strings will be used to pull forward certain heddle strings which in turn will raise the warps needed for that pattern shed. The patterns are very complex as you can see by the large number of strings in place. This is a wonderful pattern storage system!

In this video, Deb shows her adaptation of the Laos system to her loom. She explains how each pattern string is stored below the warp until it is next called into use. This enables her to freely pull forward the next string in the sequence…

In future posts I hope to show you some of Deb’s work that has been influenced by her experiences learning about Lao weaving techniques.

#######################################

Here’s what some of my online weaving buddies have been up to….
cindyQ

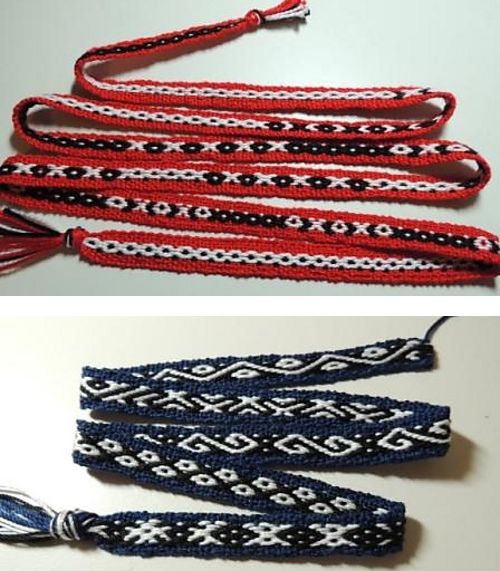
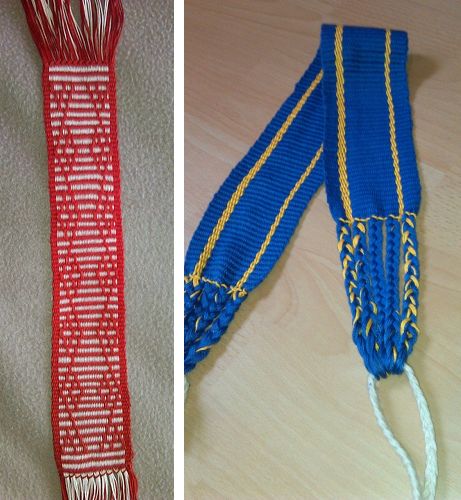
CindyQ has created some pretty bands while working her way through the lessons in my first book Andean Pebble Weave and it looks like she has it down.

cindyQ and helena

On the left is CindyQ’s current project in which she is using a pattern from the follow-up book More Adventures with Warp-faced Pick-up Patterns

On the right Helena has made a band using two-color simple warp floats with a motif from Iran. My intermediate-level tutorial on this technique is here which includes the chart for the “s” motif along the edges of Helena’s band.
ghedrain

Ghedrain has been following tutorials here and made her own backstrap and is currently exploring simple warp floats. She has picked this up really fast.
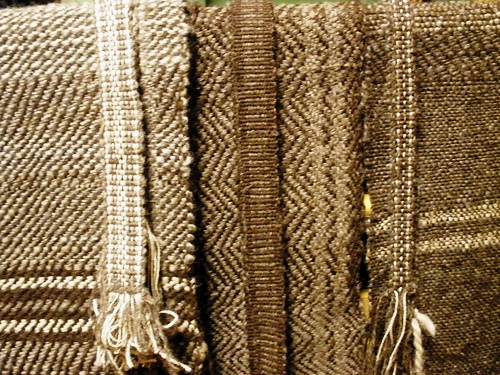
betsy

Betsy wove fabric on a floor loom using her own handpsun wool yarn which she will use to make bags. She just completed the straps for the bags on her backstrap loom.

supplemntary weft inlay cotton scarffAnd I am on the final stretch on my scarf project. I am just about to start weaving the last motif along the edge.

However, I am a bit disappointed because I could have made the scarf longer and made better use of the warp length. It was hard to figure out how long this would turn out as it is the first time I am using a circular warp for a full project and I didn’t know how far I would be able to weave before it got too difficult to open the sheds. I had to make a decision about when to start weaving the final design so that the overall pattern would be symmetric.

Now I see that I could easily add a couple of inches to this end as well as to the beginning and still have a nice long fringe. That, of course, would mean turning the loom around, swapping the position of the shed rod and heddle stick, planning a bit of extra pattern….sounds all very time consuming, doesn’t it. Worth it? Well, yes! I am not in any hurry and I have the TIME.

Backstrap Weaving – Tropical Themes and Tools

Santa Cruz,  Bolivia has almost all the lovely things that the tropics typically have to offer…swaying palm trees, avenues lined with mango trees dripping with fruit, exotic plant and birdlife and tremendous afternoon downpours of cooling rain (sadly few and far between these days). Too bad there aren’t any beaches in this country to complete the picture of tropical paradise. For those of you in the wintery whiteness of the northern hemisphere, here is a bit of tropical Bolivian color to brighten your day.

tropical color

And, on a similar colorful and cheery note, here is my newest scarf project still on the loom…

supplementary weft patterned scarf backstrap loom

Carmen at her loom

The main inspiration for the patterns has come from a particular Guatemalan plant motif woven using supplementary wefts. Carmen, pictured at left, taught me to weave this in her home of Santa Catarina Palopó on the shores of Lake Atitlan.

The small plant motif uses inlaid supplementary wefts for the leaves and various warp wrapping techniques to create the stem and plant base.

I took the leaf pattern, changed it a little to fit my working space, and used it in the side panels of the scarf. I also expanded it into an imaginary tropical flower. The tiny butterfly motif was adapted from one on a Mexican backstrap-woven textile that I saw online.

I love the way the turquoise and gold supplementary wefts look together in the flowers on this purple background….visions of tropical seas and golden mangoes! I have to admit that I have been dying to combine those two colors somehow ever since I saw the following shawl by Elisabeth Hill on her Flickr page…

Elisabeth Hill shawl

How is that for inspiration?! And I got to meet Lisa and see this piece in person at Maryland Sheep and Wool last year where the shawl took Best of Show. Lisa has done some backstrap weaving  with me so maybe that will somehow influence one of her projects. Take a look at her Flickr page to see more amazing creations in deflected double weave.

yarn from 2012 trips

I like how my purple scarf doesn’t really scream “me” at all…at least I don’t think it does.

I once had someone on Weavolution say that she could immediately spot a project of mine before clicking on the image to see who the weaver was. It’s nice in a way to know that you have developed a sort of weaving “character and style” that can be recognised.On the other hand, it’s nice to branch out and do something completely different and I have realised that, in order for me to do so, it is helpful to have access to yarn that I have never used before. So, I think that along with my “wider, longer, finer” weaving goal for this year, I will add “new fiber”. I intend to quieten the little voice that tells me to “keep it simple and just make do with what you can get locally” and take advantage of my trips to the US to gather up new-to-me fiber and a greater range of colors.

Above you can see alpaca, wool, hemp and bamboo (?…this was a gift and I am not sure what it is) yarn from a recent US trip….much of it gifts from weaver friends.
coil rod and other toolsNow, back to the current project. What about that coil rod…what has it been doing for me? I roll it along the warp as my weaving progresses and the fabric gets rolled around the loom bars. It is definitely a handy width guide. Beyond the coil rod the warp tends to spread and fan out as it stretches away toward the far loom bar.
The rod also ensures that there is always beautifully consistent tension between it and the weaving line. It locks the warps into place and gives me even tension with which to work no matter how many stretched and loosened warps may be gathering beyond it and on the lower layer of warp beyond the far loom bar. In short…I like it! It is a great little tool.

You can see the coil rod in place in the above picture. Other “tools” that I am using on this project are several ties of colored yarn along the shed rod and in the heddles.  Because my patterns are not wide enough to warrant the insertion of pattern sticks to raise the warps under which the supplementary wefts pass, I am using little ties to raise the appropriate warps instead. There are some that go around the warps themselves in the shed-rod shed and others which are tied around certain heddle strings. I simply pull on these to raise the pattern warps in the heddle shed. They save time and prevent eyesight strain!

As far as tools go, sometimes the simplest are the best…

Montagnard backstrap loom with suttes and double band

It always delights me to see that the use of simple sticks to carry the weft is common to many backstrap weavers around the globe….no fancy tool required! You have seen in my pictures that I use a specially shaped shuttle. Three of these were made for me when I lived in Chile and they have a kind of sentimental value. I enjoy using them and they double as beaters and swords sometimes so they are pretty nifty.

The Montagnard backstrap loom above has two bands in progress and you can see the two simple shuttles. The looms are so large that it quite cumbersome to balance them when only weaving one narrow band. They are designed for weaving large panels of cloth which are used for skirts, shirts and blankets.

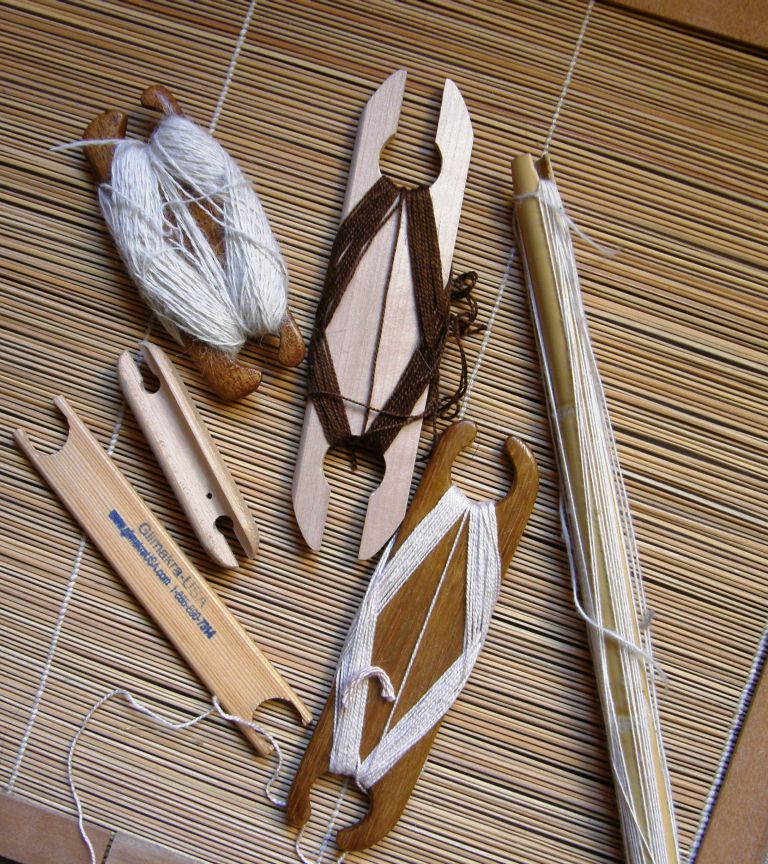
I must admit that I have been often pulled towrad buying teeny tiny shuttles at fiber fairs purely for their cuteness factor. I have on occasion used them but had to turn my closet upside down just now to find them to photograph as they have been idle for a long time…

small band weaving shuttles

The long thin shuttle on the right is one that one of my Guatemalan weaving teachers used. All my other teachers have used simple sticks about which the yarn is wound or, for narrow pieces, simple “mummy”-like butterfly bundles. Below you can see two such weft bundles. The yarn feeds off the outside rather than from the center and a hitch is put in place to stop the bundle from unravelling when it hangs freely. These two examples are of handspun wool and alpaca fiber from the Cusco area.

yarn bitterflies used in backstrap weaving

For narrow work my Guaraní teacher uses short lengths of scrap yarn for weft. This way she never wastes a thing! The weft lengths are so short that she does not even need to wind a butterfly. For wide pieces a simple stick shuttle is used as seen below.

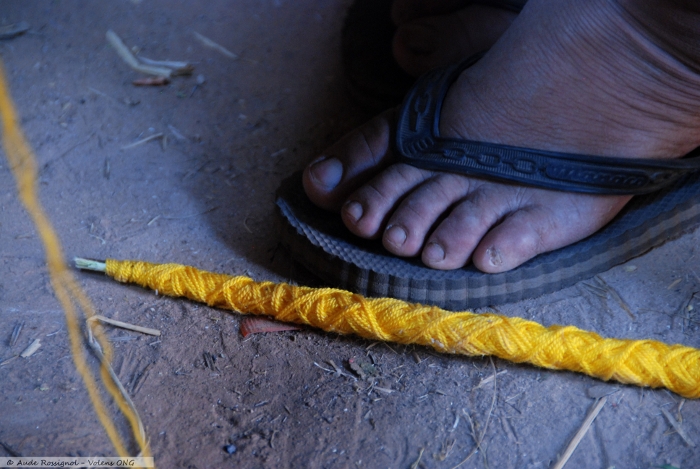
Aude Rossignol

Permission to use this image was kindly given by Aude Rossignol.

Here is a video showing my Montagnard weaving teacher, Ju Nie, loading yarn onto her shuttle. You can see that her shin is a very useful piece of equipment as, in a previous post, I showed you how she also uses it to help twist the fringes of her woven projects. The video has two segments with a short pause between. Wait for the second part which shows a weaver from the Cusco area loading her large shuttle.


One of the most charming ways of passing the weft is one in which the weaver has her weft rolled into a ball. She places the ball within the shed and then tilts her body to angle the loom so that the ball rolls through to the other side!

And finally, here is my teacher Trini in coastal Ecuador loading one of the three shuttles for the mini hammock she is preparing to teach me to weave. It was a balanced weave using three weft colors.

Trini with shuttle

In the Ravelry Backstrap Weaving Group, Marge and Julia showed what they have been working on lately. Marge has been trying out Tahki Cotton Classic Light. I have not tried the Light version but I did see it at WEBS when I visited and the color range is wonderful. Marge used an online inkle pattern generator to help her design the color arrangement. The result is gorgeous!

marge

Julia used two different color ways for the same pebble weave motif (charted in my second book) on two different looms…a four-harness and a Seidel Band Loom.

julia pebble weave on two loomsI will be visiting the Mannings this summer. If you want to come and weave, maybe we can spend a little time outside hitched to some shady trees down by the creek….on the ground or on chairs..that will be up to you.  How cool would that be?!

the-mannings-stream

Backstrap Weaving – Supplementary-Weft Patterning from Two Continents

I have had so much fun playing with supplementary wefts this week on my white warp!

This is the start of my blank canvas…an off-white plain warp-faced piece of fabric into which I can weave patterns with tencel supplementary weft. My inspiration came from several textiles from Bhutan that I saw during my recent trip to the US and I was able to use patterning skills that I learned in Guatemala to set up the warp and lay in the wefts. It has been fun to be able to apply the skills learned on one continent to weave designs from another.

First came the insertion of the two patterning sticks. From what I have seen on Bhutanese backstrap looms that I have examined and from videos, the warps under which the supplementary wefts will be passed are selected from those in the stick shed and then from the heddle shed and stored on two patterning sticks.

This is the warp that I used for the Bhutanese designs. The two sticks bound together with rubber bands are the stick shed stick and the stick which holds a second cross. The darker of the two sticks in front of those holds the patterning warps from the stick shed and the other holds the patterning warps from the heddle shed. You can see my video tutorial of how these sticks are placed in a warp destined for Guatemalan patterns here.

The spacing of the warp threads that are selected and stored depends on the kind of pattern being woven and, to a certain extent, the kind of yarn.  Within Guatemala, this can vary a lot from region to region. The warp pictured above from San Antonio Aguas Calientes in Guatemala shows the two patterning sticks in place (the two thinnest sticks). These will be used to raise the warps under which the supplementary wefts are passed saving the weaver the work of having to pick them up from every shed.

My weaving teacher in San Antonio Aguas Calientes has just selected the warps from the stick shed for her first patterning stick and is about the store them on a stick which will sit between sticks 2 and 3.

Lydia will draw the patterning sticks toward her to raise the selected warps to weave patterns like the ones she taught me to weave above right. The patterns in the upper and lower bands were woven using the warps stored on the two patterning sticks. The flower patterns in the center band, however, require the weaver to select different warps for every pick and so, patterning sticks cannot be used in this case. Naturally, weaving those flower patterns was a much slower process.

Here are some bookmarks that I wove using Guatemalan patterns. Most of these designs are based on those that I was taught in Santa Catarina Polopo. My teacher in that part of Guatemala also uses the two patterning sticks but the warps that are selected are spaced differently to those in San Antonio Aguas Calientes and you can immediately see how different the patterns are from these two weaving communities.

Above, you can see how the warps are spaced in one of the pattern sheds. I have just placed the supplementary weft which will allow me to weave the stem and base of the plant.

Here are some more patterns that I wove with my teacher in Santa Catarina Polopo. All the patterns except for the ‘X” design which separates some of the motifs were woven using the same two patterning sheds.

On the above piece which I wove in Guatemala alongside my teacher, you can see all the patterning techniques that I used in my latest Bhutan-influenced sampler…the horizontal and diagonal “chain stitch” lines  and the solid “stitches” that serve to fill in the outlined shapes.

The question was, how do the Bhutanese weavers space the warps that they select for their patterning sheds?

Frustrating!! I had a Bhutanese loom in my hands when I was in the US with unfinished weaving and sticks in place. I took lots of photos of it but did I think to look for that crucial piece of information? No!!

Thankfully, Wendy Garrity’s wonderful website came to the rescue.

Pictures and sketches that she has there gave me the answer. As I said, it is quite likely that the spacing varies from region to region within Bhutan as it does in Guatemala but, I used the spacing that I saw in the pictures, and it seems to have worked.

Here is the piece growing on the loom. I didn’t use the patterning sticks with their pre-selected warps for the designs in the foreground. The sheds for those patterns had to be created manually for every pick.

Things to work on…making the supplementary-weft turn “bumps” neater and of a more consistent size, making a smoother transition from horizontal to diagonal line…I messed that up…, calculating better the amount of weft needed for a particular design…I wasted too much yarn!

I think of how accurate the Guatemalan weavers are. They know exactly how much weft they need for each of their patterns and waste nothing!

Some of it has been trial and error…finding a neat way to start the chain stitch took quite a few attempts. My Guatemalan teachers work that stitch one thread at a time whereas the Bhutanese weavers have a very cool way of working it using both threads at once. The end result is the same but it is these little differences that are so fascinating.

I look at Leki Wangmo’s magnificent work (above) and sigh!

Here are more gorgeous Bhutanese textiles that Ute left for me to examine while I was in Massachusetts…bands of supplementary-weft patterns on a ground of extremely fine tablet-woven cloth. I was told that the tablets used to weave the ground fabric had to be cut from X-Ray film to achieve such fineness!

He he :-)…one more shot of the whole lot so far. Can you tell I have been having fun with this?
Now on to much finer yarn. I have some cotton that my friend Betty got in Guatemala about 30 years ago…much finer stuff and I am thinking about making a very light-weight scarf with it with supplementary-weft patterns using the techniques I have been practicing on the sampler this week. The motifs will be smaller using this finer thread and the whole thing will hopefully look a lot more delicate than the sampler with its large kind of clumsy motifs. I can use it on my spring and fall trips  in the US. I am thinking black with lots of small colorful motifs.

Another thing with which I have just begun to play this week…

This is my first sample using the 60/2 silk that I got at Handweavers Studio in London (it was a splurge and one of my souvenirs of the UK trip!). I saw this pebble weave design on a textile in a book and  found it quite unusual. The picture’s caption states that it was most likely woven during the colonial period. The silk weaves up beautifully and yes, it is hard to see! All the little nicks and chips in my finger nails become immediately apparent as the fine silk catches on them. Now I just have to wait for THE project for this silk to come to mind.

In the meantime I am getting the third post on the Encuentro de Tejedores de las Americas ready…yes, I know I keep promising it.! I look at those pictures now and can hardly believe I was there among all that magic!

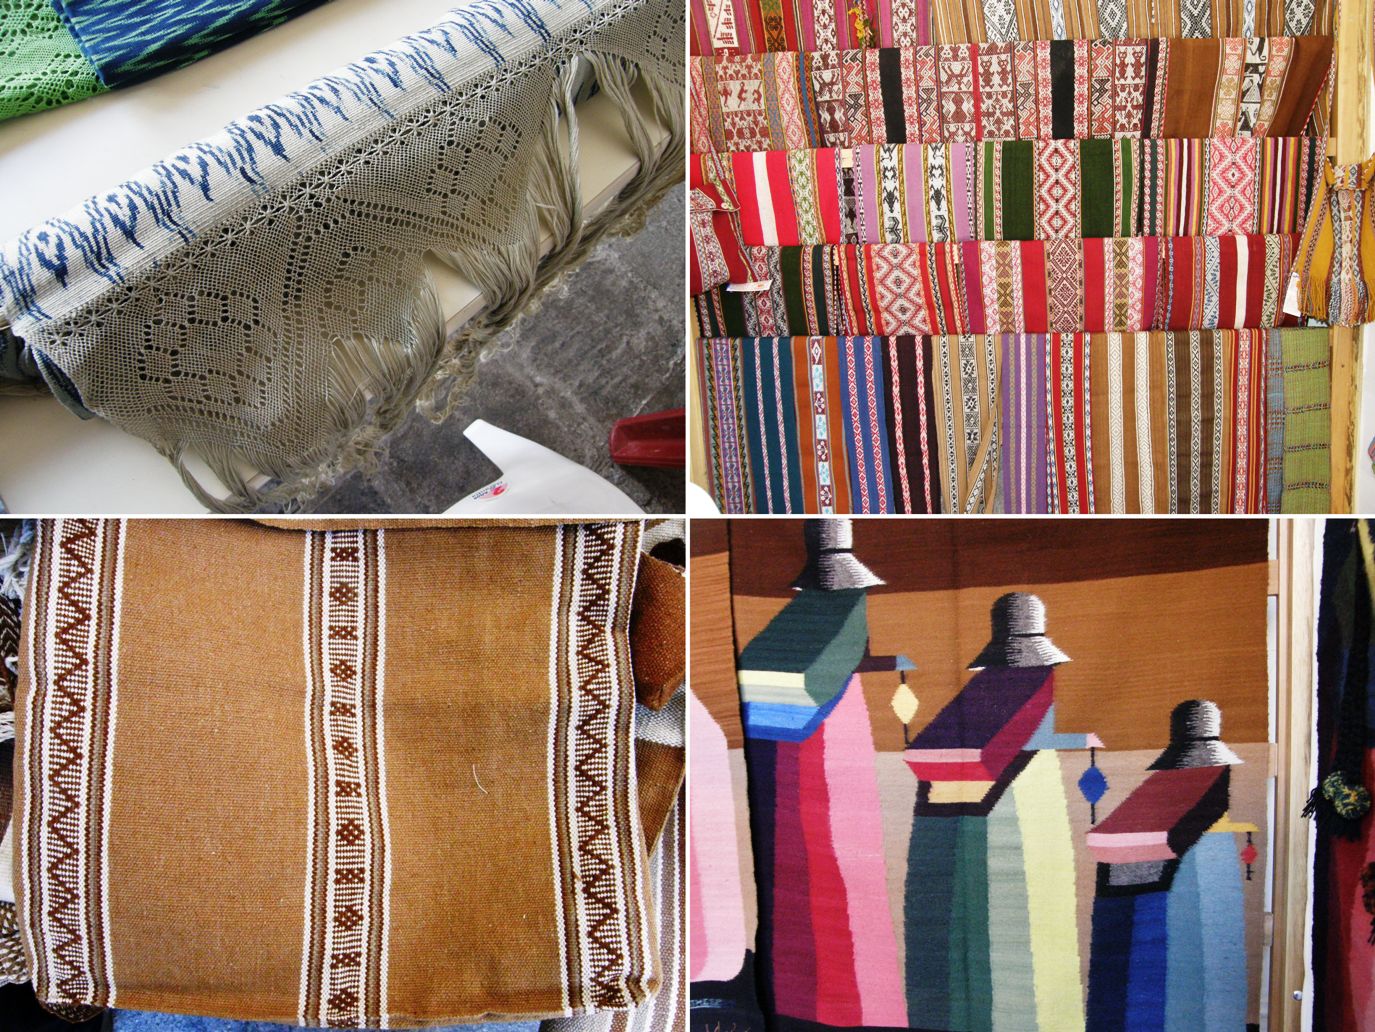
In the meantime, I will leave you with some Cusco magic fit for the coming season from the CTTC (Centro de Textiles Tradicionales de Cusco)…

Look at these gorgeous ornaments made from narrow woven bands! If you “Like” the CTTC on Facebook you can see many more beautiful images and news updates that don’t appear on their website.

Off to dye that cotton and start planning my scarf!

Backstrap Weaving – Encuentro de Tejedores de las Americas – Part Two – the cloth and the looms.

Read Part One of this story here.

ARE YOU GOING TO WEAVE TODAY?

I probably make a thorough nuisance of myself at weaving events like the Encuentro de Tejedores in Cusco Peru earlier this month. I have so many questions and want to be into everything and not miss a thing.

Calm and serene despite being in the very heart of the city of Cusco, the venue for the conference was beautiful both by day and night. There were plenty of pillars to which looms could be attached for weaving displays and shaded areas under the arches where weavers could show their textiles.

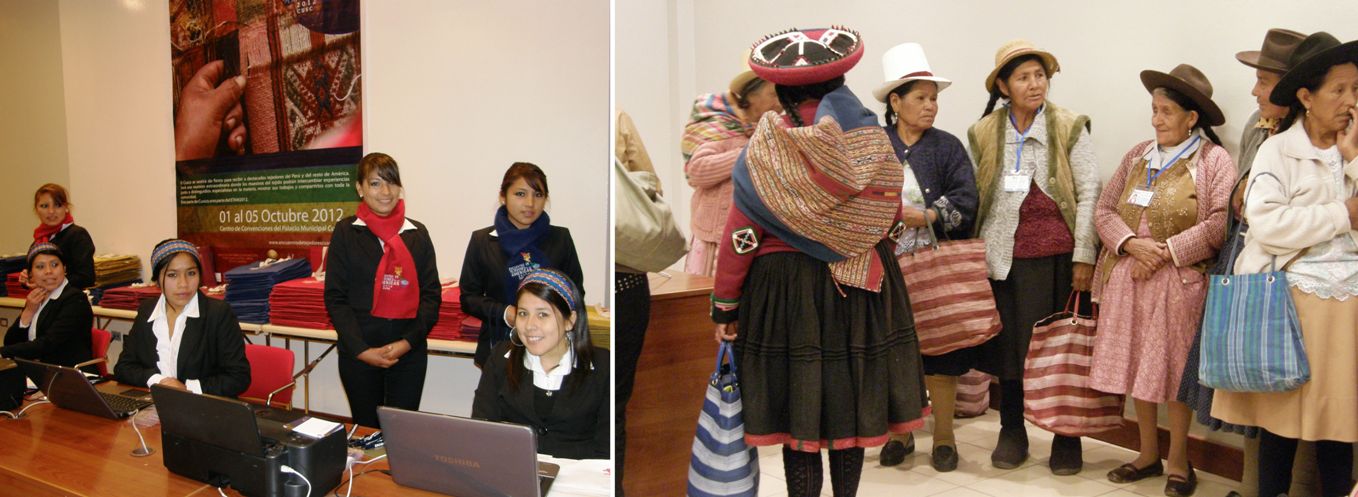
 Bright and early on day one, I registered along with other participants. The receptionists, looking smart in their uniforms with colored conference scarves and headbands, were efficient and clearly trained to be able to handle anything. The whole process was very slick and it was interesting to hear all the different Spanish accents and Quechua being spoken in the line-up of participants from all over Peru and South America. I recognized fondly the accent from Chile where I lived for five years as well as the song of the Argentinean-style of speaking used by my ex-boyfriend and the special way that Bolivian highlanders pronounce “rr”.

I then stepped outside to the courtyard to another world…a buzz of colorful activity… where I watched all the stands being assembled by weavers from all over Peru, Bolivia and Latin America, saw all the marvelous textiles emerging from travel sacks and being arranged and labeled, touched the fiber, tools and implements which were used to create the colorful cloth and spoke with the creators themselves. Some of them seemed somewhat overwhelmed by the high level of interest in and admiration for activities that are quite normal and commonplace, almost passing without remark, in the communities, villages and towns where they live.

Weavers and knitters from Taquile Island wearing and displaying their textiles and the creators of the wonderful ikat pañones of Tacabamba, Peru

The question that I really wanted to ask everyone right there and then is “Are you going to weave today?” Is today the day when we will get to sit by you and see how you created all these exquisite textiles? And all the while the  excitement is building as I see more and more gorgeous textiles and looms being extracted and arranged. I had already seen at least ten things that I wanted to explore further after having passed just once quickly by each of the twenty-two half-erected stands.

Weavers and spinners from the Navajo Nation, my friend from the Tinkuy, DY, and TahNibaa and Albina from San Ignacio de Loyola showing the crocheted “chullos” and the belt loom full of sticks which is typical of her community. 
The Chol Chol Foundation of Chile was present bringing with them textiles made by the Mapuche weavers that they support including a spectacular ikat- patterned “manta cacique”. Lowland areas of Peru were also well represented with a group of Matsigenka cotton spinners and weavers from Echarate, Bajo Urubamba.

The looms!……

A horizontal loom with a broad belt patterned with double weave and complementary-warp pick-up patterns of Taquile Island and a backstrap loom with a cotton warp-float piece in progress from Echarate.
The simple backstrap loom of Tacabamba, Peru on which the indigo ikat-patterned “pañones” are woven.  The process of creating a pañon is anything but simple. They are up to one-meter wide, covered with tiny motifs and have patterns knotted into their fringes.
A floor loom from Ayacucho, Peru with a tapestry in progress and the leaning vertical loom of Tarabuco, Bolivia.
The cotton weavers of Chiclayo managed to preserve their native cotton despite the fact that its cultivation was banned for many years in Peru. The backstrap loom is used to weave their natural brown and white cotton into saddle bags, belts and table ware for their own use. The Guatemalan loom from Santiago Atitlan holds brocaded cotton cloth destined for the typical woman’s blouse or “huipil”. Panels are sewn together and the neckline embroidered with birds.

Wide warps, narrow warps and everything in between… A Tinkipaya weaver’s leaning vertical loom, holding fabric covered n complementary-warp pick-up patterns, rests on the ground. A weaver from Pitumarca speedily edges her finished woven lliclla with a tubular woven band using three sets of string heddles and a shed loop.

A backstrap weaver from Ayacucho, Peru, creates a belt patterned with supplementary warps. She uses a forked stick to hold a secondary cross, the manipulation of which helps her to open the heddle shed quickly and efficiently. The wide backstrap loom parked against the pillar is from Tanta, Peru where handspun alpaca yarn is often combined with bright synthetic threads to make shawls, ponchos and blankets.

And then there was that tantalizing backstrap loom with its twenty-four heddle sticks…Señora Araceli, are you going to weave today?

First Araceli has to make the twenty-four sets of heddles on this fresh warp. The pattern has already been picked up and saved on sticks.

Just before lunchtime one day when we were indoors listening to speakers, I got the uneasy feeling that I really needed to be somewhere. I got up and tip-toed out at the start of the morning’s final presentation by Manos del Uruguay to find Araceli seated and preparing her warp for an afternoon session of weaving.

Well, you know that I am fascinated by the entire process and so I was happy to be able to sit alone with her and watch her make her heddles. I was tickled to see that she makes her heddles with the extra security hitch just as I have chosen to do. I have seen and learned so many ways to make string heddles for backstrap and other kinds of weaving and this method is by far my current favorite. I always say “current” as who knows what cool new method I will find tomorrow.

Here is a short video clip of Araceli making her heddles. She certainly has a smooth and elegant way of doing so. I know some people don’t like making heddles and dread that part of the process…I like it!

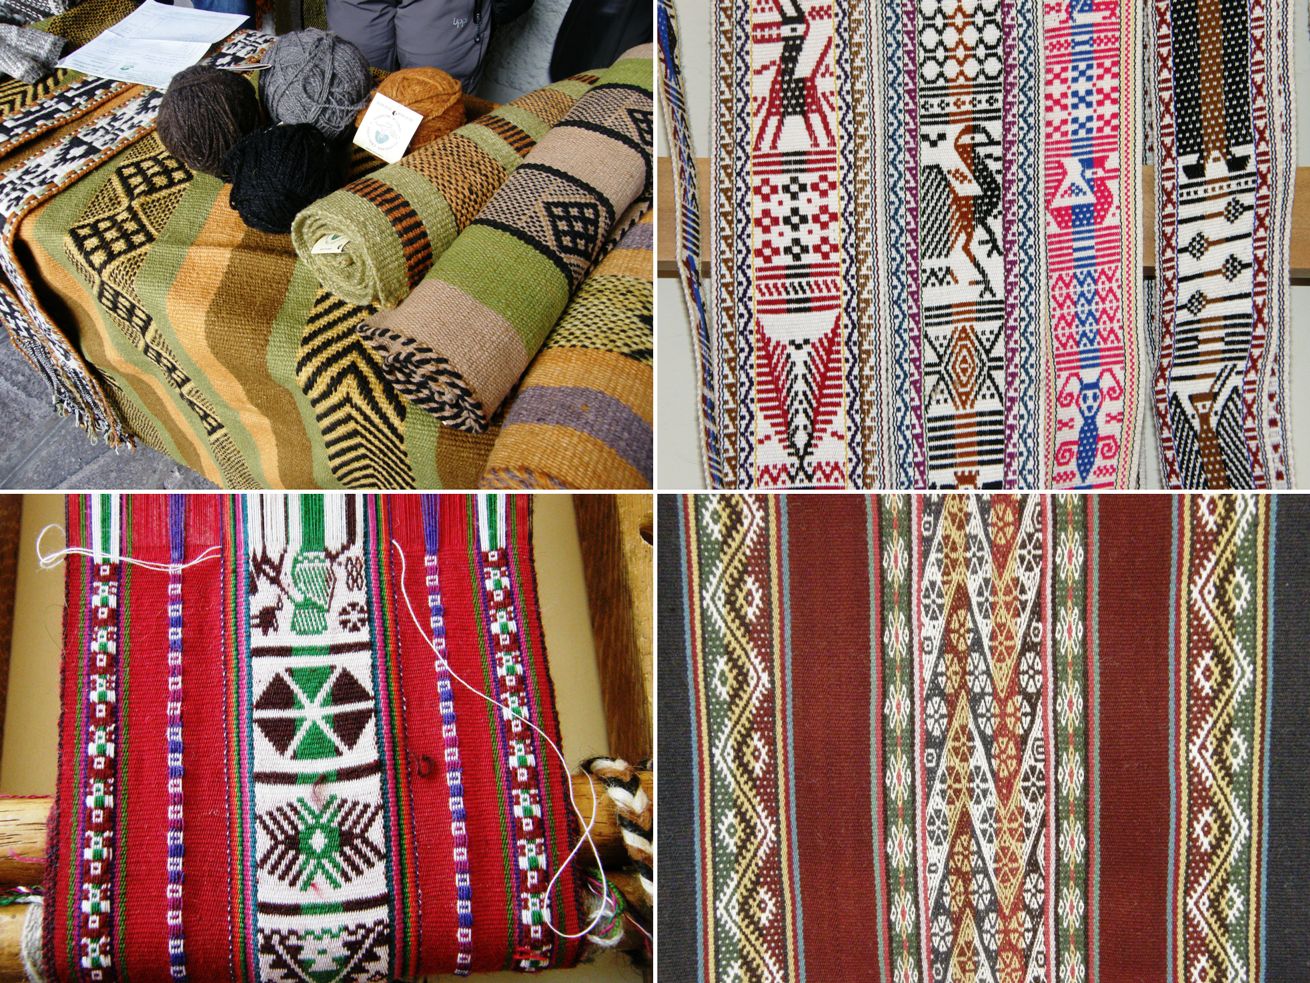
And what about the woven cloth produced by these looms and the pieces produced by talented hands using knotting, braiding and crochet?

Head gear…Crocheted “chullo” from Peru and a woven hatband from Bolivia.

There are four countries represented here….cloth from Mapuche weavers in Chile,  Salasaca, Ecuador,  Taquile Island, Peru and Tinkipaya, Bolivia.

Cloth from different corners of Peru. The variety!

Of course, each piece has its story and it was those stories that we were told in the weavers’ own words in the seminar sessions that were held in the mornings and afternoons. The stories were very inspiring and educational, often with very personal touches which brought life and meaning to the fabric that simply could not be transmitted from the market stall or loom alone. All told of hope, perseverance, strengthening of ethnic identity and a revival of pride in oneself and culture and were often very moving.

The faja sara ( the one created with the twenty-four string heddles) has its own fascinating story. It is part of an unbroken weaving tradition that dates back at least 500 years to Incan times. The belt is described in the chronicles of Mercedarian Friar Martín de Murúa in 1590 A.D. and the knowledge of how to create one has been passed on ancestrally over all these years.

Lynn Meisch has written an article about her research on these belts here. We were told by the weavers that the name “sara’ comes from the verb ”sarear”, although I have never come across this verb before, which means to choose, or in a weaving context,  to pick-up.

Interesting to me from a structural point of view is the rolled edge of the belts which is surprisingly easy to create. I am guessing that it serves the same purpose as the woven bands I have seen added to other textiles in that it strengthens the edge. When I was in Holland, Marijke van Epen and I followed Mirja Wark’s explanation of the rolled edge used by the Wayuu people of the Guajira Peninsula in Colombia and Venezuela and the way the weavers of the sara belts create theirs is equally as interesting and practical.

Here is Araceli in action with a band of spectators. When doubt was expressed by the onlookers about the quality of the cloth since Araceli does not use a ruki, the llama bone tool, to beat in her weft, Araceli immediately invited them all to feel the belt. They were all surprised and impressed by the firmness of the weave. It is a very dense piece of weaving.

The poncho shown above is from Catamarca Argentina and represents the recovery of the exquisitely fine work done with handspun vicuña fiber on floor looms which has the made the poncho Catamarqueño famous for centuries.

Two people weave the pieces side by side and have to coordinate the strength of their beat perfectly to maintain a consistent weave. With the fine vicuña thread a piece that measures 2 meters by 1.30 meters weighs only 320 grams and takes up to eight months to complete.

Fine vicuña shawls are also woven and embroidered using designs copied from old colonial textiles.

We had a chance one afternoon to handle and clean pieces of vicuna fiber and everyone was invited to try their hand at spinning it on the  25cm spindles.

More cloth…..

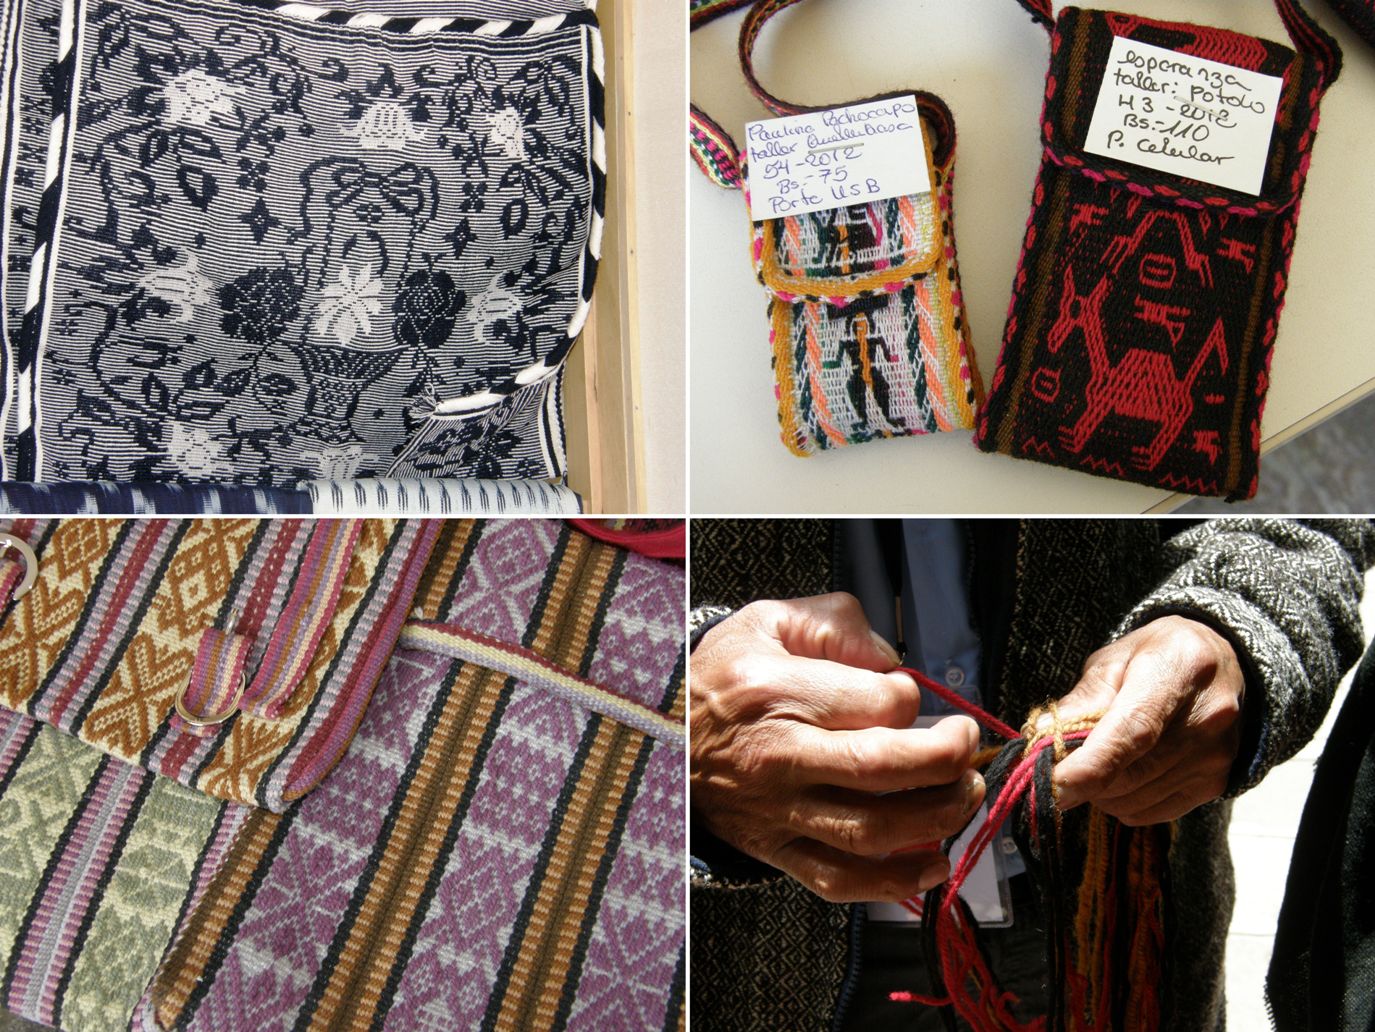
…. a bulsico , or cotton double-pocket saddle bag from San Ignacio de Loyola with beautiful patterns in simple warp floats worked in two colors. The weavers from Tarabuco and Potolo in Bolivia of course brought large fine examples of their textiles. I decided to show you here some very small and practical pieces that they also brought to sell. The tiny USB pouch is from Tarabuco and the cell phone pouch with its woven khuru figures is from Potolo.

The supplementary-warp patterned pieces in lovely pastel colors are from Ayacucho, Peru and the last shot is of an impromptu sling-braiding demonstration from one of the Peruvian presenters in the coffee break.

More lessons along the way…

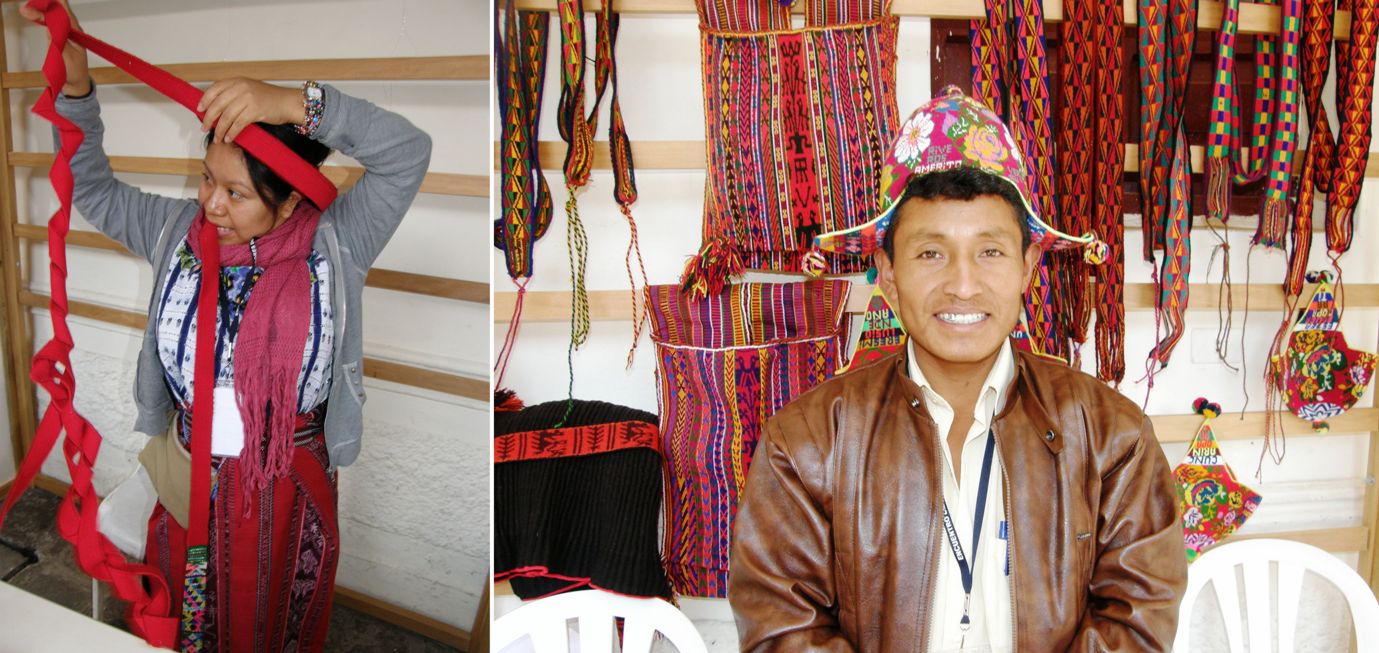
Diana from Santiago Atitlan in Guatemala showed me how to wrap her hair and head with a woven hair sash. You can see that most of the band is plain red with just the last part, which will be seen on the outside, decorated with pattern. Albina’s husband showed me how married men wear the typical chullo of his home…with the flaps standing out sideways. A single man will wear his with the flaps pointing out front and back.

So, now you have seen a selection of the stands, looms and textiles and heard a few backgroud tidbits about some of the weavings and the people who produce them. You are probably dying now to see the weavers in action, right?

ARE YOU GOING TO WEAVE TODAY?

Sorry, but I am saving that segment for the next blog post as uploading the video will be so much easier for me when I am in the US.

In the meantime I am packed and ready to leave tomorrow and I did manage to finish the discontinuous warp piece that I started in the workshop on the last day of the Encuentro. Handling alpaca fiber is not a nice business in this heat with sweaty hands, I can tell you!

Here is my ticlla piece off the loom and all curled up…

The overspun alpaca yarn made the grey and black panels curl in and the other two panels curl under. You can see my finish line on the white panel. I ended up removing one weft as I had packed too many in. I really need to remove two as now I have two wefts in the same shed. The finish line isn’t as noticeable on the other panels. I am really pleased with this!

I wove and sewed on a tubular band to the edges….… in the same way as the Pitumarca weaver that I showed earlier in this post, using three sets of string heddles and a shed loop. See how nicely the piece lies flat now? I hemmed the sides before applying the tubular band because I didn’t like the way the warp stripe at the edge was interfering with the color of the tubular band.

Here’s a better look at the tubular band and that lovely dovetail join of colors…

Done! I am keen to try this all again!

See you next time from the US 🙂