Backstrap Weaving – A Little Complementary-warp on the Side

I wanted to write a short post just to record what I have been up to in these last weeks of 2022. Here in Santa Cruz we are marking the end of the year with yet another strike tomorrow. It’s supposedly just a 24-hour one this time rather than another strike-without-end like the one we endured in October and November for 36 days. However, I was up and out early and at the supermarket today just in case it drags on.

This is a summary of what’s been going on in my fiber-y activities. I finally managed to get all the stuff I needed for my cochineal dyeing, including paper to measure pH, and produced a red in my final attempt. Then I ran out of cochineal. My usual supplier in the street market is out of it and I guess I’ll need to find another. I want to make sure that getting red wasn’t just a fluke! You can see the bright red that I got at the top and then all the other colors I got while trying, below.

I made a couple of other experiments. First, just out of curiosity, I threw some alum-mordanted wool in the pot before adding the silk in the last run. I was amazed to see it instantly turned a dark, rich red-wine red. The silk wouldn’t have anything to do with that color! The closest it would go was a dusty pink. Another thing I did was soak some of the dark purple that I had already produced, and didn’t particularly like, in pH- neutral distilled water. It turned an interesting copper color. I had too many orange samples and so I soaked one of those in the same pH-neutral distilled water and got a dull pink.

It’s nice seeing all the colors together. Now I need to come up with an idea for using them.

My original plan had been to create two tones of red to use in a silk ikat project but dyeing with cochineal on silk has been trickier than I had imagined. Wool seems to be easier.. Maybe it’s time to try ikat with wool. I feel sure that using a material like wool which has a certain amount of stretch will make that challenging. I remember my very first experiment with ikat so many years ago. In my ignorance I just dove straight in and used my handspun llama thread with bold red dye that was meant for cotton. Needless to say the result was a very disappointing Barbie-pink background with a barely discernible white pattern.

The cochineal-on-silk colors surrounded by a silk ikat scarf fabric that I wove some time ago. I used acid dyes for the ikat fabric.

And on the side, while messing around in the dye pots, I have been experimenting on my backstrap loom with something that I have been wanting to try for a long time. I wanted to try weaving complementary-warp patterns in a complementary-weft structure…I guess you could also call it “turned” complementary-warp, although “complementary-weft” does the trick for me.

I rummaged around in my stash and found some hemp thread that a weaving friend had given me years ago and used that as the base warp. I thought that the hemp would be sturdy enough to stand up to all the fiddling about that was bound to take place as I figured out the best way to execute the complementary-weft technique. The first thing to figure out was the number of warp threads that would make up each group around which the weft threads would turn. I was lucky in that my first guess turned out to be a good one.
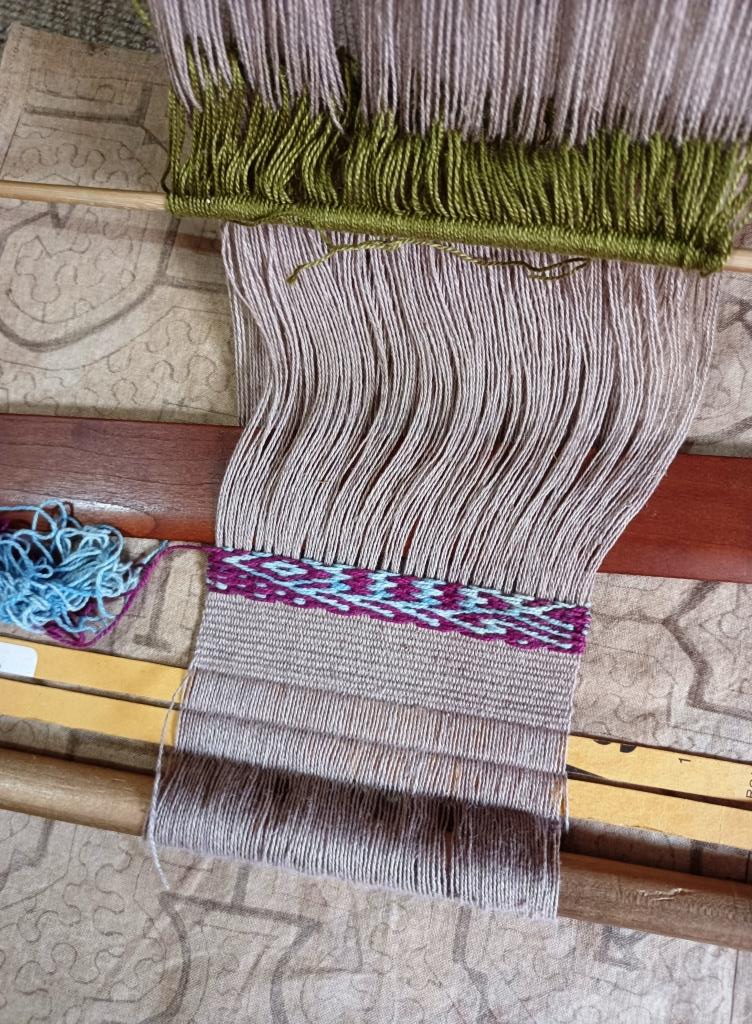
I chose one of the fish motifs that I had charted for my Complementary-warp Pattern Book. The fish would normally be swimming length-wise down the warp. In complementary-weft it swims across the width of the warp. The second thing to figure out was how to turn the weft threads at the edges. I wasn’t sure if I would need floating selvedges but after fiddling about with different ideas, I found that they weren’t necessary. The selvedges are neat and stable. Of course, the back of the fabric shows a red fish on a blue background.

For the weft patterns I used some of the naturally dyed cotton from Mayan Hands that my weaving friend Kate had given me many years ago. It was left over from a kit she had brought back from Mayan Hands in Guatemala. The bag of beautiful thread has sat in my closet for years waiting for just the right project.

Mayan Hands naturally-dyed cotton.

The natural dye substances used are cochineal (I am so impressed that they can get such deep colors on cotton with cochineal!). There are three depths of cochineal reds. You can see light indigo and dark indigo. I would so love to have more of that dark indigo. Obviously, it was also a favorite of Kate’s! Madder produced the orange, and osage orange the tan colors. There’s quite a lot of natural that I can dye myself. This thread is heavier than the kind that I normally like to use as warp but it has turned out to be perfect as complementary weft on the hemp base warp. You can take a look here if you would like to learn more about this Mayan Hands natural dye project in Guatemala.

Next, I tried an Andean pattern from my Complementary-warp Pick-up Book and then I played around a bit to see the effect of using a much finer main weft and a much heavier complementary weft. I used Omega Sinfonia as the heavier complementary weft. I thought that having the weft section stand out in high relief against the hemp cloth might be attractive. I decided that I preferred a more even surface. However, the heavier weft did produce a motif that wasn’t quite as compressed as the others.

I was done with that experiment and decided that I now wanted to combine complementary-warp and complementary-weft in the same piece. It was one thing to use complementary weft on plain weave. Working it on a denser base of complementary-warp would be different. I am sure that I was somehow under the influence of my silk cochineal colors when I chose the colors for this next sample. I used the Mayan Hands cotton for both warp and weft.

The orange sections are complementary-warp and the red, complementary-weft. I like the fact that I could change the color of the complementary-weft threads at any time, if I wanted to. However, I decided to just stick with red for this sample.

The complementary-weft structure lends itself well to motifs with vertical lines. In complementary-warp I can have sharp, smooth horizontal lines if I wish, like the beak of my hummingbird motif at the bottom. In complementary-weft I can have sharp smooth vertical lines like the stalks of leaves and stems of flowers. Once I had figured out the ideal number of warp threads around which to turn the weft threads, the next challenge was to match the widths of the complementary-warp and complementary-weft sections. I eventually got there by the time I reached the third comp-warp section. In order to do so, I had to weave the comp-warp sections at a width that is not natural to me which meant having to regularly check that I was staying on track. The narrower hummingbird sections sits at my natural width and I could maintain that width easily without ever having to check. My attempts to match the width are more obvious in the next picture.

Working on matching the width of the complementary-warp sections to that of the complementary-weft.

So, now I want to use these combined structures on a much wider piece to make a bag for cotton-spinning tools…my takli, the mortar in which it’s supported, and my supply of cotton sliver….something that will enable me to easily store and carry it all about with me when I travel or when it’s not in use. I’ll use the Mayan Hands cotton but will dye some of the natural to get more colors. I might dye some more blues to go with the light and dark indigo thread that I already have in the kit.

A fun thing about the sample band I just wove was that I wove it with four selvedges. That’s the first time I have created a four-selvedged piece in cotton. It was relatively easy because I closed the gap with complementary-weft patterning rather than trying to close it in the warp-patterned sections. I turned the loom around and wove some comp warp at the far end of the warp and then filled in the gap between the two woven sections with comp weft. I didn’t go so far as to attempt a pattern, though! I might try that next time.

And with this project in this new-to-me combination of structures I will be starting off the new year. No doubt, there’ll be more cochineal dyeing next year and more ikat. I have no idea why I have so much black 60/2 silk but I would love to get something wide and very detailed on the loom in that black silk. The “dwindling stash” that I am always talking about is still dwindling but there always seems to be enough of the right stuff to enable me to experiment and then go on to weave useful projects.

If all goes my way, there will be a trip to Australia in 2023 to hopefully lay the ground work for my eventual move back. That will perhaps straighten out the stress-inducing mess of unanswered questions in my head and, who knows, I may return here feeling settled and confident enough to work on continuing with the book projects I have started and left long neglected.

Thanks for staying with me. I wish you all the best for happiness and peace of mind in the coming new year!

Backstrap Weaving – Breathing in, Breathing out.

Some place last week, I have completely forgotten where, I heard (or read) someone say that reading is like breathing in and writing is breathing out. That really appealed to me.

Because I have been house-sitting for the last couple of weeks and don’t have all my stuff around me, on top of the fact that the whole city was on strike for 36 days (the strike ended last Saturday), I had been feeling a little as if I were standing still and unable to be as productive as I would normally like to be. However, since hearing that thought on breathing, I’ve been thinking of these weeks as a period of breathing in…time to sit back in my enforced stillness and cruise the internet, soak up inspiration, make sketches and notes in my weaving book while figuring out if the projects I have in mind are actually technically doable, and deciding if my stash will stretch far enough to make them possible…. readying myself to eventually breathe out and create.

Just a handful of the sample bands in the bucket.

But of course I haven’t been completely idle. One thing I did during the strike was go back to my home on one of the permitted shopping mornings and bring back the bucket-load of woven samples that I have accumulated over the years. Most of the pieces are bands of motifs that I wove to photograph for my pattern books and double weave book. Some were width samples as I tested a new-to me yarn for a larger project while others were just fun experiments…those funny little “what-if” things that I get a sudden urge to explore now and then. Some have stories attached to them. I have felt an urgent need to downsize lately and I’ve been procrastinating about attacking the pile of woven samples. Taking those pieces out of my home to this unfamiliar place has somehow made the task of sorting and tossing things away easier.

I managed to whittle the bucket-load down to a more acceptable amount of bands. This is one of the samples that I decided to keep. Maybe it’s the horrendously hot and dry weather we have been having lately that has made me feel a particular attachment to this watery scene with its cooling blues.

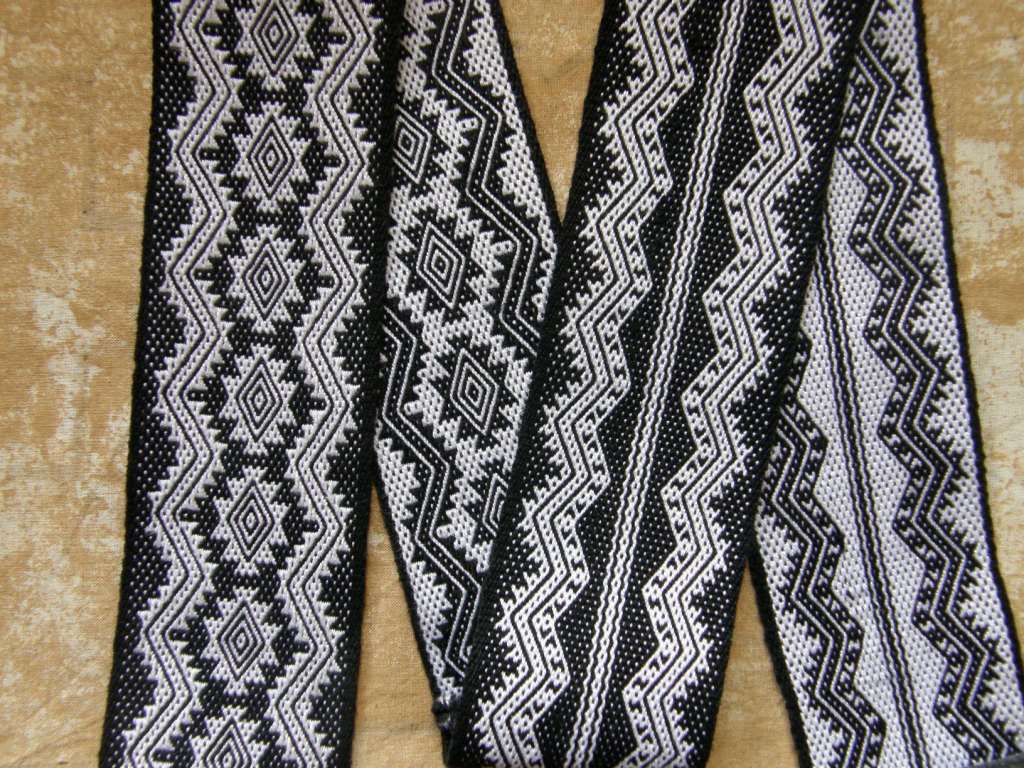
Rivers and Ocean-themed band woven for my Complementary-warp Pattern Book.

I expect that I will make something out of this band one of these days. It might end up being the strap for a bag. It wouldn’t be the first time that a strap has inspired a bag project.

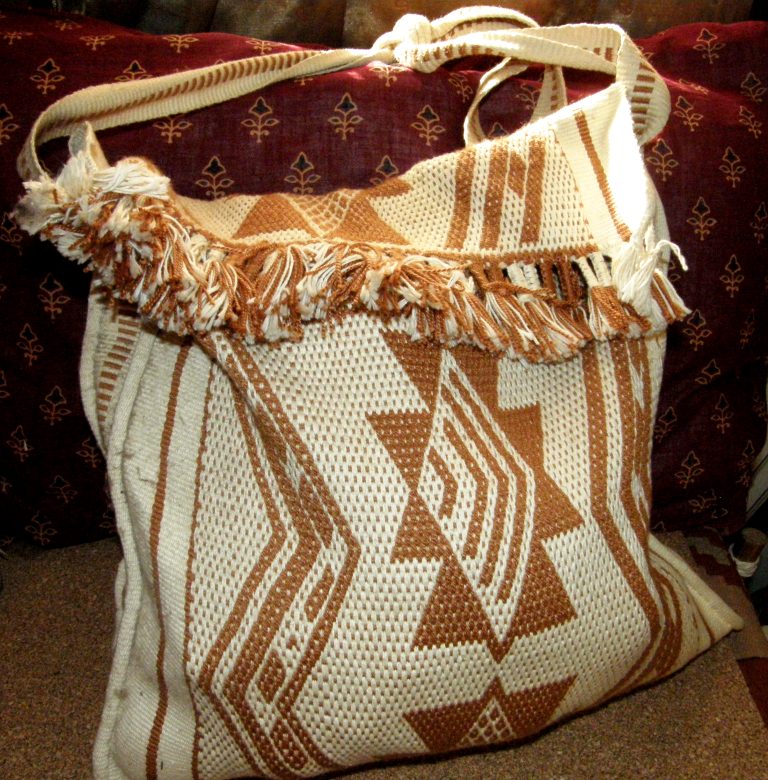
The bag project that grew from a simple strap. Every part is handwoven…even the lining.

During the strike I hadn’t been able to get the distilled water that I need to continue with my cochineal dyeing experiments on silk. I finish house-sitting on Thursday and I will get that organized on my return home. In the meantime, someone on Facebook suggested using bottled water…not as a substitute for distilled, but just to see if it made any difference. I thought, why not?

Cochineal dye experiments on scoured 30/2 silk using hard tap water for some and bottled water for others.

The dusty pink upper right is the result of alum mordant on silk in bottled water with added cream of tartar. I really like it!

This is what the tap water and cream of tartar dye bath had looked like….so promising, right? However, a tap-water rinse sent it right back to purple again. Oh well. It was worth a try.

While on the topic of dye experiments, I can tell you that I just happened to come across the Long Thread Media podcasts again a couple of days ago. I have listened to these chats with fiber artists in the past but because I haven’t subscribed, I keep having to remind myself to go and check out the new episodes. I listened to the fairly recent one with natural dye expert Catherine Ellis the other day and was so happy to hear her speak about the time she had been teaching someplace in the north east and was unable to coax any red out of cochineal bugs. This was due to the hard water that they were using. She also mentioned that using distilled water had provided the solution to this problem. Hooray. It’s so nice to have this confirmed by such an authority. It squashes the thoughts I have every now and then that I am simply doing something very wrong and that it isn’t the fault of the water that I can’t produce red. And so, while I don’t have any nice dyed red silk to show you this time, hopefully in my next post there’ll be some lovely red tones to add to my collection of samples.

The other thing that I have been working on here is the case for my friend’s quena (flute). I showed you in my last post how I was weaving two bands at once in the structure that I call Andean Pebble Weave on my backstrap loom so that I could have two pieces each with a third selvedge.

The idea was to use the third selvedges at the mouth of the case and at the edge of the closure flap as you can see below….

That gave me two raw edges to take care of at the other end of the case. I joined the fringed endings of the two bands together with weft twining which sealed the raw edges. You can see that in the photo below. I’ll leave it up to my friend to decide how short he would like to cut the fringe. He does tend to like things on the wild and woolly side. All that’s left to do is add a large snap closure or a magnet closure, or even velcro tabs if that’s what he prefers. I have a tutorial on this kind of handy weft twining here on my blog.

I am so happy with the way the pattern on the flap lines up with that on the body of the case. The pattern is a modified version of one that I include in my More Andean Pebble Weave Patterns book.

I then got the idea of replacing the decorative bands on the flute itself with woven ones. The bands that are currently in place are made from colored nylon fishing line. There were three bands and I have managed to remove one of them so far. I think that woven bands in red and black would look much nicer.

So, if it’s fun to weave two bands at once on my backstrap loom….how much more fun would it be to weave three? That way I get three pieces each with its third selvedge to place around the flute. The selvedge will slightly overlap and cover the raw edge at the other end of each band. I am weaving these in much finer cotton than the thread I used for the case. This is the good ol’ Clea thread that I used to use for almost everything long before I started traveling a lot to the States to make my yarn purchases. It’s made in Brazil and I have a bin of its odds and ends from all those years ago. It’s a 2-ply crochet cotton which isn’t as highly mercerized as the crochet cottons I have come across in the States. When I eventually move back to Australia, I am sure that I will long for it. I prefer the flatness of 2-ply thread over the round-ness of 3-ply and the less polished feel of the Clea thread.

Three bands to encircle and decorate the quena in the structure that I call Andean Pebble Weave. This is just one of the hundred patterns in my Complementary-warp Pattern Book.

And when the evening comes and its time for cat-sitting cuddle duty, I brush this little old lady and spin her fur for fun.

I have two takli spindles here with me. One is occupied with the natural brown cotton labeled as “cinnamon”. By the way, I did some boil tests with the cinnamon thread to see if the darkening of the brown color intensified the longer it was boiled. I started with the two extremes, boiling one lot for 40 minutes and the other lot for only 5. The difference is disappointingly barely noticeable and so that’s the end of that experiment! It was actually the label on the brown color called “coyote” that stated that a range of tones could be obtained by boiling the thread for different lengths of time. I haven’t started spinning the coyote yet and so I will perhaps try this experiment again when I have spun a decent amount of thread.

I’ll be back home by the time I write my next post. I’ll be breathing out some kind of mixture of everything I have been breathing in these last couple of weeks. See you then.

Backstrap Weaving – Spinning Tales

I am a “cheap spindler” in much the same way as I am a cheap drunk…it doesn’t take much to make me happy! Don’t waste the good wine on me. I do not have a refined palate. So, it is little wonder that I am content to use my humble Cusco drop spindle when I get the urge to spin. I just don’t have a refined palate for spinning tools.

The Cusco spindle was the second one I ever got, the first being from San Pedro de Atacama in northern Chile. The Cusco one that I got in 1996, being more robust, became my constant travel companion. It was practical. Although I have collected many more spindles on my weaving safaris since then, this Cusco one is the one I always use while the others hang on the wall as souvenirs of places I have been and people I have met.

The very first spinning that I did for weaving on my backstrap loom was with some extremely dry, brittle, and filthy llama fiber that I had bought from a farmer while wandering about the back roads of Uyuni in the Bolivian highlands. I cleaned and prepared it. The dust and dirt would have me wheezing and my skin would crawl and eyes run every time I opened the bags to get more. It made for good spinning training. I gave the fiber a tremendous amount of twist because at that time I believed that this was the only way hand-spun yarn could possibly stand up to the abrasion of warp-faced weaving. I have since learned that this is not so.

The natural colors of the llama I spun. I was always amazed at how nice it looked when woven. Warp-faced structures are very forgiving in that way.
And here, dyed with coca leaves, spearmint leaves and cochineal.
The first time I was given prepared alpaca to spin by my friend Janet, I decided that I simply couldn’t put all that heavy amount of twist into that beautiful fiber. With a bit of extra care in the way I handled it on my backstrap loom, it made lovely warp.

Prior to that experience, I had spun wool while still living in the Chilean Patagonia in the mid 1990s. I had brought some alpaca back from my first trip to Peru but had made a mess of it. That had me turning to sheep. There were sheep galore down there and I was given a fleece. So, I got experience washing and carding it and my first project was knitting! I can hardy believe it as I can barely knit. But I designed a pattern and fumbled my way through knitting the front of a vest. I wove the back panel in balanced plain weave on my Navajo-style vertical loom…without a reed. I probably didn’t even know that reeds existed back then. The knitting yarn was spun on the Cusco drop spindle and the yarn for the weaving on an Ashford Traditional wheel that my boyfriend at the time had brought back from the Falkland Islands. Spinning yarn that worked well for this knitting and weaving was a complete fluke. I really had very little idea about what I was doing.

Parts of the vest with a triple cross-knit looped edging. The brown part is the woven back. the multi-colored thing on the side is part of a woven bag also edged with the cross-knit looping stitch.

I really enjoy reading the online group forums about spinners and their spindles. The participants’ love and enthusiasm for their tools is wonderful….I totally get it but I just don’t share it. Some of the spindles they show are beautiful pieces of craftsmanship and I love seeing them. But when it comes down to it, I just want to get the job done.

It seems that when it comes to spinning I am totally product oriented which is kind of strange as it is quite the opposite when I weave.  I just want to get this stuff done so I can go weave with it. In weaving I am all about enjoying the process. I probably would not have been willing to devote any time to spinning if not for the pandemic. The combination of needing to keep my hands busy during Zoom sessions as well as a dwindling stash has had me happily spinning up all the wool I could find in my closet. Now I am making a start on the cotton. There’s still some alpaca lurking in there.

And as with my favored Cusco spindle for wool, I have taken the takli that Elizabeth gave me in Australia as my one and only tool for cotton. It is all I feel the need for right now. It makes for quiet, comfortable, and fuss-free Zoom spinning.

My slow-growing hand-spun cotton stash.

My collection of spindles that I have gathered in my travels includes a few that are used for cotton. Here are two from Guatemala and one that I bought from my Guaraní teacher here in Santa Cruz. The whorl on that one is a piece cut from the sole of a sandal.

And of course, there is the horizontally-held spindle that is used by my teachers in coastal Ecuador.

The cotton is draped on a wooden stand called the “rueca” for spinning. It has a notch cut into its top which grabs the cotton and allows the spinner to draw out the fibers under tension. A small basket is woven from plantain fiber underneath on which the spindle sits when not in use. This is a miniature version of the rueca which I made with my teachers’ help so that I could take an example back with me to Bolivia. I need to place something in the little basket to weigh it down because it is so small and light. The typical spindle can be seen at right with its wooden whorl. More often now you will see people using yo-yo halves and metal wheels as whorls.

Here are some tiny whorls from coastal Ecuador that the family had found while ploughing their fields. There were close to forty of them sitting in a bowl on a shelf, just like that.

The cotton sliver that I have been spinning was given to me by my friend Betty. One day while breaking off a length from the bundle in the closet to continue spinning, a label fell out which identified it as the Sea Island variety bought from a place called Straw into Gold. Judging from the yellowed state of the label and the fact that it had been typewriter-written, I am guessing that it was bought quite a long time ago. I had been becoming increasingly pleased with my progress spinning cotton but am less so now after having read a little about this variety of cotton online. Apparently it is known for its particularly long staple which makes it one of the easiest varieties to spin. Darn! It seems that I have started at the wrong end of the learning process. Considering how I struggled through the preparation and spinning of that ugly llama fiber all those years ago as well as going to the trouble of washing and carding the fleece I had been given in Chile, it seems like cheating to be picking up this beautifully prepared long-staple cotton as my (almost) first-ever cotton-spinning experience. I wonder if it will feel like going back to square one when I finish this and then start on the other varieties that I have. My very first experience had been in coastal Ecuador where I got to work almost from scratch, de-seeding, teasing apart, and fluffing up the cotton. It was difficult spinning it on the horizontally-held spindles compared to what I do now with the takli. Unfortunately, I didn’t spend much time on it while there, being much more interested in the weaving part of the process. My teachers already had plenty of spun singles that they doubled for warp so that I could learn how they weave their double-pocket saddle bags and hammocks. We would pass time in the evenings on cotton preparation.

My first attempts in Ecuador

I put in a little practice when I got back home but the loom soon called me away…

But now to the present. After finishing my big bag project, I took a few days off to spin cotton and think about what should be next on my loom.

The finishing touch on the bag project…magnet clasps for the flap and mouth of the bag. I had spare fabric to which I could first attach them.

I decided that I wasn’t quite done with the three-color pebble yet and that I should weave a study in color transitions. Upgrading my camera strap gave me a product to justify the use of my hand-spun for this study. I dyed some of it a rust color so that I would have three colors that would work well together in all possible arrangements.

Small quantities of hand spun wool for the camera strap plus some hand spun cotton singles ready to be boiled.
I got totally absorbed in working on the color transitions and different color alignments and thus forgot that I needed to start weaving the hummingbirds upside down at the half-way point so that they would be the right way up when the strap was worn. Oh well. That’s what happens when the things that are important for the final product get lost in the process.

In the picture above, I was testing shapes for the tabs which I would later cut from leather. I have an old home-made leather backstrap that was just the right color and was willing to sacrifice it for this project. I couldn’t get anyone in the street market to sell me just a tiny off-cut of leather and the available colors weren’t quite right in any case. Hand-stitching the leather was fun.

I used the existing strap hardware otherwise I am not sure how on earth I would have attached the strap. There’s a special kind of clip that I have never seen elsewhere that goes through a tiny hole on the side of the camera.

And here I am wearing the strap with its upside-down hummers on one side! and my “Ta-da!” face.

What’s next? I have started a sample for a wool Finnweave cowl. I am using 20/2 wool and need to see if the proportions of the motifs in my weaving with this material match those of the figures on my chart. But first I had to go through that annoying confusion of trying to figure out Finnweave all over again. You make notes from the last project but they are never thorough enough because you stupidly assume that some things are just too obvious to bother writing down. Not so! This time I will get it right and make sure I write down every single detail.

The other purpose of this sample is as a width gauge. This 20/2 wool is a fair bit thicker than the 20/2 cotton that I have been using for Finnweave lately. I have to get used to the difference between the cotton and wool. Cotton, naturally, gives a much sharper image and the hairiness of the wool makes it easier to produce skips in the lower layer of the double weave.

The other project idea that is waiting its turn is a very, very simple double-ikat pattern using my hand-spun cotton. I would hate to waste this lovely Sea Island cotton on a failed double-ikat experiment but I am so curious to see if I can manage to make it work. I will just have to keep reminding myself to keep it simple.

Backstrap Weaving – Pieces

I am still working on the bag project! But I do believe that I have just warped the very last piece of the puzzle. Then I will be hand sewing everything together. I’ve already made what I feel is a good start on that. While sewing, my mind will be free to start thinking about which project comes next.

The last piece is a band that goes around the mouth of the bag to cover the small pleats that will be in the main body. I really wanted a bag that is less box-like than the usual things I put together with my woven cloth. Using pleats seemed like a way to create a slightly more interesting shape.

Here you can see the warp for the 1 3/4″ band that will encircle the bag. I haven’t yet put in the two sets of string heddles for this sturdy intermesh structure. It’s a dense (complementary-warp) structure of three-span warp floats that can sometimes fool the viewer into thinking it’s plain weave. I might edge it with plain-weave tubular bands when I am done. If I decide to do that, well, I guess that means that this isn’t the final piece after all. There’ll be two tubular bands to warp and apply. I love those tubular edgings and am always looking for an excuse to use them.

The odd-looking thing to the left of the band warp is the left-over warp from the three-color flap piece. I had given myself a bit more comfort room than was necessary in the length of the warp and I am finding it hard to throw this away. I guess I will put it in a bag with the idea of maybe using the yarn for tassels, extra fringe etc. some day. Six months down the track I will discover it in the closet, realize that I am over my attachment to it, and throw it out. Surely I am not the only one who does this kind of thing!

Wide 3-color pebble weave warp.

This is what the warp for the flap looked like on the loom. I was setting up for 3-color Andean Pebble Weave using 1476 ends of 20/2 wool spread over 12 inches…dense! I enjoyed creating the warp but once I was sitting at the loom I couldn’t help wondering what on earth I had let myself in for. I had used the same 20/2 wool for the front, back, and sides of the bag and knew to expect it to be challenging in this warp-faced structure. It is certainly nothing at all like my hand-spun wool that I used for the strap. It had behaved so beautifully! Still, I tend to forget and it’s always a bit of a shock when I attempt to open the very first shed. It was a beast! but I know how to adapt and soon there was a rhythm and I forgot all about the beastliness and just enjoyed watching the little hummingbirds appear.

I didn’t break any warp threads. Dust bunnies appeared on the floor beneath the warp where they caused no harm, but not in the heddles. I used DMC #12 cotton for the heddles.

Bag flap in progress.

I plan to cut the end of the flap into a curved shape. It’s easy to say that now and we will see how I feel once I am hovering over it with scissors in hand. I have to tell you that I am loving fusible interfacing. It helped me to bravely cut away at the gold lining fabric that I wove. However, this flap fabric with its three colors is super dense and I am not so confident about the interfacing’s ability to hold everything together. I don’t know if it is considered a “cheat” using the fusible interfacing in this way. I am just making this up as I go along! This is another piece of the bag that I plan to edge with a plain-weave tubular band. It will reinforce and cover the cut edge. I have used it before on shaped pieces like this in cotton.

Curved flap edged with a tubular band.

I have a tutorial on this blog for doing this kind of thing.

The last repeat before weaving the pattern that will appear on the back of the bag.

Quite a lot of people have been asking me about the reversible three-color pebble weave…

Reversible 3-color pebble weave. The lighter reverse shows up a mistake that the dark side hides petty well. Oops!

I don’t plan to write a tutorial until I have had a chance to teach it in person several times. I find that kind of experience absolutely invaluable when deciding on which aspects I need to focus when writing it all down. I feel that I need to be able to see it through a student’s point of view and feedback from a wide variety of students who have different learning styles is golden. It is quite a step up from the basic two-color structure to the reversible three-color version that I have been doing. What I will say for now is that I have spent YEARS happily exploring the basic two-color version. There’s much that you can do to turn a piece with just two interacting colors into something that looks spectacular and complex. Clever use of color can make it seem like there is just so much more going on. For example, let me show you the beauty that Fenny in the Netherlands has created using the basic method…..

By Fenny in the Netherlands.

I really don’t believe that weaving that pattern in the three-color method could possibly improve on what Fenny has created. The block-style pattern chart for this pattern is in my More Andean Pebble Weave Patterns book. It was my attempt to replicate the very first piece of weaving that I had purchased in Peru back in 1996. It was a scrap of band that was being sold on the street and had been woven in natural wool colors. It is not a faithful replica because I hadn’t fully understood all the possible structures at the time. Still, I liked it enough to include it in the book and I continue to weave this version rather than the entirely faithful one which I have also charted in a different publication.

And if that hasn’t convinced you, I will also pull out this example again with its clever use of color because I love it so much!

By Priscilla Cardon Bradburn

Priscilla has taken several of the most basic shapes that are charted in my Andean Pebble Weave on Inkle Looms book to create her own unique pattern. Her beautiful use of color makes this band even more eye-catching. Again, I can’t imagine the three-color technique being able to improve on this and I love the fact that she has taken these basic building blocks and used them together so creatively.

I will leave you here with a reminder that the following are my two “gateway” books to this technique. The one on the right is for those who weave their bands on standard inkle looms and includes access to video clips. The other one is for those who use ANY kind of loom to weave their warp-faced bands. You should be able to competently weave plain-weave warp-faced bands on your loom of choice before attempting this. There are detailed descriptions of the books on the Taproot Video website as well as a chance to “look inside” at some sample pages. The books are available as PDFs or as spiral-bound books.

LINKS: Andean Pebble Weave on Inkle Looms Complementary-warp Pick-up

Complementary-warp is the name of a category of woven structures in which the two faces of the cloth are structurally identical with colors reversed. Andean Pebble Weave is a complementary-warp structure and just one of the varieties that sits within this category.

Until next time, when I will hopefully be able to show you my finished bag.

Backstrap Weaving – Star Gazing

Every night when no one is around I go up onto the terrace of my condo block and walk about star gazing for half an hour or so. It’s a peaceful, quite extensive space that covers the top of eight apartments. I don’t need to wear a mask up there and in spite of the light pollution from the inner city area in which I live, I can enjoy looking at some of the stars and planets while getting in some stretches and exercise. The air is fresh after a steamy summer’s day and I often wish that I could string up a hammock and sleep up there.

I remember one of the few times I was able to enjoy a night sky that was completely devoid of man-made light. It inspired me to weave stars into what I call my ‘Starry Night” wall hanging. I remember stepping outside my little room on Taquile Island on Lake Titicaca in Peru to go to the bathroom on a clear and bitterly cold night and being stunned and almost knocked over by the brilliance and abundance of the stars in the black, black sky over that dark, silent island. Kurt Laitenberger wove this motif with tablets and and I asked his permission to transpose it into the Andean Pebble Weave structure.

It’s interesting that it was this very same motif that caught my teacher Maxima’s eye the last time I was with her up in the highlands. I had taken many woven samples to show the ladies in the weaving cooperative and Maxima had chosen this one. Her first attempt to copy it on her own was not successful. Actually, she had started out very well but suddenly got stumped and stopped. She asked if she could watch me weave it so that she could learn. 

This image has an empty alt attribute; its file name is with-max-at-leaning-loom.jpg

I wove one motif and that was enough. Maxima was then able to continue just by following my woven example.

This image has an empty alt attribute; its file name is maxima-star-band-central-boloivian-highlands.jpg

Up on the terrace In these early months of 2022, it’s been nice greeting Orion on its return to the 8pm night sky on my side of the world and I am currently waiting on the Southern Cross to complete its circle low in the south and once more climb high enough to reveal itself above the light pollution and buildings.

An invitation in one of the online weaving groups to show-and-share star patterns prompted me to write this post. I actually wrote about this same topic about ten years ago but there has been quite a lot to add to it since then. Back then, I was able to share the Andean Pebble Weave strap on which I combined motifs woven by the Guaraní people here in the lowland part of Bolivia in which I live…

The Guaraní weavers use two types of complementary-warp structures in their cotton cloth. In the structure that they call Moisy, they represent all the natural beauty of their surroundings in large, bold renditions of trees, butterflies, birds, plants and flowers. However, in the pebble structure that I used above, they only ever weave two motifs – a snake and stars –  and there are an endless number of versions of these two items. You can see one such version on the woven bag.

My teacher told me that it was a snake that came to the first weaver in her dreams to teach her the patterns. The Guaraní people who live along the Parapetí River here in Santa Cruz also use the snake motif to represent that life-giving water. The stars are important guides in their agricultural cycle.

I found a story translated from Guaraní to Spanish in a book published by Artecampo, which is a craft cooperative store here in Santa Cruz, about a legend behind the use of the star motifs in Guaraní weaving…..it says that…

One day the children were taken and placed  like stars in the heavens and this is why women cry out about stars in their weaving. The stars not only speak of the sky but also about the richness of nature because one woman, in an attempt to stop her child from being taken, grabbed hold of a finger (or toe, it is not clear in the Spanish translation which). As she pulled on the finger, unfortunately, a piece broke off and this piece was buried. From the burial of this piece a corn plant sprouted. In this way, weaving symbolizes abundance which comes from the piece of the child. And this is why food crops are not only considered elements that feed and sustain men, they are part of Man himself just as the stars are part of Man and Society. Songs name those who are living in the sky and those that sing wear woven cloth to show that they are still with them even though they are distant.

Dionicia added these stars to her pattern repertoire after my visit. She wove them into a bench cover that she sells locally. Being able to include a “novel” pattern gives her a little advantage over other weavers who might also be selling their woven bench covers. 

This image has an empty alt attribute; its file name is dioniciac-1.jpg

The star patterns above are charted in my book More Andean Pebble Weave Patterns. And, speaking of the ladies up in the highlands, Dorinda has just written a new blog post on her most recent visit now that she is back home in the States. Dorinda had been away in the USA for going on two years and I can only imagine the happy reunion when she visited in November. 

In the Bolivian highlands, stars are woven into cloth by the weavers of the community of Tinkipaya. According to Veronica Cereceda in her book which catalogs the designs on these textiles, these ch’askas, stars, are a representation of the world above known as janaq pacha.

The small band in cotton that I wove to test the pattern is pictured above with a couple of wooden tools I got in a market in Potosi, the province in which Tinkipaya is located. I was told that the tool on the left is used to push down the warps behind the heddle rod when the weaver is opening the heddle shed. I have never seen a weaver actually use one of these and I have never seen another one like it. The one I have has a red stain on it and I like to think that it might be cochineal from one day when its owner was preparing to dye. The other tool, of which you can only see the tip, is used for beating and strumming and I have seen tools like this in use in several places in Bolivia and Peru although they are more typically made from a llama leg bone.

The structure used in this piece is yet another style of complementary-warp. The warp floats that surround and fill the star motif are aligned and arranged in a certain way that distinguishes this style from others. Below you can see the same star motifs woven with my hand spun llama fiber into a band that I wear as a wrist cuff. 

This image has an empty alt attribute; its file name is wrist-cuff-in-handspun-llama.jpg

And here it appears yet again in wool on a little bag I made when one of the online groups held an “orange challenge” several years ago.

This image has an empty alt attribute; its file name is 194951393_6181681991845586_2057187051893150363_n_medium.jpg

I published the chart for this pattern in my More Adventures with Warped Faced Pick-up Patterns book and Susan Torntore, one of my new Zoom weaving friends who refreshed her Andean Pebble Weave skills via a Zoom class with me, transposed it into the Andean Pebble Weave structure and then went on to create something like fifteen beautiful variations. Here are a couple of them. She plans to use this band as a bell pull.

This image has an empty alt attribute; its file name is susan-torntore-stars-crop.jpg

The Andean Pebble Weave structure has the advantage of having two regularly repeating rows which can be produced automatically by enclosing those arrangements of threads in heddles. Some weavers choose to do that because motifs can be woven much faster this way. Others prefer not to fuss with heddles and weave the patterns using pick-up for every row. In the structure used for the traditional Tinkipaya pattern, there’s no choice. Each “row” is unique and the threads for each must be picked up manually.

Wikipedia tells me that the stars on the flag of the United States represent the fifty States in the Union. Well, I knew that. I was hoping to find out why exactly stars had been chosen as opposed to some other figure but I guess there doesn’t have to be a reason. I am sure that we could all come up with some kind of symbolic meaning for a star. I swear that some of the indigenous weavers with whom I have studied have made up things about the motifs they are using just to please or else have a bit of fun with me…I have seen the twinkle in their eyes and the way they look sideways at each other!

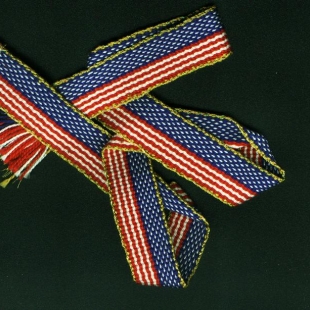
Gail wove this very patriotic collar for her dog on her inkle loom many years ago and I have seen this pattern and variations of it show up in the various online Inkle Loom groups many times over the years around the fourth of July. Gail was forever coming up with clever collar designs for what must have been the best-dressed dog in New York.

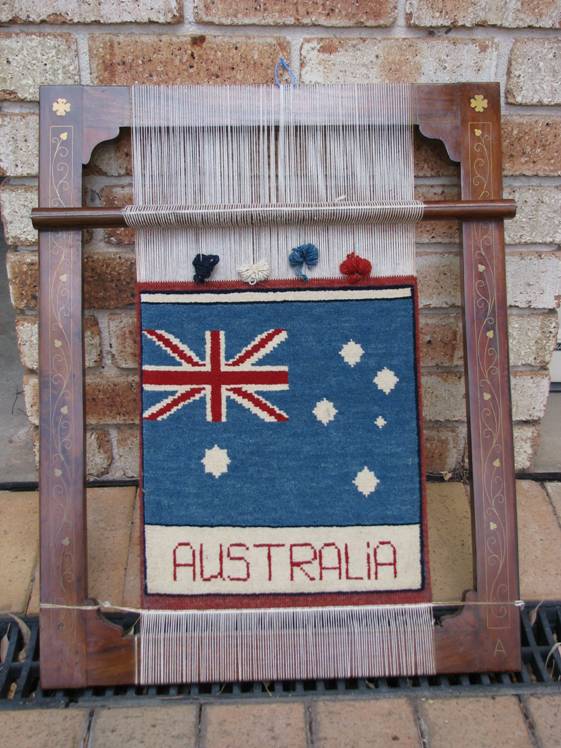
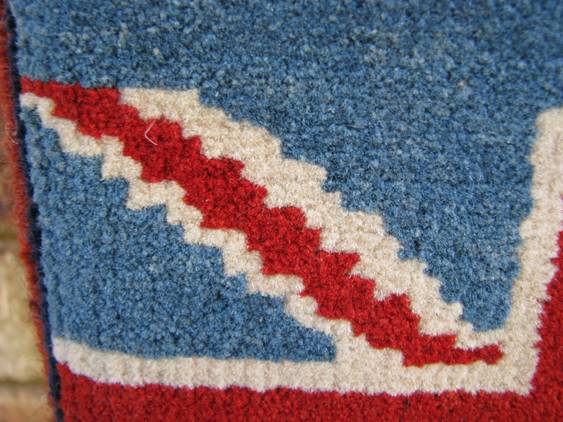
Speaking of flags and patriotic weaving, I assume that the next starry piece was made by someone who is proud to be Australian. I have this very cool cut-pile weaving of a representation of the design on the Australian flag…

The group of stars is the Southern Cross constellation which really is a sight to behold there in the southern sky. I am so happy to be able to see it low on the Bolivian horizon and it makes me feel somehow connected to Australia and  the people I know and love so far away. It is little wonder we so love stars and choose to use them in our cloth.

The large single star, which should only have seven points, represents the Nation’s seven states and territories. This cut pile piece on its beautiful frame is gorgeously dense and I would love to meet its creator.

It was given to my brother as compensation from the Indian owner of a furniture store who went out of business before he could supply all the chairs for my brother’s dining room setting. My brother then gave it to me. One day I will track down this furniture maker and see if I can talk to him about this weaving technique.

I don’t know if the weaver intended to continue with the design. There is so little space at this point and the tension on the warp is so high I can hardly imagine being able to do so.

There are a lot of representations of stars in Andean weaving. I took one small motif  and combined it with others to make the guitar strap below in colors reminiscent of the desert and canyons of the US southwest… a winding river, moon and stars. It took me back to clear, warm nights camping in the depths of Utah canyons with nothing between me and the stars. Moonlight bounced of red canyon walls and dozens of frogs singing away at the water’s edge. These were other precious occasions on which I could star gaze without man-made light pollution.

Combining several small motifs in this way is a nice stepping stone toward designing your own unique patterns. I teach the Andean Pebble Weave technique for those who use a standard inkle loom in my book Andean Pebble Weave on Inkle Looms which you can buy as a PDF or as a spiral-bound book from Taproot Video.

And then there are many motifs that look like stars to our eyes but which and perhaps represent something else all together. Maybe one day I will find out what exactly they mean to the weaver. There’s what I believe to be an Andean ch’aska  in Andean Pebble Weave on the left. In the center are the star-like motifs that I replicated from Central Asian yurt bands. A motif on a belt from Ecuador is on the right. Its star-like motif is woven using supplementary warp threads.

I chose a star motif for my first ever attempt at using 60/2 silk as warp on my backstrap loom. The motif did not have any symbolic significance to me. I simply needed to use something that was smooth-sided and symmetric. This was because I wanted to use a supplementary-weft technique in which the additional weft is not carried from selvedge to selvedge. I didn’t want the supplemental weft to thicken the cloth and so I used a technique in which the weft just travels back and forth from edge to edge of the motif itself. This only looks nice, in my opinion, when regular rather than irregular shapes are used. So, who knows why certain motifs ae chosen by weavers? It could be for what they symbolize or the choice could also just as easily be for purely practical reasons, as was the case in my silk piece.

There aren’t any stars on my current three-color Andean Pebble Weave piece. It’s all about flowers and hummingbirds. If you have been following me on Instagram (I go by my name: lavernewaddington there) you will have seen some of my progress. At some point I unconsciously stopped being concerned about my hand-spun wool being up to the challenge and have been simply enjoying how lovely it feels instead. But for now, I will stick with the Starry topic and wait to show you more of my three-color pebble in my next post here on this blog.

Let me finish by showing you some beautiful creations that were shared with me by another new Zoom weaving friend, Laurice Johnson. She has converted her pretty inkle-loom-woven bands into these gorgeous star ornaments by following online tutorials. There are several tutorials on Youtube for fabric stars that can be used for inkle bands. They are really stunning. My friend Jennifer Williams also has a tutorial on her blog for a different kind of star made from narrow bands.

I’ll be heading upstairs soon for another night of star gazing. See you next time.