Backstrap Weaving – Blur

It’s amazing how quickly it can all become a blur. Here I am back in the tropics…bananas, palm trees and clinging humidity. It is hard to imagine how it had felt being amongst the redwoods experiencing autumnal coolness and colors just a few days ago, snuggling under the covers at night and listening to the chirping crickets.

Scene of one of the backstrap weaving gatherings at Ace and Pam's place in Humboldt County
View from the weaving room at one of the backstrap weaving gatherings at Ace and Pam’s place in Humboldt County a couple of weeks ago.
Not too cold yet to be warping outdoors under the big ol' oak tree at Janet's place.
Not too cold yet to be warping outdoors under the big ol’ oak tree at Janet’s place.
The view from my bedroom! at Cheryl's place on a break between Humboldt County and Sacramento.
The view from my bedroom! at Cheryl’s place.

ikat ready fo dyeingAlthough I haven’t settled back into my full Bolivian home routine, some parts were easier than others to pick up again….weaving and writing a blog post, for example.

I have managed to get back to the loom since I got home last Thursday and here I am back at the blog. I wove off the plain fabric on the ikat warp that I had taken as a display loom on my US trip.

I decided that this fabric could be sewn into a nice bag for the wee Kindle that I recently bought.

I thought that the top of the bag looked a bit plain and so I wove a teeny pick-up band and attached that to the rim. It was fun weaving that band in fine cotton. I have always liked all things miniature. The finished fabric was just long enough to make a pouch with a drawstring top.

???????????????????????????????

???????????????????????????????Now it’s time to survey the three wall hangings on which I had been working before the Fall trip and finish them off.

There are twined ends to be tidied, fringes to be cut, and a new set of red panels to be woven for the first flower panel. Yes, I will be undoing all that weft twining on that piece, removing the current red panels, which are darker and finer than the others, and replacing them with new ones. In that way, all three hangings will have identical red panels each with its own red-on-red pick-up pattern. It wasn’t something that I had had the courage to face before I traveled, but I have been away from my loom for so long and have been missing it so much that I feel I can attack this now with gusto!

And what about the blur and whir of activity in those last weeks of my trip?…

I stayed with Kathleen in California where she gathered a small group to weave supplementary-weft techniques using fine thread.  We played with Guatemalan techniques with traditional patterns which some people used for creating patterns outside the box such as autumn leaves and pre-columbian motifs of South America.

maximo laura x3I have woven with all these ladies on several occasions on past trips and it was great to see them all again.

Dorothy had spent many weeks over the summer in Peru studying tapestry techniques with the internationally recognized Peruvian tapestry weaver, Maximo Laura. She brought the piece on which she had been working to show us at my insistence.

I imagine that the teacher must be very proud of this student! We all urged Dorothy to have this piece prepared for hanging and professionally photographed.

???????????????????????????????

Kathy's backstrapThe design is Dorothy’s own composition. You really have to see it in person to appreciate how much of it is also about texture. Various sections showcase different techniques of color blending and texture.

Dorothy’s stories of her hours spent at the loom in the loud busy-ness of Maximo Laura’s workshop are priceless…the sounds, the colors, the characters, the excitement of it all…as well as the feelings of isolation and occasional loneliness associated with being far from home for such a long time and unable to communicate fluently. I hope that she is able to present her work and tell her stories at her guild.

Kathy and Dorothy also brought along large backstrap pieces which we had started in other gatherings in which we challenged ourselves to go wider. Sometimes, when weavers leave their work untouched for some time, they need a little kick start to get back under way. We can see the value of going away to some foreign land for a six-week intensive weaving retreat where life does not get in the way of our weaving! Kathy tells me that her red and black backstrap in Plymouth Fantasy Naturale, pictured above, is now fnished.

I helped get Dorothy back on track with her piece. She is using Tahki Cotton Classic with three columns of bird motifs which are charted in my first book.

dorothy's backstrap weavingFrom there I headed up to Humboldt County to my friend Janet. Again, there were lots of familiar faces to greet me…people I had met on previous visits as well as those with whom I had spent time at CNCH.

amber and janetThere was a weaving gathering at the mill followed by another session at Ace’s and lots of time in between to hang out weave alone. Above, you can see Amber practicing the supplementary-weft technique we wove together. She chose a pattern that I based on a traditional Bedouin motif to decorate her black bookmark. Janet can be seen refreshing her ñawi awapa skills using her own beautiful handspun wool.

During the weaving get together, Janet wove a piece with her handspun (of course) and indigo-dyed yarn using the intermesh technique. She chose a Mexican motif that is charted in my second book.

janets handspunOnce done with that, she was ready to warp another wider intermesh project. You see, she now has quite a stash of yarn that she has spun specially for warp-faced weaving and dyed with natural substances. In the past she has used both synthetic and natural dyes but has now decided to stick with natural. Lucky me, I was given some of her gorgeous yarn to take home.

???????????????????????????????

??????????????????????I got into the dyepot with some synthetic dye and dyed some wool that Virginia in Arizona had given me…red and black…no surprises there. This is ready for another series of wall hangings using the ticlla, or discontinuous-warp technique. It is funny that this was what I had chosen to study last summer too. Wait until the weather gets hot and sticky and then let’s bring out the wool! Janet has a nice dye kitchen set-up on the porch outside her mill. These wool projects will be competing with more ikat studies that I have in mind.

One of my discontinuous-warp studies from last summer.
Another 'ticlla' study with some pick-up patterning included.
Another ‘ticlla’ study with some pick-up patterning included.

On the second weekend, we went out to Ace and Pam’s place (the place that has that gorgeous view in the first picture in this post). It was nice attaching our warps to the wooden posts in Ace’s living room and extending them from there in a spoke-like fashion.

weaving at aces placeWe used lots of Janet’s wool bands around the posts for attaching our warps. There was time spent weaving but also time spent looking st woven motifs and figuring out how to chart them.

Tracy was using a backstrap brought for her from Guatemala patterned with a beautiful double-faced supplementary-weft technique…

Guatemalan double faced supplementary weftThe guild meeting was wonderfully busy and entertaining. There had been two workshops the previous weekend on mushroom dyeing and eco-printing which resulted in lots of Show-and-Tell.

Onward to Diane’s place with a fun day of weaving with folks who had woven with me on previous occasions. Even Jen, who had woven  with me over in Truckee and South Tahoe, was able to make it. It was wonderful to be able to see what everyone was working on. Some people were finishing off the samples that we had started in our last get together while others were well into new projects.

cheryl and backstrapIn previous sessions, Cheryl had warped, with Jane’s help, for a backstrap decorated with a pattern in the Andean Pebble Weave structure. She was able to almost finish weaving it in this time. Calculating to get the motif centered was tricky considering that Cheryl had not woven a sample with this yarn which we could use as a guide of her beat and take-up. We got close. The motif is charted in my second book. Cheryl uses the “thick border” structure that I describe in my first book and has created a thick and cushy backstrap. I call the backstrap that I made for myself with this structure my ”Rolls Royce”.

study group nevada cityFrom top left to bottom right, you can see Jane, Shan, Wendy and Jen weaving. Diane showed me the finished band that we had warped at the end of our last time together…the red, black and white one, below, (motif from the second book)…

jen and diane

With Cheryl and Ken's 'wee' pup, Trace.
With Cheryl and Ken’s ‘wee’ pup, Trace.

…and I loved Jen’s idea of combining solid color yarn with variegated for the plain Andean Pebble Weave section of her backstrap. She has a solid green “background” through which multi-colored pebble spots appear in the variegated yarn.

This is a solid group that gets together frequently to weave at Diane’s place. I am so happy that I was able to be part of one gathering and offer help and advice.I often long to be able to jump through my computer here in Bolivia to be able to help people who write with questions about their projects.

While revisiting this group of friends and staying with Cheryl at her gorgeous lake house, Diane, Cheryl and I were invited by renowned fiber artist, Sara Lamb, to visit her home and yurt studio.

This had long been a wish of mine!

yurt studioBeing familiar with some of Sara’s work from her online presence, her magazine articles, and from having seen her in her own woven garments made from her own exquisite handspun and painted yarns, I had an inkling of what I might expect to see within that enticing yurt. Of course, what lay within was beyond my expectations and I am not even sure that I can begin to describe that space filled with the richness of colorful yarn and tools, and crammed with the signs and sources of creativity, production and inspiration. Where to focus, where to start…so much to see and touch and so many stories to hear. It was an impossible space to photograph…at least for me. I would never have been able to contain all that magic in one frame.

Then, we moved into the house where a simple glass-fronted cabinet, with just the right kind of magical muted lighting, revealed an Aladdin’s cave of woven treasures (of course, Woven Treasures, the name of one of Sara’s books…there could be no other name for her work as that is the phrase and vision that immediately springs to mind when you are approaching the display).

Flash photography of course spoils the mood of that muted lighting. Cheryl’s picture is closer to reality than mine.

Picture by Cheryl Taylor
Picture by Cheryl Taylor.

woven bags by Sara LambIt was fun to be able to spot a backstrap-woven band used as trim amongst the treasures which resulted from a class Sara had taken with Ed Franquemont.

Each piece had its story. It is an astounding body of work and we didn’t even scrape the surface. We are so grateful to Sara for having invited us over.

visiting with Sara Lamb

The beautiful mansion that houses the Sacramento Youth Hostel

Last stop was Sacramento and a chance to stay with Vonnie and her family again and see long-time online weaving buddy, Franco.

There was a nice combination of known, familiar and new faces in the group…people who had woven with me before, people I had met at CNCH and new people with whom I hope to be able to weave again.

I enjoyed the guild meeting  and having people thank me for bringing back memories of their trips to Peru from years gone by. I hope that my pictures might inspire in people another visit to South America…maybe Bolivia next time…to see the weavers and the textiles with new eyes.  And the guild meeting was a chance to see weaving friends again…not only from Sacramento but from other places in the area.

Vonnie took me to a great local yarn store called Babetta’sYarn. We shopped for Plymouth Fantasy Naurale so that Vonnie could make her backstrap.

Vonnie started her backstrap the next night, I set my alarm for 2am for the pick-up by Super Shuttle, and my trip was done!

So, there you have the blur of those last weeks. While all that was going on, backstrap weavers from various countries were posting their projects online and sending me pictures by email…evoking lots of smiles!

cheryl san diegoCheryl wove with me on this trip and has already finished making her backstrap. It’s one of the things that I like to emphasise…warping and setting up to create good plain weave.

ruth chileRuth, in Chile, used the Backstrap Basics article, which I have online in Spanish as well as in English, to weave her own backstrap. She has done a beautiful job!

Ximena, also from Chile, often sends me updates on her Andean Pebble Weave work. Here is a set of bookmarks that she made…

ximena chile

Father Kyriakos, in Australia, wove a wool piece of fabric decorated with Andean Pebble Weave patterns using a four-shaft table loom (instructions are in my first book). He included some soumak and weft twining and used a band woven on an inkle loom for a strap for his finished product….a gorgeous satchel.

kyriakos bag (3)

kyriakos finished bag 1And, speaking of gorgeous bags and straps, Julia is constructing one using several bands and wide pieces. She has two other bands off the loom as well and I can’t wait to see how she uses them. All these motifs are charted in my second book.

julias bands and bagFather Kyriakos also sent me an update on his bookmark project. These he made using a backstrap loom…

kyriakos bookmarks Gwendolyn shows how she can comfortably set up to weave both indoors and out. She is weaving a plain weave band and decorating it with a pattern using a supplementary weft. The pattern is one that I have adapted from textiles of Central Asia that were woven using completely different structures. You can find that pattern charted here.

gwendolyn backstrap set upThat piece is now off the loom with lining attached and ready to be made into a bag…

gwendolyn bag with liningCamilla, in Sweden, is using both string heddles and a rigid heddle to operate her looms for Andean Pebble Weave, with its two sets of string heddles, and basic complementary-warp pick-up which is based on two sheds.

camillaAmanda wanted to weave a banner band for her mother’s craft business, Crafted by Rozella, and used the lettering technique that I learned from the Montagnard (Vietnamese hilltribe) backstrap weavers in North Carolina. It always makes me happy to see those tutorials being used.

letters-front-and-back1The critters on the table are wine bottle toppers.

amanda and her momFinally, Valtricot showed us a way to wind a warp if you don’t have pegs or clamps…

valtricotIf you have managed to get all the way to the end of this long post, I imagine that you might also be feeling like everything is blur. That is what happens when I leave off posting for a while. I just couldn’t manage to squeeze in a space for it while on the road for the last part of my trip.

1926818_621735811232203_1955837164_nAnd speaking of blurs…as in objects moving at great speed…my nephew, Ryan, recently took third place in his first ever professional appearance in long-distance triathlon.

You may remember that he brought home the gold in the World Amateur Champonships in China in September. Once again he thanks all the supporters from the weaving world who visited and liked his Facebook page.

Ryan first pro race (1)

Backstrap Weaving – Fancy Footwork

I got distracted again this week. I  love getting distracted. It’s always good and it’s almost always related to weaving. Between the delightful distraction and a lot of warping, I did manage to find some time to spend at my loom…

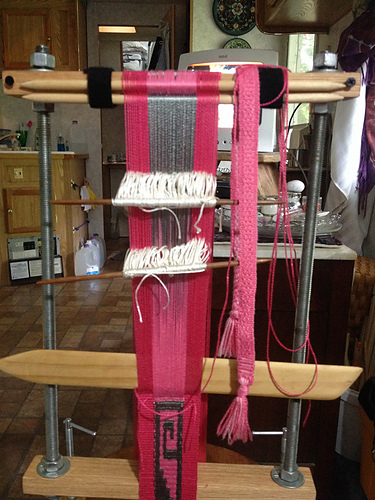
ikat and brocade on backstrap loomI ended the brocaded part with seven little stepped peaks and will now weave the rest as seven separate brocaded tabs. I am doing this because I want this panel to match the central panel of my Shipibo-inspired piece which also ends with seven woven strips. The other end will have a weft-twined pattern, probably something that is based on those stepped peaks.

Now, about that distraction…

All of you who have Facebook accounts will know the feeling when you receive a friend request from someone whose name you do not recognize….do I actually know this person, are they a friend of friend, what is the possible connection, is this just someone who likes to collect friends? I take a look at their page to see if there’s any weaving or fibery content and look for mutual contacts. Very rarely, the person who sent the request will also send a message. In case you didn’t know, there is a message inbox entitled “other” in the message section of your account to which people who are not your Facebook friends can send messages. Facebook does not send notifications for these and you have to go and look for them yourself. When I was first told about this inbox, I found a pile-up of messages dating back to 2010!…ex-boyfriend, old neighbors, requests to meet and weave with me!

Anyway…Yen-Chi Sun sent me a message. Yen-Chi Sun tells me that he is Taiwanese and that he is working with others to revive, document, and re-learn traditional backstrap weaving techniques. He had found my blog and thought that I might be interested in what he is doing :-). He shared pictures which he has allowed me to show here.

10588723_1675462386011227_1421427335_nThe language barrier makes our communication brief and a little disjointed but, from what I gather, Yen-Chi Sun’s group has been studying textiles in museum collections as well as discussing and observing techiques with elderly people who are still weaving in the places where these practices originated.

What a fabulous sight to see in the picture above…all those young people learning to use the newly-built versions of the traditional loom with its unusual tipping footbrace box (what else am I to call that thing!) You can see how the man in the picture is relaxing tension on the warp so that he can open the heddle shed. He does so by moving his feet and allowing the box to tip forward.

This next picture shows warping in progress in what Yen-Chi Sun calls the “five columns warping method”. Heddles are applied, as they are in many places in Asia and Southeast Asia, while the warp is being wound.

10615873_1675462382677894_1084265123_nI love those sturdy forked sticks used as the cross posts and end stake. I am not sure why the end stake is also forked but I think it might have something to do with the placement of threads for the coil rod…just my guess. My Montagnard weaving teachers have a stake in their warping set-up that creates the space for the coil rod. You can see the coil rod as it sits in the warp behind the box on the red warp in the above picture.

supplemntary weft inlay cotton scarffI have created a few circular warps myself, like the one at left,  and was surprised while weaving on them to find that I had a definite urge to have my feet braced against something, much more so than when I weave a piece that has been warped in a single plane. I love how the foot brace in the traditional Atayal loom of Taiwan can be used not only to help the weaver apply tension the warp but also to allow the weaver to relax tension.

Yen-Chi Sun also sent me the following picture from a demonstration in which the parts of the loom have been labeled (unfortunately for us, in Chinese) and so I will have to keep using silly names of my own invention like “tipping footbrace box”.

The following video is wonderful. All the speaking is in Chinese but. honestly, it doesn’t matter. The observers are asking  questions about all the things that I would want to know and you can tell exactly what is going on. It is a delight! Watch that fancy footwork!

The webpage of Taiwan Pictures Digital Archives has many old images of weavers and spinners in Formosa at work like the one below:

taiwan formosa history aboriginal weavers taipics022

John G Kreifeldt, whom I met recently online because of his interest in Asian art, allowed me to show a picture he took of an Atayal woman weaving during one of his visits to Taiwan.

a_modern_atayal_woman_weaviHere you can very clearly see the shed rod (with which I am in love!) Those of you who use a pair of sticks or a forked stick  in a second cross in your backstrap warp which you  grasp and twist to help open the heddle shed, will understand immediately what is going on with that stick. I put together something similar in my ikat piece right now so that I could try it out. But, more about that next week…

As for the kinds of textiles that are produced by these weavers and their traditional uses, I am trying to gather information about that for a future blog post.

1526640_771375512876288_903590434_nAbout that fancy footwork…when I think about it, I have been using similar foot movements to operate warps that I attach to my big toe, that is, a movement which relaxes the tension on the warp. I found that while I was weaving with such a set-up, rather than moving forward to relax the tension on the warp, I would simply flex my foot. It was done unconsciously and was such a natural and logical movement.

Now, I am not saying that tipping and controlling that big and heavy looking box  with one’s feet is natural and easy. I imagine that the feet must go through a long period of training to get to the point where they can manage the moves well.

Which is precisely what Tracy Hudson told me when I asked her to describe her experience weaving in Laos with looms that require some fancy footwork.

tracy hudson

In Tracy’s words:

I encountered this weaving method at the Ock Pop Tok Living Crafts Centre in Luang Prabang, Lao PDR in 2013, where I spent six weeks on an internship, working with the traditional textile collection.
Katu weaver LaosOne photo shows me using Keo’s loom. My feet are flexed to release tension as I open the heddle shed, holding a bar wrapped behind the other shed sticks to assist the process.
The other photo is Keo, a Katu weaver from Salavan Province, my teacher & friend. You can see how all her toes are involved in the adjustment of tension. This complex use of the whole foot & toes was the most inaccessible part, since my feet are completely untrained!
When releasing tension, Keo can hold the bars high in her toes while flexing back with her feet. When I do this, there is a danger of losing my grip on the loom bar and it pops over my toes toward my body. So I tend to bend my knees a bit to loosen tension. But the bar still has to be propped high on the toes, so that it doesn’t drop to the ground beyond the feet.
Tracy has made a video available on Youtube of a Katu weaver at work which includes their beadwork and you can read more about her experience in Laos on her blog.
The pieces that make up the backstrap looms used by the Li weavers of Hainan Island are beautifully constructed and include bars with decorated paddle-like ends against which to place the feet…
OLYMPUS DIGITAL CAMERA
A Li weaver demonstarting at the Santa Fe International Folk At Market. Picture by Pam Najdowski.
A Li weaver demonstrating at the Santa Fe International Folk At Market. Picture by Pam Najdowski.
I love seeing experienced toes and feet in action with the dexterity of hands and fingers. I found that my pathetic gringa big toe got sore and chafed with the rubbing of the tightly twisted handspun wool when I was weaving with my teacher Maxima in Cochabamba, Bolivia. After a couple of hours I transferred my warp to her big toe and we both wove attached to hers!
???????????????????????????????
Toes can be used to tension the warp while making heddles or weaving or even to tension the heddle string. Below you can see my teacher Hilda using toes to hold her kinking overspun yarn taut as she makes heddles…
hilda making heddles
A big toe makes a fine warping stake but toes can  be employed in other ways during the warping process…
Dennis Penley collection C Philip Willet
This picture of a gentleman in Ecuador winding a circular warp was taken by Dennis Penley in the early 1960s and is used with the permission of C Philip Willett.
The first time I got to use a foot brace with a circular warp was when I was visiting with Ju Nie, a Montagnard backstrap weaver, in North Carolina. When you don’t have the traditional items on hand, like a nice hefty piece of bamboo, you have to improvise. Here Ju Nie is using a cardboard roll. The ability to brace the feet is so essential that Ju Nie and her fellow weavers would be unwilling to demonstrate their backstrap weaving if a foot brace could not be set-up at the venue.
me-at-the-loom
cardboard foot brace
Here is another Montagnard backstrap weaver with an improvised set-up outside her home…
From Betsy Renfrew's webpage blackstrapweavers.blogspot.com
From Betsy Renfrew’s webpage backstrapweavers.blogspot.com
A Burmese weaver that I visited  in Massachusetts had not yet found a way to set up a foot bracing bar in her home. She had her circular warp placed around a rod that was fixed to the window frame and sat at a distance away from the wall that did not allow her to push against anything. As I watched her weave, I noticed her idle feet stretch and flex as she unconsciously worked them against a non-existent foot brace. Such is the training and the muscle memory.
Backstrap weavers in Ecuador can weave indoors all year round if they please. They use circular warps which take up little space within the home compared to the amount of space needed for a warp created on a single plane at full stretch. Weavers that I spent time with in San Roque have a permanent weaving area in the home, in fact they had two, with blocks of wood stacked against the wall to accommodate the varying leg lengths of the different weavers in the family. This meant that each person could sit and comfortably brace their feet.
fluffing the woven fabric with thistles Ecuador
And just for fun…
Sometimes backstrap weaving doesn’t involve the feet at all. It is just about kicking back, putting the feet up and relaxing. Here’s one of my weaving friends in Texas…
austin class
Enough about feet. Next week I want to talk more about the Atayal shed rod and nifty ways for opening heddle sheds.
I’ll finish with some great projects from Ravelry and Facebook friends and students…
emerald
Emerald has put together a gorgeous warp with three sections for Andean Pebble Weave. This will be a Christmas gift pouch for her sister.
Julia is practicing motifs from the Peruvian highlands that I have charted in my second book…this is simply beautiful weaving…
CuscoBand_2_medium2
And Marsha is back at the loom, this time with an adjustable vertical frame loom that she built herself. She is using the intermesh technique that I teach in my second book and cleverly combining it with plain weave. The frame is fixed to a piano stool so that it can be raised or lowered as needed.
image_medium (1)
Back to the loom, back to the warping board, and here’s hoping for another week of weaving distractions.

Backstrap Weaving – Those Other Techniques

This month the winners of the annual weaving competiton run by the CTTC (Centro de Textiles Tradicionales, Cusco) were announced and the weavers were awarded. Many pictures of the evaluation of the textiles and the prize-giving ceremony were posted to the CTTC’s Facebook page. Although it isn’t clear to me which group was the overall winner, there is a wonderful array of pictures of the gorgeous textiles and their proud creators on the page. In the CTTC’s next newsletter we are bound to be told which textiles were judged to be best.

10610503_689671741081744_8141454025465810761_nThis year’s competition was based on four challenges….

1. The creation of a knotted four-cornered hat based on those made in pre-Incan times (you can download a free e-book on these hats here).

met-publication-andean-four-cornered-hats

Here is an extract from page 10 of the book with a basic description of the techniques employed…

Almost all fourcornered hats are made with larkshead knots, variously manipulated for texture and color change.
A major distinction can be made between plush hats, patterned with supplementary pile yarns caught into the knotted foundation, and knotted hats without pile.

This intriguing video from Museo Chileno de Arte Precolumbino shows how the hats are constructed.

Here is a translation of the text that accompanies the video…

The four-cornered hat is constructed from the crown, with a ring formed from the first series of knotted loops. The knots are continued in a spiral pattern, with additional knots added on the diagonals to achieve the square shape of the hat. To make the sides of the hat, more knots are added at different intervals, depending on the shape and type of hat design: The knots are added in a spiral pattern if the hat is a single color, or in sections if more than one color is being used. The lower edge of the hat is finished off with a final row of knots. The “points” on the top of the hat are made separately. The relief designs on monochrome and bichrome hats are achieved by combining “front” and “back” faces of the knot, according to the motif desired. In contrast, the designs on polychrome hats are made using up to nine different colors of yarn, with the knots always tied in the same direction and grouped by motifs or color fields.

2. The creation of pieces inspired by Incan cloaks worn by the ñustas (Incan princesses)


Image of a late 18th century painting from the Museo Inka in Cusco provided by CTTC.


3. Double-weave belts.

4. Tapestry.

A weaver from Pitumarca  taht I watched at Tinkuy 2010 creating a taspestry using a backstrap loom.
A weaver from Pitumarca that I watched at work during Tinkuy 2010 creating a tapestry using a backstrap loom.

The following pictures are from the CTTC’s Facebook page and are used with their kind permission.

Here is one of the tapestries spread out on the floor during the evaluation process. I don’t envy them that job! Every piece must have looked amazing.

tapestry CTTC 2014

10417469_689672474415004_7225471250316288685_nIn this piece, you can clearly see the squares of woven fabric that were pieced together to form the large textile. I am assuming that, as in the competitions in previous years, the weavers were challenged to create 30 x 30cm squares and combine them to create one large piece. That reminds me of the interesting and emotional presentation at Tinkuy 2010 that I attended where weavers from the various communities talked about their experience with these competitions…the difficulties as well as the advantages involved in working as team, the pain of rejection of pieces that didn’t quite fit or meet the standards, the enormous amount of time involved with planning and agreeing on designs that would suit the year’s themes, and the rewards and benefits of participating in these events.

One such rejected square (see below) from the 2010 competition made it into the hands and home of my friend Virginia. I am sure that the pieces that don’t make it into the final work do not get tossed by the weaver or forgotten in a box under the bed. They stand alone as beautiful pieces of work even of they don’t fit within the whole.

??????????????????????

10376922_689671514415100_1698807909188374612_nWhat an experience it must have been to be seated within that courtyard surrounded by those amazing pieces of work and their proud creators.

1920489_686163014765950_455227465195720892_nHere are some of the four-cornered hats displayed for evaluation.

10568795_689672764414975_4096139166593297128_nAn award winner in what could be the Inca cloak section judging by the image on his certificate.

10603682_686163974765854_4113572595310474414_nI am assuming that these are some of the fajas from the double-weave section.

I will leave you to look at all the other pictures in the album on the CTTC’s Facebook page.

This is the first year’s competition  (that I am aware of in my brief experience with them) where different techniques have been highlighted….tapestry, double weave and the knotting technique used in the four-cornered hats.

This made me think about my own future projects and the possibilty of basing  my next wall hangings on some of the non-weaving techniques that I have learned or observed as well as techniques that  involve not only warp-faced pick-up. I suppose my latest ikat project has been a good start towards that.

ikat projects backstrap loomAs you can see, there are two versions on the go. Long story short…I got some black cold water dye from a one-time unexpected source  and was able to unwrap and weave the larger motif.

Large ikat motif backstrap loomI am loving the way this looks with that bit of red in the background as I think about the red panels that will accompany it. I haven’t decide which of the two ikat pieces will eventually be used. It will most likely be the one that came out more brilliantly white.

As for other non warp-faced pick-up techniques that I might use in future wall hangings, I ran across this piece of fabric that I bought from an alpargata-maker in Ecuador. This shaped piece, which  is created around a mold, forms the cover for the front part of the foot.

fabric fro alpargatas Otavalo

boy's alpargatas otavaloWhen I originally posted on this blog about these alpargatas that are used by mostly older men in Otavalo, Ecuador, it was suggested by a reader that the technique used to create the fabric might be called ply-split darning. I spent a day with an alpargata artisan and watched how he created the fabric. I wouldn’t mind trying to include the technique somehow in a wall hanging. I love the textured white-on-white pattern and I could perhaps use  in the red side panels that accompany some other kind of technique from Ecuador.

Another technique that is begging to be explored further is soumak and my greatest inspiration for that has come from Julia Miryam Chavah. I haven’t seen soumak in use here in South America and have no idea if, in fact, it is practiced here. Miryam frequently posts her projects online. I have watched in admiration and wonder as her skills have grown over the years and she attributes it to a humble little booklet (and a lot of hard work and determination, I am sure) that I managed to buy on a recent US trip…

??????????????????????Here is a piece called Double Happiness that she recently posted…

First, a nice close-up of the structure…

julia miryam chavah (1)


The work in progress…

julia miryam chavah (2)

And, the finished piece…..

julia miryam chavah (3)Wow!

I confess that I have never been quite clear about what exactly soumak is. Fortunately I have some books to guide me (and Julia’s work to inspire me)…

Jean Wilson in her Soumak Workbook describes soumak  as  a method of wrapping weft around warp. It is worked on a closed shed. The wefts do not pass through a shed.

However, I have also seen techniques described as soumak in books where the weft is supplemental, that is, a separate ground weft is used to create fabric and another patterning weft creates the soumak. In her book Woven Treasures, Sara Lamb teaches to create soumak using a supplemental weft. Another foundation weft is used to create a ground fabric.

Marla Mallett’s book, Woven Structures, has a section on soumak in which she indicates that reinforcing ground wefts are sometimes used but she says that “the thin ground weft hidden in most allover soumak fabrics exists merely to reinforce the wrapped construction.”

Peter Collingwood in The Techniques of Rug Weaving describes soumak with two wefts…

“One is the gound weft which weaves with the warp to make a normal weft-face structure, the other is the soumak weft which crosses the warp at intervals, wrapping round its ends, more in the manner of an embroidery stitch than of weaving.”

He also writes that the technique can be carried out on a warp-face plain weave background.

stitched-sta-cat-2It seems to be, in that case, that the upper form of patterning on the sampler above, that I studied in Guatemala, could in fact be called soumak. The supplemental wefts follow the path described and diagrammed in my books. (I would be happy if a reader were to enlighten me further!)  There is a warp-faced ground cloth beneath the colored patterning wefts. I think that this would be the technique I would explore further on a backstrap loom because it is something with whichI have had experience in my travels in Guatemala.

And then,  there are the sling braids and edgings that I studied in Peru way back in 1997. I would love to somehow incorporate those in the sets of wall hangings I hope to create.

sling-braid-edgingsTo pick-up or not to pick-up…all kinds of beautiful things can be created on a backstrap loom. Gwen just finished this plain-weave guitar strap for her husband using variegated Plymouth Yarn Fantasy Naturale. It’s only her second project and it is gorgeous. The hardware for the strap is from ASpinnerweaver’s Etsy store.

gwen guitar strap (2)

gwen guitar strap (1) Julia is doing pick-up and is practicing  designs that are charted in my second book that require all pick-up (that is, they are not semi loom-controlled as the Andean Pebble Weave ones are). This one is a sample and I know that she is already on to bigger things using colors with higher contrast.

DSC04807_mediumJane wove with me once and then joined the Weave Wide/Weave Fine challenge group this last spring. Here is her finished project. She made a backstrap using  all pick-up to create the central motif. Jane is totally at home with this and I can’t wait to see what she creates next.

10574436_817321331632239_2699883635988505940_nAhem…as I was typing that last line, Jane was already posting the next project…a camera strap…

1557630_817321921632180_4274413554055257658_nHow cool is that? The interlocking design is one that I adapted from tablet-weaving by Louise Ström and charted for Andean Pebble Weave in my second book. For this project, Jane would have used two sets of string heddles which makes the technique partly loom-controlled. She’s also good at charting patterns from pictures and textiles. A photo of a textile with the cute bear motif appears in Nilda Callañaupa’s book on Traditional Textiles of Chinchero.

I am ablaze with ideas for more wall hangings and have another ikat idea brewing, if I dare…just when it is time to put down the loom and start winding warps. Actually, it is the warp-winding that starts the ideas flowing. It gives me lots of time to think and ponder and, as my warping board is on a table in front of a wall of books, there are plenty of reasons to pause and start leafing through pages.

For now, I will get in a bit of weaving time at the loom, wind some warps, sketch and dream.

Mexico has been working its way into my life recently. I will show you some of things that have been coming my way next time.


Backstrap Weaving – Inspiring Ikat

sunlight on red panels backstrap weaving“Question of the Week” on the Warped Weavers Forum asked us if our finished projects always measured up to what we had envisioned. It is interesting for me to think about this and see how my ideas about the larger projects on which I have been working lately have evolved during the long process of weaving.

I have been spending months planning and weaving these wall hangings, often interrupted by a break of several more months while I travel.

I look back at my notebook with its sketches and glued-in pictures and can see how far the finished pieces sometimes stray from the original idea.

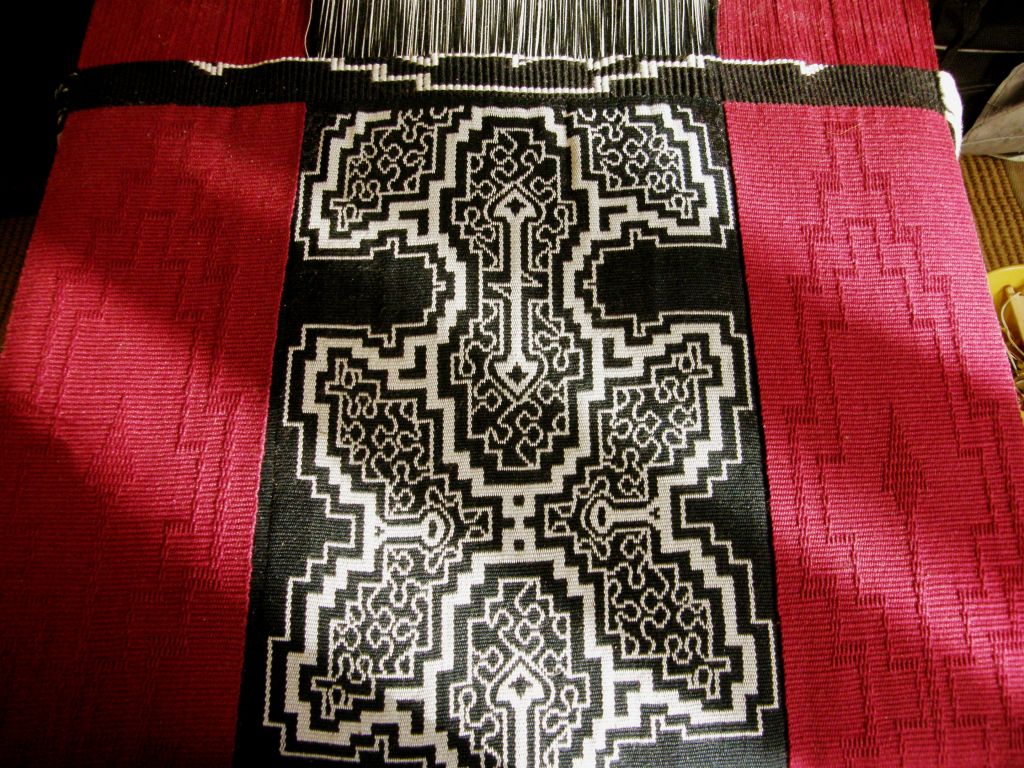
Sometimes it is a technical hitch that does not allow me to create what I had envisioned. For example, I had wanted the Shipibo-inspired piece to comprise only curves but could not manage to form nice smooth curves with the thicker solid lines in double weave. That had almost caused me to abandon the idea. But, I went with a strong angular outline filled with finer curves instead and I really like that contrast.

backstrap weaving Bhutan bagSometimes, in the middle of a project something will catch my eye online, or someone will show me something and I will want to add those ideas to the mix.

That is what happened with my Tales of the Sub-Continent fabric which started with a Bhutanese-inspired motif and spread to Afghanistan, Nepal and beyond.

Sometimes it works, sometimes it doesn’t. When it doesn’t, it goes into the closet. And this is one of the many cool things about backstrap weaving…my half woven projects can be easily removed, still on their metal rods, from the loom bars and stored. I can discover a project months later, pull it out and wonder why on earth I hadn’t liked it! Then it can be easily lashed back onto the loom bars and continued..

It’s like in the old days before digital cameras. I never wanted to process my rolls of film until at least three weeks after my trip. If I got impatient and processed them straight away, I would always be disappointed with the shots. They didn’t live up to my fresh memories of the things I had seen on the trip. The colors would not be as brilliant and they wouldn’t have captured the mood.

However, just a few months later, they would look fantastic as my memory of how things had looked and felt faded.

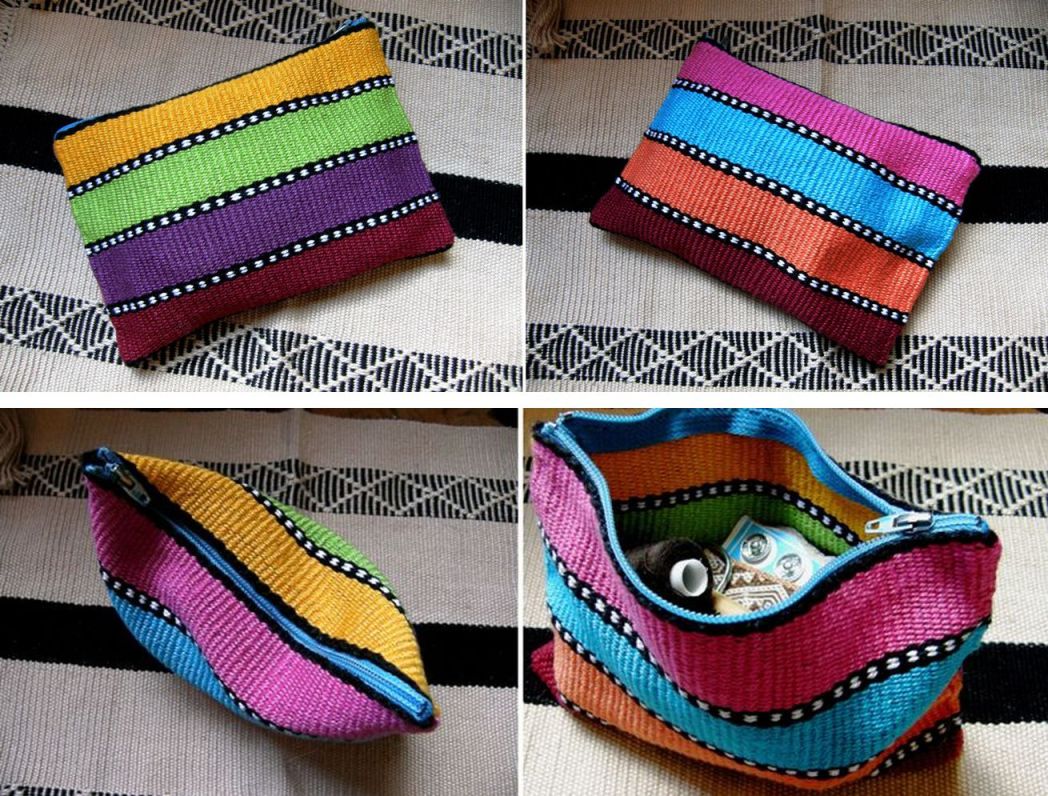
striped-pouch-x-4I detested the above fabric when I first wove it. It was a demo warp that I had hastily put together before a trip. I wanted something fun, bright and cheery in place of the black that I am so often using. It didn’t come out as I had envisioned and I didn’t even take it out of my bag to show anyone as I thought it was so ugly. Now I love the fabric, the original idea has been long forgotten, and the little sewing kit pouch is really useful.

Guatemalan supplementary weft sampler overviewThis fabric has also been living in the back of the closet for the longest time. I wove it to practice what I had learned in Guatemala shortly after returning way back in 2008. Now I love it and need to make something from it.

There have been a few things that simply didn’t work as far as I was concerned and those things got tossed. But, I have to wonder how I would feel about them if I were to uncover them in the closet today. If there isn’t even a picture of it, it means that I must have really hated it!

All this is leading up to my telling you that I have been walking by last week’s forlorn, rejected ikat piece, which has been sitting on a bench in my bedroom all week, and finding myself eventually wondering why I hadn’t liked it. Of course, there’s a whole blog post dedicated to why!  But, I finally decided that I could unweave some parts and improve it somewhat. So, here I am weaving away on that piece again…and not just to get it of the loom and learn more lessons…no, it’s because I actually like it now despite its flaws.

I spent most of the week washing yarn to take of the wax finish, setting it up on a frame and wrapping it for a new slightly larger ikat motif.latest ikat projectI was very excited about this new larger motif and really wanted to weave it. However, I had to face the fact that I didn’t have any black cold water dye left. In the end, I couldn’t resist trying to achieve black by mixing  colors.

Well, it looked black in the bath and even looked black while it hung to dry. However, the rinse water certainly wasn’t black and the dry cloth has a purply reddish glow.  It is kind of like the color of those big, fat, juicy, ripe mulberrries on the tree. They look so black and shiny but your hands and lips stain purply-red (which is why my brother and I could never get away with eating from the forbidden tree in our backyard as kids). I almost unwrapped it but I will wait until I return from my next US trip with fresh supplies of dye and I will overdye this warp black. That warp has to go on the back burner for now. What will be interesting, will be seeing what colors have already seeped under the wraps.

Here’s some online inspiration for more and more ikat experiments…lots of reasons to keep at it!

Photo used with the permission of the Ministerio de Cultura de la Nación Argentina. The ikat poncho was woven by Guillermina Cabral.

Ponchos on and off the runway….

Don Juan Millain shows a ponch woven by Norma Millain. Photo from the Facebook page of MATRA - Ministerio de Cultura de la Nación Argentina.
Don Juan Millain shows a ponch woven by Norma Millain. Photo from the Facebook page of MATRA – Ministerio de Cultura de la Nación Argentina.

And on the loom….

Graciela Salvatierra's work in Catamarca, Argentina from the Facebook page of Ponchos Artesanales  Salvatierra ll
Graciela Salvatierra’s work in Catamarca, Argentina from the Facebook page of Ponchos Artesanales Salvatierra ll

And here’s my wee, wobbly project being slowly fixed…straightened on one side, and now with white embroidery floss for supplementary weft which looks so much better than the creamy colored silk I was using last week.

ikat

Chris Buckley, in Beijing, has shared many images with me over the years from his vast collection of textiles. I was happy to find his Art Southeast Asia page on Facebook recently, via a weaving friend, and see the picture of Li ikat weaving that he had posted. He has just had an article on these pieces published in the September issue of Textiles Asia (I have a copy coming my way). There were a lot of tiny wrapped sections in his piece! and the seeping of the indigo into the white has created a nice effect. Using handspun cotton…now that’s a whole other trip.

chris buckleyHere is his description that accompanies the picture:

The September 2014 issue of Textiles Asia (www.textilesasia.com) includes my article on ikat made by the Meifu Li people of Hainan. The Li make dense, complex and beautiful ikat, using locally grown handspun cotton and natural indigo dye. The designs are tied on the warp threads with small strips of resist, before the yarn is dyed. The dyed threads are woven on a simple backstrap loom, so that the designs appear in white on a deep blue background on the finished fabric. Motifs include geometric forms, human figures and amphibians, such as those in the photo here, which shows a detail of a large sarong. These were mainly for ceremonial use (weddings and festivals). The Textiles Asia magazine is excellent and I recommend it to anyone with an interest in this area.

You can watch a short Youtube video here showing the ikat process with string and masking tape used by some weavers in Argentina.

I think they are very brave to use that heavy marker pen! I tried using a fine-tip marker and the ink bled into the yarn. Now I use faint pencil marks.

A booklet that I have on Guatemalan ikat, known there as jaspe,  says that the person tying the knots marks with a pen the parts that need to be reserved. Most likely they are less prone to making mistakes than I am!

A Guatemalan jaspe warp ready for weaving
A Guatemalan jaspe warp ready for weaving.

Leaving ikat aside for now, let’s look at some other kinds of backstrap woven beauty. Gwen shared with us pictures of the beautiful pick-up weaving that she saw on a recent visit to the Cusco area of Peru.

10305594_10203495499921874_8779412477090214824_nThis is one of the textiles that has inspired her to take up backstrap weaving and she has already woven her own backstrap. Her enthusiasm and obvious enjoyment of the whole process has me remembering the simple pleasure of just sitting at the loom and working the sheds, listening to sticks clack while watching the warp and weft interact and the fabric appear…

gwendolyn facebook (2)I appreciate her having taken this next picture of the process of braiding the ends of the backstrap and inserting the cord. I didn’t use a picture of this in my article and I know that Gwen’s picture will make the process very clear to those who may be unsure.

gwendolyn facebook (3)Some more simple pleasures…

10570318_770325679684468_7800201937456857640_n…weaving outdoors on a warm sunny day. Oscar Vasquez tells me that he doesn’t live in a part of Mexico where backstrap weaving is practiced and so, he has been following the same WeaveZine article that Gwen used (the Spanish translation) to weave a narrow band while out and about.

This coming week, I hope to warp the two red panels that will accompany the central  ikat panel of my planned wall hanging. I will create another red-on-red pattern using simple warp floats. The motif will have elements of that used in the ikat panel.

See you next week.


Backstrap Weaving – If I were to do it over….

“If I were to do it over”….

I know that I am trouble if I find myself sitting in front of a warp and saying that phrase before I can even throw the first shot of weft or, in the case of my current ikat project, before I can apply the first tie to the area that will resist the dye. As I set the warp on the loom bars, I was thinking that I would warp it slightly differently “if I were to do it over”.

As I wrapped the warp threads, I was wondering why I had automatically started placing the knots at the edge of the wrap rather than in the center as I had  in past ikat projects where I used cassette tape. Would it make any difference? Yes it did. “If I were to do it over”, I would put the knots in the middle of the wrap. There is far less chance of nicking or cutting a warp thread with scissor tips when unwrapping if the knot is in the center rather than at the edge.

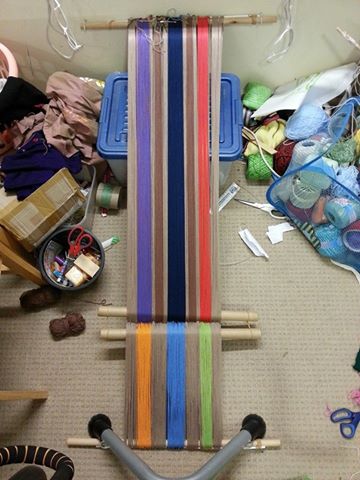
wraps for new ikat project?The wrapping part didn’t take as long as I had thought. It was fun watching the design appear and satisfying seeing it take on the same proportions as my sketches. I had calculated and measured corrrectly…yay. No thoughts about do-overs there.

ikat motif backstrap weaving“If I were to do it over”, I would wash the thread in hot water before starting the project. I have dyed a lot of cotton in my time. I guess it has all been knitting yarn and crochet thread. Those have all dyed beautifully with the Dylon cold water dyes that I buy in small packets. However, my supplier of  the UKI 20/2 weaving yarn that I am using in this project told me that this yarn is finished with a coating of wax. I only found this out by contacting them after my failed attempt to dye the warp black.

That explains the medium shade of blue I got with navy blue dye last week more than the fact that I had used a very watery solution. With this new warp, all I could turn out was an ugly steely grey instead of the black at which I had been aiming. What a waste of dye. I then overdyed it with far more dye than was necessary to ensure that I got black the second time around….another waste.  So, that’s the end of my black dye supply…no do-overs possible for that part of the process.

spots of dye under ikat tapeAs the ikat tape was close to transparent, I was able to see dark spots under the tape before I could even start removing it. That was very disheartening.

Clearly, the dye had seeped under the tape in several places.

However, it wasn’t that bad after all. A very noticeable concentrated spot of color on a group of threads all squished together and tied, turns into a vague smudge when the individual threads are untied and fanned out. It is not like the marks disappeared, but they were something with which I could live. I couldn’t see why those particular parts had allowed dye to seep in, and so it is not a problem that I would expect to be able to eliminate “if I were to do it over”.

ikat motif on backstrap loomIt was time to make heddles, put the shed rod in place and then unwrap. The unwrapping part was nerve-racking….take it easy and don’t snip a warp thread for goodness sake!  And then it was time to weave! And this is where the “if I were to do it over” turned to “when I do it over” and there are several reasons for that.

woven ikat motif backstrap weavingI placed many…too many… thin strips of cardboard within successive sheds to start with. I can see now that not all those strips were perfectly straight and the accumulation of this flaw had the effect of having me start the weaving with a slightly askew weaving line.

I didn’t notice. Iwas concentrating so hard on the ikat motif and the alignment of the warps that I didn’t even notice until the whole motif had been woven. I had to weave in some short rows to get things straightened out for the supplementary weft patterning…NOT GOOD. It looked awful. Then I noticed that the ikat motif itself had also been thrown slightly off center. Oh well.

Maybe only I can see it but it just isn’t good enough. It was time to start the list headed “When I do this over” and get used to the fact that this will go on the sample pile.

However, I have to say that I am really pleased with the way the ikat pattern turned out. I didn’t get any of the dreaded “railway tracks” (my name for repeated single rows of lines and spots of undyed thread that get completely detached from the main motif.) There is fuzziness…perhaps more like a raggedness…it looks like ikat! Yay!

When I fished out my silk thread for the supplementary-weft patterning, it was plain to see that there are many levels of off-white-ness. The UKI thread is closer to white and the silk weft closer to cream. They weren’t going to look good together but I wove some patterns anyway. This piece is now a sampler and I may as well use it to learn as much as I can.

ikat figure with supplementary weft patterning backstrap weavingIn the picture above, I have flipped the loom around and made new heddles so that I can add the supplementary-weft patterns to the other side of the ikat motif. More short rows had to be added to get things straightened out….stupid cardboard strips! grumble, grumble.

So, WHEN I do this again, I shall adopt some different ways of doing things, starting with the warping. Add to the list….don’t forget to dye the weft!! Weft went into the steely grey bath but not the black one which wasn’t such a problem until I broke two warp threads while weaving and had nothing with which to replace them.

ikat tapeI have loads of thread, a lifetime supply of ikat tape, and I think that I could probably get some embroidery floss here to match more closely the color of the UKI thread. What is missing is enough black dye…darn. Do you think that mixing navy blue and dark brown would work?

In the midst of this I had visitors who had not seen my weaving before.

I hate having to feel all squirmish about showing my work to people because I know what kind of questions and reactions I always get from local Santa Cruz people when I do so.

They are fascinated and delighted at first until they eventually ask how much time I spend on this kind of thing. And, when they find out that I don’t intend selling my work, and won’t even be hanging my wall hangings in this home (I am saving them for some vague future home-of-my-dreams!), well, that is the end of the story. Heads are shaken in bewilderment and I am left feeling a little deflated and almost foolish. My explanation of the ikat process was sheer madness to them!

painted tshirt ethnic motifWhich had me thinking once again about process versus product.

Of course this and pretty much all my projects are all about the process.

I want to experience the ikat process and not merely create a large solid white motif on a solid black background. I could, after all,  paint a white motif on black woven  fabric if that is all I wanted,  like my friend Sharon did when she hand-cut stencils and painted a beautiful set of tshirts for me with ethnic motifs.

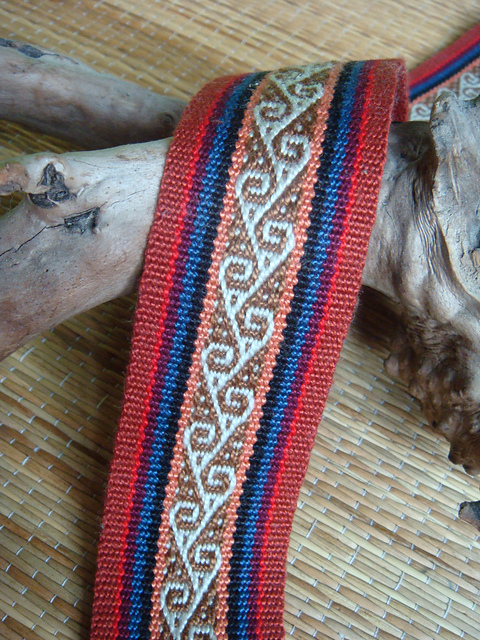
Or, I could use the warp-faced double-weave stucture which would allow me so much freedom to create motifs on solid-color backgrounds…made up of straight lines that can be put together to resemble curves, like those in my last Shipibo-inspired wall hanging and other projects.

Below, you can see an experiment with curves and Celtic motifs that I made a long time ago.

first-curve-experiments-in-double-weave

abba-yohanni-curtain-and-reproAnd another not-so-curvy one from the archives at left…

Double weave, of course, creates a thick fabric when what you might really be after is something finer and more flowing.

It also does not favor the use of a lot of unpatterned area. The parts of the double-weave fabric that do not have pick-up patterning will sit as separate layers of cloth simply joined at the edges. This can create a sort of ballooning effect over large areas.

The simpler little brother of the warp-faced double weave technique is warp substitution. With this structure, you won’t have to worry about layer separation in large unpatterned areas but most people do not like the awkwardly long floats that  form on the back of the cloth.

Another structure that allows motifs to sit on solid-color backgrounds is intermesh….

bhutan-collage-11It’s a warp-float structure that creates rather dense fabric….not something I would describe as light and flowing. The motifs can be very linear or curvy like the ones below.

intermesh with curved designPatterning with supplementary weft allows you to have a light piece of solid-color fabric patterned with soild motifs. The drawback is that in order to make the woven piece practical, the length of the weft floats needs to be limited and that will restrict the kinds of motifs you can create. Large solid-color areas will need to be broken down into segments of short weft floats.

tubular_band_on_ticlla_pieceAnd then, leaving warp-faced options aside all together, there is always tapestry technique…

greca design on a pillow coverThis is a pillow cover woven on a floor loom by a  member of the Hipolito family of Zapotec tapestry weavers in California. (Which reminds me…my weaving friend Dorothy is currently in Peru studying tapestry techniques with master weaver Maximo Laura… can’t wait to hear more about it).

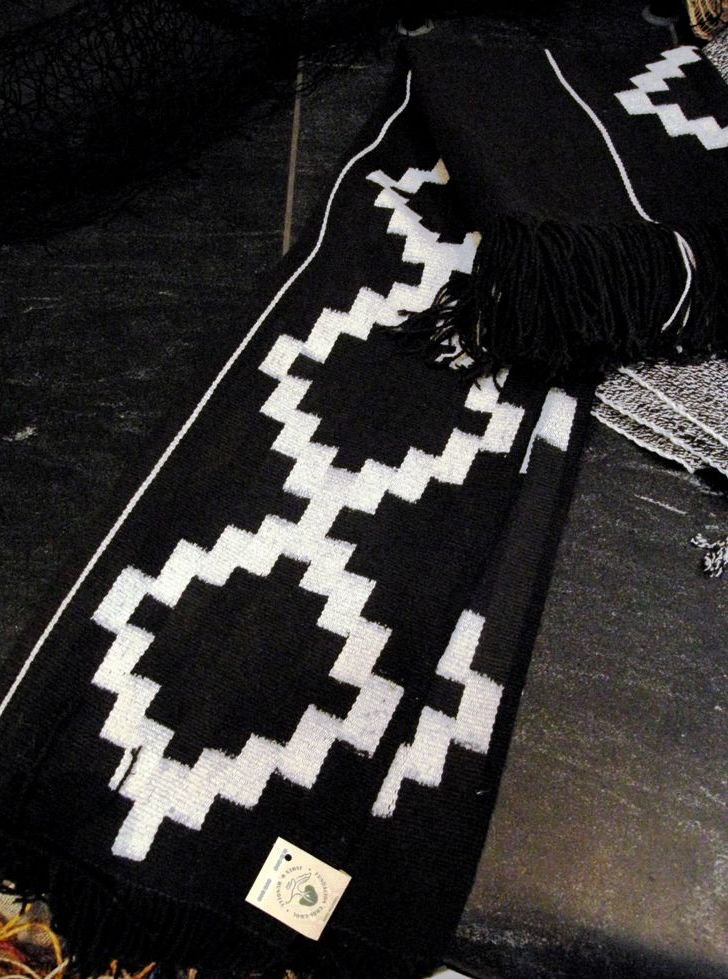
I love comparing the fine double-weave belt from Argentina, below, with its bold black and white pattern, to the precise black and white ikat work done by the Mapuche weavers of Argentina and Chile…two completely different processes that create superficially similar results.

OLYMPUS DIGITAL CAMERA

mapuche-ikat-11And so, I will finish this post this week by showing you a fabulous ikat poncho created by Argentinean master weaver, Guillermina Cabral, from Victorica, La Pampa province and thank the Ministerio de Cultura de la Nación Argentina, to whom the image belongs, for allowing me to show it to you here. I found it on the Facebook page of MATRA (Mercado Internacional de Artesanías Tradicionales de la Argentina). The page has other images of beautiful ikat work along with other exquisite handcrafts of Argentina.

10564839_1546978602191639_385201088_nSo, it’s all about process for me. But, concentrating too much on one particular part of the process can mean carelessness in others which are of equal importance…stupid pieces of cardboard! 😉