Backstrap Weaving – The Sounds of our Craft

It’s been a while since I last heard the scritchy sound of hairy warp threads releasing their grip on each other as I open sheds on my backstrap loom. I am hearing it now because I have taken on the challenge of weaving with mill-spun wool singles that I bought from a farm while traveling in California. I don’t really know what I had in mind when I bought that yarn. I had just wanted to buy something as a souvenir of that part of my travels from the lovely people who had allowed my friends to gather and weave in their barn.

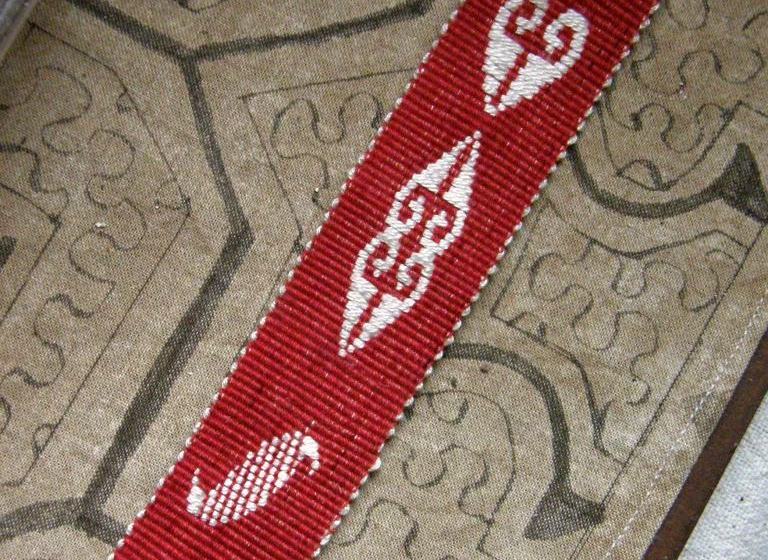
Because traveling to far off places to buy yarn like this is off the table at the moment, this is another case of my exploring my dwindling stash and enjoying the new challenges that this presents. My idea is to use this yarn to weave the body of a bag that will go with the strap I just finished. I used a three-color reversible Andean Pebble Weave structure for this strap and the wool yarn that I had been spinning and plying on a drop spindle during pandemic Zoom gatherings.

Despite the dark colors, I think it’s a happy garden scene of flowers and hummingbirds.

I did start off with the idea of creating an orderly, cohesive pattern layout but the temptation to play with the three colors and pop those hummingbirds wherever I wanted took over and I had a lot of fun doing just that.

One thing that I had wanted to do was use one color for the pebble spot that represents the hummingbird’s eye and another color for all the other pebble spots that sit within the figure’s body…but you know, I forgot to do that every single time! Well, almost every single time. I was determined to remember to do two things before I eventually finished the band…take a picture of myself at the loom working on it and get those colored eye spots in!

I once met a bird photographer that told me that it is really important to capture the little spot of white light in a bird’s eye in order not to have it appear lifeless. I have looked for it in every bird photo I have seen since. In the same way, I think the different colored eye spot on these last two hummers makes an enormous difference.

I didn’t hear any woolly scritchy sounds while working with this hand spun of mine. I had been concerned about how well it would stand up to this rather dense structure but realized after a while that I had completely forgotten all my concerns and was able to enjoy how friendly it was and how lovely it felt.

I remember the first time I wove with my hand spun. It was with some rather nasty dry and dusty llama fiber that I had bought from the animals’ owner up in the highlands. At the time, the scritchy tearing sounds were freaking me out and the yarn I had spun was anything but soft and lovely to handle. I had put a tremendous amount of twist into it so that it would stand up to warp-faced weaving. I don’t do that any more.

And now, there is a new experience…weaving with these mill-spun singles. This is a first for me. Yes, there’s some “scritchiness” but I am actually finding it pleasant…almost like the warp is whispering to me. That llama fiber had seemed to be screaming at me in that first-ever experience. I made adjustments to the way I was spinning it, it became friendlier, and I was able to enjoy weaving with it more. 🙂

This is my sample for the bag fabric that will follow. I wound a warp of 27″ length and 160 ends. The idea was to weave and allow it to settle into a consistent width so that I could then make calculations for the bag fabric. I most typically start off too narrow with new-to-me yarn and have to let the piece gradually widen and settle. Once I am happy with that, I put it aside and work on the real project. This time, however, I was enjoying working with this wool so much, I decided that this piece really needed to be something and I figured that my cell phone, which currently sits in a case, could do with a pouch. So, I unwove a good 3″ of fabric so that I could start over at the correct width. The fact that I was able to unweave the warp-faced cloth woven with wool singles yarn without losing my mind, tells me that this yarn and I are going to have a happy weaving relationship.

And I decided to use some of my plied hand spun as supplementary weft to weave in a pattern. This is some of the thicker “Zoom” hand spun that I first created and used to weave a wrist cuff before deciding to try and go finer. It is making a very nice supplementary weft. I am using the outlining technique of supplementary-weft patterning in which the weft does not travel from selvedge to selvedge. I can make my hand spun yarn go further that way. It is precious to me and I don’t want it to be just hidden away between the layers of warp as it travels to the selvedge. I can’t tell you how much fun I am having with this!

Wrist cuff with the initial run of hand spun.

A couple of observations: There had been a tendency for me to think that the action of the heddles against the wool would be the cause of most of the abrasion and subsequent pilling or shredding. Lately I have found that with good loom-operation technique, this isn’t so. There is actually a point of layer exchange that sits between the heddle and the shed rod where most of the abrasion is occurring for me. This exchange happens when the threads that lie on top of the shed rod are lifted and brought down through the heddles to the weaving line. (I keep my shed rod stationary and don’t slide it forward to the heddles as some backstrap weavers do which explains why the point of layer exchange on my particular warp is in that position.) That abrasion point is the one I need to watch and I notice that a little bit of fluff accumulates there. I am particularly gentle there and tend to spread the threads with my hands and lift them through that point in sections. It is also important to advance the warp as often as possible so that the abrasion point is constantly changing position.

I love the multiple tones in the warp and its rustic look. I had considered a hummingbird pattern but decided that this one better suits these natural earthy colors.

But despite all that gentle handling, the warp does continue to whisper to me in its scritchy voice, possibly just as a reminder not to get cocky and careless when I open the sheds. This talk of sound playing a part in our weaving, reminded me of some thoughts I had posted way back in 2013 that I thought I would revisit and share with you.
tools01

Back then, something a weaver had posted on the Weavolution website had resonated with me. An Australian gentleman, Hakim, was learning to make cut pile knotted rugs with an Iranian teacher in Australia. He said that when he is at home working on his practice piece, he can tell that the tension of the warp threads is correct if they make the same sound  when he handles them as they do when he is working on his learning piece with his teacher in class.

What a piece of priceless knowledge!

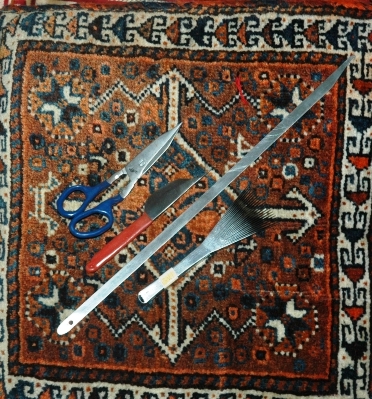
(At left you can see an example of a set of tools that Hakim was able to get for me from his teacher for the day when I try this technique. It’s on that long, long to-do list).

Hakim’s comment made me think about the different sounds that are connected with weaving on simple looms and how much I enjoy them.

I am not one for placing things in my ears and listening to music while busy with something else. I can’t stand that. I like to be in touch with the sounds around me. They form a very important part of my memories of places and experiences.

In my skiing days, I would wonder at people who skied with headphones on. I would never give up the pleasure of hearing the wind and the swish of the skis on the snow, or the sudden change of sound as snow turned to ice giving me time to react and adjust position. Back then, no one wore helmets. I am told that the helmets being worn now don’t affect the skiers ability to enjoy those sounds.

I learned to fly a glider when I was 19. There is nothing like the sound of an engine-less craft rushing through the air. There was so much with which to be occupied while learning (especially for someone like me who was so utterly un-coordinated at the time!) but I could always simply rely on my ears for certain information. For example, if the sound of the rushing air suddenly disappeared it was a sure sign that I had the nose up too high and that told me that I had better do something quickly before the glider stalled!

When we first went into pandemic lockdown here in Bolivia, I remember finding the sudden absence of sound really disturbing and almost frightening. Then I realized that what was missing were familiar sounds of human activity and that they had been replaced by much more pleasant ones…bird song and the sound of leaves being blown across the cobbles…sounds that normally were drowned out by the hum of city living.

As for sounds while weaving, I love using multiple big swords. I so enjoy the musical tok tok sound they make as they knock together in the sheds. And I love the chuckling chatter of all the sticks on the loose as they fall together when I release tension and roll up the warp at the end of the day. Below, you can see the sticks I used in a wall-hanging piece….many different kinds of wood making interesting sounds. It can become quite a collection.

O

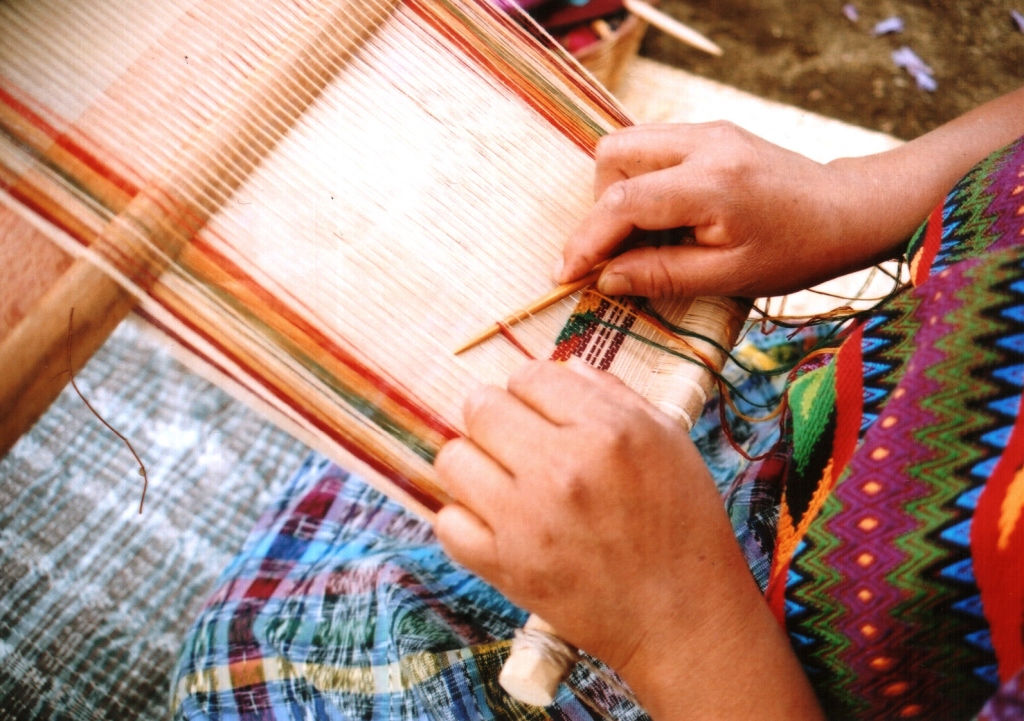
Then there’s the plink plink sound as the tip of a delicate Guatemalan pick-up stick slides from one taut warp to the next as the weaver counts out threads for supplementary-weft inlay.
weaving-tijera

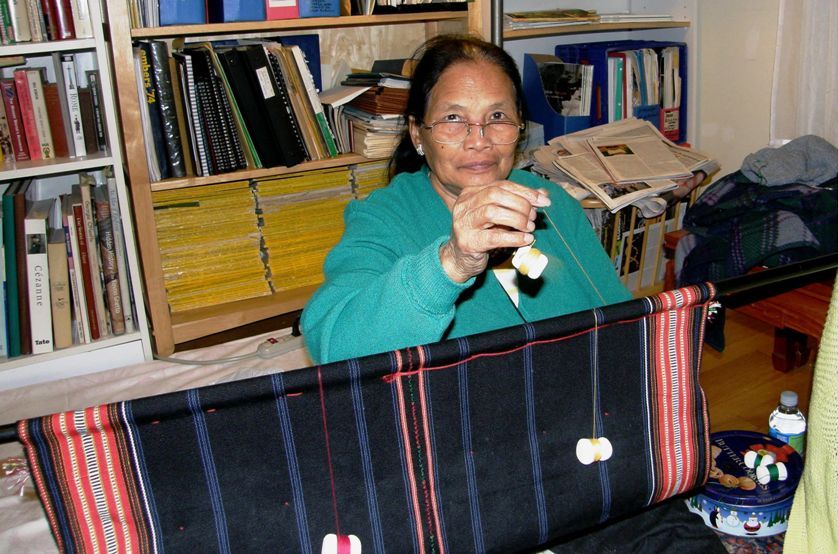
The dancing dangling bobbins used in weft twining go clackity clack as they twist and jiggle.
final-twining-session

And they enable my teacher to create such beautiful work as this:

Examples of kteh work by my Montagnard weaving teachers.

I loved the opportunity to drag the llama bone tool across the strong highly-twisted wool threads that my teachers in Peru had prepared below…scritch, scritch, as I strummed to help separate the warps. Only warp threads with certain characteristics will tolerate this.

O

Listen to my teacher doing it…

If you stroll around a  village of weavers in a certain part of the central highlands of Bolivia, you will know in which houses a weaver is at work by the LOUD THWACK!! THWACK!! of the llama bone hitting the sword as the wefts are slammed into place. That sound is one that is not really pleasant, at least not to my ears, when I am seated right next to my teacher. Here is one of my teachers in Candelaria at work at her loom:

When I stayed in the stilt-house home of my weaving teacher in Ecuador, I was often awoken at dawn by the muffled thump, thump and accompanying vibrations as Trini drew down her heavy beater while working at her vertical loom. This was combined with various house shaking and creaking sounds as the loom was connected to floor and ceiling beams…a part of the house itself. You can see that big sword/beater lying across Trini’s leg below and get an idea of the muscle that goes into operating this particular set-up.

trini-opening-shed1

The sound of threads in a warp-faced weaving rubbing past each other as a shed is opened can range from a soothing smooth swish to a seemingly painful tearing protest depending on the yarn being used and how it has been prepared.

When weaving with new backstrap weavers, we even learn to be amused by the constant clatter of swords jumping out of their sheds and hitting the floor. Each sword has its own musical tone…nowhere near as much fun on a rug! A cement floor like the one in this picture greatly enhances the melody.

Joan following a pattern chart at the Mannings.

By the way, I am in charge of picking up the fallen swords….gives me something to do. It is funny that as time goes by we have people weaving in silence. What happened to our musical accompaniment? Well, new weavers, without even realizing it, get a feel for the right amount of tension and the sweet spot in the warp where the sword will sit happily upright and not leap to the floor. Or…they just get rather good at catching the sword on its way down!

Maybe one of the nicest sounds for me is the fwip fwip fwip fwip in rapid succession as I pull my heddle string quickly but carefully (or else it will tangle miserably!) off its heddle stick. This means that the piece is finished.

And with that soft, happy sound in your head, I will leave you.

Until next time.

Backstrap Weaving – Making the Most of It

Back when I was doing my training to be a teacher of English as a foreign language, I remember being told over and over to make sure that any original materials that we created were designed to be multi-functional. Why go to all the time and trouble to create something that would be used once in only one context?

I loved creating my own materials for English-teaching. Back then when I didn’t have much time for weaving, it seems that I poured all my creative juices into doing that. It was multi-functional in that I got to be creative while at the same time providing some welcome fun time for my students away from the text books. And I got better and better with using the same material in different ways with a variety of groups in a variety of contexts at different levels in their learning. And, as a bonus, it gave me a reason to buy stationery. I discovered that I have a thing for stationery.

Give me a chance to draw and paste and sticky-tape and color and I am happy as a baby.

When it comes to weaving, I have folders and closet shelves piled high with charts that I have created for projects. They got used once and then filed away, like the mega chart that I created for my Shipibo-inspired project that you can see above. Sometimes I wonder why I keep them. But then you know how that goes….about a week after you throw something away, you find that you need it, right?

My cat always enjoyed my get-down-on-the-floor-to-chart time.

So, with all that in mind, I am pleased that I have been taking the hummingbird charts, over which I have long labored, and using them in a variety of ways…making the most of all that time and effort. And, I am not done yet. I have a theme in my head for a future project…something that I wish to express, and all this sampling is hopefully leading me there. It’s all just a vague idea at the moment and I am still waiting for the light bulb to come on. In the meantime, I’ll just keep weaving hummingbirds.

I wanted to see what my hummingbird motifs looked like in a large format. I had completed my piece in 60/2 silk. In that fine thread, the stepped nature of the lines that form the various diagonals and curves is not all that noticeable. But what about in something much heavier? Would those lines then become clumsy and ugly? I combed through my stash and found that the only thing I had that would work in terms of having two high contrast colors was 8/2 Tencel and so I created a short warp for sampling. Some particularly high-twist crochet cotton made pretty heddles for warp-faced double weave.

What a dream it has been to weave with this heavier thread! Firstly, the Tencel is gorgeous to handle. It plays well with the crochet cotton heddles and is so easy to see when doing pick-up compared to to the 60/2 silk…no surprises there. I do think it is a shame to use Tencel, which is so much appreciated for its draping qualities, in a dense structure like warp-faced double weave but it was the only option in my available stash for this experiment. I promise that I won’t do it again!

Because the theme that I have in my head concerns embellishment and also the lack thereof, I decided to embellish my king-sized hummingbird to the max. I really enjoyed planning those “hippy bandanna” curls and swirls and I think they add to the playfulness, the love of life and joy of flight that hummingbirds always suggest to me. The hummingbird will be my new signature pattern.

I felt that the curve-like lines and stepped diagonals looked fine. I certainly did not feel distracted by the fact that the steps in these lines are more obvious than they are in finer thread. In fact, I would have to say that I was pretty thrilled with the whole thing.

So, what was next? I could see that 8/2 in warp-faced double weave in something of this width (3″) would simply not be useful for much…too wide for a sturdy belt or bag strap and much too thick and heavy for anything else. So I turned once again to my stash for something a little finer. I happen have, courtesy of my friend Deanna, a good supply of natural-colored 30/2 silk along with a small quantity of it that I had dyed in a color called “rye” for an ikat project I wove last year. The problem was that I did not have any other color that would allow me to weave pick-up patterns in double weave. Yes, I could dye some but…sigh…I wasn’t in the mood!

Solution….use supplementary weft to create the patterns. Bonus: for the supplementary weft structure, I can use the same chart as I do for double weave. I like to use several strands of a finer thread for the supplementary weft which gave me a nice selection from which to choose in my stash of 60/2 silk. I went with rye warp and teal supplementary weft.

The pattern color that you see in the double weave version on the right comes from warp threads that do not float as opposed to the silk piece in which the pattern is formed by floating weft threads. I love the added dimension that the supplemental weft threads give to the cloth. Bonus: I only made one set of heddles for this structure as opposed to four for the double weave piece. The double weave bonus: I can create horizontal lines of any length I please which I can’t do in the supplemental weft structure as the weft floats need to be limited to a certain practical length. That meant that some parts of my original charts needed to be modified. Long horizontal lines for wings needed to be transformed into sweeping curves. It took some time but wasn’t difficult to do and I am really pleased with the way they turned out.

While I wait for that light bulb to come on which will enable me to figure out how exactly to compose the themed piece that I have in mind, I will weave these embellished hummingbirds into something useful. I think I will use my embellished hummers with some indigo-dyed cotton from Guatemala that I have and use it to make journal covers as I have in the past. That will involve an outing to the stationery store to find a nice sized journal. I want something quite big so that I can squeeze in a lot of hummingbirds. I am hoping to get something that has paper that is nice for sketching.

The indigo and champagne colored Guatemalan thread along with the initial width sample that I wove for the first journal.

I used this 30/2 cotton in the past for mini-journal covers which I have given away as gifts. I wove my friends’ initials into the spines of the books…no re-gifting allowed!

For these, I used embroidery floss for the supplementary weft but I can tell you that removing strands from the slightly twisted six strands of floss is a royal pain if you are wanting to use very long lengths. I like to split all six strands and then lay them back together again so that all twist is removed. That way they lie flat and ribbon-like on the cloth just the way I like it. Yes, it’s a pain and so I might use silk instead. Combining threads to create multi-stranded weft is so much easier than pulling stands apart.

In the meantime, Zoom time is still spinning-and-plying time and progress is ever so slow. It gives me lots of time to think about how I would like to over-dye some of these colors and what I would like to weave with them. The planning is all the more important when using one’s own handspun and I already blew it by over-dyeing a really nice green with black the last time I used this handspun to weave some cuffs.

I also have another idea for an ikat project developing in which I combine it with three-color reversible pebble weave. I am sure that it will happen long before this handspun is ready for use.

And so I keep myself busy and out of trouble and keep my spirits lifted. Book sales at Taproot Video are keeping me afloat and I am hoping that the cooler temperatures in the northern hemisphere mean more cozy time at home weaving for those who live up there and maybe time to try some of the patterning techniques that I teach in my books. As always, thank you all for your support!

Backstrap Weaving – Time for a new Tool

One weaving tool which hasn’t really made its way into my kit is the temple, an instrument that helps weavers maintain consistent width in the cloth they are producing. I have never really felt the need to use a temple and that’s most likely because I haven’t used my backstrap loom to create the kind of cloth that I felt required one. The ladies with whom I studied in Guatemala used temples. They were wonderfully simple tools….a piece of bamboo that sat underneath the cloth with a couple of small nails holding it in place.

I have to admit that I would cringe every time we pushed those nails into the edges of the woven cloth. When I took the pieces that I had started weaving with my teachers in Guatemala back to Bolivia to finish, I continued using the temples for a while. However, I soon abandoned them as I really felt that they weren’t doing anything for me. I have seen some fine Bhutanese textiles with horrible holes gouged at intervals into the edges from the sharp ends of the temples and that, more than anything, has really put me off using them.

But, now as I am typing, I am remembering that there has actually been one piece of cloth that I wove where I could see a clear need for a temple. It was a wide silk piece that I wove some time ago. I did manage to get away without using a temple because I couldn’t bear the thought of pushing nails or even pins into the edges of the silk.

When weaving this wide piece, I was finding that the cloth would ripple slightly as I propped the shed open ready to pass the shuttle. I had to try and grab the edges of the cloth, first one side and then the other, to straighten and smooth the cloth so that I could be sure that I was laying in the right amount of weft. A third hand would have been handy! It was clumsy and slowed me down but I was willing to do it to avoid using the ”dreaded” temple.

My Montagnard (Vietnamese hill tribe) weaving teachers used wooden temples with carved pointed tips for the cloth they wove on their backstrap looms. They even used them for narrow bands…

And, my weaving teachers in coastal Ecuador who wove on vertical looms rather than backstrap looms, used a similar style of temple cut from a large tube of bamboo that they attach to the upper face of the cotton cloth on the loom. I remember really struggling to bend that slat of bamboo into place each time it had to be re-positioned on the cloth. This heavy-ish sturdy cotton did not suffer at all from the pointed tips of the temple.

Why all this talk of temples? Well, I would like to weave another sheer cotton piece like the one I just wove but using much finer cotton. I don’t have a reed that is fine or wide enough for the piece I have in mind and so I will have to resort to trying to maintain the sett and width by other means just like the Guatemalan weavers in Alta Verapaz do. The temple will help with the width. Maintaining the sett will be another story! What tool do the ladies in Guatemala use?….skill and lifetimes of experience and know-how passed down through generations!

Until I get the fine cotton singles that I would like to use, I will practice with the little bit of hand spun cotton that I have left over from my most recent project. For that project I used a reed and so I have a sample from which to take calculations for width and something to guide me to determine and try to maintain the spacing between warp threads. I have wound a short warp with half the number of ends that I used for my scarf. Wish me luck!

Here are some bits and pieces I have gathered together for possible temples…

The piece at the bottom of the picture is the temple that came with a Karen loom that a friend gave me. Pins have been taped to a piece of wood and the temple was sitting on the back side of the warp-faced cloth. The bamboo pieces are the temples I was using with my teachers in Guatemala. The nails that pierced the cloth and then turned into the open ends of the bamboo, are sitting on top of the tongue depressor. I was wondering if cutting points into a piece of heavy cardboard like the black stuff you see there and reinforcing it with a tongue depressor would also work.

Or, there’s this….contributed by friend Franco to the backstrap weaving group on Ravelry many years ago…

It was working well for Franco. I would love it if I could get something like this to work for me. It measures and maintains width all at once!

As for my current project…it is finished! Except for the very first part which I un-wove and turned into fringe, I got a consistent 9 1/8 inches of width.

First patterns underway.

After finishing the hem-stitching the far end, I slowly unrolled the cloth and worked my way back to the start, burying weft ends as I went. Then I  cut the weft out of the first wider part of the cloth and hemstitched that end.

Here it is off the loom waiting to have its fringe twisted before being washed and pressed.

Procrastinating! Enjoying the cloth and taking pictures because I was nervous about what was going to happen to it when it was washed!

Moe procrastination…yes, it’s sheer now but will it lose this translucency when it has been washed?

A whole day has gone by. Tomorrow I’ll wash this thing.

Post-wash and press: it lost between 1/8” and 1/4” in width and the warp threads moved closer together ever so slightly. It feels so soft!

Post-wash cloth with twisted fringe.

Post-wash verdict: I love this super soft supple cloth that is so unlike anything I have woven before!

Now I am thinking about dyeing it. Should I?

During all the pre-wash dithering, I decided to take a sample that I had woven before my last trip away and make it into something. You might remember that I wanted to make a wool shoulder bag with a built-in pocket in the style of the ch’uspas (coca-leaf bags) that the Bolivian weavers make. I learned how to set up the warp and weave the pocket back in 1997 with my teachers in Potosí. This small green piece is the wool sample that I most recently wove to refresh my memory of the technique. I edged the little pocket with triple cross-knit looping.

I decided to go ahead and make this into a little zippered pouch. I edged it with a tubular band style that is woven in Chahuaytire, Peru which also served as the strap. The bottom is decorated with coil stitches and the pocket is edged with single cross-knit looping. A four-strand braid makes a nice zipper tab.

The wool surface loved to attract the stray bits of cotton that I have had flying around during my latest project.

I had started gathering materials for this project before I had finished weaving the cotton scarf. I thought about what I could possibly fit into the tiny pocket and found that my door key sat within it perfectly. Two days later when I wanted to go out, I turned my apartment upside down looking for my door key. I was locked in and had completely forgotten about having placed the key in the little pocket. I had to call a friend who keeps a spare for me to come and let me out. Another two days went by before I picked up the little green bag once more to work on it and discovered the secret contents of the little pocket. Duh!

So….I guess the hand spun-cotton-with-temple experiment is next. I have also wound my skeined silk into balls ready for warping. I am thinking about weaving a silk cowl….just a simple tube to drape around my neck instead of a whole scarf. At three-and-a-half months into the grey hair transition I am still thinking about wearing color around my face to brighten things up a bit. Until next time……..


Backstrap Weaving – A Potpourri of Structures

Phew! I didn’t think I would get this post out today. The internet was out for most of the day… on again but really painfully slow, then off again. I have started lifting weights while I wait for pages to load. How many bicep curls can I do while waiting? I finally gave up and wove.

It has come back to life again this evening but I have my heart in my mouth as I type. Last weekend, along with Monday and Tuesday, were Carnival days and I believe a good many people packed up and left town. That left me with high-speed internet for those four glorious days. Perhaps there is something good to be said about Carnival after all. You may have guessed that I am not a fan of this celebration. Anyway, I knew there would be a price to pay for enjoying all that high speed! Everyone came back and the system collapsed

I had a few things going on this week. I simply cannot weave on my yellow scarf project at night. I can even manage black thread at night with the aid of a head lamp…but not this yellow. Light from a head lamp makes things even worse. It’s like looking into the sun. So, it was good to have a couple of other things to play with in what happens to be my favorite time for weaving. I turn on the air conditioner and enjoy an evening of fresh coolness at my loom.

two wool panels joined backstrap weavingThere was the sewing on my brown wool panels to complete. This was not an easy job even though I had chosen the simplest of the decorative stitches to use. All the things that I had envisioned going wrong when I joined my two cotton panels last month, and which never actually happened, went wrong on this wool piece. The softer, slinkier wool fabric moved around and the edges got misaligned. I can’t tell you how many times I had to pull out the stitches.

decortaive joining stitch on wool panelsI finally got it under control. This was definitely something I wanted to do at night in the cooled air. Having that wool thing on my lap while I sewed during the heat of the summer day was horribly uncomfortable. Now, I would love to weave an edging but this project used up all my brown wool. I simply can’t see it done in any other color and so I will just have to wait.

supplementary warp width sampleIn the meantime, I have been planning the next wool project. I am going to use more jewel-like colors on the next one and weave patterns using the supplementary-warp structure. This, along with Andean Pebble Weave, were the first structures I learned in Peru back in 1996.

I was not a big fan of the supplementary-weft structure at that time. My teachers in 1996, and another with whom I had studied in 1997, had taught me to weave tiny animal motifs and some of them were a little awkward and had really long warp floats. That had put me off.

It wasn’t until I saw the more geometric Mapuche motifs woven in this structure when I visited a sheep estancia in southern Argentina, that I started appreciating the structure and all its possibilities. Nevertheless, I haven’t used it very much. While weaving with my teacher Maxima in Cochabamaba, I saw some of the supplementary-warp figures woven by ladies in her co-operative and those have given me ideas for this next project. First, I needed to weave a sample in the wool that I plan to use so that I could figure width. That kept me busy in the evening when the yellow warp had to be put aside.

There it is above. Weaving this gave me the chance to see that there was a glitch in my pattern chart. I had woven four repeats before I even realized. I am glad I caught it now and not in the middle of the larger project.

When I got back to Chile after my first weaving classes in Peru in 1996, I was very excited and wanted to weave everything I had learned at once. I wove a narrow band with some of the pebble weave figures I had been taught and then I got very brave and wove a wider piece using both the supplementary-warp and Andean Pebble Weave structures together. Back then, I didn’t for a moment question whether it would possible to successfully combine a complementary-warp and supplementary-warp structure. I didn’t know any better. I had no idea about such things as ”take-up” and there was no one to tell me that I shouldn’t do it or that there might be problems. I just did it. And, I guess I was just lucky that it worked out fine. I am thinking I will do the same on my next wool piece…combine the two structures. This is not uncommon in the highlands.

second pebble weave warpYou can see the green and white supplementary-warp figures on the edges of the piece I wove in Chile back in 1996. I had figured out a way to chart those little figures but I hadn’t come up with anything for the pebble weave. I just followed my scribbled notes with all their references to numbers and color.

one of the first weavingsEverything was upside down and back-to-front on this warp! The warp was very crooked as my stakes had leaned. I ended up with my warp upside down. The supplementary-warp figures show their ”right” side. I consider the right side the one where the supplementary-warp threads (in this case the white ones), are forming the figures. However, the pebble weave figures are showing their ”wrong” side in the picture above.

Complementary-warp structures do not have a structurally right or wrong side but I had wanted my cloth to have white figures on a red and green background and didn’t have the experience at that time to know how to adjust the way I was doing the pick-up to fix that. I had come back from Peru not having a deep understanding of what this was all about. I was just blindly following my scribbled notes. Having a thorough understanding came much later after lots and lots of weaving and more trips to Peru and Bolivia.

You can see the finished cloth above adorning the cover of one of my photo albums….now showing the ”right” side of the pebble weave but the wrong side of the supplementary-warp sections.  Even the narrow strips of pebble weave came out wrong. That is not the pattern I had intended at all! My pebble sheds were out of order and I ended up creating an entirely new motif….a happy mishap. I am so happy that I still have this piece of weaving. It holds a lot of stories.

While digging around for that old photo album, I unearthed the only picture I have of myself weaving in my home in southern Chile. It is totally out of focus, but what a happy memory from 20 years ago! I am working on the piece I just described.

weaving in Punta ArenasYou can see the very large pattern charts I had created for the supplementary-warp figures. My backstrap loom is attached to the bottom beam of my Navajo-style loom. I am sitting on my legs…can’t do that anymore! You can see a pile of Peruvian hats that I had brought back on the chair at left. What really makes me smile is the small pillow on the sofa. It is covered in one of my very first weavings… a tapestry piece in acrylic that I made on a frame I had knocked together a couple of years earlier into which I had hammered nails. I knew nothing about winding a warping and had simply tied a piece of sewing thread to a nail at the top of the loom, cut it and then tied it to a nail at the bottom of the loom. And so on… I so wish I had kept those little things I had woven.

As for the yellow scarf, I have just finished the intensive supplementary-weft patterning at the beginning and am moving on to a nice relatively free run of plain weave. I will repeat the bands of supplementary-weft patterning at the other end. I had started with the idea of covering the piece with cream-colored silk supplementary weft so that only small bits of yellow would be revealed but I found that the supplementary weft thickened the cloth too much for my liking. I didn’t want to lose all the light liquid flow of the silk.

first supplementary weft figures finished yellow silk scarfHere is the first band of figures. I adapted the pattern from a cotton rebozo of Mexico.

flower figures in negativeI changed the pattern for the second band so that the flower motifs show in the yellow negative space.

And then, the plain weave starts. It will be decorated with scattered flowers. And, this time, when I say ”scattered”, I really mean it! I have planned pieces with so-called scattered motifs before only to find myself measuring and looking for symmetry. I can’t seem to help myself! No. This time they really will be scattered. I have woven more since I took this picture and added a couple more flowers. I am enjoying this whole ”scattered” business now. I don’t have to count any of the 700 ends to see how to place the motif and create balance and symmetry. I just pick a thread, any thread, and start weaving the motif…love it!

Hopefully, I will get the wool warp wound this weekend. That will give me something to work on in the evenings next to the 86 inches of yellow scarf warp.I need a longer bed to which I can lash these various projects side by side!

A friend in Chile sent me a link to a free e-booklet on natural dyes in southern Patagonia. It’s in Spanish but still lovely to look at even if you don’t understand the text.

natural dyes patagoniaThis would have been so nice to have when I was living down there. There was a time when I played around with dyeing during my 5 years there. I used anything I could find in the back yard and dyed some small samples of wool. I kept notes but never dyed enough yarn to make anything. When I came to Bolivia I wrapped the dyed samples around tubes of newspaper and made a lid for one of my tall storage baskets ( which I had also made of tubes of newspaper.) It’s still in pretty good shape despite having had cat claws in it multiple times. The very dark brown, by the way, is just plain old loose-leaf black tea. I needed a dark color to contrast with the others.

natural dyes southern chile

You may remember I posted this next picture a couple of weeks ago. These are the sweet coin purses made with fabric created by the Hmong people of Thailand. I noticed that there were a lot of hits on the link to the Fair Trade store that sells these. My friend, Susan, in Australia, sent me a link to a tutorial on how to make them which solves the mystery of how much fabric they require… not all that much after all. The site provides a pattern template. Beware, you may fall down the rabbit hole of Renaissance Ribbons when you visit the site…I did!

hmong triangle coin purses little mango imports

There has been some double weaving going on among online friends. Moniek Deroo in Belgium wove red poppies on a band dedicated to the fields of Flanders where she lives…red poppies on the blackness of war, bordered by the green grass of the battle fields…

moniek deroo in flanders field poppiesMoniek is using her inkle loom for this and has added extra string heddles to speed up the pick-up. It can be woven as a simple two-shaft structure and that is actually how I was taught to do it when I learned it in Potosí, Bolivia.That’s also the way I teach it in my tutorial. Moniek is weaving the embedded version of the double weave structure which I teach in this tutorial.

I add extra heddles when I work with particularly fine or numerous threads like on the 60/2 silk piece below…silk bookmark backstrap weavingOn narrower pieces, or those with heavier thread, I enjoy not having to deal with the clutter of all those extra heddles and am pretty fast doing the pick-up without them.

Betsy has just started following my online tutorial and is working her way through the exercises. Betsy has woven Andean Pebble Weave with me and says she finds double weave easier. I find patterns easier to read on double weave pieces as there are no warp floats and it is quite easy to read the pattern repeats on the cloth just by looking at the motifs you have already woven rather than at a chart. I find it faster to reach that ability when doing double weave than when weaving structures that involve warp floats.

betsy

I have a few more things to show you from my talented online weaving friends but I will end on this last one as my internet is showing signs of giving up again.

Liza has also been dabbling in double weave and is already designing her own patterns. I love this leaf pattern of hers…

liza d bl weaveAnd, she made this wonderful rug using a backstrap loom and old jeans…how cool is that…

liza jeans rugI asked her for a shot of her work in progress because I wanted to see her loom set up. She sent me a beauty…

liza backstrap rugI’ll quickly publish this before my internet breaks down to a crawl or to zero again.

If you are a bit bamboozled by the potpourri of structures I have presented in this week’s post… supplementary this and that, double weave, complementary-warp, warp floats, blah blah, I do hope to update the Structures and Terminology page on this blog soon to explain them in a bit more detail for you.

Until next week…


Backstrap Weaving- 5 years

Facebook has started reminding me that it was five years ago that I opened my account. Every few weeks I get a Facebook Memories reminder showing me a picture I posted on that day five years ago with the option of sharing it with the public. It seems they consider five years the period of time that should pass before a person can look back on an event with nostalgia.The first one I got was this:

40547_151962888150890_2724025_nThis was taken the day before my birthday five years ago. I was in North Carolina and went to visit some ladies from Vietnam – Montagnard, or hilltribe, backstrap weavers –  to look at their textiles and watch them weave. They dressed me up in one of their traditional skirts. The skirts are made of two panels which are woven on backstrap looms. The panels are sewn together and the join is covered with decorative stitching. The entire piece is then placed on a frame so that it can be edged with weft twining. They also gave me one of their shoulder bags to carry for the picture.

The following day I returned to watch Ju Nie prepare her warp. I learned a lot about her use of the coil rod on a circular warp and heddles that are applied during the warping process. It was a perfect way to spend a birthday. I was lucky to be able to return to visit Ju Nie and Ngach again a few months later and study their weft twining technique.

I went home and wove something to put into use some of the things I had learned and seen…a patterning technique using warp floats, patterning with supplemental weft and weft-twining.

This Montagnard inspired piece was on my loom this time last yearI can’t believe it has already been five years since I did this. It takes me back to the time of my beginnings in the online weaving communities, the purchase of my first digital camera and the start of this blog. So much has happened since then in my world of weaving and even more had happened prior to that. I am in my 20th year of backstrap weaving now.

I can’t believe that it has already been eight years since I went to coastal Ecuador to study cotton spinning and weaving with Trini and her family.

weaving with cotton coastal ecuadorThis has been on my mind because my friend,  Janet, has just returned from time spent with this same family and it has been amazing seeing some of her pictures. Trini’s nieces and nephew have grown and one even has a child of her own now. I am waiting for Janet to send me pictures so I can show you. She has been busy practicing the simple warp float technique that she learned there…the patterning technique that you see on the piece in the above picture. She also came back with the confidence to warp up a 10-foot long piece using a dovetailed warping system (see below) on a large vertical frame to make a plain-weave panel for a hammock.

dovetail warp

She will weave and sew two panels together to make the complete hammock in the same way that my Vietnamese hilltribe teachers sew panels together to make their skirts and blankets. The dovetail warping system allows a weaver to work her way around the circle of warp and then open out the cloth once it is off the loom without having to cut the warp ends. Stick D in the above drawing is simply removed and the intact end loops of the warp can be used to form the ends of the hammock.

Guaraní weavers here in the Bolivian lowlands where I live also use this system. They use vertical frames and cotton thread and weave their hammocks with pick-up patterns all in one piece.

Picture courtesy of Aude Rossignol.

Warping for a hammock in Santa Cruz, Bolivia. This would certainly give you a work out.It’s been thirteen years since I first met my Guaraní teacher, Angela, pictured above warping for a hammock, here in Santa Cruz. She left shortly after to return to her community. It was only in 2010 that I found her again back in the city.

I have had the joining of woven panels on my mind lately which is partly what has been responsible for all these thoughts about my past experiences with this practice and the weaving teachers who showed it to me. My latest project is about weaving two identical panels and then joining them using a decorative stitch.

I have done this in the past using narrow pieces which gave me a chance to put to use one of the decorative stitches that my Montagnard backstrap weaving teachers use. Below, you can see how I joined two bands to make a tool bag…

47543_160384537308725_6646315_nYou can see the stitching down the center. I also joined a long belt that I started weaving on a floor loom at a friend’s house and finished at home on my backstrap loom. This is the piece that I used to put together my instructions for Andean Pebble Weave on a four-shaft loom.

andean pebble weave strapI cut the long strap in half and sewed the two pieces into a backstrap. It has been used by many people who come to weave with me and is a favorite. I used the same stitch as the one I used on the tool bag for this project.

new-backstrapI came across some belt weavers in Peru who sew their pieces together to make satchels to sell to tourists. They create neat joins which they do not cover with embroidery.

bands joined to make satchels peruI decided to be moderate in the width of this project rather than fill my loom bars up completely with thread. Weaving two very wide pieces with pick-up patterning and joining them is my ultimate goal. These panels are just under 12” wide with 1100 ends of Guatemalan cotton in each. I am weaving a pattern using silk supplemental weft along the four edges and leaving the center blank as I hope to sew large stitches over the seam where the two pieces will be joined.


The project has progressed with all the challenges that I had anticipated and then some more!

Firstly, I wrongly assumed that this brown cotton from Guatemala was the same as the red cotton I used in the project I showed you in my last post. I calculated to get a 30cm width based on measurements taken from the red piece but, once I started weaving, the piece clearly did not want to be that wide. So I unwove and started over at 27.5cm.

Both panels have exactly the same number of ends and are the same width yet the one on the left is exposing more of the white supplemental weft than the other. I have three broken warp threads in the one on the left and several others are looking kind of sad. Meanwhile, the threads on the one on the right are in excellent shape. I am scratching my head about that. I also have to be on the lookout for the need to adjust my beat as the picks per inch on one panel tend to outnumber the ones on the other. So far, it is pretty much under control. I expect the embroidery over the join will be another challenge and I think I will practice on other cloth before I attempt it it on this piece.

I have the idea that creating identical panels in plain weave in this fine thread may be more difficult than doing so using a warp-float structure. I think that finishing this project will place me in a good position for a second one in Andean Pebble Weave.

I played around a little with supplementary-weft designs before starting this piece. I had seen a picture online of a flower motif and wanted to try something new in the way I used the supplementary weft. The image was so tiny that it was impossible to see any kind of detail by enlarging it, but it gave me ideas.

Bhutan design bagOne of the limitations of the single-faced supplemental-weft patterning technique that I use a lot is that you can’t really create and fill in large solid shapes. You are limited by the length of the weft floats. This is simply because very long floats are not practical. They won’t lie flat and can get caught on things and pulled. One of the supplementary-weft threads around the buttonhole in this bag that I made got pulled right out of the shed. It got caught on a finger nail as I fastened the button. It was too long and placed in a high-traffic area.

Naturally, the finer the thread you use, the more detailed the patterns can be. With fine thread, the weft could float over 15 warp ends, for example, and not cause any problems, whereas heavier yarns might make anything more than a 5-span float impractical. This means that if you want to fill in a large shape with supplemental weft, you need to break the weft floats into several short segments.

This is the picture I saw online…

flower

I am not even sure if this is a handwoven piece of cloth or what the technique is but I like the idea of having the shapes of the leaves and petals broken into those regular diagonal sections. It gives the shapes the look of being solid without being heavy. It is a lovely delicate look and I would love to create something like it.

At the bottom of this red band you can see my first rather clumsy experiment with this idea. I wasn’t pleased with this and will definitely keep working on it. In the meantime, I decided to go with something more Andean-like for the current project and wove a couple of samples to test design proportions.

sampler for supp weft project backstrap weavingMy Guatemalan weaving teachers have their ways of dealing with large shapes.  I took out my Guatemalan samples pieces and journal to refresh my memory and, again, I had to pause in disbelief at the realization that it has already been 7 years since I went there to study.lidia-and-iBelow, you can see one of the patterns that is typical of San Antonio Aguas Calientes. You can see that the large shapes, that look quite solid when viewed from a distance, are made up of several short weft floats. Three short floats take the place of one long one which would simply not be practical on a woman’s blouse.

short float lengthsThe weavers of San Antonio Aguas Calientes use both single and double-faced techniques when patterning with their supplementary weft threads. The double-faced technique allows them to create truly soild looking shapes without the sort of ”speckled” effect created by the exposed warp ends that you can see in the single-faced method above,

single and double faced supplemental weft patternsThe bird and flower motifs that I wove above are made with the double-faced technique. The motifs look exactly the same on both faces as you can see below. Although the figures actually comprise a series of several short weft floats, they look solid.

double-facedHere’s a brief explanation of how the double-faced method works. This is not meant to be a tutorial as I have not gone into details of thread weight and how to actually start and end a pattern. I just want to give you an idea of how the solid look is created as I have been asked many times about this especially by my backstrap weaving friend, Eladio, in Mexico. I hope he is reading this!double faced supp weft

The ground cloth is warp-faced plain weave. The next shed in the weaving sequence is opened and the band is beaten. Then, blue supplemental weft is worked over and under the warp ends on a closed shed, that is, the weft goes over and under all the threads rather than just the threads in any one shed. The supplemental weft goes over and under groups of four warp ends…two ends are taken from the upper layer of threads and two from the lower layer to form this group of four threads.

In the first picture,  you can see the weft going from right to left over, under, over, under four groups of threads. The weft then turns around behind the last group and passes from left to right (see the second picture above) going over, under, over, under. The supplemental weft needs to be laid quite loosely in the shed. The original shed is then reopened and the main white weft is passed.

The next shed in the sequence is then opened and the band is well beaten. The two passes of supplemental weft will pack to look like a solid line. After beating, it is time to use the supplementary-weft again on a closed shed to build up the pattern as you can see below. The supplemental weft shows on both faces of the band.

Below, you can see the little bee motif which was the first one that I was taught by my Guatemalan teacher. The weavers often use sheets and booklets of cross stitch patterns for design inspiration. Lidia took me yarn shopping and the little stores had many cross stitch magazines and individual pattern sheets. One of Lidia’s wishes was to to find patterns to which no one else in her community had access. Competition to sell weavings is fierce.

bee and chartYou can see how I have chosen to chart the bee motif. Each filled square represents four passes of the supplementary weft (my two explanatory photos above show how to make two passes). A half-filled square, therefore, represents two passes. What is critical to the success of this technique, as with all work with supplemental weft, is finding the right balance in the weight of the ground weave material and the supplemental weft. That is a matter of trial and error. Supplemental weft that is too light will not provide enough coverage. The opposite will make it difficult to maintain a horizontal weaving line.

One of these days I will make this a complete tutorial, take much better pictures than the blurry ones I took in low light this morning and fill in all the details.

However, I have to tell you that this is the slowest and most tedious technique I have done so far! I wove my large piece with the quetzal birds (at left) when I got home as well as a couple more samplers, and I have not done anything with the double-faced technique since!

I used the quetzal piece as my journal cover which was not such a great idea as you can’t see the other side and appreciate the double-faced nature of the technique. However, the Guatemalan weavers’ double-faced work is also hidden on the inside of their blouses.

It’s time to get out some cloth and start practicing my stitching for the join in my two panels. I want my sewing to be as neat and pretty as my teacher Maxima’s is. I hope to sew triangular shapes, as she has, and I chose the supplementary-weft motif that I am weaving, with its sort of triangular base, with that in mind.

Picture courtesy of PAZA Bolivia and Dorinda Dutcher
Picture courtesy of PAZA Bolivia and Dorinda Dutcher.

I will leave you with a couple of hat bands that Anne wove using the intermesh technique that we wove together on one of my visits. My teachers in Huancayo 19 years ago, taught me the intermesh structure with a two-heddle set up which makes it partly loom-controlled. You can see Anne’s two heddles and sticks holding her picking cross below.12011180_10203611210680313_88856834057994414_nShe has used the lettering that I include in my second book in which I also teach this structure. The other design is charted in my second book and was adapted from a Mexican tapestry motif. Anne started the hatband as part of a weaving get-together we had on one of my trips. It is lovely to see it finished. I think her hatbands have come out beautifully.