I was very “creative” when I first bought my little apartment here in Bolivia. I wanted to try every novelty decorating technique that was popular at the time and cram it all into this small space! It was fun and then I was done. I had no desire to touch a can of paint ever again. There was water damage at one stage. I didn’t care. I wasn’t going to paint. After getting the cause of the damage seen to, I just hid all the flaking paint behind screens.

I just now Googled how often interior walls should be painted….every 5-7 years. The horror. It’s now 23 years since I had my home decorating splurge.
Now that I face having to sell my place to hopefully eventually return to Australia, I’ve decided that I cannot inflict my eclectic and unique decorating style on potential buyers. So, I’ve been occupied for some time now erasing all that fun with coats of good white super-washable paint. It’s all going back to a blank slate and it’s amazing how much brighter and airier the place feels. It’s funny that even though there’s no creativity needed to simply paint things white, I’ve been having a lot of fun doing this job.

What’s been interesting is how mindless jobs like sanding and spackling have allowed my mind to also “wipe the slate clean” in a way and, in doing so, allow me to come up with plans of execution for ideas that I’ve been pondering for some time. One of these is a theme that I’ve been wanting to express in weaving: “She Needs no Embellishment”. This one’s been in my head for several years now and I think that I’ve finally pinned down how to go about weaving it. There will be hummingbirds.
I guess it’s similar to those months I used to spend away on weaving trips. The hours of mind-numbing waiting time in airports and on flights would bring me ideas in very unexpected ways.

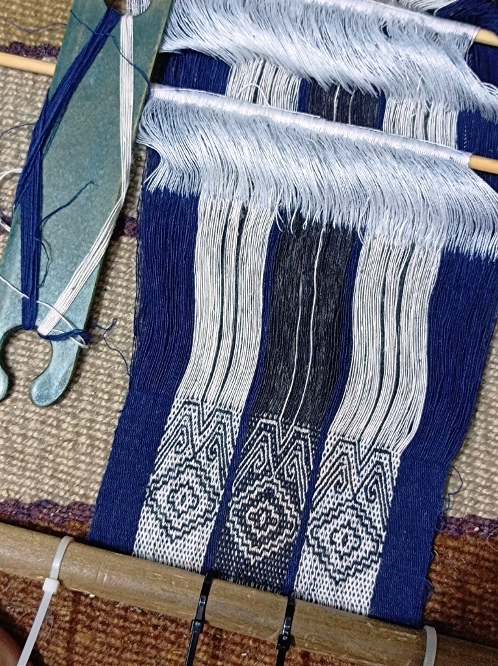
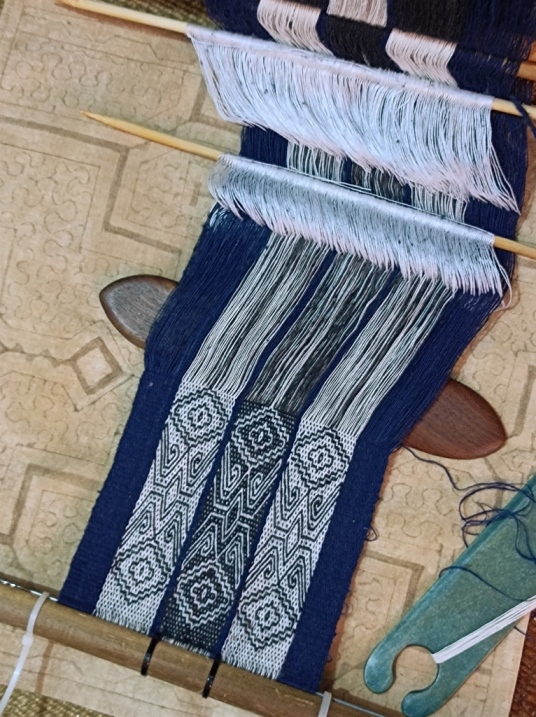
I used that idea on-and-off over several years. The last piece that I wove in that way was this….

So, while I’ve been a little frustrated by being kept away from my loom, it has given me time to clear the slate and come up with new ideas.
In my last post, which seems so long ago now, I was talking about coming up with an idea for the double-faced supplementary-weft technique with which I’d been experimenting. I like the technique but was finding it hard to come up with a project which would allow both faces of the fabric to be appreciated and therefore justify the extra time and effort needed to create this kind of patterning. Thanks so much to those who left me a comment with ideas. Laura suggested a screen and I love that idea. I could probably use one in my place in Australia, who knows? But not one which sits on the wall to hide flaking paint! I’m thinking of one that can be used to stand freely and divide a space. In any case, I’ll weave the cloth and decide how best to use it later. But first, I need to get the painting job done in my bedroom studio space.

The neck gaiter can wait. I really have the urge to get a wide warp on my loom to use this technique and I just may have enough silk in my stash to allow that. I’ll spend the rest of my sanding time thinking about supplementary-weft colors and motifs. Hours spent staring at white should help! By the time I get done with the painting, I’ll have this project and the She-Needs-no-Embellishment piece competing for space.
I’m going to finish with some book talk. I know that many of my regular`readers must already own one or some of my books (thank you all so much!) but I do get new subscribers all the time and I’ll take this opportunity to let new folks know what I have to offer. I’ll just give three of my instructional patterning technique books a plug for now :-). All are available as PDFs or as spiral-bound books at Taproot Video. I provide direct links to each item below.

The cover of my Complementary-warp Pick-up book says that it’s aimed at “experienced band weavers”. By this I simply mean that you are able to set up a loom and weave a plain warp-faced band. What’s important is that the patterning method that I teach in this book can be used on any kind of loom that allows you to weave warp-faced bands. The structure that I call Andean Pebble Weave is one example of the complementary-warp structure. Some of the patterns in this book are in fact Andean Pebble Weave patterns. This book’s also available in German.
Here’s a fun little video clip that I made some time ago which gives a more complete description of this book and allows you to see examples of the patterns….

For my Andean Pebble Weave on Inkle Looms book, I took into account the particular characteristics of the standard inkle loom and adapted the methods that I had learned on the backstrap loom accordingly. I present three methods which all produce the same results so that each weaver can decide which one suits their particular style. I’ve used dozens of step-by-step photos, detailed descriptions as well as supplemental instructional video clips to walk you through the process. In this way I aim to address a variety of learning styles. The book is suitable for beginners at pick-up weaving or for those who would like to add another patterning technique to their repertoire. You do need to be able to weave plain warp-faced bands before taking this on.

Likewise, in my Warp-faced Double Weave on Inkle Looms book, I adapted the methods that I learned using simple horizontal ground looms here in Bolivia to the inkle loom. This book also comes with supplemental instructional video clips. It’s a more advanced technique for those who have already tried some kind of pick-up patterning and know that they enjoy this slower kind of weaving. The product pages on the Taproot Video website give much more detailed descriptions.I hope you’ll click on the links and take a look!