Backstrap Weaving – Show and Tell

Show and Tell and tell and tell…get the word out, spread the obsession. It is exciting to be all the way over here in Australia and run across this…
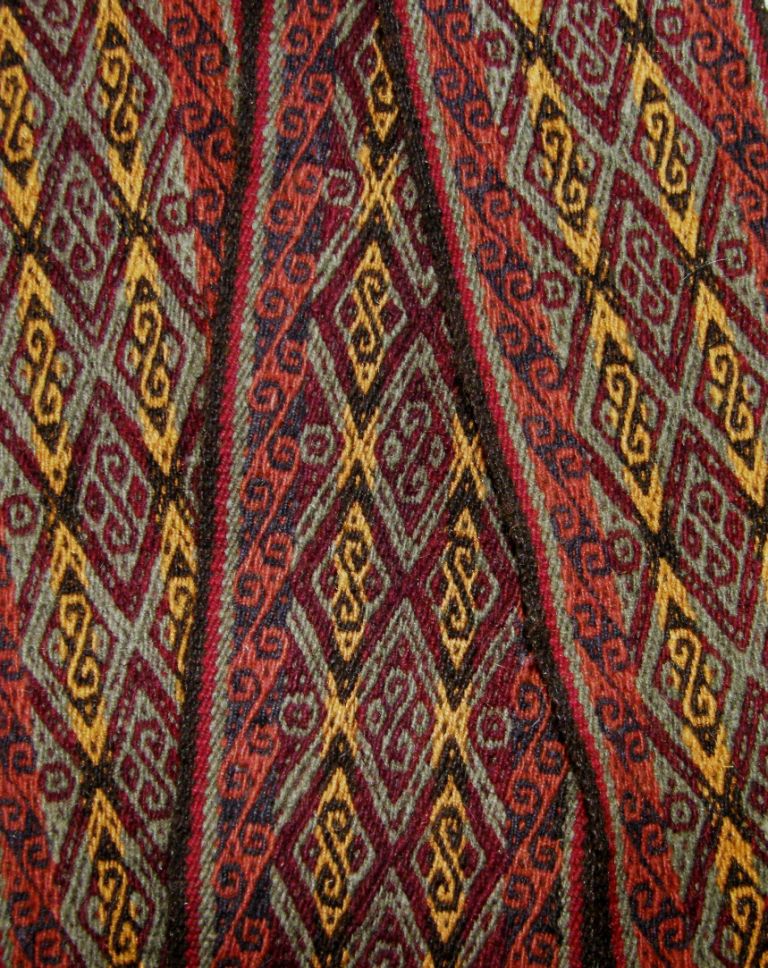
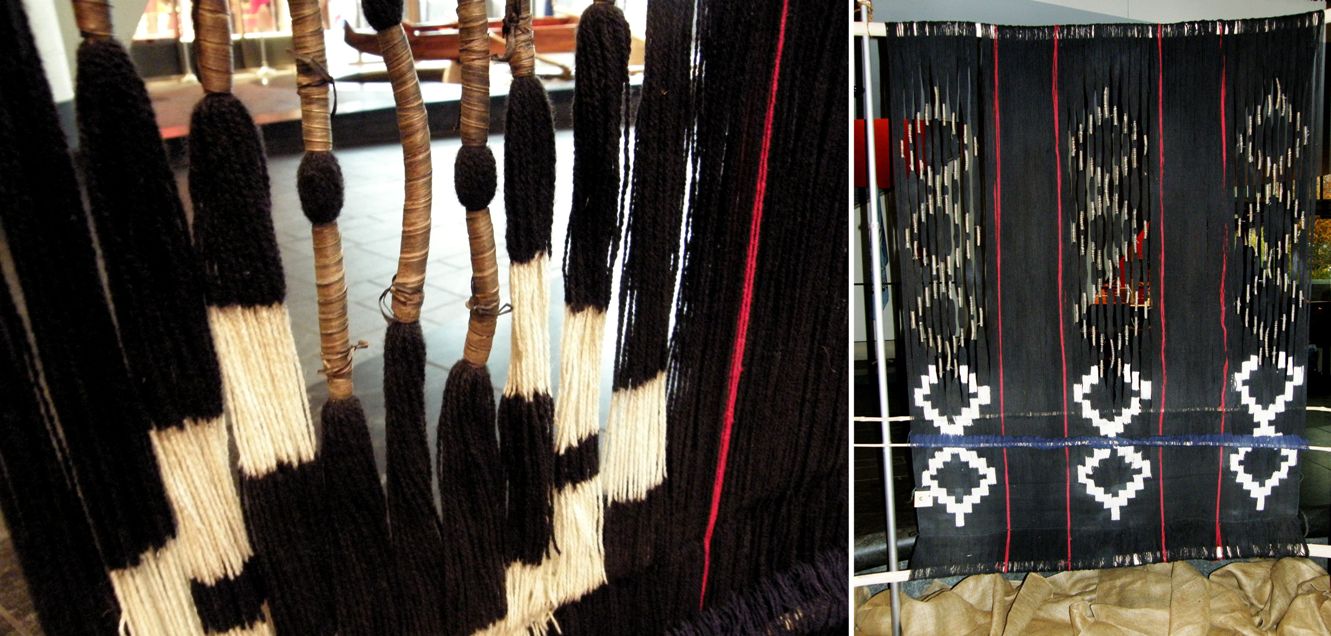
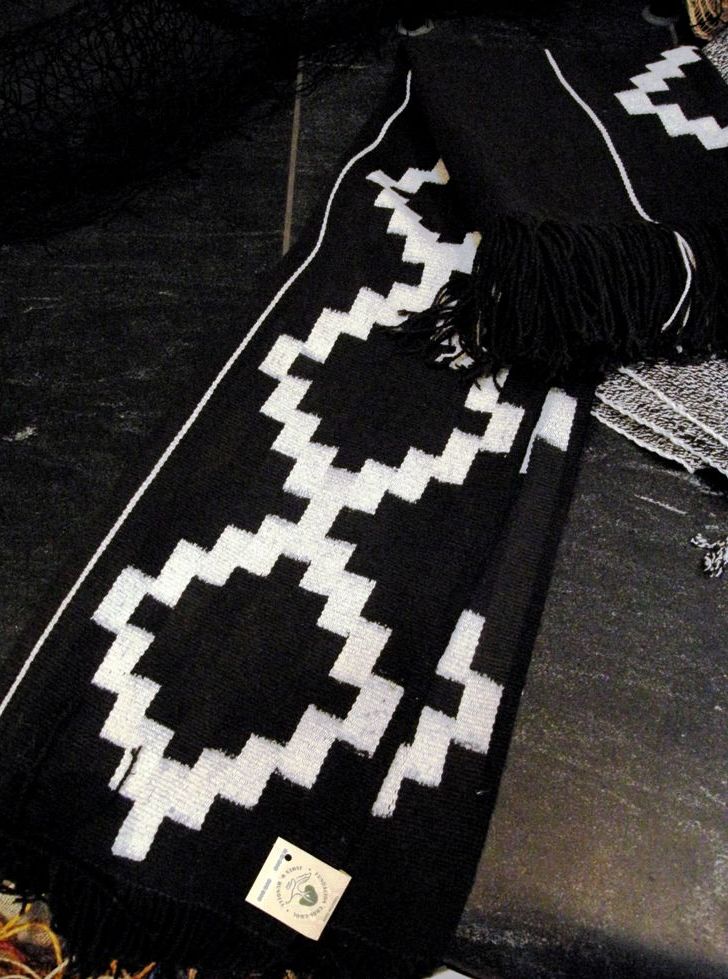
??????????????????????The Center for Traditonal Textiles in Cusco (CTTC) reaches across the world, showing and telling, promoting and sustaining the work of  weavers on simple looms in remote communities of highland Peru. This piece was bought from founder Nilda Callañaupa herself when she visited Bothwell, Tasmania in 2007. One of the people who came to weave with me a few weeks ago here in Sydney had been to Peru and came with  bags and pieces still on the loom with those distinctive Chinchero patterns woven with handspun naturally dyed yarn. One of the other ladies immediately picked up her smartphone and started searching for the site from which she could buy these items. Show and Tell…spread the word!

From the CTTC's Facebook page
From the CTTC’s Facebook page

One of the greatest Show and Tell events in my world of weaving was held last month in Cusco. The CTTC hosted its second Tinkuy de Tejedores, a gathering of weavers from across the Americas and even from as far away as Asia.

I couldn’t go this time but have heard a few reports from friends.

Dorinda, who works with weavers in Cochabamba, Bolivia went with one of my weaving teachers, Maxima. Maxima took workshops and learned three new figures in a backstrap weaving class as well as the ñawi awapa edging. It was something she had been wanting to learn for years. Her sister knew how to do it but I guess she hasn’t been nearby to teach it to Maxima. Finally, the curiosity has been satisfied and I look forward to seeing Maxima put it to use.

Maxima and a group of Bolivian weavers at Tinkuy 2010

Dorinda’s PAZA website is currently down but she tells me that she has four blog posts prepared with details of the trip ready to go up once the problem is fixed.

???????????????????????????????Who doesn’t like Show and Tell? In the guild meetings that I have attended so far in the US and Australia, this has always been my favorite part. I am a member of several online weaving groups and we do our share of show and tell on a daily basis. Some of the larger groups, like Warped Weavers on Ravelry, can have dozens of projects presented in a single day. There is always something to learn. But, of course there is nothing like being able to actually handle the fabrics and yarns and listen to the weavers and spinners’ enthusiastic descriptions and explanations.

I spent a nice Saturday  in the lower Blue Mountains last Saturday at the home of weaver Helen (author of the electronic newsletter, Weavers Forum). Helen has a nice group of about fifteen mountain weavers and spinners who regularly meet at her home for fiber talk, lots of laughter, occasional workshops and, of course, show and tell. That’s yet another reason for me to consider settling in the mountains should I ever come back to Australia to live permanently….the aromas and colors of the bush, the bird song, the cicadas, the coolness,….and a lovely community of weavers!

Lorette with knotted pile on backstrap loomLorette brought along a backstrap loom that she and a few friends had put together some years ago with its unfinished project. Just when I am taking home tools for knotted pile weaving and wondering if I am mad to be thinking about doing it on a backstrap loom, along comes Lorette with her Show and Tell. She showed me that yes, it is do-able and that she was able to produce nice firm and well beaten rows of cut pile. I wonder if she has found the inspiration to finish this project now.

I was happy to receive the most beautiful gift from Helen as I left after a fun day spent with her weaving friends…

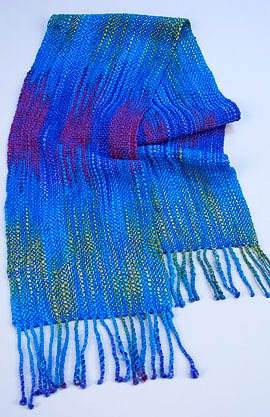
??????????????????????My camera has somewhat softened the pretty tones of green in this scarf but I hope that it gives you an idea of its wonderful flowing liquid silkiness. This was made by Helen in an advancing twill structure. This was Show and Tell and  I got to keep it! It is just the kind of light weight scarf that I can really use. Beautiful!

??????????????????????Yesterday I went out to Dace’s home. Dace had invited me to her home for a morning of dyeing.

The Mission: take home cotton yarn that had been dyed with native Australian plants.

I would like to weave something that represents my trip and this seemed like a good way to start. Fortunately, I had taught myself from an experience many years ago that cotton and wool take color very differently. I had been wooed by the sight of the most amazing shade of orange that Dace had achieved when dyeing wool with leaves from a certain kind of eucalyptus (see left). I knew not to expect anything like this kind of intensity from cotton.

Two of the ladies at the gathering at Helen’s house advised me to mordant my thread with diluted soy milk which I did. Dace’s home filled with the gorgeous aroma of eucalyptus as the pots boiled on the stove. It drove her husband and cat away for the day! You can see the tree from which Dace took leaves and bark below right. She told me that it is one of the “box” varieties of eucalypt.

eucalyptus for dyeingAs the pots, one with bark and the other with  leaves boiled away, we did a lot of Show and Tell. Dace showed me some yarn that she dyed with the same variety of eucalypt…

spun yarn by daceAgain, that gorgeous orange! And again I reminded myself that I was not expect anything like that result. Still, I couldn’t help hoping…
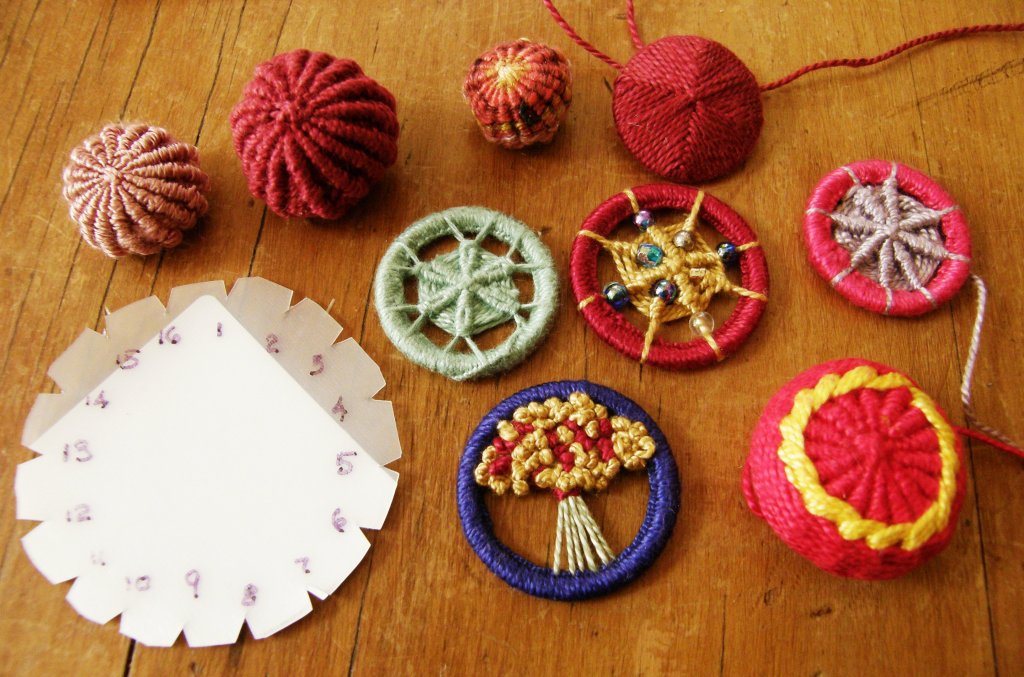
??????????????????????This was another fascinating piece of Show and Tell. Dace had taken the NSW guild’s summer school class lat January on buttons and produced all these over the course of four days. I was especially interested in the ball-like buttons upper left which so resembled the little coil stitch pom-poms that Bolivian weavers sometimes have dangling form their ch’uspas, coca leaf bags. Dace gave me enough information to be able to come home and make one…fun! The Bolivian pom poms can be made in multiple colors whereas these ball-like buttons cannot.

???????????????????????????????There you can see my button (made with wool) nestled between my dyed skeins. The skens on the left came from the leaf pot and the other from the bark. Okay, so they are not the most brilliant tones in the world but…mission accomplished. I have cotton dyed with native Australian plant material. And I will take home the happy smells of the Austraian bush which have not faded after rinsing. Dace told me to use vinegar with the rinse but I didn’t, not wanting to lose the eucalyptus smell.

Those buttons! I am on a road trip to Canberra tomorrow to watch my nephew compete in a triathlon. Guess what I’ll be doing in the car and probably during the race!

Dace is Latvian and, while talking about both our backgrounds, she came out with some Latvian bands that she had bought on a trip to her homeland in 2011. These are all woven with supplemental warps (and now I realize that we are probably not looking at the “good” face of the one on the left).

??????????????????????I love the simple border on the third band from the left…so simple and so very effective.
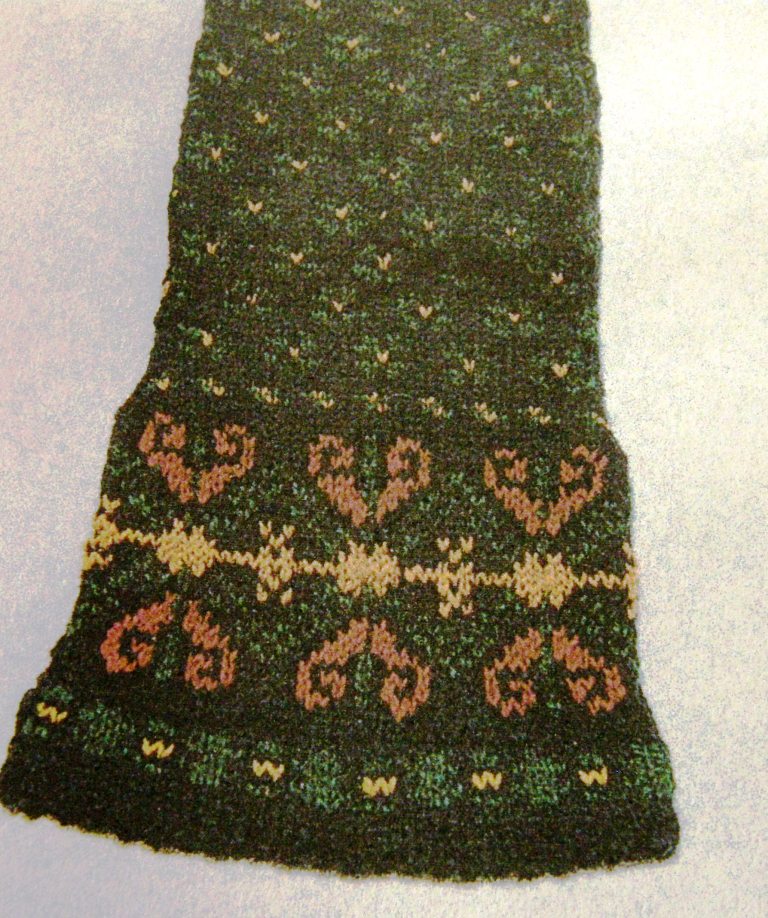
Latvian mitten patternDace showed me pictures of Latvian mittens and I loved this one with its hook design…a hook and its reflection…so like a classic Andean weaving motif which I am sure that many of you will recognize.

Speaking of Latvian bands, I  made contact online with Sanita who very recently started a blog on Latvian band weaving. She is slowly constructing it and it promises to be very informative. So far, she has included pictures of bands with pick-up patterns using supplemental warps as well as (and this make me very excited) those which have used what I call the Andean Pebble Weave structure.

Sanita confirmed the stucture by sending me charts of some of the patterns. I think I am edging a little closer to finding an answer to my questions about the use of this structure in the belts of the Russian Old Believers.

Keep an eye on Sanita’s site.

Well, I am off to make some more button/pom poms and can’t wait to have some dangling from my next woven pouch. I miss my loom and my big weaving…this is the next best thing until I get back to Bolivia.

knitted hat with south american birdSpeaking of pom poms, I will leave you with one last picture. I uncovered a relic from my past while going through boxes of “stuff” here in Australia. This is possibly the only surviving piece from the little knitting machine endeavor I had in my early 20s. I used to make hats and headbands by the dozens for skiers. It seems like I might have been trying to use up odds and ends of left over colors in this one! The thing that I like is the little South American-like bird motif that I chose to include. I have no idea about the origin of that motif but I think it is fun to see that many many years before South America and weaving became a part of my life, I had a definite interest in these kinds of patterns.

See you next week! (possibly from Bolivia)
Backstrap Weaving – Ikat – Turning “Blips” into Beauty

IKAT! Ikat can be a little hard to deal with for someone like me who is into planning, charting and precision. I count my warps carefully…this one needs to be floated, this one doesn’t and, oh no, I made a mistake and must un-weave and…. darn!, the design is not looking as I thought it would…better un-weave and re-chart. I am not one for “winging” it or just throwing a warp on the loom and seeing where it takes me. I am even less crazy about letting a “blip” become a “design element” although my work often has such blips!

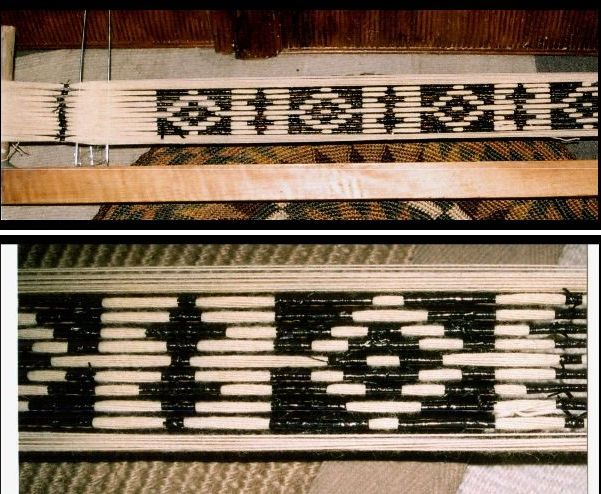
When I have tried ikat, the tie-dyed warps wandered off as they pleased once I started weaving, blurring the design to the extent that the original planned pattern became totally unrecognizable! You can wrench the warps about and try to get them to behave or just let them go and appreciate the beauty in the “blips”. You can probably guess which one I am more inclined to do.

Way back when I first tried ikat on the above warp I thought that it was all about the tying and dyeing and I was so nervous. Had I used the right wrapping material? It took me a while to settle on cassette tape after trying cabuya fiber (a kind of agave) and then strips cut from plastic supermarket bags. Had I tied tight enough? Was I using the right kind of dye (answer: NO…I used cotton dye on wool which gave me a wishy washy pink instead of  the Mexican red promised on the package). Would the wrapping allow the dye to seep?

Once I had dyed the warp and unwrapped part of it to see my lovely crisp and sharp pattern I was delighted. Now to get to the weaving…the easy part, right? Just plain weave, a piece of cake. And that is when everything went quite mad. The warps slipped around out of position with every move I made, the parts of the design wouldn’t line up and I was terribly disappointed.

Then came this….

On my trip to Guatemala in 2008 I bought this…a prepared ikat warp ready to go on the loom. “Ikat the easy way”! I exclaimed. This warp had been prepared by the experts and surely it would turn out nicely. I took just one section of it and put it on my loom….it was coming out even worse than my own experiment. At least on mine the first motif looked kind of okay. I put it aside very quickly. I just couldn’t bear the thought that someone had gone to all the trouble to tie and dye this warp only to have me come along and mess it up. It’s still there in the closet.

Once you have had an ikat disappointment, it is not really something that you feel like launching into again in a big hurry…all that time spent tying, dyeing, waiting for it to dry. In any case, I felt that I hadn’t really learned anything from the exercise to warrant another attempt. I needed to do some thinking about what needed to change about the way I was handling the warps.

But I did take something away from the experience – a growing awe and respect for the ikat weavers around the world! My gosh, the work they do creating those amazing images in their cloth. The motifs  have that wonderful fuzziness in their outlines which is what makes the technique so attractive.

This is a piece from Indonesia from a collection  of textiles owned by Phil Willett that he and the late  Dennis Penley collected. Of course the warps move out of alignment but not so much that the image is completely lost as mine was. Just the right amount of shifting is what makes this piece beautiful.

I saw an ikat bed cover that my weaving teacher in Candelaria was weaving with both hers and her husband’s names spelled out in the tie-dye technique, watched ikat weavers with their backstrap looms in the towns around Cuenca in Ecuador, saw ikat warps being prepared for floor looms in Salcaja in Guatemala, gazed at the amazing Central Asian ikat robes at the recent exhibit at the Textile Museum in DC and got to touch and examine a Mapuche ikat warp for a poncho on the loom at an exhibit at the National Museum of the American Indian in DC late last year.

The Mapuche ikats are known for the minimal shifting of the warps in the design and the relatively clean and crisp outlines the patterns have as a result.

Ikat! Sigh! I read an article here just today that describes it as “as trendy as anything ancient can ever claim to be”. I am not trendy by any stretch of the imagination and wasn’t aware that it was so. In any case, the “trend” does not appear to have reached Santa Cruz, Bolivia. The article says that “this kind of pattern now lends interiors a kind of dressed up Bohemian vibe”.

Let’s hope that this is good news for the artisans and that people are aware of the incredible amount of time and skill that goes into the pieces and will be prepared to pay fair prices accordingly.

This video, which was embedded on Ravelry recently, shows one group’s enterprising way of mimicking the appearance of ikat. They produce large lengths of cloth with large fuzzy-outlined ikat-like images without the long tying and dyeing process….

Schumacher – Darya Ikat Weaving Process from Schumacher on Vimeo.

And I have seen other interesting ways to imitate the look of ikat in the online weaving groups…the “faux ikat” using painted warps. Weaver Bonnie Tarses has a video here that shows how to set up for what she calls “almost ikat”.

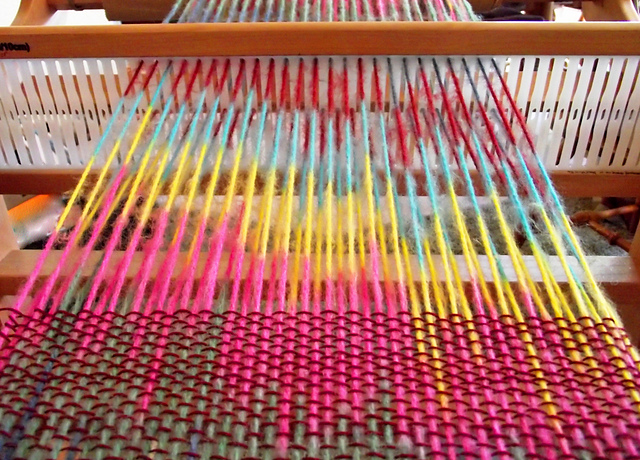
In this WeaveZine article Syne Mitchell shows how to create an ikat effect with painted skeins on a rigid heddle loom.

The beauty of the piece is all about the very misalignment of the colored warps that I have been struggling to avoid.

See how the “blips” are turned into beauty!

I would love to weave something like that but I know that I would spend the whole time fussing with the warps and trying to get them to line up! I just wouldn’t be able to stop myself!

Ravelry member jtellier wove a faux ikat scarf on her rigid heddle loom, which you can see below, and shared it with us for inspiration when we were planning  our plain weave weave-along in the Backstrap Group.

Now we are doing an ikat weave-along and have four participants so far.

In this current weave-along we are trying to do true ikat by tying and dyeing the warps. We recognized that we needed to go into it with the right attitude. I didn’t want people to end up as disappointed and frustrated as I did after my first attempt and so we are all participating with the idea that we will definitely create something “interesting” if not exactly what we had in mind in the planning stage.

I have got some ideas and theories together about how to create my ikat pattern with a minimum of blurring in the design. My weaving friend Tracy and I discussed how the Mapuche weavers appear to leave all their ties in place on the warp and only unwrap enough of a bundle to give them the minimum of space in which to open the sheds and pass the weft. I have tried weaving without unwrapping everything beforehand (the warps still slipped) but not to the extent that the Mapuche weavers do.

I was also intrigued by this picture on the Education and More website, on their backstrap weaving page, of a warp in Guatemala which has been glued to the loom bar with corn masa. (Karen from Education and More tells us that it is used as a paste to secure the threads).

Hmmm… I thought. Maybe I can use diluted white glue to do the same.

Karen from Education and More shared this image with us in the Raverly Backstrap Weaving Group:

It shows how some ikat weavers, with whom she works in Guatemala, tie cotton around the sections of dyed warps to stop the warps from moving. I suspect that cotton against cotton holds well and does not slip. I have tried doing that with the cassette tape. The tape is far too slick to be effective. Doesn’t that warp look gorgeous!

And the final inspiration came from a Chilean lady on Facebook. A Facebook friend of mine “liked” her picture which is what allowed me to see her at work on an ikat piece on a wooden frame loom. I so wish I could have posted the picture here but I have not yet made contact with the weaver and, if I do, I will post the picture next week. I saw that she too was working in a very small space between the partly unwrapped ties and the weaving line.

She had a separate bar which appeared to part of the frame loom which was her shed rod. Unfortunately only a very small part of the loom can be seen. What interested me was that she had multiple sets of small heddles around  the groups of warps that she had wrapped. Each group had its own string heddle rather than having one large string heddle across the entire warp.

So I decided to use all these tactics in my project. As an experiment, it is not a very well conducted one as I will never be sure which of the new tactics will be responsible for the result…one or any combination of all of them.  Ah well.

First came the warping and wrapping. I set up the warp on a frame to wrap with cassette tape…still my favorite medium. I did not get carried away with the size of the warp. I guess that tells you something about my confidence, or lack thereof, in the success of the project! This is a cotton warp.

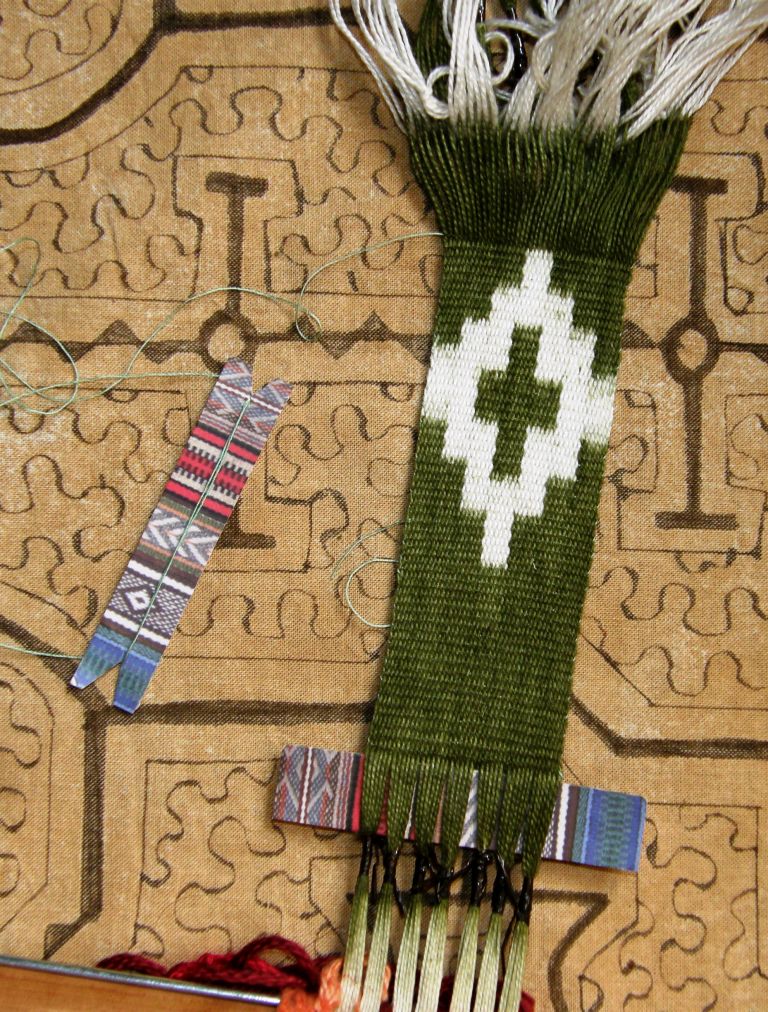
Here it is after dyeing with Dylon Olive Green cold water dye. I had dyed a skein of Plymouth Yarn with the green and this warp got tossed in at the end. The color is a little uneven and I kind of like the sort of washed-out look.

So here is the first motif. I was very pleased but still reserved in my excitement as I know from experience that the first motif generally works quite well. Things tend to go mad after the frst one.

My friend Annie will recognize the business card that she gave me back in 2010 which I am using to start the weaving and as a wee shuttle. I still have it, Annie and I hope you will give me a new one when I see you in March!

The warp at the loom bar is stiff with white glue which never entered the dye bath. The cassette tape ties down there are fairly ineffective. The warps just slide right through those but I like to think that they help a little. Cotton ties like the Guatemalan use would have been better. You can just see the bunches of white string heddles.

And I used a very fine weft. The warp is similar to a #10 crochet cotton. Of course I forgot to dye yarn for weft. I wove with this fine weft to start and finish the rep weave piece I showed last week and I really liked the feel of the fabric it produced.

Here are three finished motifs and all is well. The motifs are all a little different. I was not precise in my measuring and wrapping of the segments. The space in which I open the sheds is tiny and I am thankful for the fine sword that came with a Guatemalan backstrap loom that Linda in California gave me. I am using shed loops for the non-heddled shed. One shed loop for each section.

Three more motifs to go and I will be done…short and sweet! Very sweet! I am pretty happy with this. Now, which tactic or tactics produced these pleasing results? Good question!

What about the backstrap weavers who just go and unwrap all the ties, throw the warp on the loom and weave away producing beautiful results?…no “glue” or teeny tiny weaving spaces with teeny tiny bunches of heddles. I am completely in awe of these people.

And what about the ikat weavers in Uzbekistan?

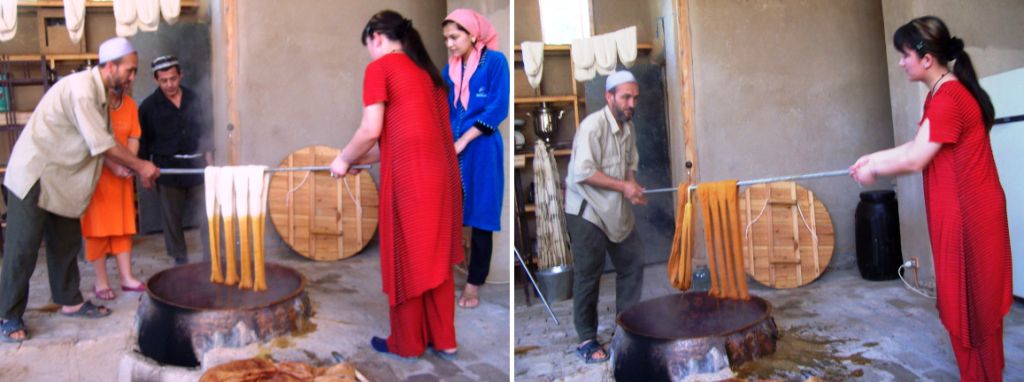
My friend Pam took this picture in Uzbekistan and has allowed me to show it here. The ikat Master marks the mordanted warp and the ladies do the tying. Often the warp is mounted in layers on the frame so that multiple layers can be included in each wrap to repeat the patterns along the length of the entire warp. I got the idea of mounting my warp on a frame to wrap from seeing this picture.

The Education and More site which I linked to above and Flickr page have lots of beautiful pictures of Guatemalan weavers and textiles including many images of ikat weavings.

Did you know that Education and More is selling naturally dyed cotton from Guatemala on their website now?


Bobbie who is in the Ravelry group is not joining us for the ikat WAL.

She has just received her shipment of naturally dyed cotton yarn and has launched herself into a new project which has been inspired by this Guatemalan piece.

It is from the Education and More page and Jennifer discovered and shared it with us. It is the simple warp float technique and very effective.

I am sure Bobbie is going to do a beautiful job with it. Look at the Bedouin piece that she just finished:

As for ikat….will I go to all this trouble again? Yes! Now I am thinking multiple colors and trying to figure out how best to do the layering….it will be another sample. I will probably sew the current piece onto a piece of woven fabric. It is fine enough to do so, I think, and I would really like to use it.

In the meantime, I have started the next part of the si’ira inspired piece. All that counting had me procrastinating I am afraid…576 ends in the pattern area. The first row of pick-up is crucial. All other rows are picked up relative to that one and I can tell you that it is not fun to discover on row 20 that the lines in the motif are not meeting as they should because the first row was picked up incorrectly! So I really have to be in the right frame of mind to work on that first row…check and re-check.

And, it is done! and I am off and running.

Backstrap Weaving – Blue, white, black and back to blue

When I said I was excited about the prospect of seeing the fall colors in the north east of the US, I was thinking more along the lines of reds, oranges and yellows…turning leaves and pumpkins.

It turns out that the color palette I encountered was somewhat different in an area that seems to have been ravaged by a series of freak weather events this year.

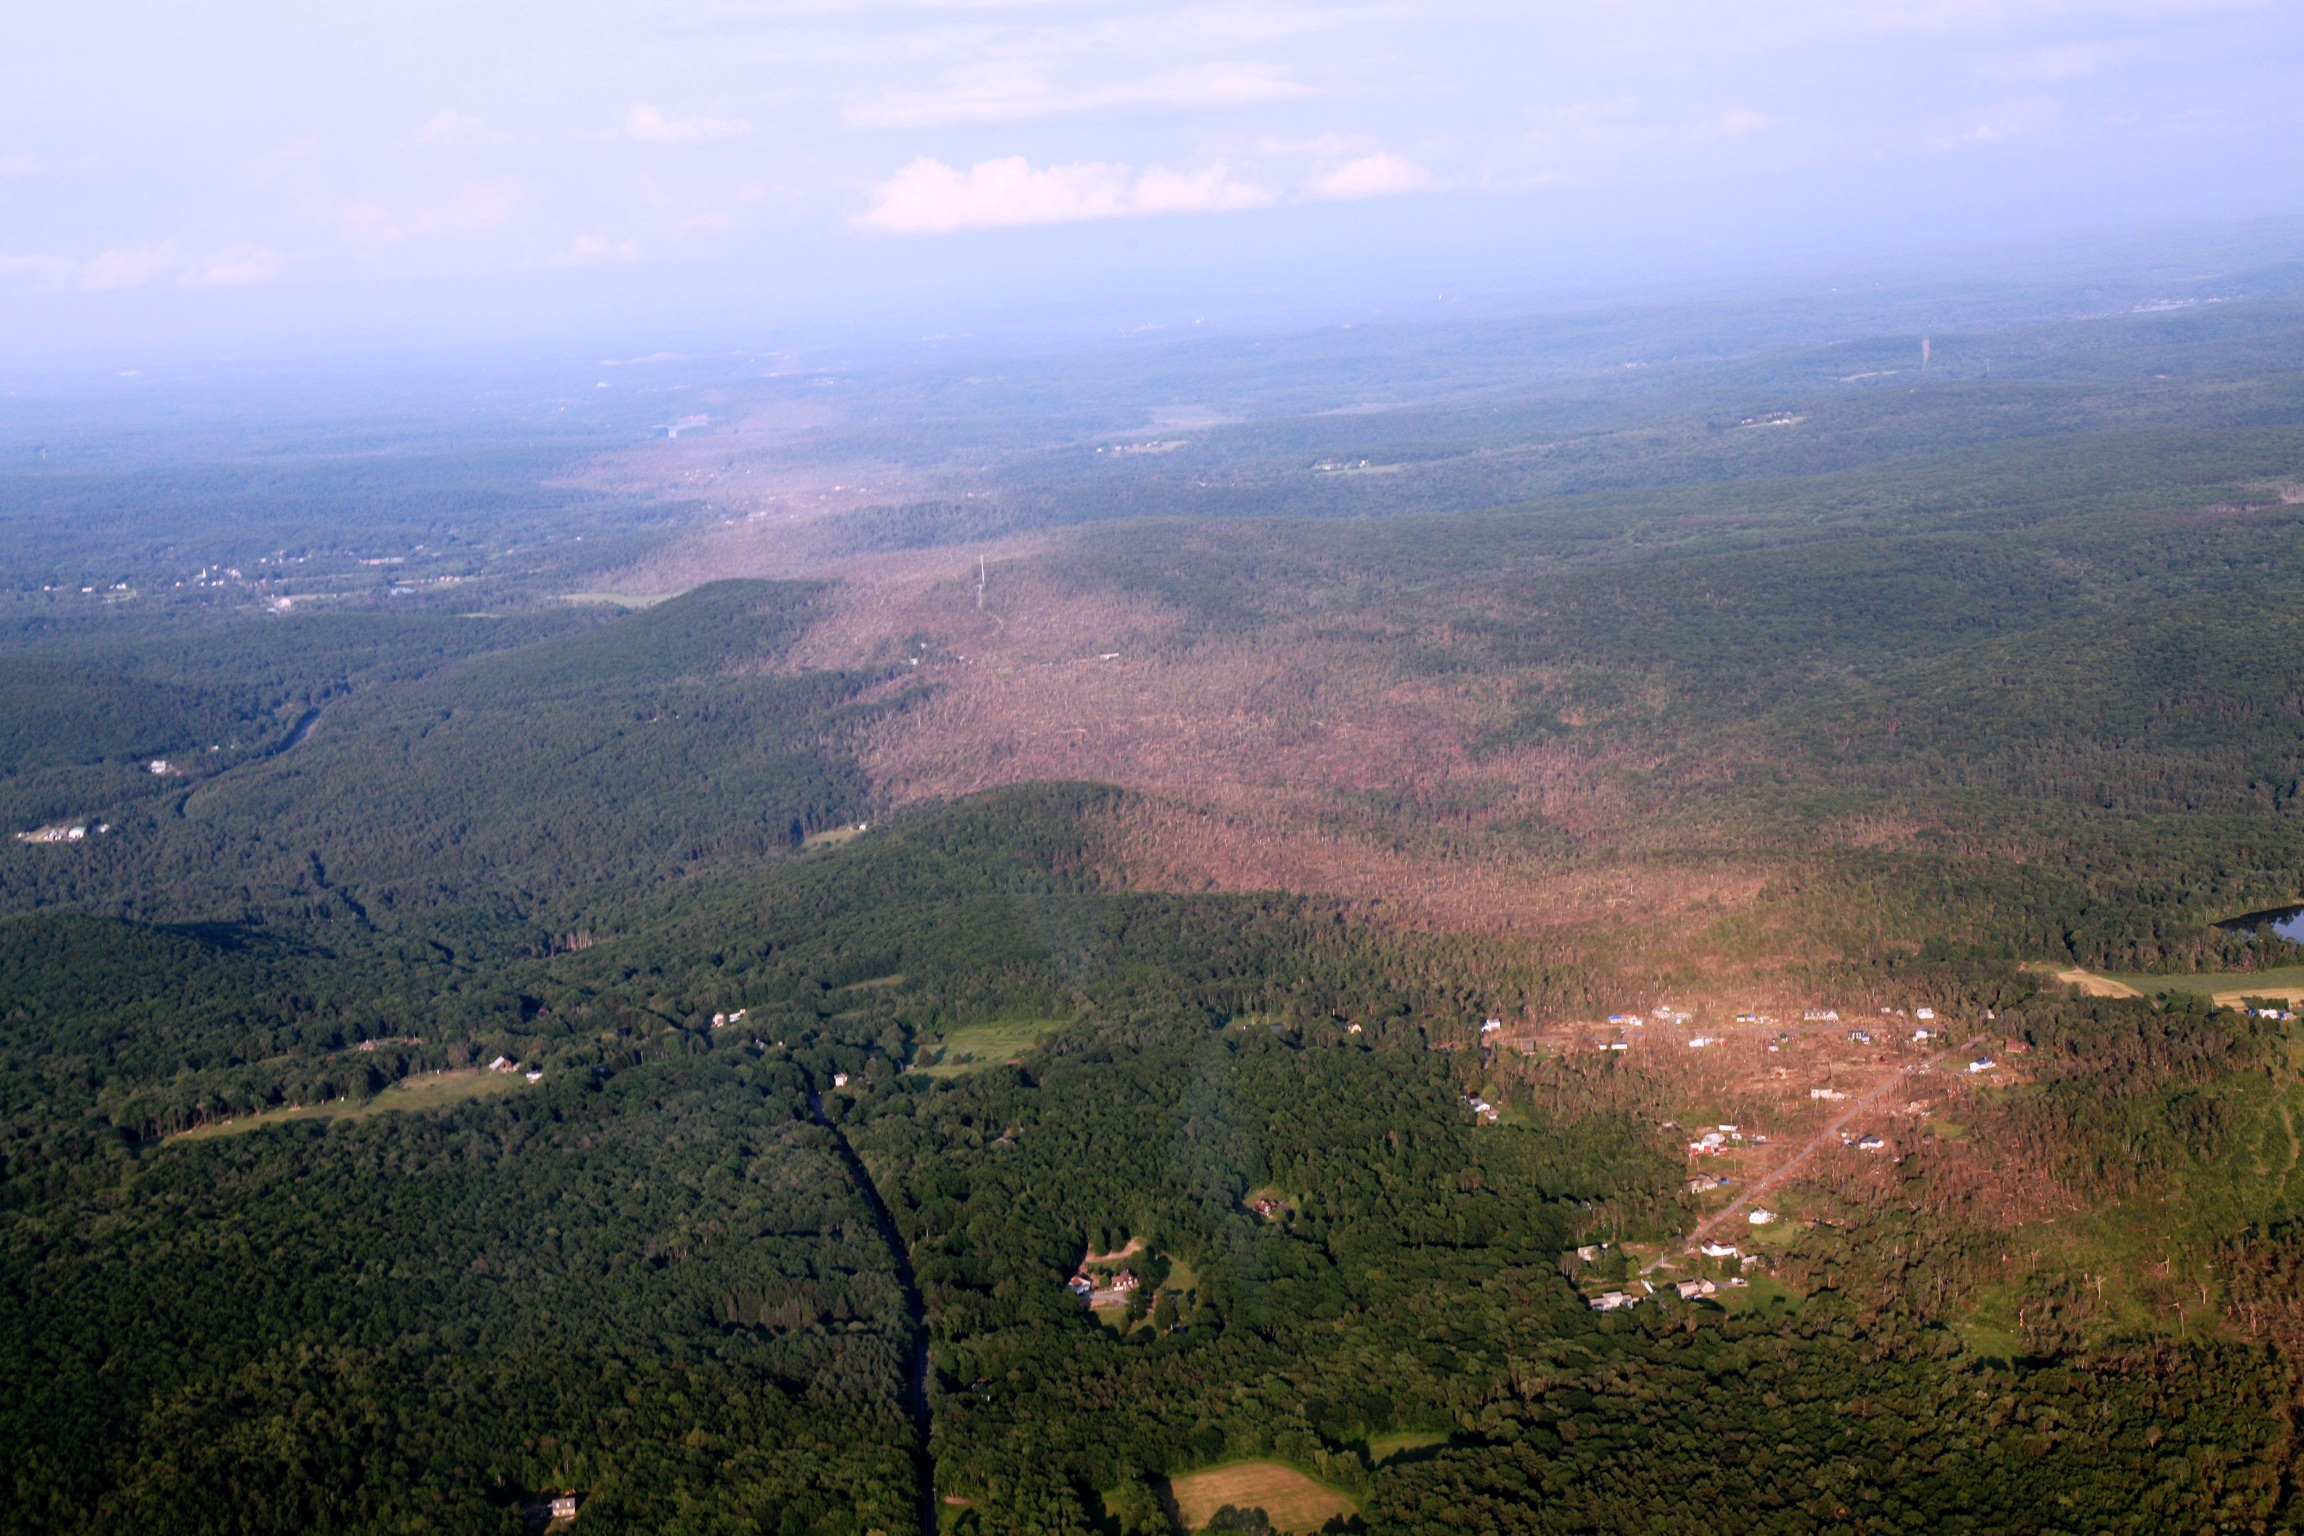
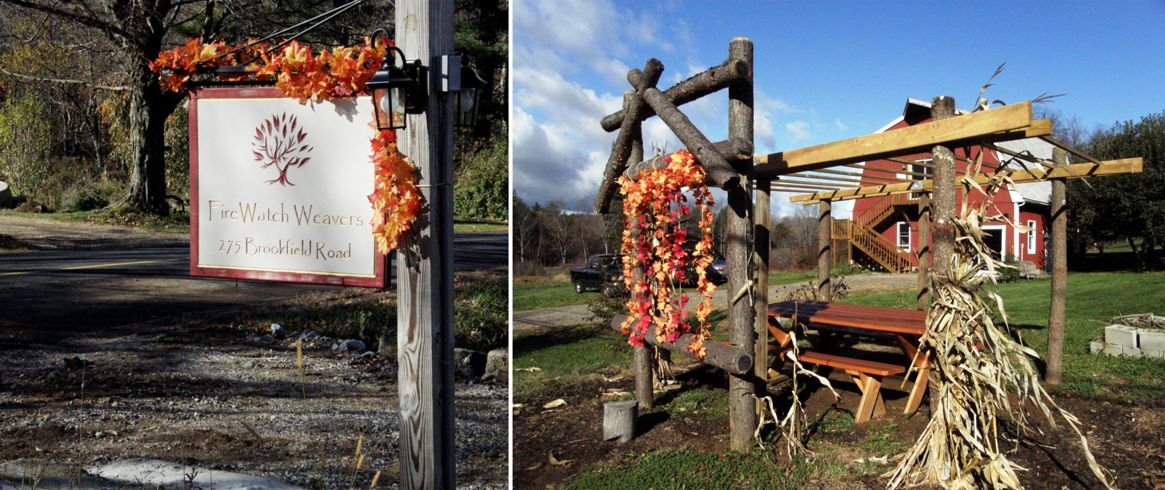
After leaving a cold, drizzly and dreary Massachusetts last May, a tornado swept through the area where my weaving friend Pam has her studio Firewatch Weavers in Brimfield. Pam’s husband Jim Engberg, who pilots his own plane, took this aerial shot of the clear path of destruction. I am happy to say that I missed this by a couple of weeks.

I was a little disappointed to once again arrive in a dreary drizzly Massachusetts in October but the weather was kind and gave a us lovely blue skies and sun the following days. A wind storm had blown most of the pretty fall leaves off the trees so I had to be content with the soft blue of the sky rather than the golden and red leaf colors.

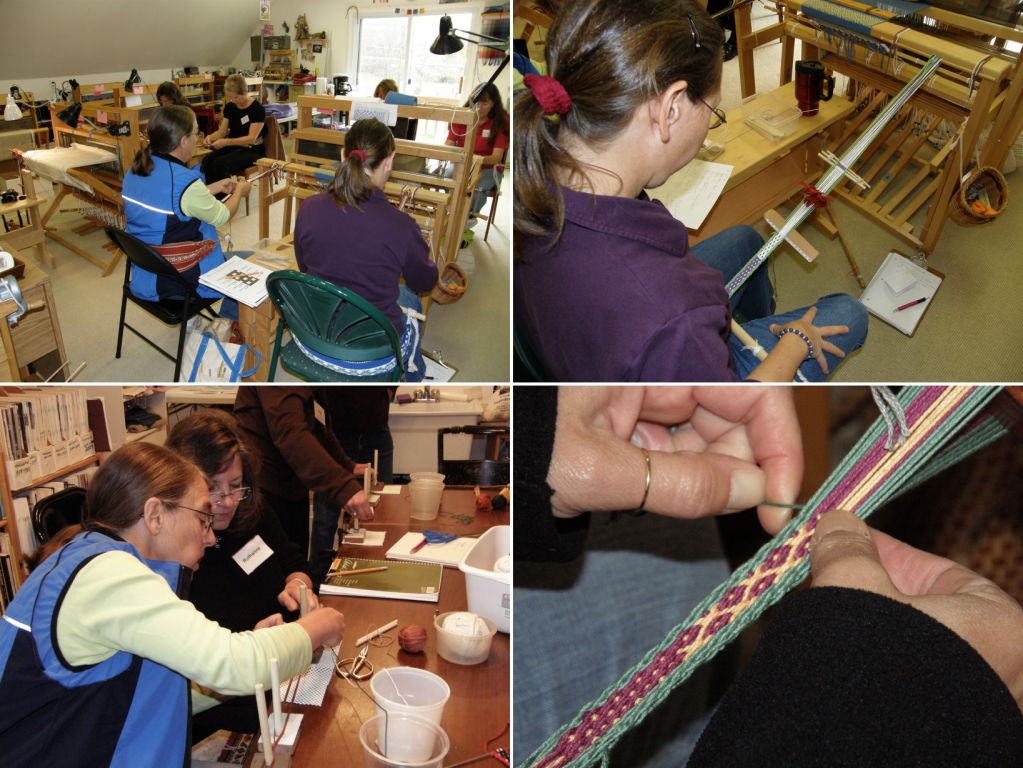
I came to Massachusetts to see my friend Pam and to weave with friends in her studio.

It was a very productive couple of days in Pam’s lovely red barn studio. Since my last visit, Pam has installed an outdoor table and seating and a frame on which shade-giving vines can creep. I can see us all backstrap weaving out there next time!

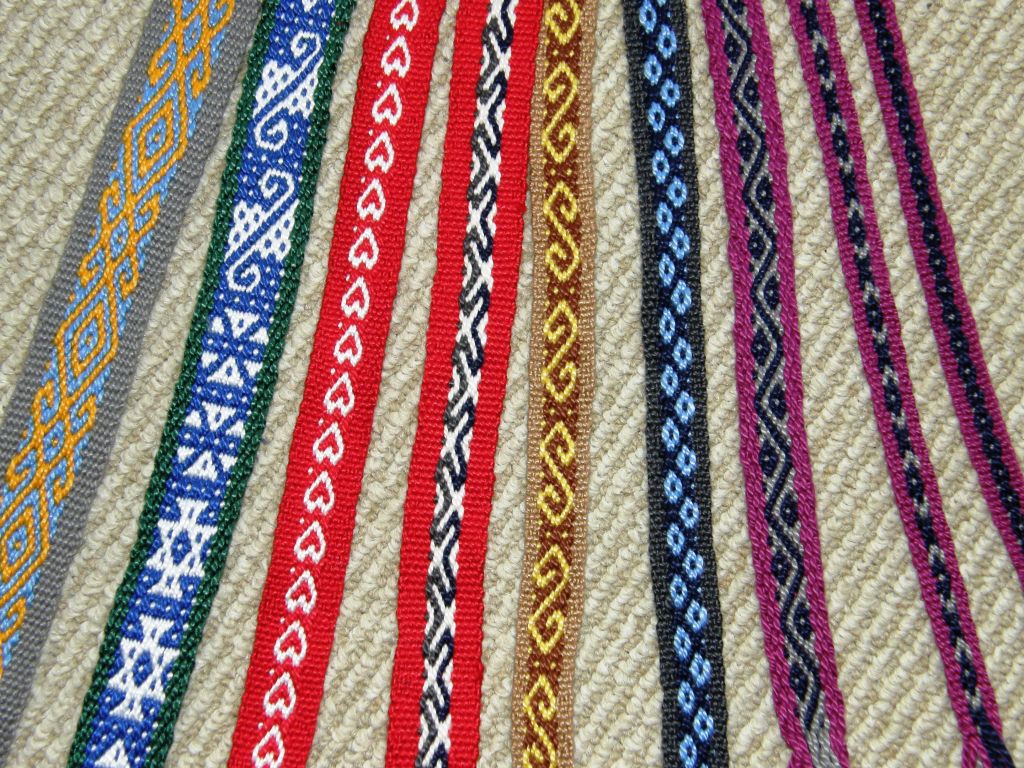
One of the group, Jayne, who has my book Andean Pebble Weave, brought in the colorful collection of bands that she has made while working her way through the lessons. Everyone got a sneak preview of a few of things that will be in my next book.

I got to meet Kateri who has been corresponding with me on Ravelry. It is always wonderful to meet in person one of these online friends. Holly and Cindy returned  after having woven with me last spring and I met Ellen and Ruthanne for the first time.

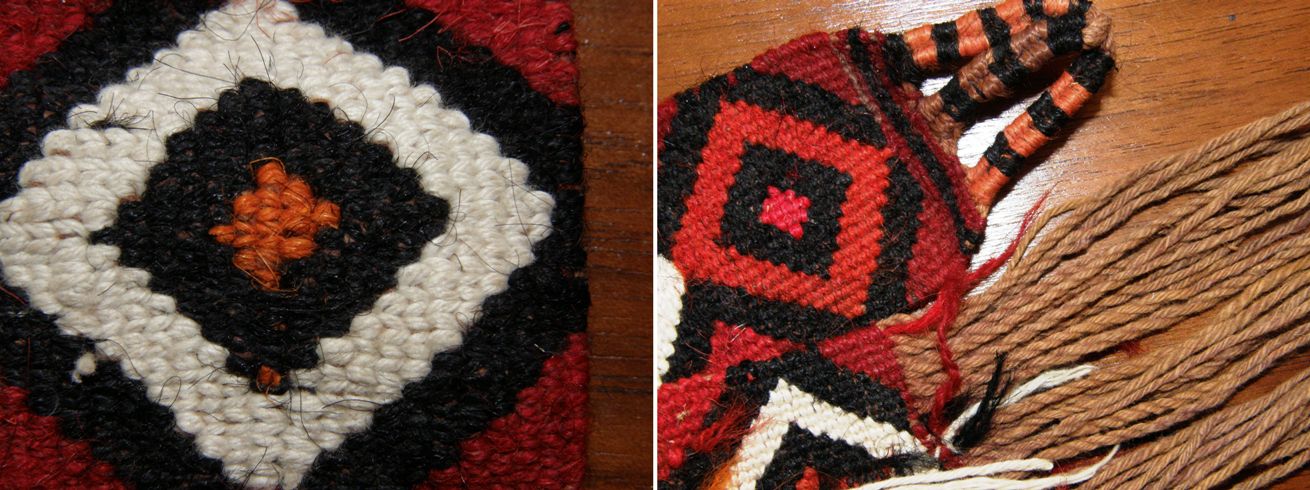
Kateri had recently been to Mexico and brought a bag made by Huichol weavers to show me. Having just completed my own double weave piece using Huichol and Otomi motifs, I was really interested in seeing Kateri’s bag.

Each time I weave this balanced double weave technique I know exactly what I want to look for the next time I have the opportunity to hold one of the Huichol pieces in my hands and so I carefully examined the motifs on both front and back.

By the way, my bag with the Huichol and Otomi motifs won me the People’s Choice award on Weavolution’s Halloweave event and the prize was $250 worth of cashmere yarn from Colour Mart! I will have to think very very carefully about what kind of piece I will use this precious fiber for. Don’t worry, I promise not to use it for a warp-faced heavily beaten project!

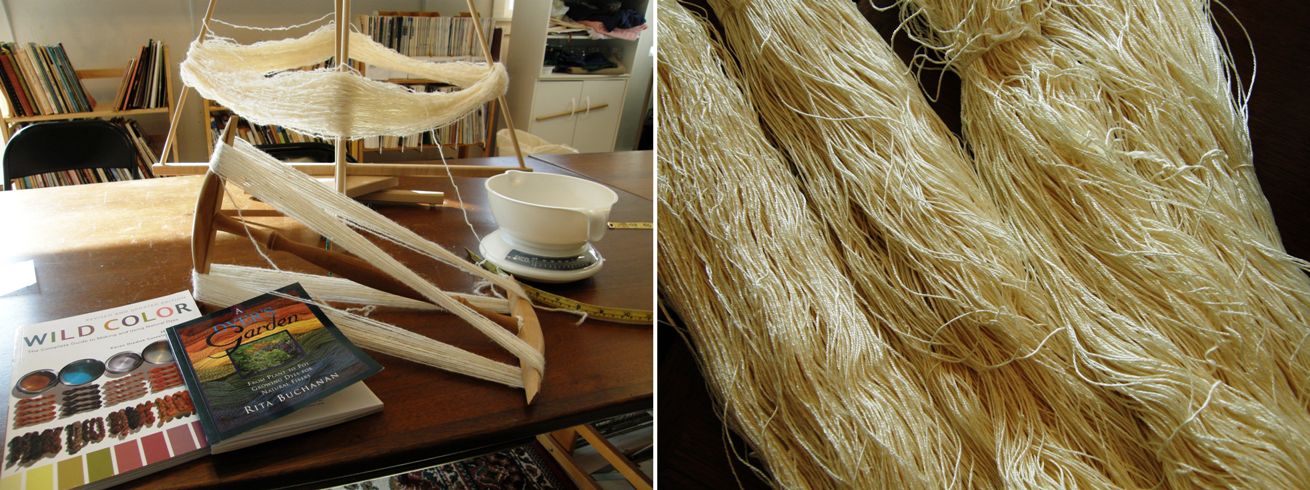
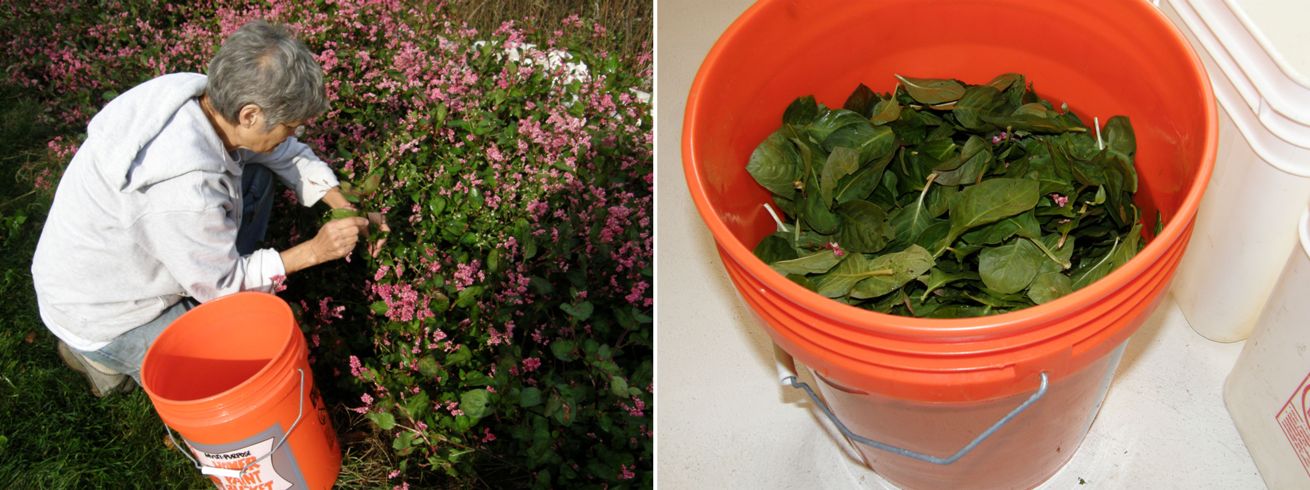
The following two days were spent harvesting Pam’s crop of Japanese indigo to dye silk and wool skeins. This would be my first time dyeing with these plants and I was very happy to have this opportunity to learn about the process. We skeined silk from Uzbekistan and wool in their natural colors and also prepared a skein of yellow wool for the pot.

We went through the whole process on day one and  discovered that there is a reason why the author of one of the books we were following said to add “fresh” spectralite. Pam’s stash of spectralite was obviously beyond its prime and we couldn’t get the oxygen out of the bath. Late into the night we had to admit defeat and stat anew the next day with more leaves and FRESH spectralite.

So, a new batch of leaves went into the pot and into the double boiler to slowly heat over a couple of hours. I was excited to get on with it and see the magical results and it was hard not to just stand there and watch the pot trying to will it into heating more quickly…

Pam passed the time weaving off one of her pebble weave samples on her backstrap loom. Freddy snoozed and I went around taking pictures of all the woven treasures in Pam’s studio to stop myself from poking and prodding the indigo leaves in the pot every few minutes…

Here is a weft-twined band that Pam was given made by the Maori of New Zealand which I supsect is a headband. It was so exciting to see this as reading books on Maori twining is what gave me my first clues about this technique which enabled me to experiment with reproducing the Montagnard twined designs.

This is another of the pieces that Pam bought in Uzbekistan that is originally from Turkmenistan. (I showed some others in my last post.) This one has patterning with supplementary wefts and another  lovely shaped flap, what appears to be a finger woven strap and pretty tassels.

Bunches of tassels hang from a band decorated with a warp float pattern. The soumak rug on the right is made of silk.

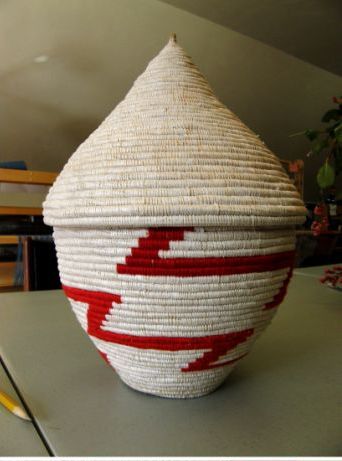
Pam’s friend Joan had brought a basket to show which had been made by a newly arrived artisan from Burundi who has come to settle in Massachusetts as part of the refugee program.

Joan found out that she made baskets but had no idea what materials she would need to continue her craft.

Pam donated some reed which the basket maker proceeded to split into finer strips to coil.

She then unwove a plastic rice sack and used the plastic warp and weft material to wrap her split reed coil and produce her magnificent basket.

Red acrylic yarn was used to make the pattern.

Hopefully she will be able to find similar materials to those she used at home in Burundi to produce her baskets but what a fine piece she made with her limited resources!

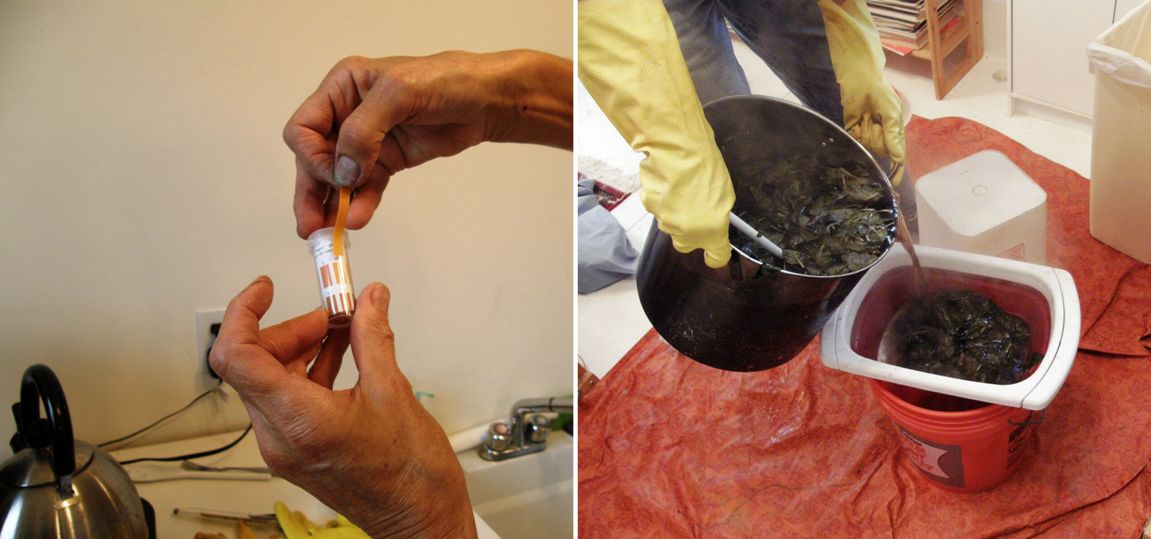
Finally, the water in the indigo leaf pot heated to the desired temperature and it was time to separate the liquid from the leaves and do a ph test.

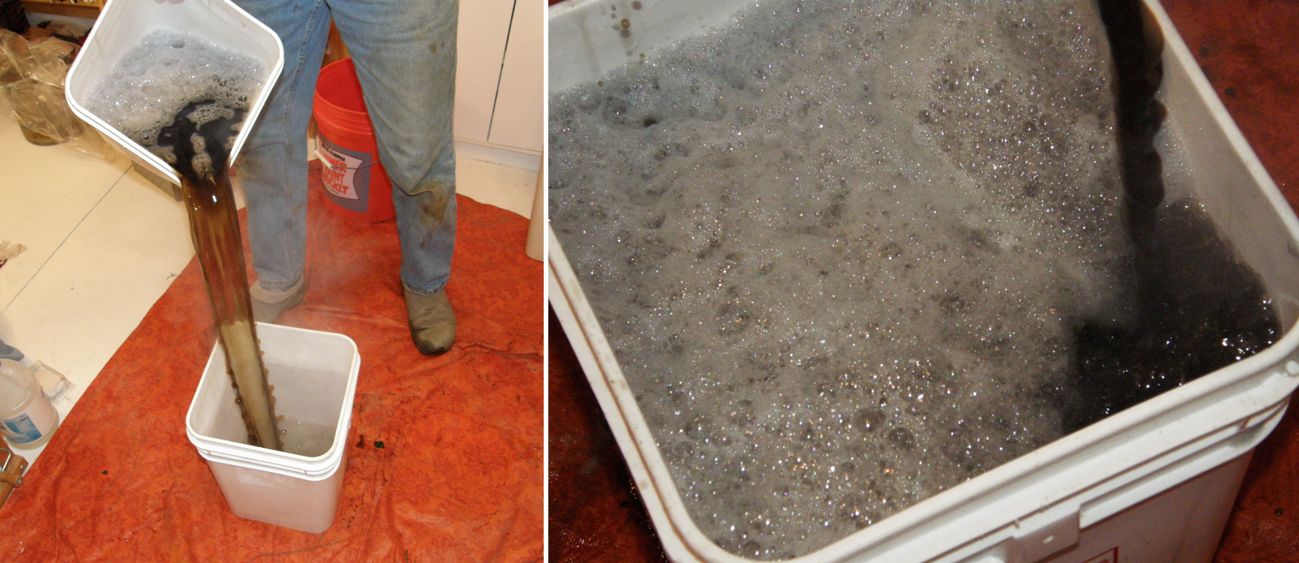
Then Pam poured the liquid from container to container to introduce oxygen. A heavy froth formed and increased in volume with each pouring.

This time we added fresh spectralite and the liquid turned the right greenish-yellow color which indicated that we could now introduce our wet skeins…finally the big moment.

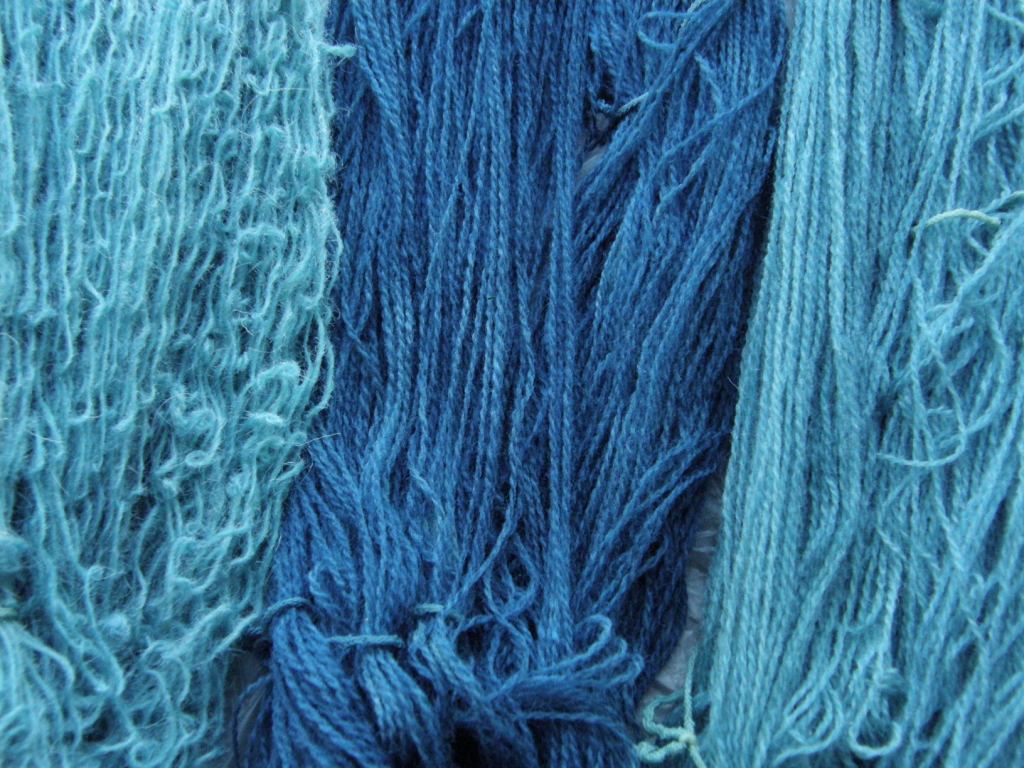
So, I got to see something that I had so often read and heard about…that magical transformation as the skeins emerged from yellow to gradually deepening shades of blue.

If you have never had the fun chance of seeing it for yourself I made a little video of one of the silk skeins coming out of the pot…magic!

The silk skeins had been bought by Pam on one of her three trips to Uzbekistan the first one of which she made with natural dye master Michele Wipplinger, who is pictured below, with master dyer Madrim Matkarimov in the Silk Carpet Workshop in Khiva, Khorezm Province, Uzbekistan. I was lucky to meet Michele at the Tinkuy de Tejedores in Peru around this time last year (gosh! has it already been a year?!)

Pam told me that Khiva, which is in far western Uzbekistan, was rebuilt by the Soviet Russians using local craftsmen to restore some of the old madrassahs and mosques and the khan’s castle, etc. She said that people do still live inside the wall as well as in the suburbs outside it. All these pictures were taken on Pam’s trips and she has kindly allowed me to show them here.

Above you can see one of the indigo-dyed silk rugs produced by the workshop. On the right, the indigo-dyed silk skeins, as they emerge wet from the vats, are simply thrown against a wall where they stick and can dry. They look like an unhappy tangled mess here which would be a headache to have to unravel but Pam explained that only small lengths of the silk are used for the knotted pile technique in these rugs so there is no need to  unravel the skeins in one continuous thread.

Pam also visited the UNESCO Silk Dyers’ Workshop in Taskent in 2008. In Pam’s own words…this was a project to employ women in the community using traditional arts. Note: Traditionally men are the dyers and weavers of ikat-dyed fabric (women are the cut-pile carpet weavers), but there was a lot of work in new construction in Tashkent that summer so UNESCO couldn’t get men to participate. Therefore they converted it to a project for women.

The dyemaster was named Dalat (pictured below left). The dyepots were huge tanks set into the floor, heated by gas jets. First the skeins of silk were mordanted and wrung out (pictured below left). These were then allowed to “cure” (sit damp overnight) and can be dried and stored.

The mordanted silk is made into  a 100-meter warp on a warping reel and wound on an ikat frame making several layers so that when the apprentices, pictured above right, tie it for dying, they are actually making multiple repeats. The ikat frame is tensioned by securing it to bolts in the floor (below left).

Dalat paints the design onto the warp so that the apprentices know exactly where they need to bind.

The tied warps are then dipped into a vat of onion skins and apple leaves to produce the first of many colors. The bound sections will be unwrapped and other sections tied before dipping the warp in another vat to produce a second color and so on until the multi-colored warp is ready to be woven into fabric like the examples seen below (although these particular examples were not dyed with natural dyes).

The picture above left shows an ikated warp on an 8-shaft counterbalance loom. There is no warp beam – the warp is stretched out across the room and weighted (above right). Each time the warp is advanced it is straightened, smoothed, and sized.  Then they weave it in a warp-faced twill (7/1 – the weft goes under 7 warps and over 1) which looks like satin and shows off the warp colors on the face but is weft-faced on the back.

Quite a process! I at least got the tiniest taste of this ancient practice with our little indigo dyeing experiment and I am so happy that I was able to see the exhibit of the Central Asian ikat robes at the Textile Museum in DC last November. Pam’s pictures and explanations and the stories she told me of her travels in Uzbekistan have added so much to what I saw at the museum last year.

My indigo blue and blue skies which stay with Pam in Massachusetts changed to white, white, white when I got to Pennsylvania.

It snowed!…big fat wet flakes that fell and fell all day Saturday. I was thrilled. I lived in snow for nine months of the year every year for six years back in the eighties and haven’t had a chance to walk about in the lovely white stuff since 1992. I loved it! I especially love that special kind of muffled silence that the snow creates. However, you probably all know of the unhappy results of this early heavy wet snow and we, like hundreds of thousands of others, were a part of the power outages that hit the area. My white wonderland turned to black but we were lucky to have the warm yellow glow of kerosene lamps and crackling logs in the fireplace.

I will write more about the snow adventure in Pennsylvania, my backstrap weaving friends there and my wonderful hosts over those days in the next post. But I will let you know for now that the snow scape has since turned into a sandscape as I have winged my way to the other side of the country. So, the last color for this post is the deep blue of the Pacific Ocean.

I am here for my second time of weaving with friends out at Martha’s  lovely cabin in the woods. As always Martha is a never ending source of fascinating information and stories and her weaving studio is full of interesting experiments, pieces she has collected in her travels and her current works-in-progress. Oooh, I have so many cool things to show you!!

But, that’s enough for this time. I have just managed to catch a break to put this post together before getting ready to hit the road…..back once again east to no snow and full power, I hope!