
I wonder what colors spring to mind when you think of winter…blues, greys, winter white? As I sit here in shorts and a tank top, I have to remind myself that it’s actually winter here in the tropical lowland part of Bolivia in which I live. It’s the same in the fall when flowers are still blooming and the city is alive with the bright colors and fragrances that are usually associated with spring. It’s easy to forget that the leaves in the fall season in other places are turning all sorts of stunning colors.


I guess all this has been on my mind lately because I am in the midst of a long move back to Australia to a place that has four very distinct seasons. It will be a little too cold in winter for my liking but hey, I lived at the southern-most tip of the South American mainland for five years and spent eleven seasons living in ski resorts. I’m no stranger to cold…just getting fussy in my old age! I do look forward to the more classic fall colors but I’ve heard that the winters can be grey and foggy. The locals like to call that mountain mist “the champagne air”.
So, what are winter colors here in Santa Cruz?…all the bright colors of tropical fruits and flowers.

And in keeping with that, I’ve had some quite bright colors on my loom lately. As you know, I am only working with yarn that I have stashed away here…no new purchases. I decided to pull out the tub of Omega Sinfonia cotton thread that I often use to prepare workshop samples. It’s a riot of tiny balls left over from years of workshop prep. I almost took one look at the mess and turned around to put it straight back into the closet. The worst part was that what looked like the bigger balls of thread were actually made up of dozens of tiny quantities all rolled into one ball.

In my last post, I talked about weaving a grocery tote using the Mayan Hands naturally-dyed cotton but I just couldn’t get inspired. I turned to the Omega Sinfonia instead and decided for a start to scrape together enough to dye navy blue for outer pockets for the tote bag. If I wove the pockets in the structure that I call Andean Pebble Weave, I could show both faces of the cloth…one pocket on each side of the bag displaying each of the two faces.
As for the rest of the bag, well you know my style….I’ll figure that out later. I grabbed some other colors from the tub and set out to plan a pattern…something very colorful and jolly. I was going to say spring-like but it would actually be all-year-round-like here where I live. It would certainly be something lively to brighten the days of “champagne air” when I end up living in Katoomba.
Then it occurred to me that I had never actually woven anything substantial with this thread and that I would have to, therefore, sample….eye roll…..I wasn’t in the mood for sampling! But no, fortunately, I remembered that I had put together a warp for the cover of my video class, Operating a Backstrap Loom, in good ol’ Omega Sinfonia.

Having done its job as the DVD cover, the warp had sat unloved in a drawer for quite some time until I had the idea to unweave that small woven section and turn it into a backstrap with a bit of pick-up patterning. I took it traveling.


Speaking of weaving one’s own backstrap, let me show the one that Natalie wove using the instructions in my free tutorial here on my blog that includes video clips. I love how the yarn she used has created its own pattern.

So, I had all I needed to be able to make my width calculations, I dyed the scraps navy blue and drew up an idea.


I remembered a colorful warp that I had taken traveling with me years ago…hastily put together the night before I had left. I had hated it so much that it never left my bag. But I did eventually weave it when I got home and made it into a sewing kit pouch. It had grown on me, and I still like it.

Fortunately this latest warp also grew on me. I think the pockets will look very jolly against a dark solid-color bag.
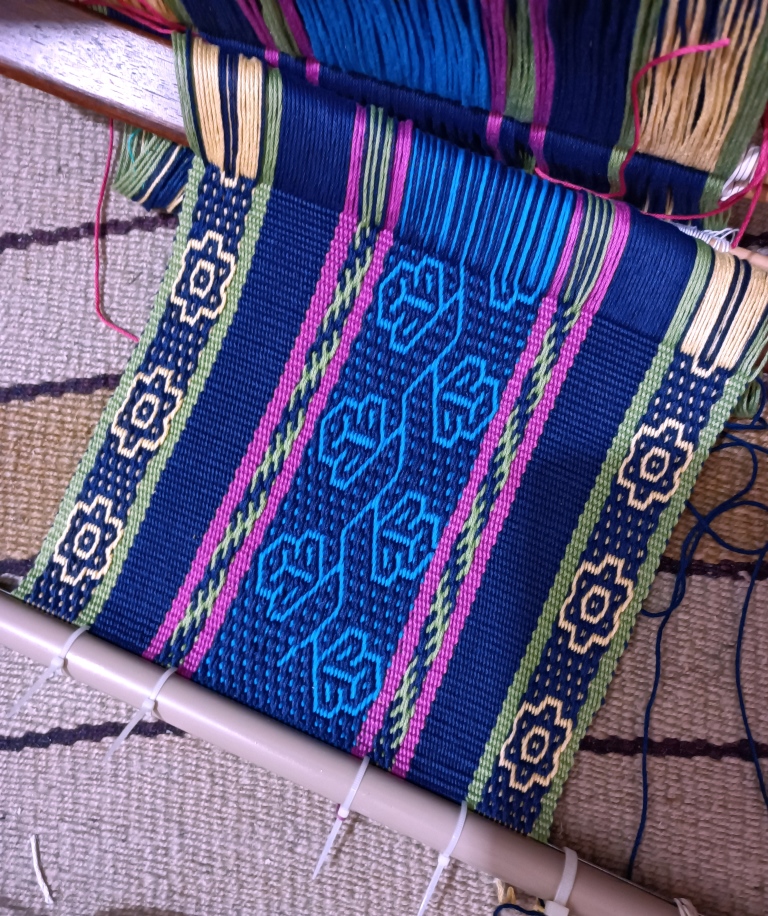
All these patterns are in my Complementary-warp Pattern Book. If you have followed my instructions for either complementary-warp pick-up or Andean Pebble Weave, you’ll be able to weave these.

I love the fact that my backstrap loom allows me to create lovely neat third selvedges…

I have what you might call an unconventional way of setting up to create my third selvedge in that I don’t do it the way my teachers here in South America showed me. But then who is to say what is “conventional” when it comes to this kind of thing? You can see the way my indigenous teachers do it here. I talk about how I do it here. That link takes you one of my FAQ pages….a resource that is often overlooked by my readers or perhaps forgotten. In my latest project I used an umbrella rib as the header to create my third selvedge.
To create the neatest third selvedge, you do need to dedicate some time to making sure the warp threads are all well settled in their correct positions before you start weaving. Then you open a shed and beat really well against the beam. When doing the four-stake warping that I show in Method 2 in my free warping video, paying attention to how the doubled threads pass around the two end stakes will make all the difference to the amount of time you need to spend tidying up before you start weaving. Try to have them pass consistently with one of the two colors always sitting above the other on the stakes. Of course, if you plan to start with a fringe, none of this matters.
In the meantime, another pouch got lined with a stitched shibori learning piece. This time there was an attempt to create a bird. I will do better next time. You probably know where this is heading and perhaps hummingbirds will make their appearance soon.

I scoured the fabric on which the shibori pieces sits in the hope that I can do some stitched resist on it. I am intrigued by the idea of using the technique on printed fabric. I know that I’ll have to place the figures carefully or the original dark blues of the cloth and the dark dye color will just merge. If that happens, the figures won’t have clearly defined outlines.
I threw a strip of this scoured fabric into the dye pot when I was dyeing the Sinfonia thread blue. The scouring did the trick and the fabric took up the dye nicely. You can only faintly make out the pattern and I think this will be a nice effect.

I’ll finish with a quick reminder of the pages on this blog that list and provide links to my free tutorials and video clips. These may not be immediately obvious to those viewing the blog on certain devices. Check them out 🙂 See you next time.


