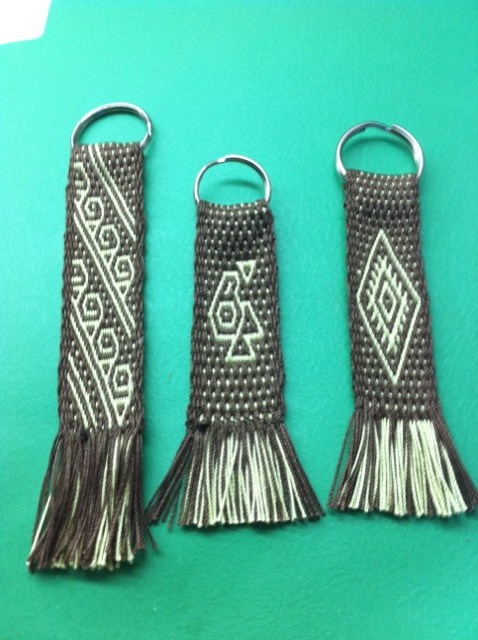
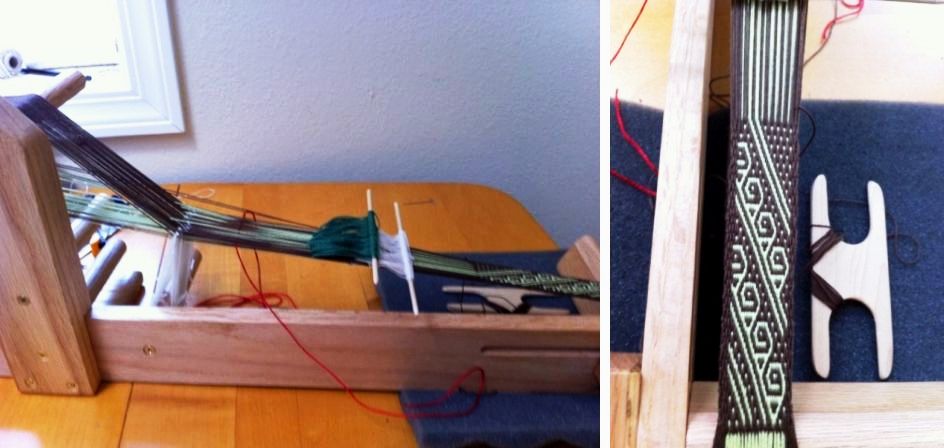
Backstrap Weaving – Weft twining with the Montagnard backstrap weavers.


But first a look at gorgeous rural Maryland where I am currently staying with  friends on the first day when it has felt really cold out. There has been talk of snow on Friday…I hope so as we are putting up the Christmas decorations here that day! while Santa Cruz Bolivia in the meantime experiences a “cool” change with temperatures dipping below 30C  (86F). Most of the leaves have fallen here and it’s interesting to see the turkey vultures perched in the gaunt leafless tree across the street every morning.

Last week I was down in North Carolina where the weather was mild and the neighborhoods were still awash with red, gold, yellow and brown.

I was down there revisiting the Montagnard (Vietnamese hill tribe) weavers whom I had met on a visit last August about which I wrote in this previous post. I had discovered Betsy Renfrew’s videos and photos on her blog about the group of Montagnard people in her community and her project to help them integrate and find sources of income by teaching them English and making it possible for them to gather the materials and resources necessary to build looms, buy thread and practice their traditional weaving skills. Betsy was more than willing to extend an invitation to visit. She has also allowed me to use some of her photos in this blog post.
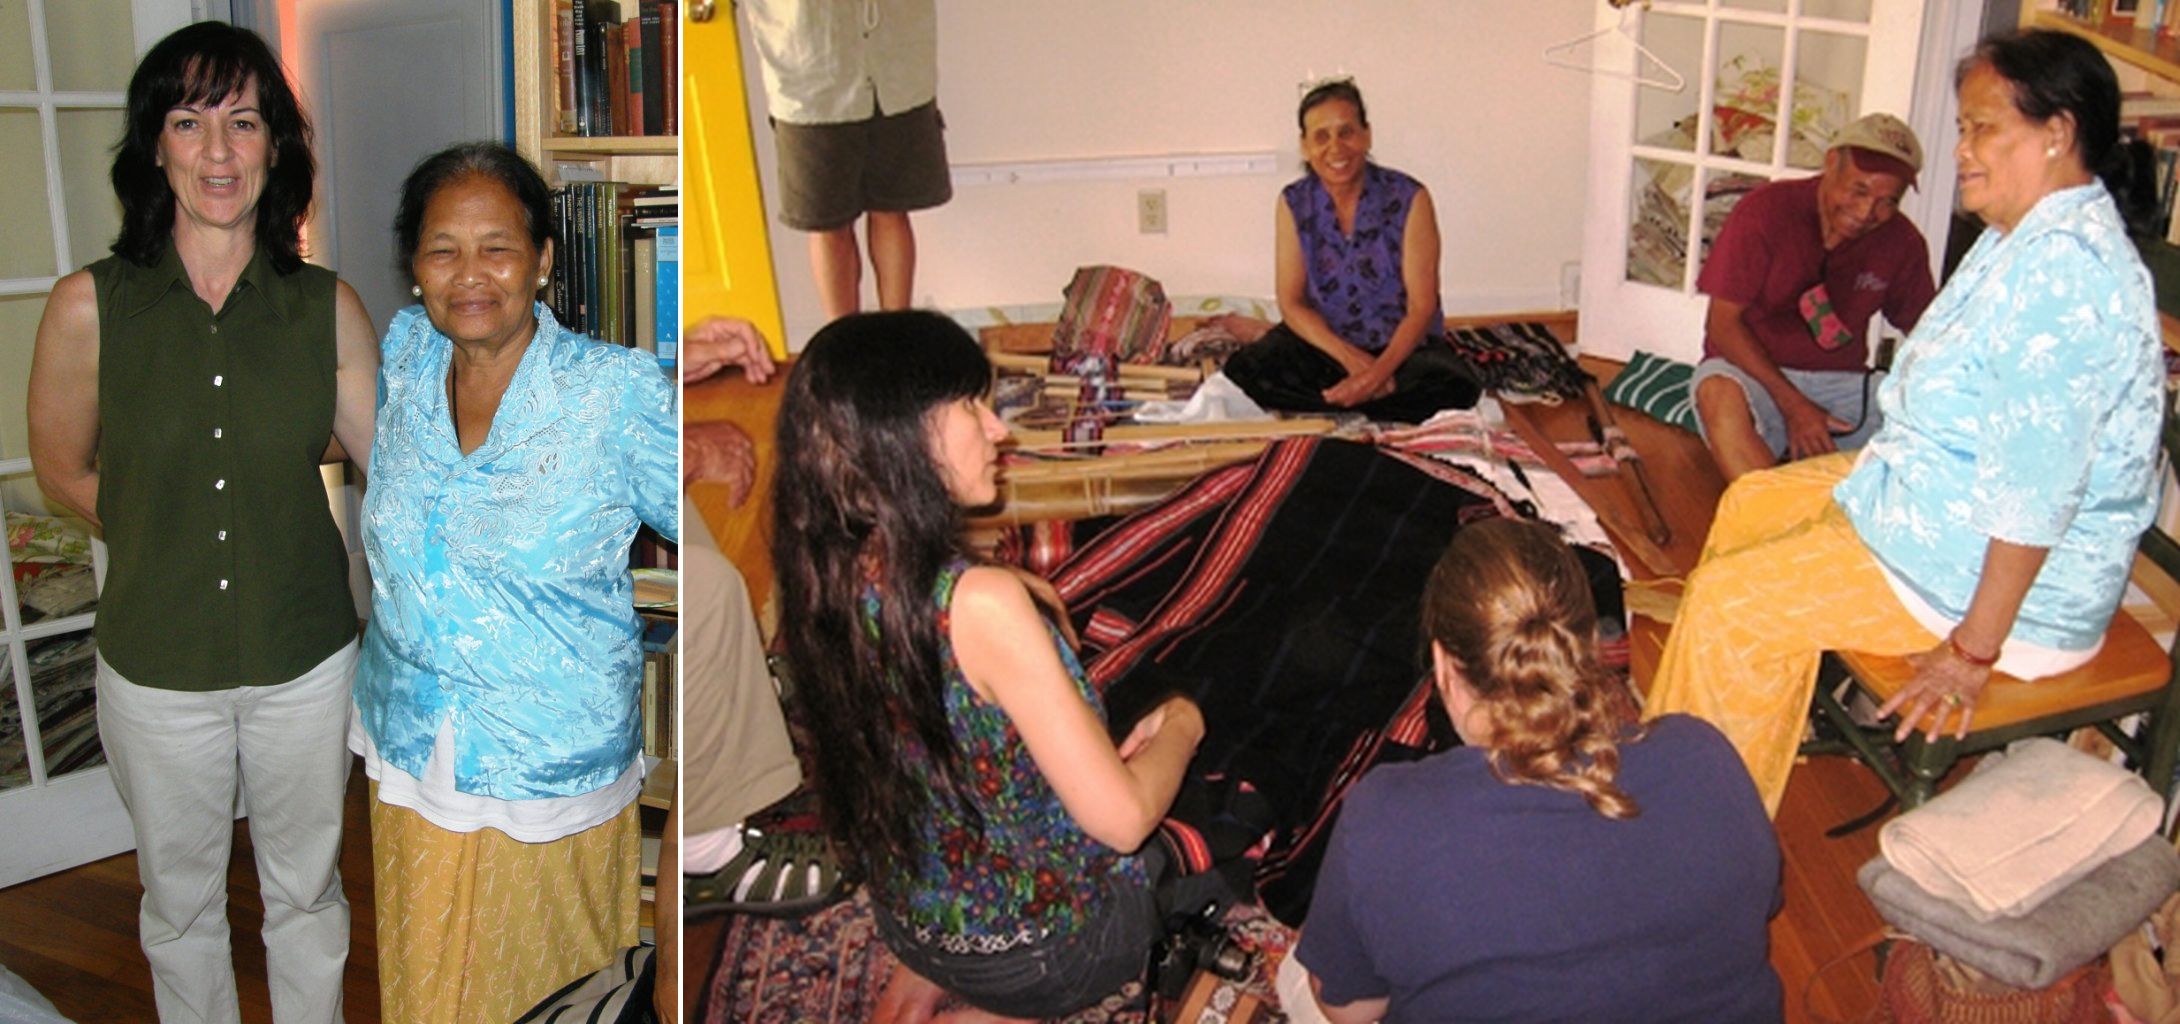
 

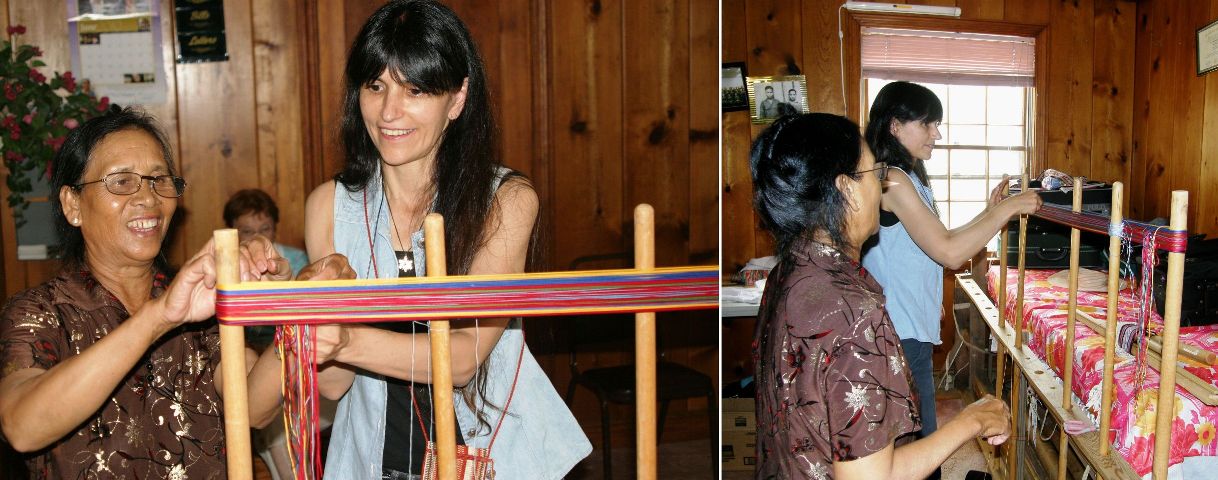
Betsy and weaver Ngach together on the left during my first visit. On the right a scene from my first visit with Lisa and Maurice in Betsy’s home with weavers Ngach, Ju Nie and her husband Thomas. It was a chaotic afternoon with lots of chatter, sharing and interaction which cleared away all  language barriers.  Backstrap looms and textiles covered the floor of Betsy’s front room and, as this was my very first encounter with these kinds of textiles, it was impossible to wade through and take it all in during our short visit and I left with many unanswered questions knowing that I would simply have to return one day.
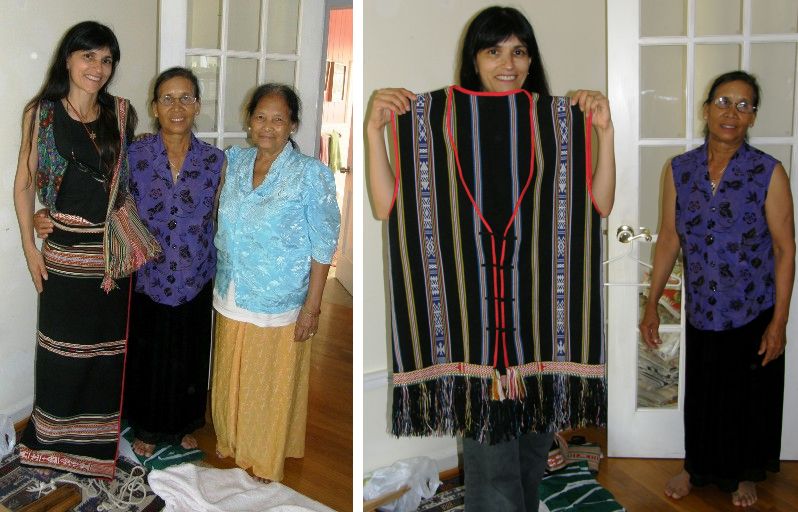
We got to see Ju warping and setting up her loom and Lisa and I both got to try out her warping technique where she adds string heddles as she winds the warp as well as weave on her backstrap loom. I tried to photograph as many woven pieces as I could – skirts, blankets, baby carriers bags and belts so that I could figure out the woven structures when I got home. Ngach put on skirts for us and Ju modeled the baby carriers. Many of the structures I immediately recognized and it was fun to show Ju and Ngach pieces woven with the same techniques in South America. In fact that was the most fun part of the visit…comparing and sharing our different experiences with the textiles, patterns, tools and looms and seeing for what purpose the textiles were intended. I was able to study and figure out some of the other less recognizable techniques when I got home.

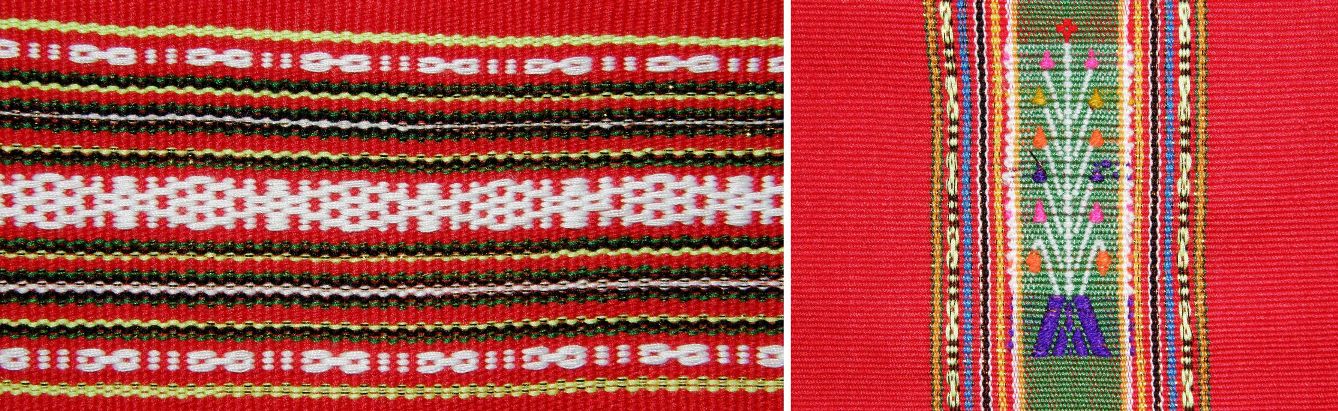
Some of the different patterning techniques which include simple warp floats, cross knit looping, supplementary warp and weft can be seen below…
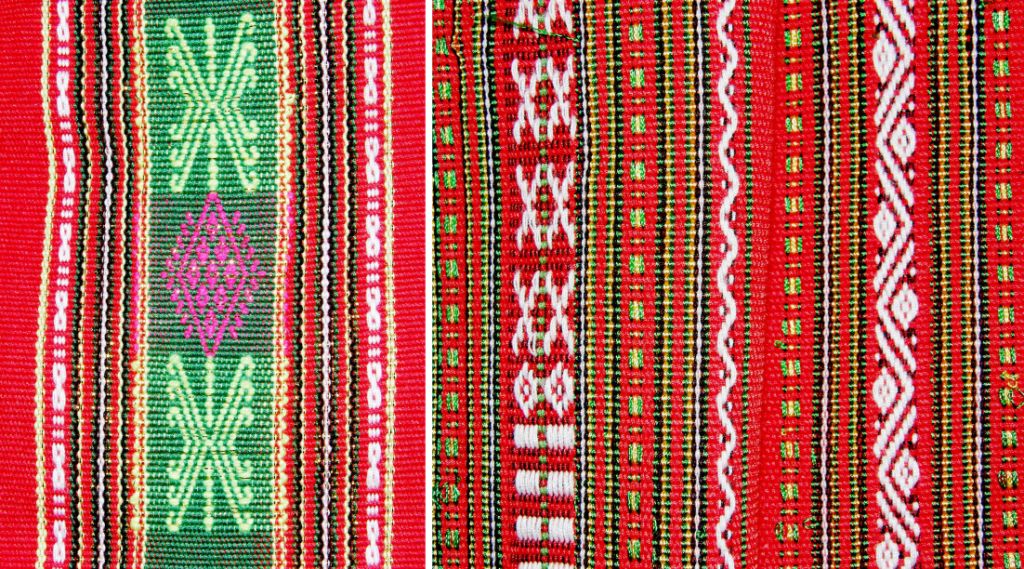
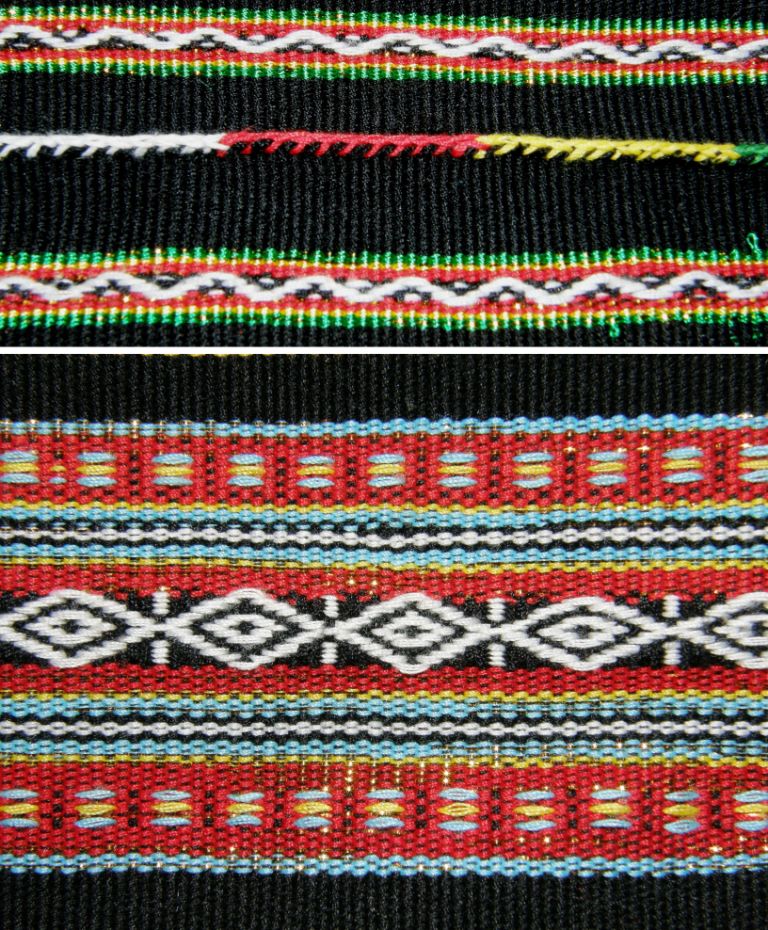
I like the supplementary weft patterned piece on the right as it reminds me very much of some flower motifs that I recently wove using Guatemalan supplementary weft and warp wrapping techniques. The similarities in the designs across cultures are astounding.

If you have been following my blog, you will know that the technique which really grabbed my attention was the following one which both Ju and Ngach, who are from different tribes, call kteh.
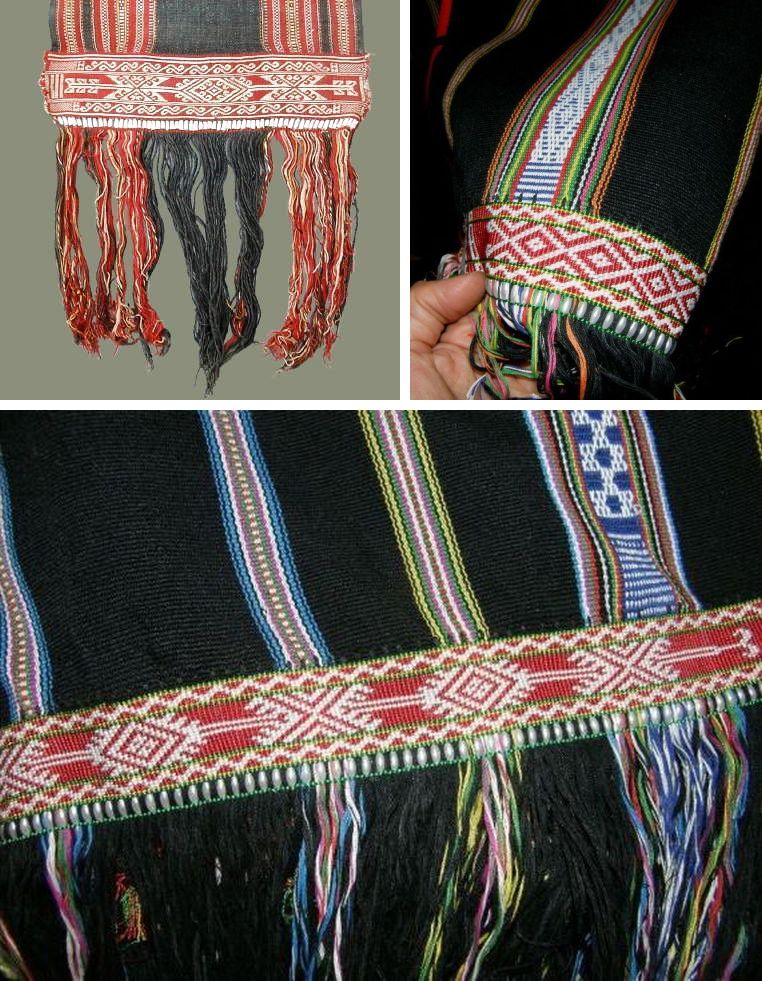

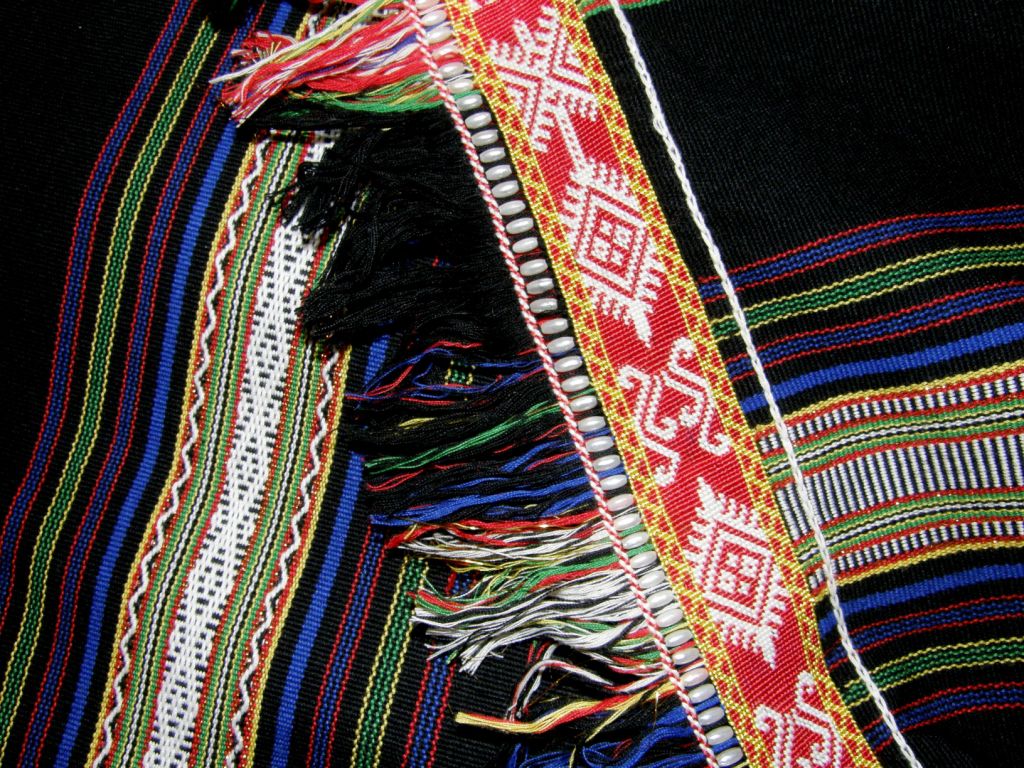
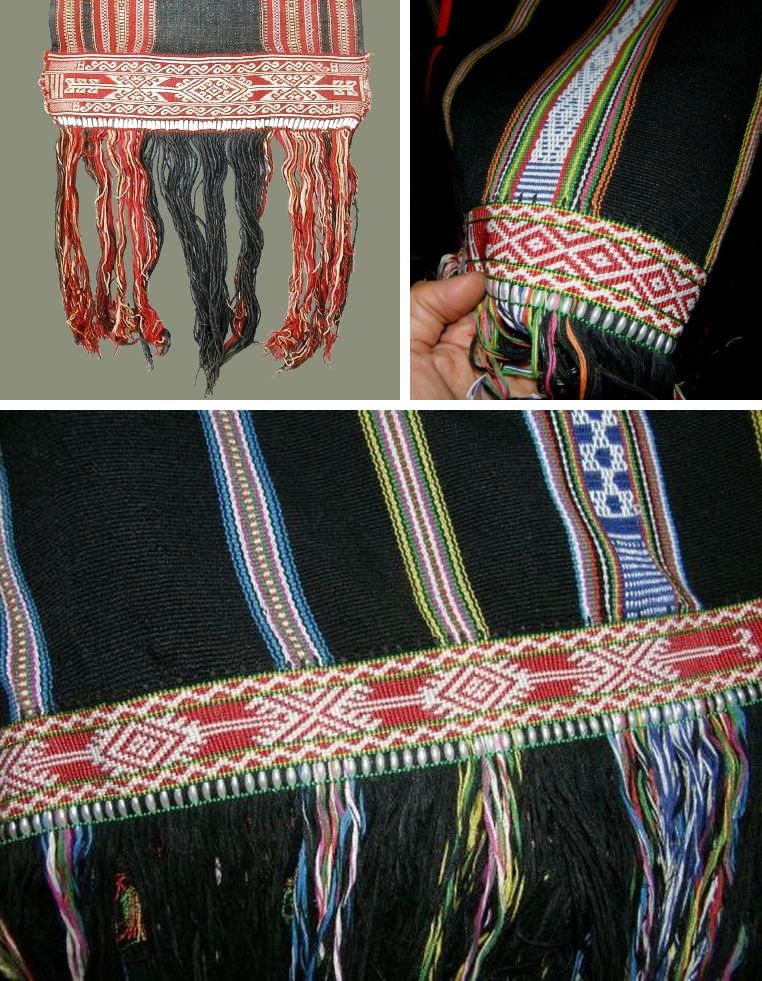
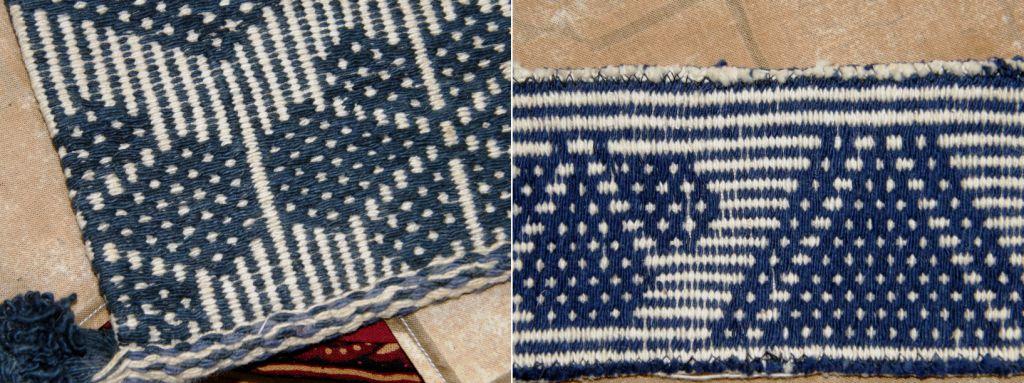
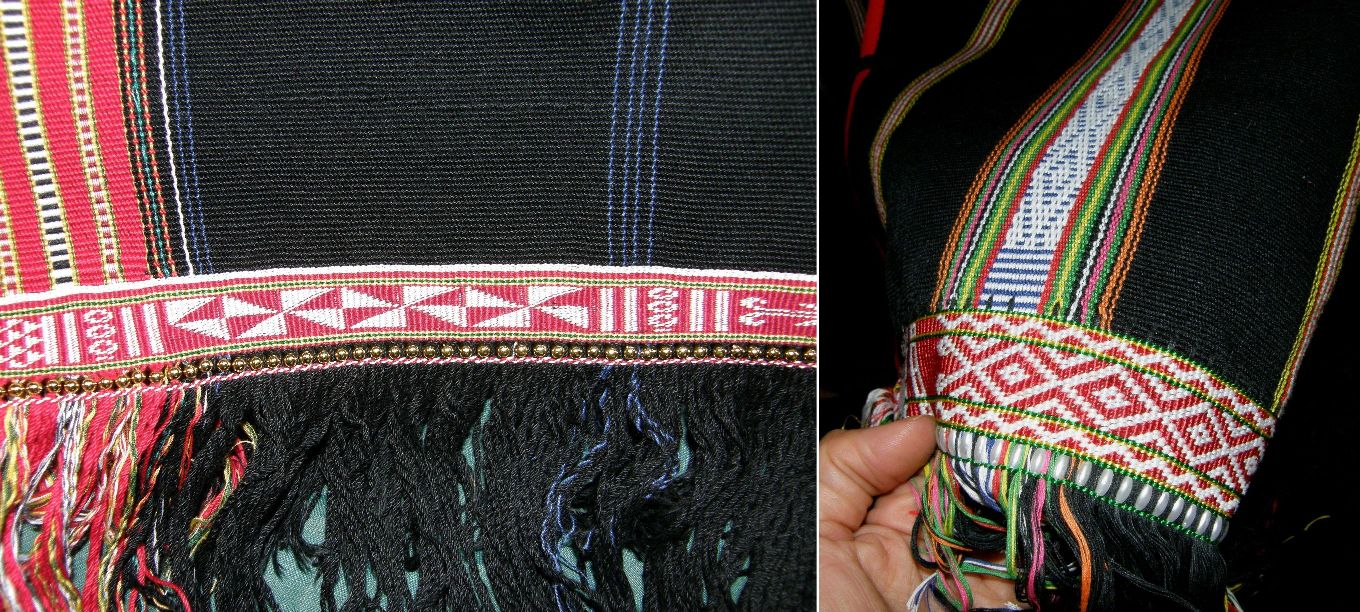
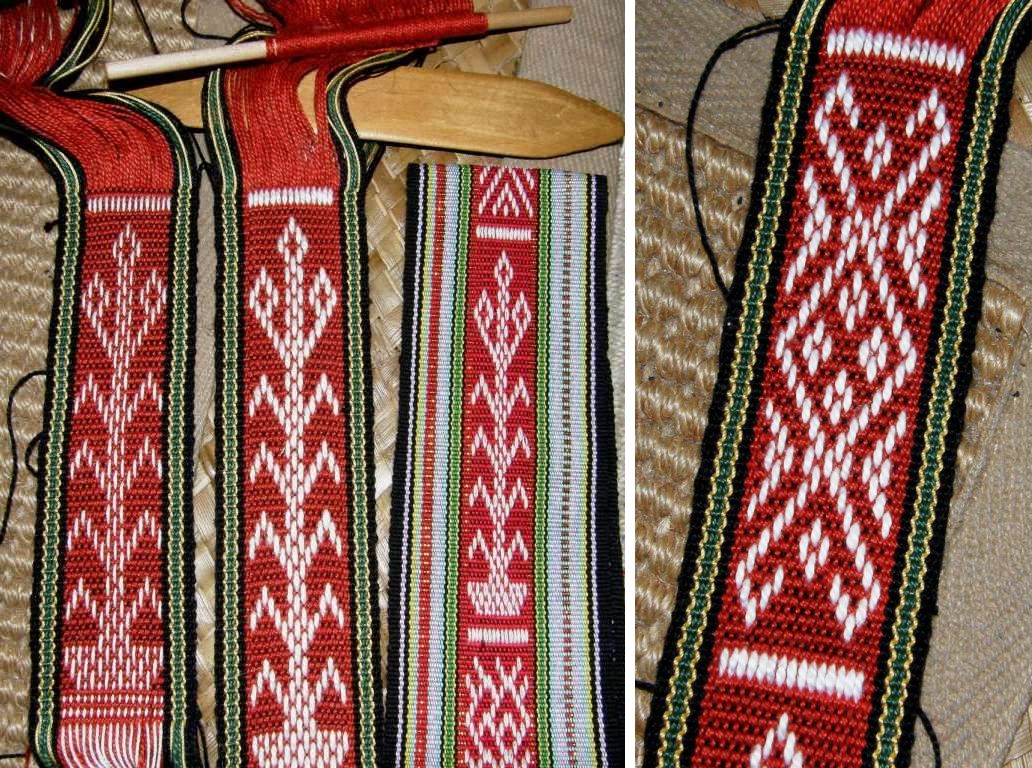
Above you can see two pieces with the kteh weft twining technique that Ngach has worked around the warps on the edge of  her woven blankets. The upper left picture is a loin cloth which Susan Stem showed me when I made inquiries about this technique on the Tribal Textiles forum. I think that Ngach’s pieces are every bit as fine as the example photographed by Susan.

So this was the technique that I really wanted to learn more about and I got to see even more amazing examples on this most recent visit.

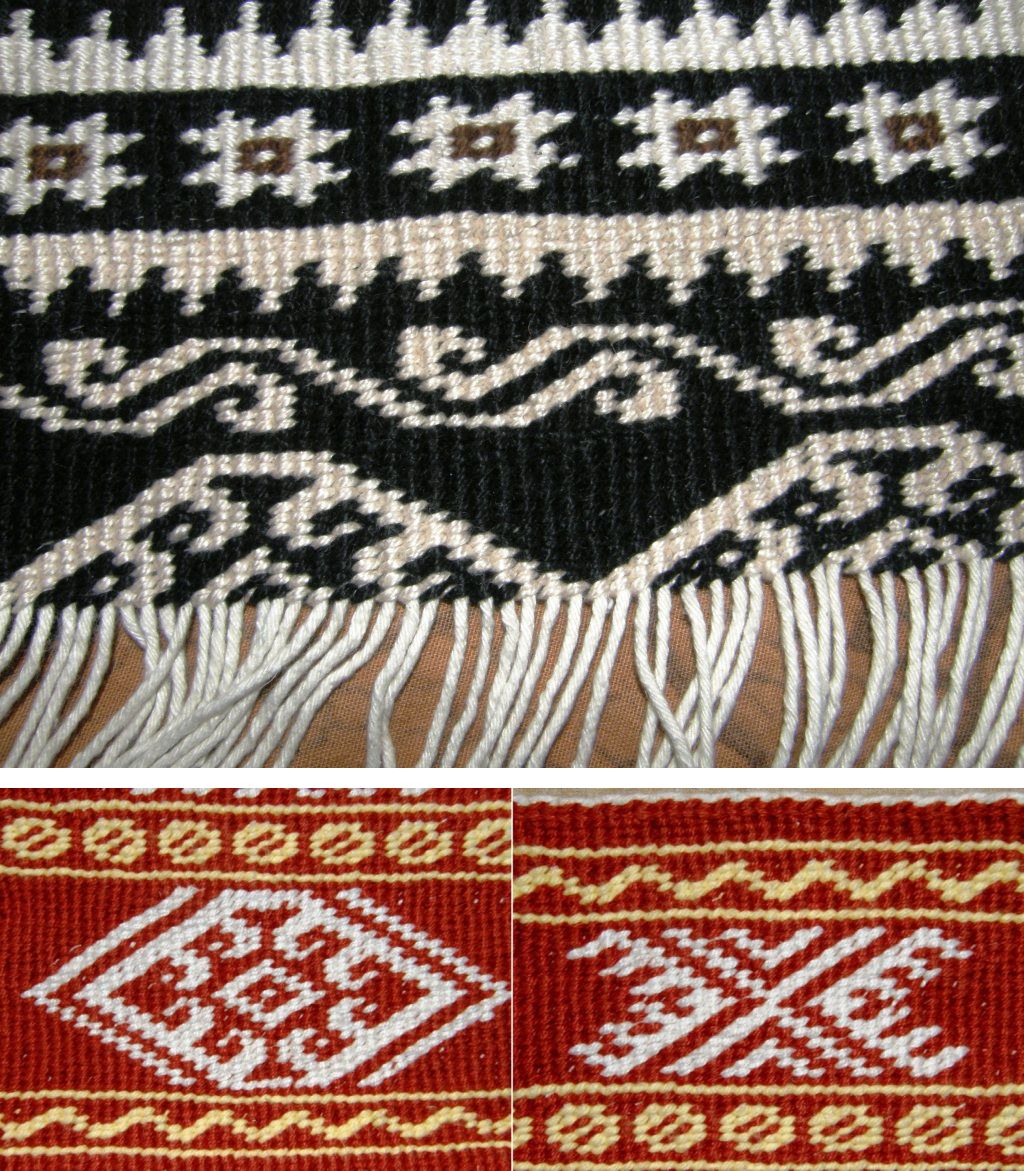
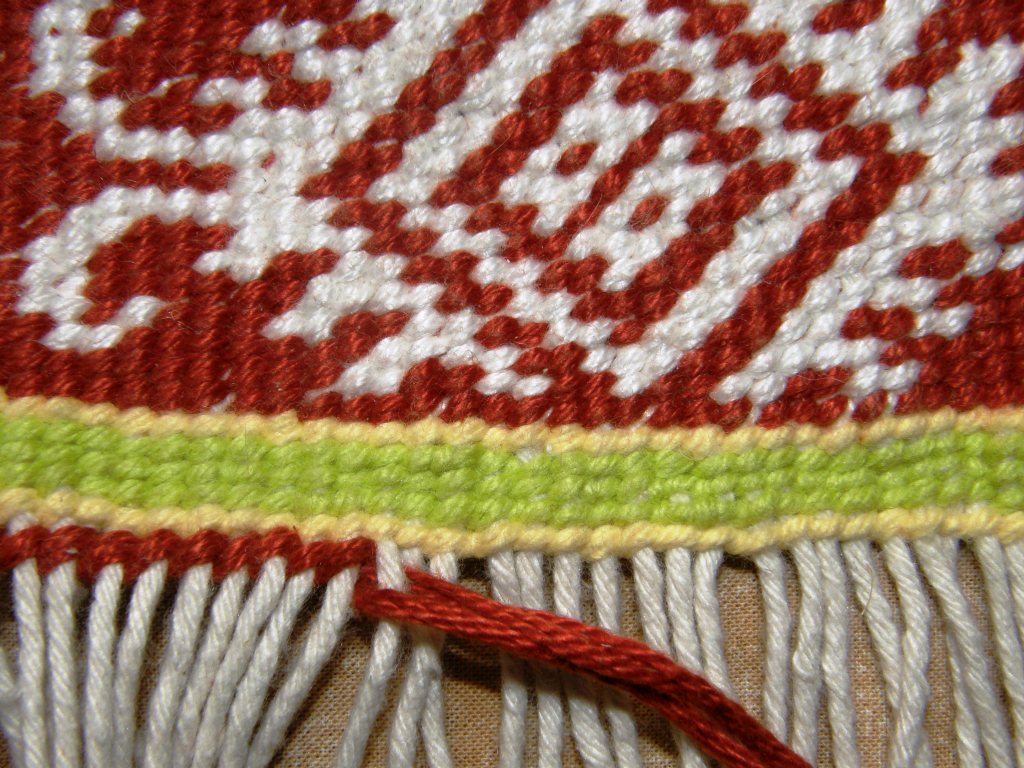
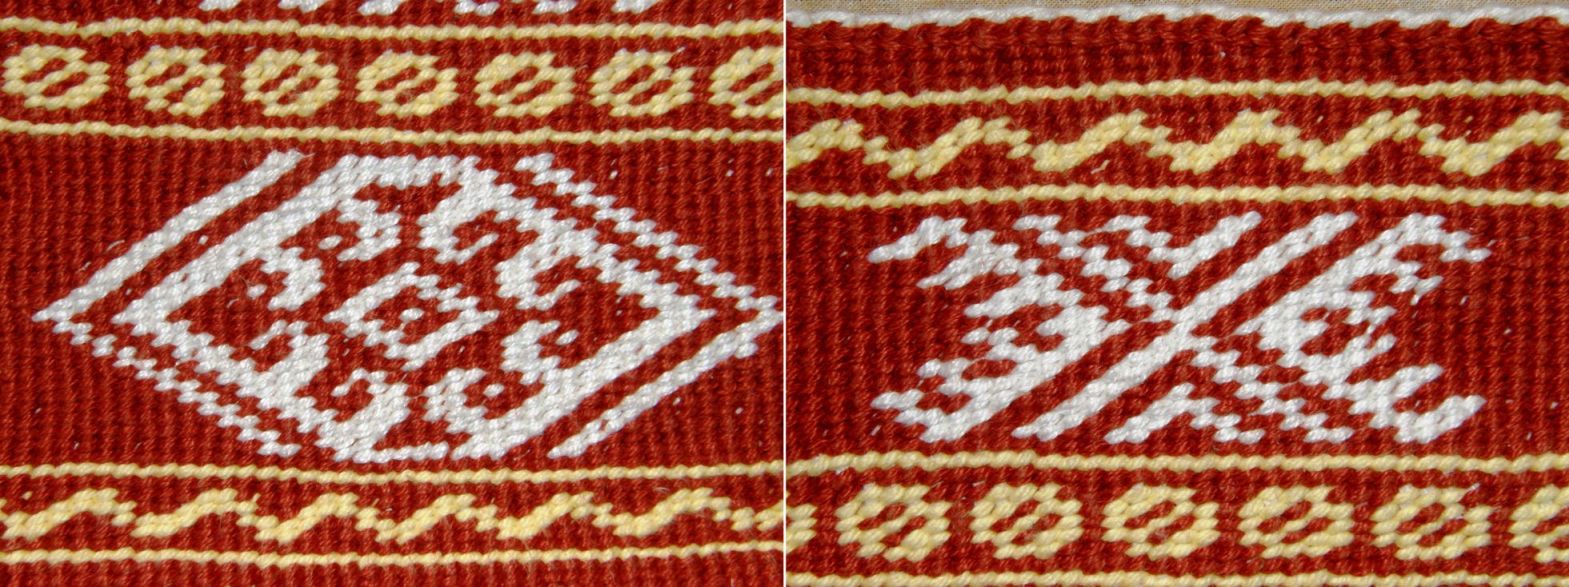
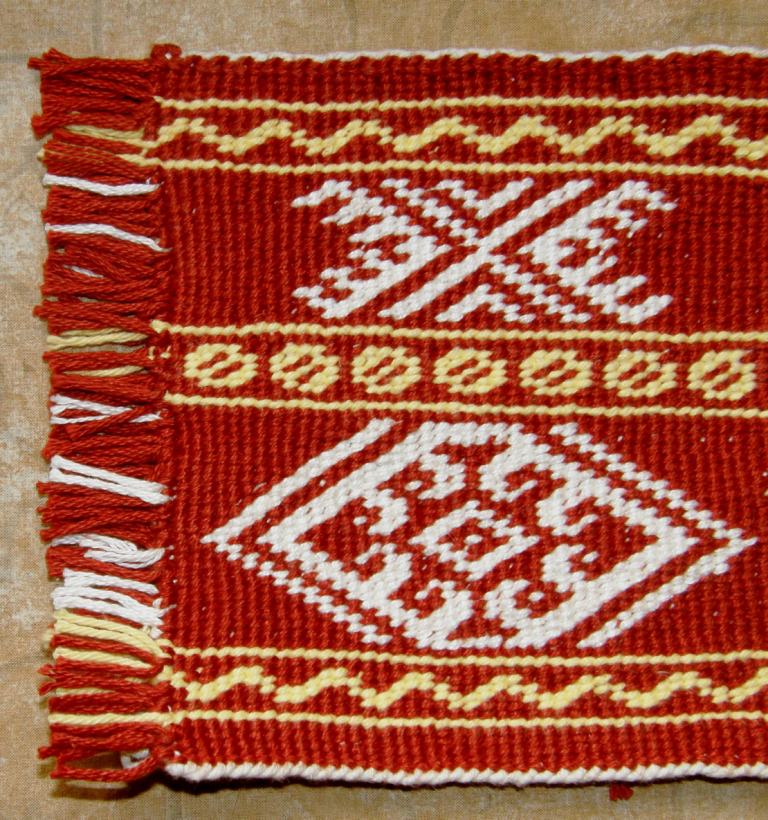
When I got home I was keen to try weft twining and made examples in different colors using Montagnard designs that I had photographed and seen online. (at left)

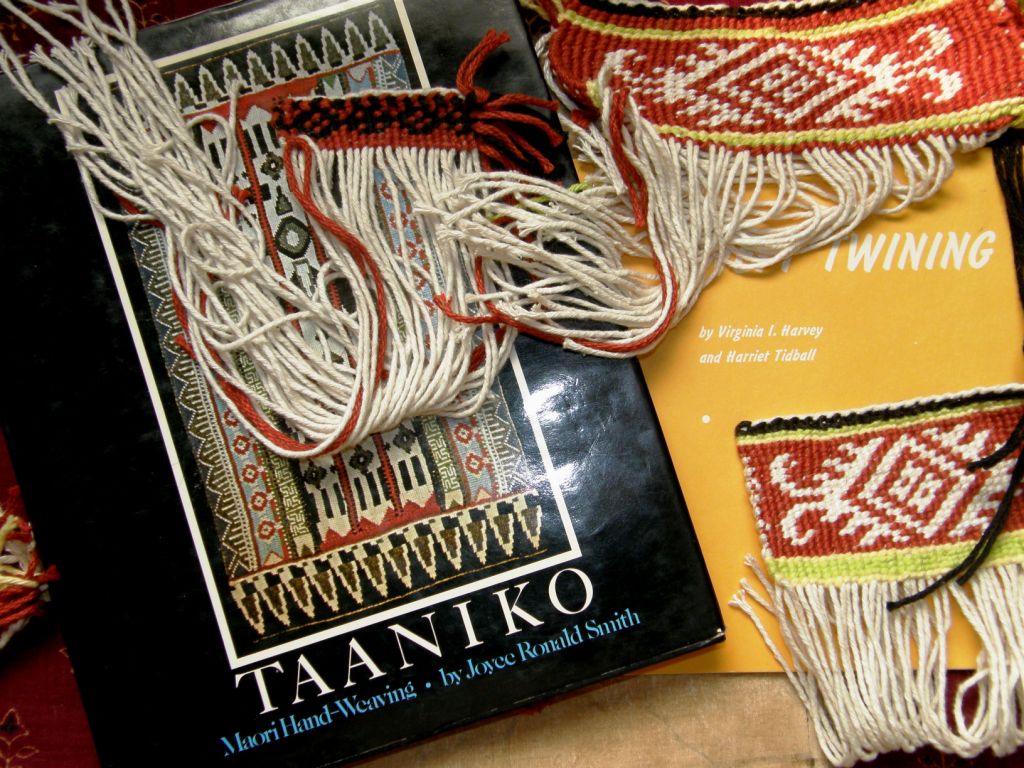
I learned a twining technique from books on Maori Taaniko..You can read more about this here and here.

I was surprised on my visit last week to see the use of yellow in the main design in one of the pieces as, by coincidence, I had chosen it to use in my own experiments at home.

All the pieces I had seen on the previous visit as well as in books and online had been patterned in only red and white with only the stripes done in green and yellow.

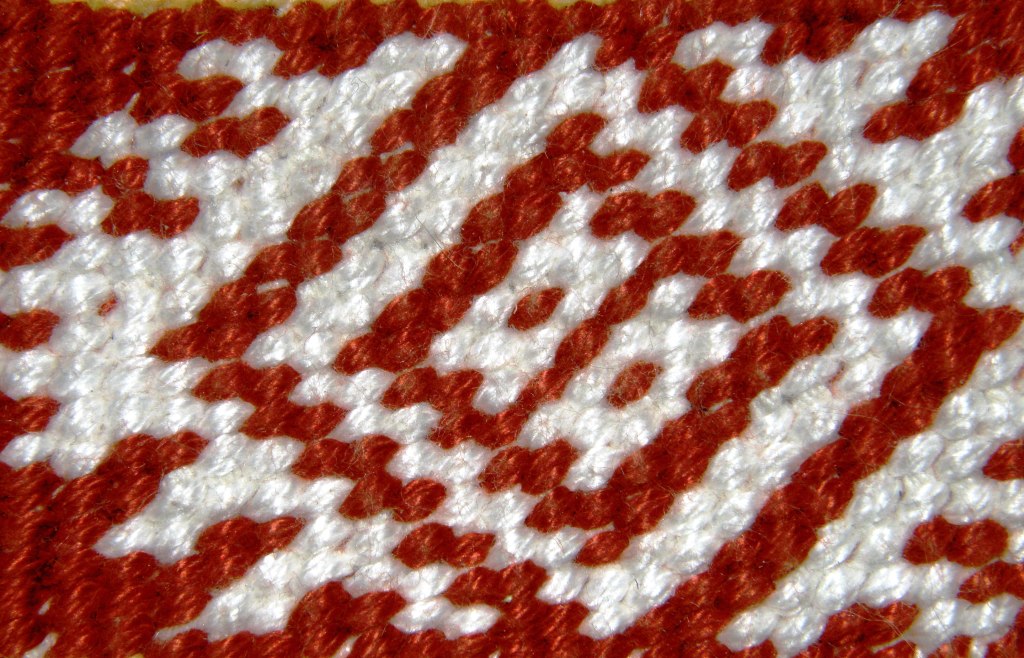
In weft twining, strands of “weft” are twisted around warps. When weft strands of two colors are used, patterns can be formed by controling which of the two colors appears on the upper surface of the piece after each twist.

Here are some more examples of Ngach and Ju’s work in kteh technique.
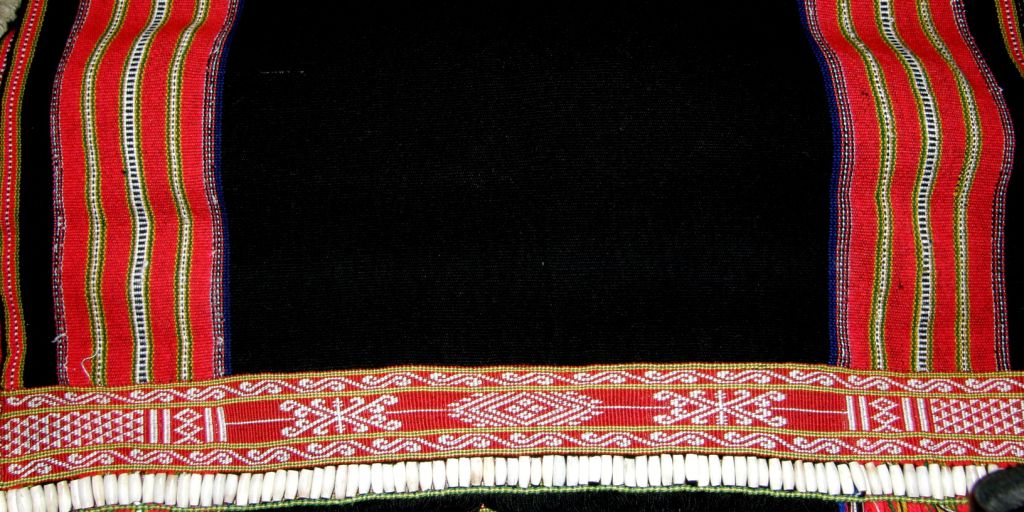
The above piece of kteh adorns the edge of an extremely fine skirt which Ju wove and which H Ni Buonya modeled for me.

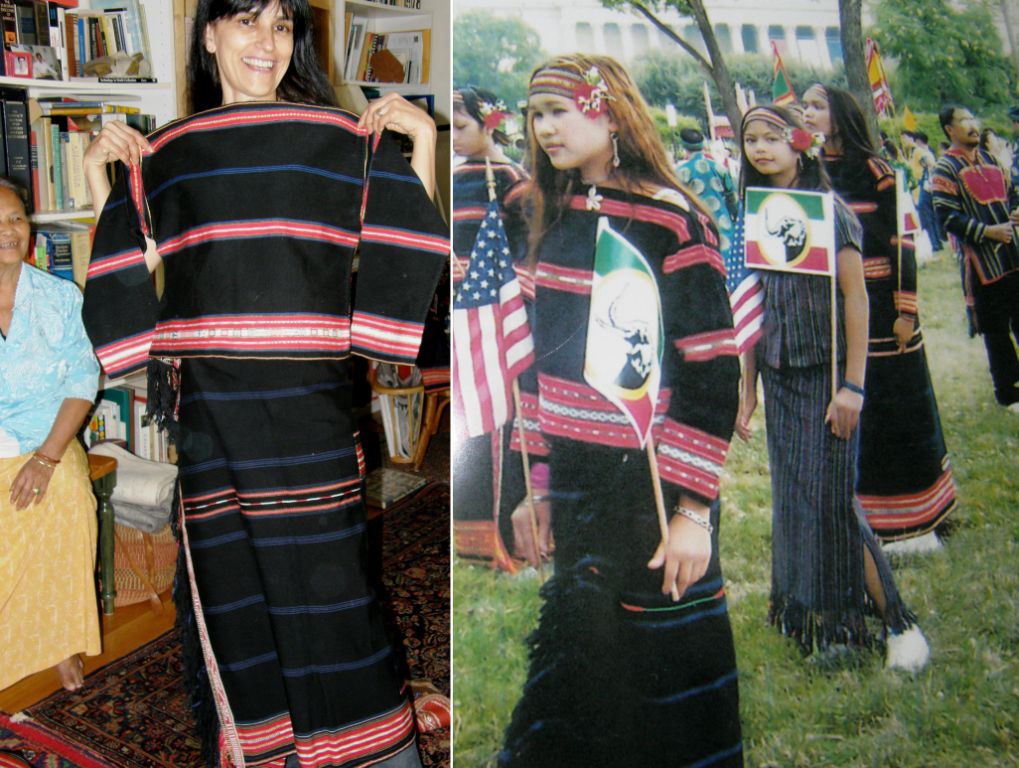
Instead of being wrapped and tucked as traditional skirts are, this skirt had hooks sewn into its waist band which held the folds in place.

The twining was flawless and the selvedges impeccable. I think this was the finest of all the pieces I saw.

Eventhough I was able to reproduce the designs in my bulky cotton thread, I couldn’t feel convinced that I was on the right track until I could compare the reverse of the kteh pieces to my own twined work.

Besty sent me a picture of the back of a piece and  I was finally able to see for myself on my visit.


What I really wanted to do was learn how to do the twining alongside Ju and Ngach and Betsy was able to organize classes for me with both ladies. Ju and Ngach, as I said before, are from two different tribes, the Rhade and the Jarai and both Betsy and I thought that it would be interesting to see differences in the way the two ladies did their twining.

LEFT: Twining class with Nagch at Betsy’s house. At right, Ju shows me how she gathers the warps in groups and sizes them before twining.

I first met up with Ju at Betsy’s house where a collector was coming to see and possibly purchase one of Ju’s woven pieces. Ju, who I gather never likes to have idle hands, had brought along a finished piece of weaving that was to be sewn into a bag. She was busy twisting the fringe dragging the warps through a wad of sticky cooked rice that she carried in tissue and then rolling them on her leg to set the twist. She would select four warp ends, divide them into two pairs and then, with one quick movement, roll the two pairs away from her on her leg and then swiftly roll the two twisted strands back toward her to unite them.

She used this same kind of sizing to twist and group the warps ends together for twining which, as a beginner, I found very helpful . Ngach on the other hand does not size the warp ends.

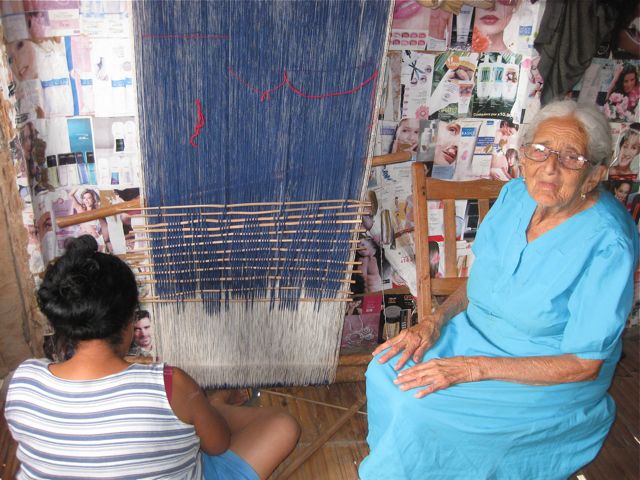
The first class was with Ngach. After having seen pictures of Ngach warping outdoors on Betsy’s blog it was nice to see the enormous tree where she does it in her front yard right on the edge of a very busy street.


Here you can see the different set ups that both ladies use. Both fold and tack the woven cloth so that it can be suspended on a rod or bar with the weft ends, or fringe hanging down.  Ju, at left, has a lovely stand built by her husband especially for twining. Ngach suspends her work on a metal rod which she has supported on two chairs. Ngach is twining the end of a child’s skirt while Ju is twining  the ends of two small bags, something which she is only doing in order to be able to teach me on a small piece.

Here are pictures of Ngach twining on warmer and brighter days courtesy of Betsy. The pictures we took this time around tended to be somewhat darker unfortunately.

The wefts are stored and carried on bobbins. Ngach says that they are made of clay in Vietnam while Ju used to use wooden ones. Both ladies have had to improvise their bobbins in their new homes.

Ngach has lovely bobbins fashioned from cement.
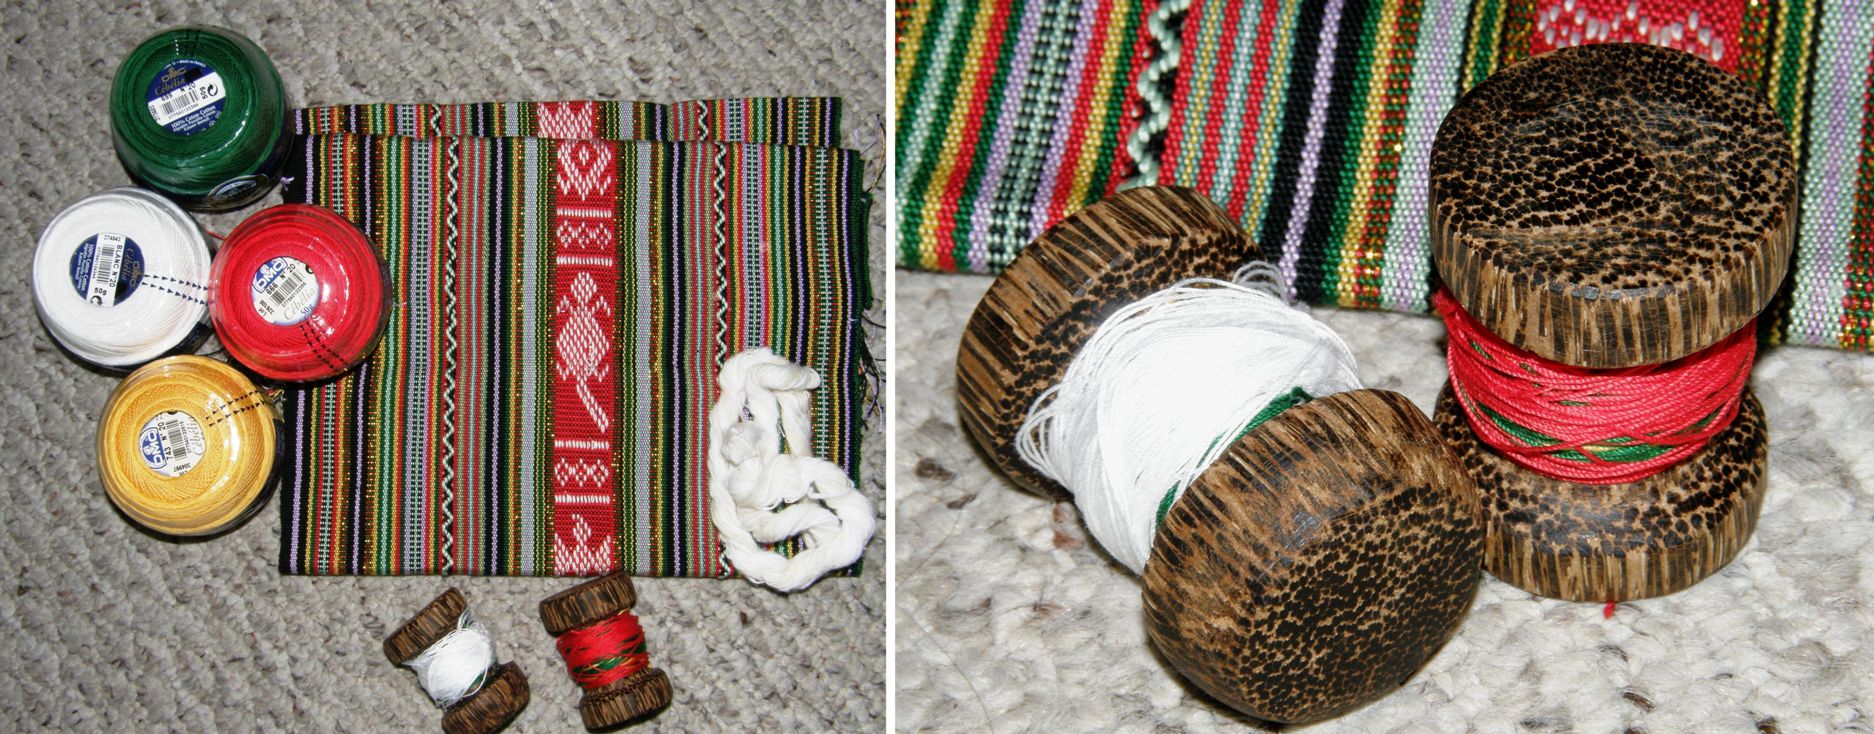
Ju’s were heavier and made from wood. Her husband bought a pestle from a Laos store from which he carved them. I bought a pair from her. Both use Cebelia size 20 thread.

Below you can see Ngach at work holding the warps under tension with her left hand while she twists the wefts on their bobbins with her right…one twist to change color in the pattern and two twists to continue with the same color.
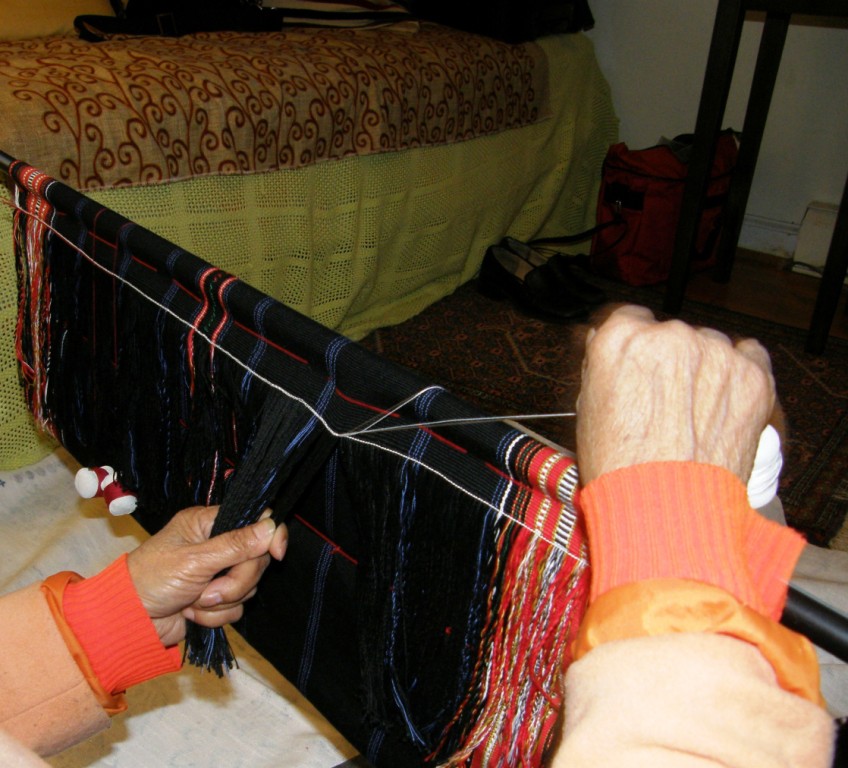
Her movements are so fluid, graceful and rhythmical and she uses her one long thumb nail to separate each group of warps around which to twist the wefts. This was the part that really slowed me down…separating the warps into correct groups of three. What was nice was that Ngach and I could sit side by side and work together. I would struggle along trying to match her rhythm. We could both work simultaneously on different rows of pattern.

Here is a rather dark piece of video which will at least give you an idea of the movements. Ngach is making a pattern in red and white. Her movements are very graceful and I love the soft “clack clack” of the bobbins as she works. You will see her doing double twists when she wants to continue with the same color and a single when she wants to change colors. I have brighter but longer videos which need to be edited when I get home so I can upload in another post.
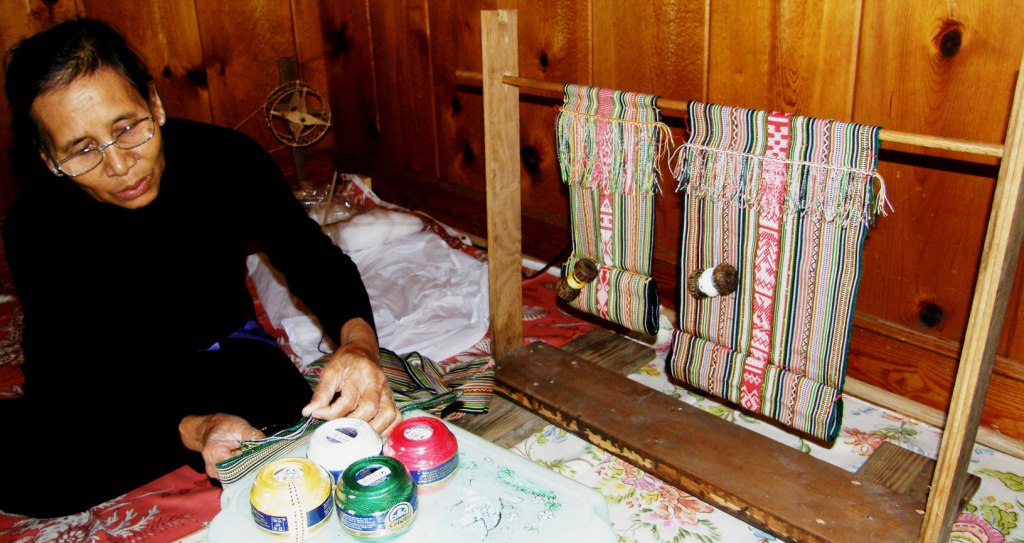
Above, Ju is twisting warps on a piece so that I can take it home and practice. I really think both my teachers enjoyed showing me this. Ju, even with her very limited English, was very talkative and eager to show me the entire process while Ngach was very keen to make sure that I learned it just right, constantly correcting and adjusting the way I was holding the warps and not letting me get away with anything. At one point when I had made a mistake and untwined to fix it, I asked her if she always undid her errors. She looked at me over the top of her glasses and said “no mistakes!”. I am not sure if that means that she doesn’t tolerate them or that she doesn’t make them but there was definitely a twinkle in her eye. I liked Ngach!

Results:

We finished a tiny design on Ju’s small piece but didn’t get as far on Ngach’s larger one. However, I enjoyed working more on Ngach’s piece for some reason. I think sitting and working alongside Ngach made all difference as I was able to watch closely and try to follow her movements and rhythm.

Each twined row always starts on the left and moves to the right. When the right edge is reached, the weft ends are knotted and cut leaving a small “fringe”.  This was something I had been very curious about as the instructions in my Taaniko book indicated that one needed to ambidextrous and twine in both directions back and forth across the piece.

Ju’s enthusiasm for showing me all about the weaving arts from her home in the hills of Vietnam didn’t stop at twining. After I had become tired from twining and the concentration it required, she brought out a wonderful spinning wheel that she had had sent over from Vietnam.

What a sweet little spinning wheel this is. It is made from simple bamboo wood and wicker and all held together with hand carved wooden pins.

Ju set to spinning cotton, which had also been sent over from Vietnam, with her foot thrown over the beam of the spinning wheel to anchor it down. She really seemed to be enjoying showing this to us.

Once she had finished with her small quantity of prepared cotton, she brought out a funny little tool that looked much like an archer’s bow to prepare more. Below you can see this tool and Ju skeining on a niddy noddy.

The following video will show you how it works. I would love to show this to the cotton spinners that I stayed with in coastal Ecuador.

On another day, I got to see a bit more of Betsy’s work with the Montagnard ladies. A few weavers gathered with their looms in a local church. Its congregation has kindly allowed its space to be used for possible weaving demonstrations. The idea was to see what would be required to enable the weavers to set up their looms in those facilities . Not only would they need a strong and stable place to tie up their looms but also a way to set up the foot braces against which the weavers push to tension their warps as they weave.

Ju and H Ni attended and finally managed to get their looms set up and foot braces in place. While I find a foot brace nice to work with, I am glad that I am not dependent on one and, therefore, have more freedom to set up my loom easily in different places.

H Ni is weaving two bands at once on her loom which will be straps for shoulder bags. Weaving two straps at once helps balances out the very wide loom.

H Ni’s set up was a bit awkward. We had to improvise adding books and bits to her bamboo poles in order to have her foot brace within reach.

I am thinking that one of those wonderful ergonomic benches designed by Synergo Arts with its built in foot rest/brace would be a solution to this problem. I wonder if they break down in pieces for transport.

A close up of H Ni’s two straps.

Ju was weaving a narrow pick up patterned piece which will be  a scarf – not one of her typical woven pieces but it has occured to her that scarves may be popular small items that visitors to her demonstrations may like to buy as opposed to skirts and blankets.

Ju and H Ni enjoyed seeing pictures of the designs from various Montagnard tribes in books that Betsy brought to the meeting.

The other purpose of the meeting was to give the weavers booklets which Betsy had put together with pictures and weaving vocabulary in English.

Khin attended the meeting to act as translator and it turns out that she too is a weaver. The problem is that many of the ladies in the community who have these weaving skills simply do not have the means to have looms made and buy thread to get started.

Betsy also made tapes for each weaver to go along with the booklets with the pronunciation of the English words for them to listen to and practice at home.

The idea is to have the weavers eventually feeling confident enough to be able to give presentations and demonstrations of their weaving to small groups in the future. I would love to return for the day when that happens and see these ladies enjoying sharing their skills with even more people with same good humor, generosity and enthusiasm that they showed me.

###########################################

Back to what I like to call the World Wide Cyber Weaving Guild….

It seems that the cold weather has brought on a flurry of weaving activity and so I am able to show you some finished projects from online friends who have visited my blog.

Anna (who is cycling from Alaska to Ushuaia and who is currently in Santiago Chile) sent me this picture of her latest pebble weave bands and Kim, whom I met at Convergence wove the pebble weave keyfob on the right. Both used the instructions from my Andean Pebble Weave book.

These are more of Kim’s bands on the left, again in pebble weave with one in simple warp floats in the middle, and Lavitaaj made this amazing supplementary weft sampler on the right using the pattern charts from my blog. There is also a section with a yurt band design in simple warp floats.

And finally, here is Marsha Knox’s band made with simple warp floats using two color combinations in the same piece while Helena in Brazil has taken the Bedouin patterning one step further with a large strip of diamond pattern bordered by the classic triangle motif. I will definitely add a tutorial on this technique to the blog soon.

UPDATE: Marsha uploaded a picture of her finished band. She reversed the scrolls and did them in brown. It looks super!
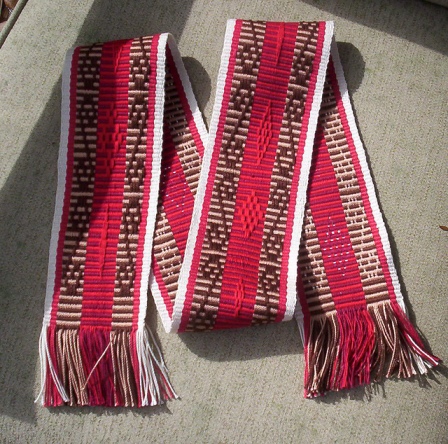

Last Sunday I got to quickly pass through the Central Asian ikat exhibit, which was stunning, at the Textile Museum in DC before attending Ann Rowe’s talk on ikat rebozos and ponchos in Latin America.

I hope to return next Saturday to take the guided tour of the exhibit, use the library where I want to look at David Fraser’s book on weft twining, and maybe pick up a few more Textile Museum journals in the gift shop.

There is hardly a journal there that doesn’t have something of interest to me. I think that eventually I will own them all.

This week Claudia and I had  skills exchange. I taught her to make the tubular woven bands that I learned at the tinkuy and she introduced me to the wonderful Weavette. Yep, this was the first time I had ever seen one of these little marvels and Claudia even has an old Jiffy Loom in its original box and a plastic Weave-It. My eye was immediately caught by the cool long weaving needles that come in the kit. Aha…just the thing for weaving in the wefts for my four-selvedge warp faced pieces and so I ordered some online.
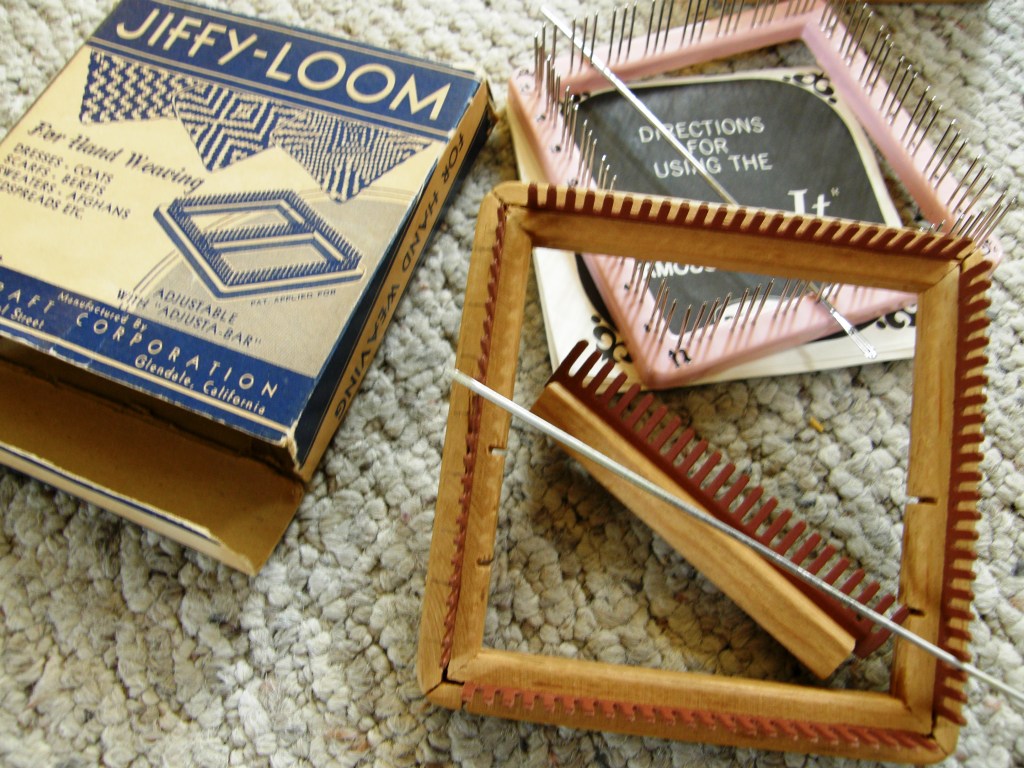
These would be just the thing for making little amulet bags…love them!

And speaking of learning new skills, here is DY, still in Peru, picking up some new techniques – drop spindling and backstrap weaving. I think she has been taking Spanish classes too.

Finally, a very happy Thanksgiving to all. I spent it Claudia and family and friends…only the third Thanksgiving I have ever had. We watched the Macy’s parade this morning and  I declare the sweet potato casserole with butter, brown sugar and pecan topping my favorite dish of the day.
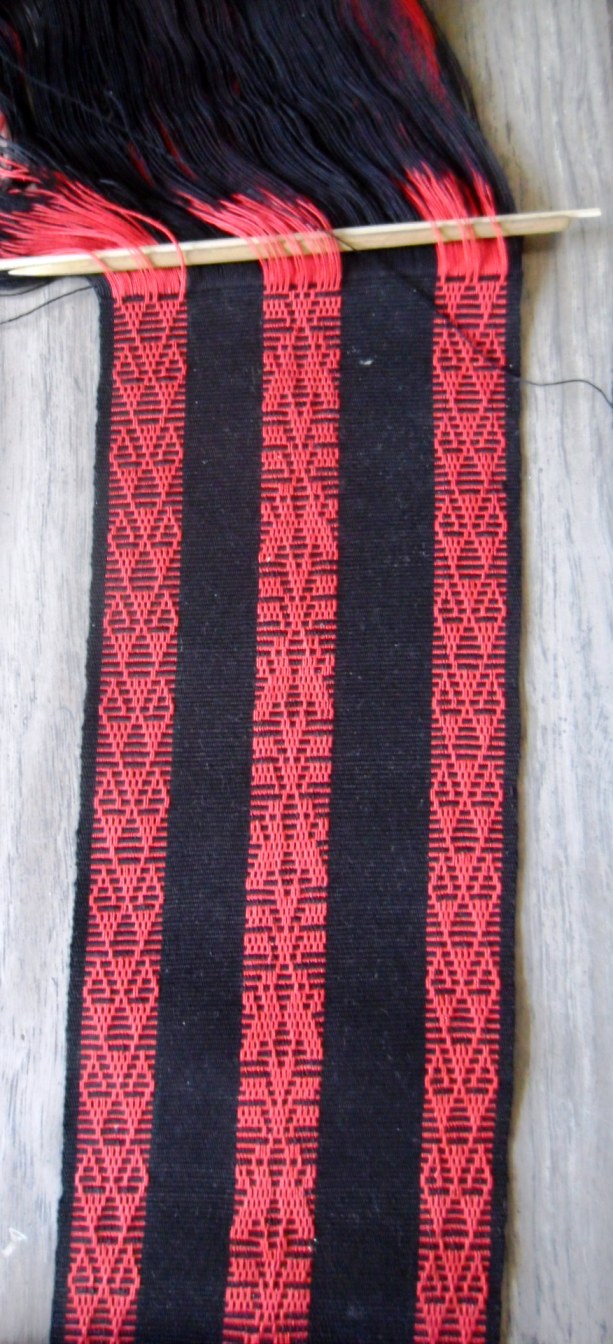
Backstrap Weaving – Spreading the Obsession:warp faced and weft twined


Simple warp floats in red and black by Eladio Salas Torres


WARP FACED AND WEFT TWINED

Three things have influenced the weaving I have been doing this week and they are spread across three very different parts of the world:

– a new book in my collection of weaving books on Bedouin weaving which has taken me on a fascinating trip through Saudi Arabia and other lands inhabited by the Arabian Bedouin with their colorful woven tent dividers, bags and camel adornments;

– the intricate weft twined work that the Montagnard weavers of Vietnam, that I met in the US, incorporate on the edges of their warp faced textiles;

– the beautiful combination of red and black in the backstrap woven piece by Eladio Salas of Mexico that I showed you last week.

First I took a step backwards as I had decided that I didn’t like the weft twined piece that I was practicing on last week. Fortunately I discovered that un-twining is a lot easier and faster than un-weaving. It is just a sample piece for skills-building but I just was not happy with the colors and motifs I had chosen and it had to go! Half of it got pulled apart and I did some searching on the net to figure out how I would like to continue. So now I am continuing with a swirl design from a Jarai tribal textile and will finish it off with other Montagnard motifs.

Meanwhile the Bedouin designs were calling to me…fabulous red, white and black warp faced pieces interspersed with bands of weft twining. I noticed that there was a small three color band of design that was common to many of the pieces which Joy Totah Hilden identifies as al-‘uwairjan pick up patterning and so I decided to sample that before launching into a big project.


The three-color al-'uwairjan pick-up patterning. It is used to create triangles and diamonds and other simple designs and creates long floats on the back of the textile.


I worked, of course, on my backstrap loom.


In Hilden’s book I see that  Bedouin weavers use staked out horizontal ground looms with their heddle bar suspended on forked sticks, rested on top of oil cans, cement blocks or other such objects or tied to sticks driven into the ground.  The weaving is suspended just a few inches above the ground. As the weaving progresses, the work is not rolled up. Instead, the weaver sits on the completed work and inches her way along the warp to stay close to the weaving line. Weaving is even done inside the home with the loom bars and warp held under tension in ingenious ways. One picture shows the loom bar tied to another bar which has been lodged behind a doorway.

Images of Bedouin textiles and looms can be seen here and here.

Here was my chance to put the reds and black together and learn some traditional Bedouin designs. The main panel of my weaving is done in a technique which I believe is called warp substitution. This pick up technique creates long floats on the back of the textile. I have never been a fan of long floats and much prefer double faced weaving but I wanted to use the technique employed by the Bedouin. To eliminate the floats I could have woven the very same designs in double weave.

The center panel of my piece is woven with the warp substitution technique called “shajarah” (tree) pick up patterning.

This weaving also gave me the opportunity to try weft twining on the loom. Many of the pieces shown in Hilden’s book have not only weft twined edges but also several bands of twining at various stages within the weaving. I have been enjoying my off-loom twining experiments and was looking forward to comparing them with twining on warps under tension on a loom.

I have kept these first attempts at on-loom weft twining narrow and simple.

I had to consider how many warps to use in a bundle around which to twine the wefts as well as the right  thickness of weft yarn so that the warps didn’t get spread too much thus widening the piece. Should I twine loosely or tightly? It took a few attempts to get it right. The warps did get spread slightly and so I had to work to get them back into place so I could continue with the warp faced weaving.

I plan to leave the weft ends on as a decorative feature. This piece will be a wall hanging. I was thinking about using it as part of a pillow cover but my cat, no doubt, will chew those weft ends off.

Feeling a bit more confident, I did a slightly wider weft twined band at what will be the center of the piece and added in a little bit of chaining.


A wider band of weft twining.


It is lovely doing the weft twining on the loom and the added control that one has by having the warps under uniform tension allowed me to use a much finer yarn than I have been using on the off-loom pieces. I expect with more practice I will eventually be able to do fine off-loom twining too….some time in the distant future! 

The motifs in the warp substitution band have been copied from images in Hilden’s book and from those I have found online.

You can see the bands of al-‘uwairjan pick up on the sides.

I am now just over half way through this piece and hope to finish it with a wider and more complex piece of weft twining.

I will add to the weft ends that are hanging from the sides to balance both sides and perhaps add some tassels.

Hopefully it will be ready to show next week.

There are many beautiful weft twined camel adornments in gorgeous red, tan and mustard tones that I would like to use as inspiration in other pieces.

While we are in red-and-black mode….

I promised you last week some more information on the lettering used by the Montagnard weavers in their bag straps.

Anyone who knows how to do simple warp floats as detailed in my tutorial here will pick this up in no time. The lettering is done in simple warp float technique with some variation.

In simple warp float technique you are using a shed of each color, for example, all the red warps in one shed and all the whites in the other. You weave alternating red and white horizontal bars and then go floating one of the colors over the other to form your designs.

The difference in the Montagnard method is that they have one shed of red and another shed of alternating red and white which you can see at left (with a two-warp red border).

In the red and white shed, they drop all the whites which exposes their black weft – you can see black dots on the above lettered band. They use twenty-nine warps in each shed to weave their letters, that is, twenty-nine reds in one shed and fifteen whites alternating with fourteen reds in the other.

When they want to weave a letter, they…

-open the shed with the reds and whites and drop all the whites except the ones that they need to form the letter.

-pass the weft.

-save  those whites and add them to the red shed.

-pass the weft.

open the red and white shed again and keep the same whites from the previous weft pass along with the whites  needed to form the next part of the letter.

-drop all the other whites.

-pass the weft.

-save only the whites needed for the next part of the letter and add them to the red shed.

pass the weft.

AND SO ON……

This will be double dutch to those of you who have never done simple warp floats. Well what are you waiting for? Here’s the tutorial! Become familiar with the simple warp float technique first and then try the letters.

NOTE:

  • If you use a red weft instead of black you will create the impression of a smooth solid color background.
  • This is not a double faced technique.
  • This technique does not produce the stiff band typical of true warp faced weaves.

####################################

There was a question in the Inkle Weaving group on Ravelry about doing one-weft double weave on an inkle loom and so I warped up my Ashford inklette and have added some pictures to the one-weft double weave tutorial for this. I only warped up to take the pictures and wove a triangle as a sample. This morning I had some time to play around with the warp…

This is very easy to do on the inkle loom. One-weft double weave produces a thick band with sharp motifs on a solid background. It is double faced.

Flipping the loom upside down, this is what you see…


This is the first time I have tried this on the inkle loom. Weavers in the Backstrap Group at Weavolution have tried it but warned me that it is a bit stressful on the loom. I wasn’t sure if my inklette would be able to take it but I actually don’t find it stresses the loom at all.

You will warp your loom normally except that you will be using doubled threads.


Here are the warps in the heddles. You can see that there are two strands of red border warps and one strand each of blue and yellow together in each heddle.


See the full tutorial with all the details and more pictures here.

######################################

You may remember my blog post about Anna who came to visit and learn backstrap weaving with me here in Bolivia. She and boyfriend Alistair are on their way by bicycle to Ushuaia after having started in Alaska in May 2008.

Well they have just completed the Lagunas trail in the salt lake area of Bolivia and Chile and are currently luxuriating in San Pedro de Atacama, Chile. Anna described that riding section (which turned out to be more of a pushing section for the last five days…deep sand and a strong headwind) as one of the most physically demanding things she has ever undertaken.

Anna and Alistair teamed up with a couple of German cyclists for this part of the trip and Anna has been spreading the obsession by teaching new friend Carolin to backstrap weave. They are carrying printed pages from my Andean Pebble Weave download with them.

Here are some fun pictures of them weaving on the road…


Anna on the left gave the first weaving class to Carolin in the town of Uyuni in Bolivia before heading off on the lagunas trip. The little table has been fashioned from "madera de cacto" (wood from the dead pillar cactus)


Carolin with her tiny loom tied to her bike and weaving on the salt lake.


Anna designed a fitting motif with which to practice her newly acquired double weave skills.


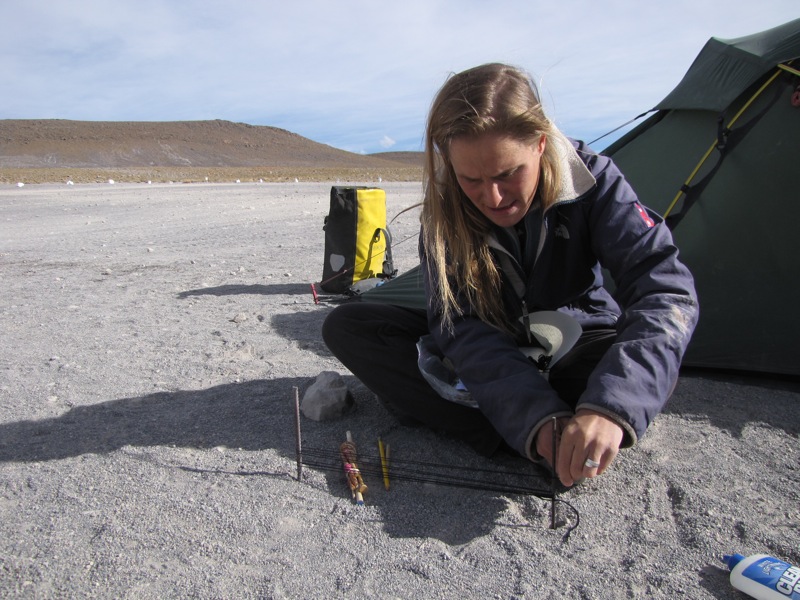
Anna warping in camp somewhere in the desert. She said her fingers nearly froze off! I recognize those pencils...


So nice to see my apprentice so enjoying her new skills! Apparently Carolin will be doing a long sailing trip after this bike journey so we can expect to see the backstrap loom being used in the middle of the ocean some time in the future!

Anna brought me some spindles and llama bone picks from Sucre.

I gave her very precise directions to the curandera stalls  in the crazy campesino market which sell llama fiber, weaving tools and all kinds of home remedies.

She not only found the curandera area but I believe she bought the things at the very same stall at which I shopped when I was there.

I have sent some of the spindles to the Netherlands and the US and have one left if anyone is interested. I have a few llama bones left too.

Drop me a line if you are interested. 🙂

Backstrap Weaving – Weft twining: the learning process

WEFT TWINING: THE LEARNING PROCESS.

It has been a long time since I have learned something fiber related that it is completely new to me. As fun and interesting as it is, it has reminded me of just how much time is involved in practicing something so you can get to the stage where you are making something even half decent.

It is great finding weavings from different cultures online, finding that I know the technique and being able to chart and weave it like the  Tarahumara band that I wove last week. When I visited the Montagnard weavers I saw a variation of a  pick up technique that I already knew so it was not difficult to come home and weave it.

Tarahumara design band and Montagnard pick up patterned piece

However, I also saw that the Vietnamese ladies were working with weft twining, something that I had not tried nor seen worked before. Unfortunately I didn’t get to see the process and so I needed to come home and dive into my books in order to learn something about it.

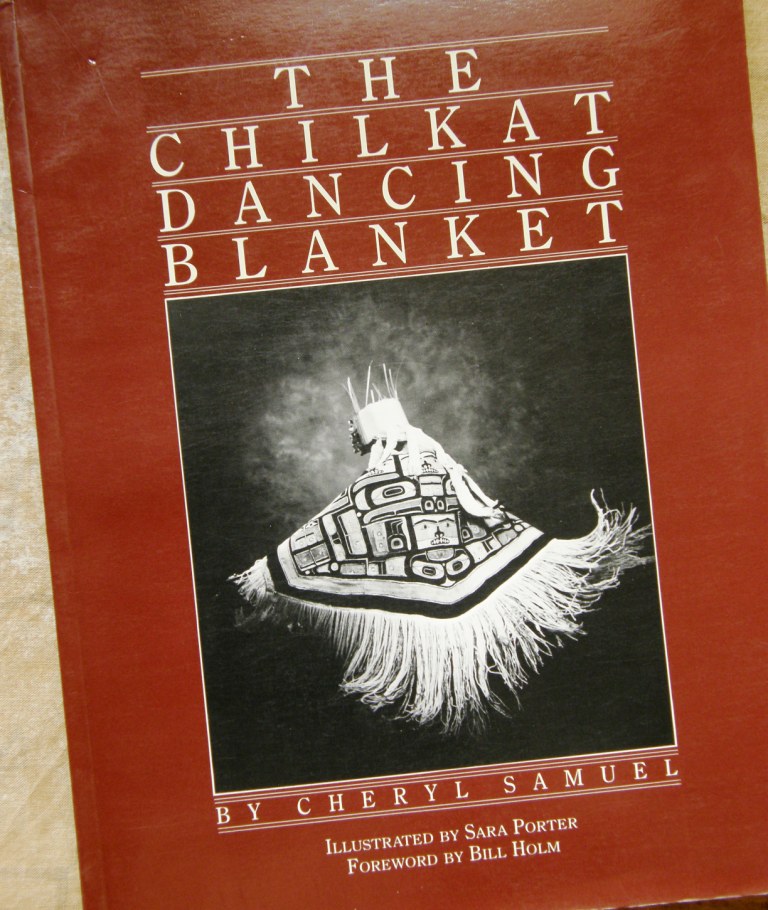
This is a technique that has interested me for a long time. I bought Cheryl Samuel’s gorgeous book on weft twined Chilkat blankets from that wonderful newspaper-like catalog that Unicorn books used to put out back in the 90s. It is a stunning piece of work with beautiful illustrations – a joy to look at even if you don’t actually use it to make anything.  Making a Chilkat blanket was perhaps a little daunting and so later I got a book on the Taaniko weft twining practiced by the Maori people of New Zealand. This seemed a lot more manageable. The book has fabulously clear step-by-step drawings but the disappointing lack of a variety of traditional Maori designs left me uninspired to try the technique.

More recently, my friend Caroline in Australia sent me a monograph on weft twining by Virginia Harvey and Harriet Tidball which has proved to be very useful.

Seeing the fine designs worked by the Montagnard weavers into the edges of their woven blankets and shirts was the motivation I needed to finally get down and learn how to do weft twining. Being able to touch the textiles and meet the weavers made all the difference.

Susan Stem shared the image above left with me of a loin cloth with a red and white weft twined edge. The other two examples were made by Montagnard weaver Nach Rahlan.

I remember being amazed when Betsy Renfrew, who is working with the Montagnard weavers, told me that this weft twining called kteh is worked off the loom. However, after reading my books and searching online, I have found that this is more often the case than not. Now that I have tried the technique myself, I don’t see any need to have the warps stretched out taut and can just hold everything in my lap. Maori weavers apparently have the top of the piece stretched out between two vertical stakes with the warps hanging down loosely.

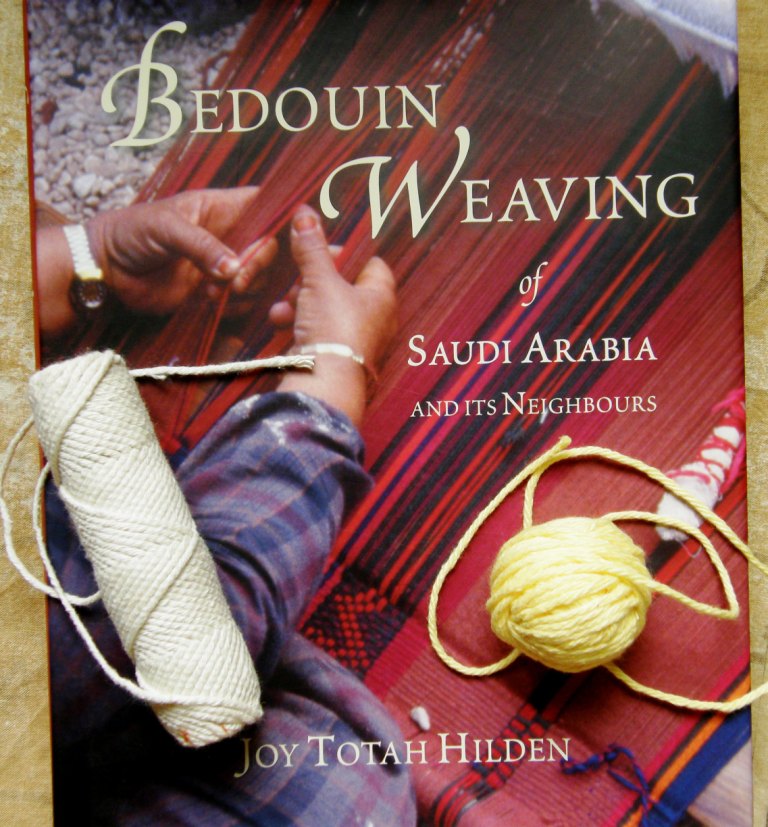
And how is this for wonderful timing… the book you see at left, which I had ordered online and which has information about weft twining, arrived today. I can’t wait to get into this! Author Joy Totah Hilden has a wonderful website on Beduin weaving (she chooses to use that spelling) with seven pages devoted to weft twining which include images and instructional diagrams on the technique. The roll of cotton string which you see on top of the book is what I used for my warp and the yellow ball is Sugar and Cream cotton which served as my weft.
In her book Joy Totah Hilden describes weft twining as “the oldest weaving technique known in the world”. She quotes Mary Atwater who says “Twined weaving is so ancient that it may be said to have no history”. There is a discussion in a forum online about whether it is , in fact, classified as weaving. In any case, the results are beautiful!

So after a considerable amount of reading and trying to visualize the process, I got my materials together and started. This is one of the lowest tech techniques ever! That roll of string, the ball of yarn and my hands is all that I needed…no needles, pins, stakes or hooks. Okay, you do need one more thing in abundance: patience, as this is a slow technique.

I would liken it to learning to knit or crochet. The basic moves are not difficult but you have to figure out how you are going to hold and tension everything and you need to practice it a lot to get into a rhythm and settle into your own personal tension. You are all thumbs at first, tension is all over the place and the results are not too pretty! Basically you are taking two wefts,  generally in two different colors, from one edge of the warp to the other twisting them as you go so that they encircle each warp.The twist is single or double depending on which color you need on the upper surface of the piece to form the pattern.

Working without a loom, the loose warps are controlled and held under tension by the left hand while the right hand twists the wefts.

I soon got bored with my first red and black piece with a small design from the Taaniko book. What I really wanted to make were some of the Montagnard designs. The good thing is that the designs are really easy to chart on basic squared paper. You can see the great variation in tension between the two red and white samples above as I slowly got used to doing the twining and settled into a consistent rhythm and tension.

The Taaniko book teaches you to first twine from left to right one row at a time tying off the yarn once the right hand edge is reached and then beginning again from the left side. This results in a series of knots down the right edge. This has you twisting the  yarn with your right hand while holding the warps with the left. The idea is to eventually become ambidextrous in order to be able to reach the right edge, turn, and go back in the other direction twisting instead with the  left hand.

Well I am sorry to say that I simply don’t have the patience for this part of the learning process and so I just flip the work over and return with the back side facing me twisting with my right hand all the way. You soon learn how to read the pattern equally well from the back side (this is a single faced technique).

As you can see above, the resulting “stitches” are slanted which means that diagonal lines in the design take on a different appearance depending on which way they are slanting. I thought at first that I must be doing something wrong but a close inspection of the Montagnard pieces showed that their designs have exactly the same appearance.

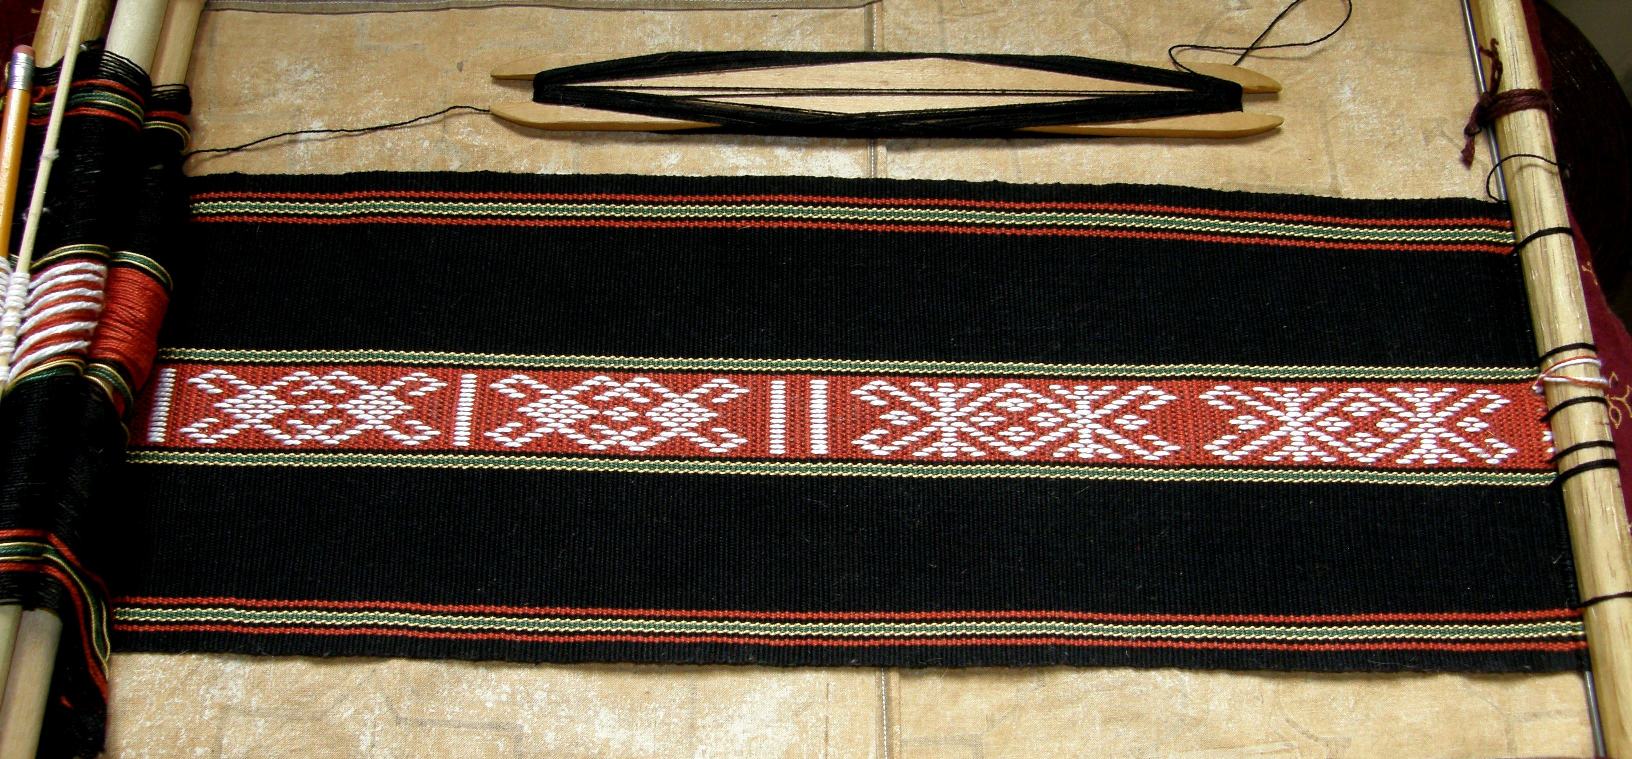
Getting increasingly adventurous I created a wider warp and charted one of the motifs from the photo that Susan Stem had given me. This is not a completely faithful reproduction as I could not see the details well enough in the picture. I chose some small border motifs from the Montagnard pieces, a Maori border and another main Montagnard motif and lumped them all together in the one piece.

Ideally, you would work with weft long enough to twine back and forward and finish the whole piece but this length of warp would be very difficult to handle. You eventually have to finish at one edge and knot the wefts there, take more weft and start again.

Now what to do with all those knots and tails? From what I have read, it is common practice to cover the knobbly knotted edges with braid or add a fringe or tassels along the entire edge. In the picture below, I added a fringe along one edge to see how that looked.

That doesn’t look too bad although you can see that the edge in general needs a lot of improvement. What I might do for the next piece is add a Navajo-style twining down the side.

My first weaving experience was with Navajo-style tapestry and this is one of my early pieces. I always loved the way this twining looked on the sides. I would like to see if this helps smooth out some of the lumps and bumps in the edges of my weft twined work.

So now I have an even better appreciation of the work that the Montagnard weavers are doing creating the weft twined edges on their weavings. Of course they are working with much much finer yarns and their warp is the fringe of their woven piece. They use several strands of their fine warp yarn as one warp for the twining.

Maybe I will get down to finer yarns eventually but for now I am content to continue with the chunky stuff and I would like to make some of the designs from my new book. I love the colors of these pieces..all those sun faded reds, blues and mustard yellows that work so well together. Now to start planning a piece that can be made into something useful. The result is very sturdy and would actually make a brilliant backstrap, belt or bookbag.

That was my week of practical work and then there was the charting. I have plans to reproduce the Huichol piece at left that I photographed at the National Museum of the American Indian. It has been woven in balanced double weave.

I have woven this technique only once before from a ready made chart but I don’t have enough experience with the structure to be able to chart it directly from a textile so there will be a lot of experimenting and sampling before this project gets off the ground.

Actually there are some charts in an old issue of Prairie Weave Companion which I should probably weave first to get my hand back in. One of the charts is of a Chinese lattice work design – gorgeous!

As usual I will leave you with some work done by members of the online backstrap groups on Weavolution and Ravelry.
Kimberly, whom I met at Convergence, has taken to Andean pebble weave in a big way following my book

The band on the left is made with size 3 crochet cotton and the one on the right size 10 – Coats Royale  – beautiful rich colors.
Carinefile in Belgium made a backstrap following my article in WeaveZine and Evelyn has been pebble weaving.

I see many more days of weft twining and charting Middle Eastern designs coming up hopefully with improvements in my technique. If all goes well, I will have a balanced double weave project underway too and there is a supplementary weft piece taking shape in my mind after having seen a yurt band online. Oh and there’s another Tarahumara piece that I would love to tackle….!

Backstrap Weaving – Warp floats and Woven Words

Rain at last!

Widespread scrub fires in the countryside here in Bolivia got a dousing recently so that the atmosphere here in Santa Cruz, which looked like that pictured at left during the height of the fires about a week ago, is once again relatively clean.

And just in time for the month of September which is a month of celebration in Santa Cruz.There will be all sorts of cultural activities and fiestas culminating in the Feria Expo, an annual international event, and September 24th, Santa Cruz Day which marks the day of the initial call to take up arms against the Spanish in the fight for independence. This year will be particularly festive as the city celebrates the bicentennial of this event. Along the way the first day of spring will be marked on the 21st which is also Students Day as well Bolivia’s answer to Valentine’s Day.
This week I have been studying the letters worked into the bag strap woven by the Montagnard weavers of Vietnam that I met while in the US. Once again I marvel at the possibilities that the simple warp float technique presents and the way it has been used by different weavers around the world.

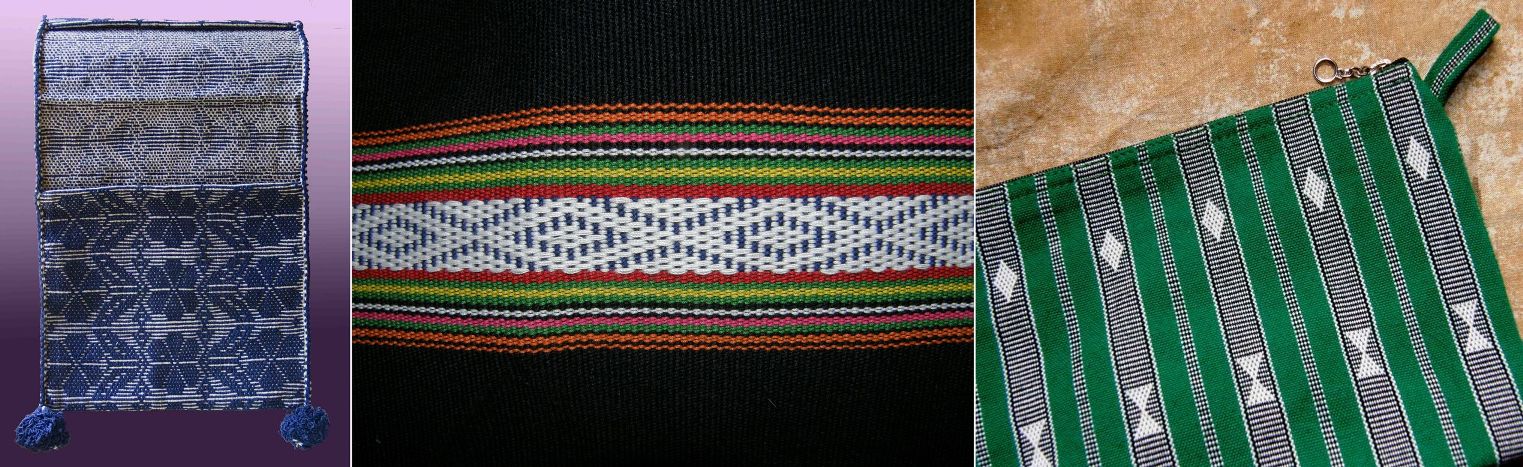
From left to right: simple warp floats decorate a cotton saddle bag from Manabi province in coastal Ecuador, the same patterning technique on a blanket woven made by Montagnard weavers of Vietnam and a simple but very effective piece made in Sagada, Mt. Province in The Philippines. The latter was sent to me by Trish who lives in The Philippines. We met and spent many hours together in Los Angeles airport on one of my standby flight sagas.

In the examples above, the technique is seen in its very simplest form, floating single or paired warps of one color over horizontal bars of alternating light and dark warps.

As we have seen here before, the technique can be taken a step further by floating both the light and dark warps in succession, filling in the background to the main motif and thus covering the horizontal bars completely.

This technique is employed to pattern one style of yurt bands made in Kyrgystan where the technique is called "terme". I wove this sample piece to check if my charting was correct and made it into a small bag.

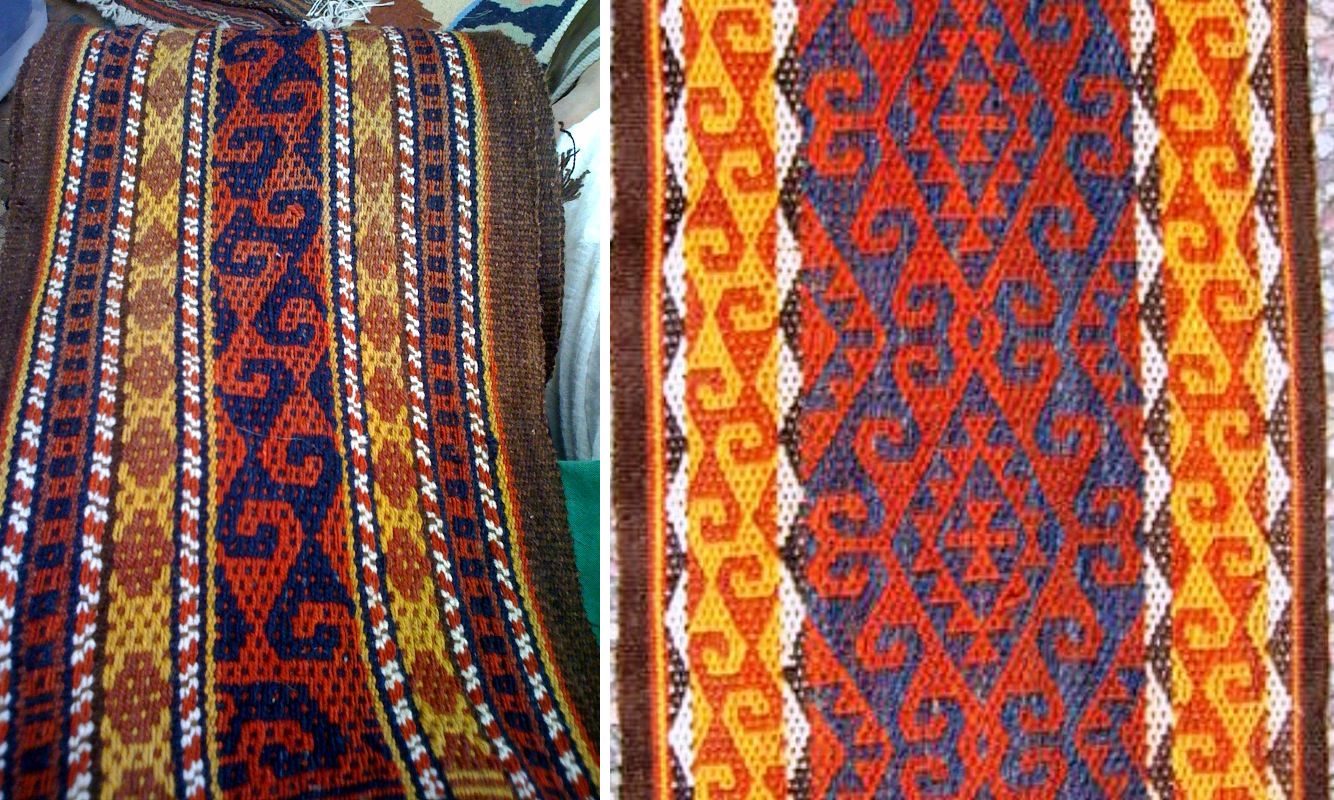
While doing a bit of a desktop clean up this week I came across an image of a Central Asian piece that Lisa had photographed at one of her reenactment events and sent me about which I had completely forgotten.

The photo on the right is the one that inspired the small bag that I wove. The picture on the left is the new buried desktop discovery and it is nice to see the same hook design that I copied on this piece too.

Here is a quick summary of the difference between the single color and two-color versions of this simple warp float technique.

Basically, when you weave the single color version, the weaving sequence can be summarised with four “S”s:

  • Shed….Open the dark shed and pass the weft
  • Select..Choose the dark warps that you wish to have floating and forming a pattern
  • Save….Save these chosen warps on a stick
  • Shed….Open the light shed, add the saved warps to this shed and pass your weft

We could even add a fifth “S” to the sequence which would be Start again.

Here it is again with pictures…

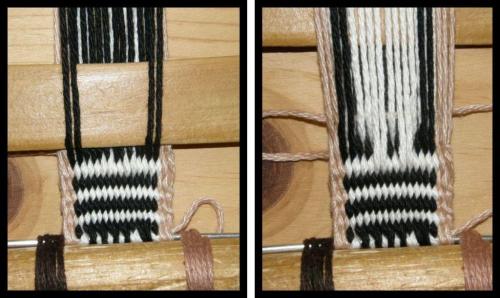
The dark Shed has been opened and the weft has been passed. The dark warps to be floated have been Selected. The selected warps have been Saved on a stick.

The light Shed has been opened and the dark selected warps added to it. The weft is then passed. Then you Start again, that is, open the dark shed etc etc…

Moving on to the two color simple warp float technique, the sequence changes to: (this time I start with the light shed for no particular reason)

  • Shed…..Open the light shed and pass the weft
  • Select…Select the light warps that you want to float to form your pattern
  • Save…..Save the chosen warps on a stick
  • Shed…..Open the dark shed and add the saved light warps to it. Pass the weft
  • Select…Select warps from the dark shed which will float and form the design
  • Save…..Save the selected dark warps on a stick
  • Shed…..Open the light shed and add the saved dark warps to it. Pass the weft. From here move on to the second step: Select.

In pictures:

After passing the weft through the light Shed, two pairs of light warps are Selected, Saved and added to the dark Shed.

Dark pairs are then Selected from the dark shed, Saved and added to the light Shed.

Here is the pattern chart for the hook design taken from the yurt band and woven piece that Lisa photographed.

Full tutorials for both the single and two color warp float techniques are here on my blog.

The single color version has videos too.

Click on the TUTORIALS tab at the top of any blog page here and scroll through the list of tutorial links.

As always, things should be taken in steps and so, before attempting this hook design, I suggest weaving samples in single color floats first. There are so many possibilities for this simple technique using a single floated color and so there is no need to rush into the two-color version until you are good and ready.

With some experience in the single color version under your belt, you can then try the two-color “S” design for which a full step-by-step tutorial is provided here.

I wove the above pouches in order to reproduce some of the motifs woven by the Montagnard weavers with whom I got to spend some time in North Carolina. The technique is a twist on the basic simple warp float technique. Their way of arranging the sheds and selecting the warps produces warp floats on the back of the weaving and exposed weft on the front but the basic steps in the weaving sequence are the same. The resulting bands of pattern are more flexible than those produced by the Philippine and coastal Ecuadoran weavers as they are not truly warp faced.

This week I worked on extracting and charting all the woven letters that I found in the photos I had taken during the visit. I then wove up a sample band.

There are a few unorthodox moves that they use to form nicer curves for the letters. Betsy Renfrew who is working with the Montagnard weavers tells me that someone wove a banner  with the words Montagnard-Dega Association for their office. I am looking forward to seeing that as the letter “s” is amongst the five or six that I am missing. I have been wanting to weave nice letters ever since I saw Linda Hendrickson’s beautiful book on card-woven letters Please Weave a Message. All I have done so far myself is devise a simple stick alphabet which I sometimes weave in double weave. Now I have another alphabet for my repetoire.

Another source for beautiful woven letters is Annie MacHale (aspinnerweaver) who weaves  a line from musicians’  favorite songs on the guitar straps she makes for them on her inkle loom.

Some weavers who employ the simple warp float technique choose to float single warps, others pairs. As the weavers in coastal Ecuador are weaving with their homespun cotton, they float pairs of doubled strands of cotton to form their designs.

This photo was taken by anthropologist Kathleen Klumpp and shows one of the completed saddle bags or "alforjas" . This particular design is called "rosa y hoja de naranja", rose and orange leaf. The piece was woven on a vertical loom using a circular warp.

Kathie is with the weavers right now and has been urging me to go and join her with Doña Luz and her family whom I met on a three-week visit back in 2007. Knowing the amount of laughter that shakes their stilt house every evening when the extended family gets together, I know that they must be all having a wonderful time. Unfortunately I could not get my program to fit with Kathie’s and I am unable to accept her invitation.

In 2007, sharing prints of photos from the 1976 visit.

Kathie has enjoyed a long, close and warm relationship with this family over the last four years visiting them to document the entire process that takes them from cotton boll to finished woven saddle bag and commissioning pieces to encourge them to continue weaving.

However, the story of her contact with these talented weavers started back in 1976 when Kathie was in Manabi province collecting data on village pottery making. She happened to see a gentleman on one of the rural buses carrying a most unusual saddle bag. It immediately stood out from other saddlebags that she had seen which were patterned with simple warp stripes as it was covered with geometric designs in indigo blue.

Her enquiries led her to Doña Luz Parraga and her family, master spinners and weavers in the settlement of Zapote and a friendship was formed.

At left you can see Luz’s daughter Trinidad, at fourteeen years of age in 1976, weaving and sewing an edging onto a finished saddle bag using a wooden rigid heddle fashioned by Luz herself.

After this visit, life interrupted, as it often does, and Kathie had to put her anthropological work aside. It wasn’t until her retirement that she was able to return, thirty years later, to the very same family, rekindle her friendship and continue her research.I would have loved to have been a fly on the wall of that stilt house when Kathie emerged from the vehicle and walked up the dusty slope to meet once again with her old dear friends. The following year  I was able to join her.

Photos taken by Kathie of Luz in 1976 and during her return visit in 2006.
Here we are in 2010 with Luz and Trini at the loom. They have set up the warps which will go into twelve heddles to weave the orange leaf design after several days of studying the samples and struggling with the warps. This is a design which they had not woven for some time and were on the point of forgetting. Luz's eyesight is at the point where it is almost impossible for her to select the warps and Trini had great difficulty at first relating what was on her woven sample to the loom. Her perseverance paid off and, thanks to Kathie's encouragement, this design has been revived.
The rose and chalice design at left is probably the one that is most often woven. This design requires eleven heddle sticks. The warps which are programmed into each of the eleven heddle sticks are recorded on the woven sample at right.
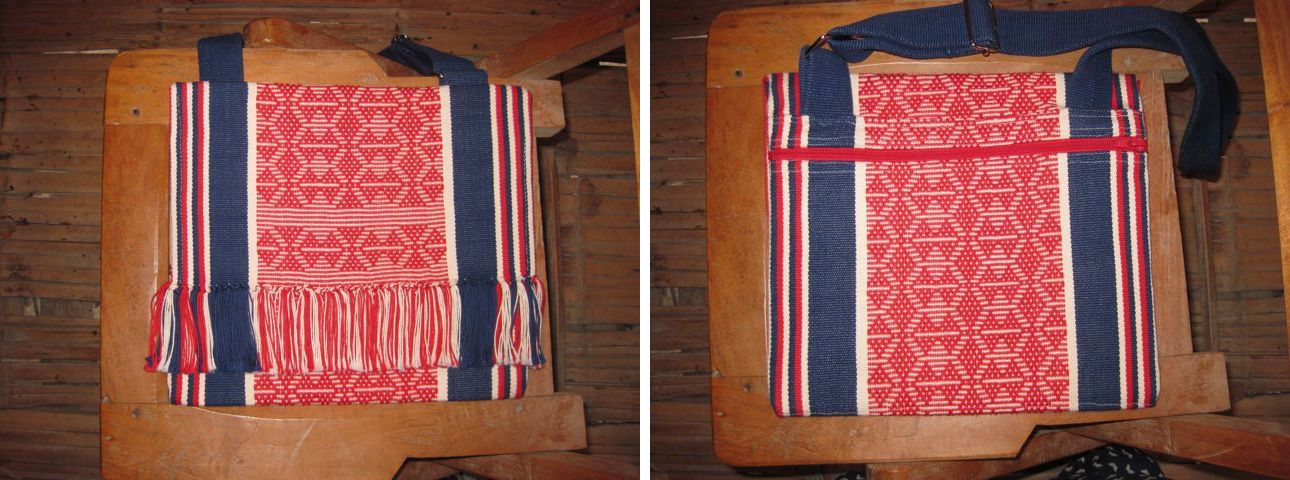
On this latest visit Kathie is helping Trini to develop new products as the market for traditional cotton saddlebags is now virtually non existent. This shoulder bag with a zippered outside compartment and made with factory cotton, has an adaptation of another traditional design of the coastal area. With Kathie's help the family members have planted and are raising 150 cotton plants on their property so that eventually they will once again be able to use their own handspun and pass on the spinning traditions to future generations.

Here is an edited version of a video that Kathie has made during this visit showing Trini making her string heddles and weaving a piece. You will see how she uses a flat stick to help ensure that all her heddles are made the same length. Those of you who have studied the simple warp float tutorial will recognize the moves when she starts weaving although she doesn’t have to select her warps to float as they are already in the heddles. The full version of the video can be viewed here.

I love the way she opens the heddles! They open relatively easily as she is using a smooth factory cotton.

It was never so easy when I was with them in 2007 and we were using their homespun thread.

At left is a flashback to 2007 when I was with the family. I wove quite a lot of this piece as part of my “training” so here you see the two proud weavers in front of their finished work!

Speaking of opening heddle sheds, I have put together a video of my own this week to show a couple of ways that I use to open a sticky shed as well as how I open each of the two sheds when doing Andean pebble weave.

The warp in the Andean pebble weave segment of the video is the one that Maurice, Lisa and I set up on Lisa’s four-shaft loom in North Carolina. I had intended doing something a lot wider but had not anticipated the amount of warp length that was required for the four-shaft loom and so had not bought enough yarn. So I ended up with a piece that happens to be just the right width for a guitar strap and I already know a guitar player who will love it.

As you can see, it ended up back here in Santa Cruz on my backtrap loom and wasn’t as difficult to retension as I had imagined.

Setting up on the four-shaft loom was a bit freaky. Maurice, however, was completely unphased by this mess and soon tamed it into submission. The two dowels you see at left in the picture are part of a previous abandoned project and were later cut out.
Weaving underway...

Using that big loom to weave a narrow band may seem a bit strange but, if this is the only loom you have, you are not keen on trying backstrap weaving but really want to try Andean pebble weave, then all I can say is, why not?

What’s in the mail and the inbox?

Speaking of Andean pebble weave on other looms, Jennifer is weaving another pebble weave band on her inkle loom and has sent me pictures..

Inspired by Jennifer's progress, Marydargie on Ravelry warped up her inkle loom to weave the band in lesson one in my book.

In a discussion in the inkle weaving group on Ravelry we all agreed that mini inkle looms are not well suited to weaving pebble weave. A heavy-ish with a lot of room in front works well for this technique.  My Ashford Inklette needed to be clamped to a table as it was too light and felt very cramped. Although I managed to weave a band on it in pebble weave, it was not very comfortable.

Francois in California, who has been following this blog, sent me a picture of his finger weaving, at left. I dabbled in finger weaving many years ago attracted by the Peruvian bands Ifound in a book and was surprised to see the enormous piece that he has created. I imagine that this comprises several bands sewn together. Another great technique requiring few or no tools.

Another small discussion on Ravelry was started when someone asked about whether people preferred backstrap or inkle looms in general. I could find  advantages for both, naming as one of the inkle loom’s advantages the fact that the heddles are put in place as the warp is wound but…now I have learned a cool way to do that while winding the warp for backstrap weaving thanks to the Montagnard weavers…

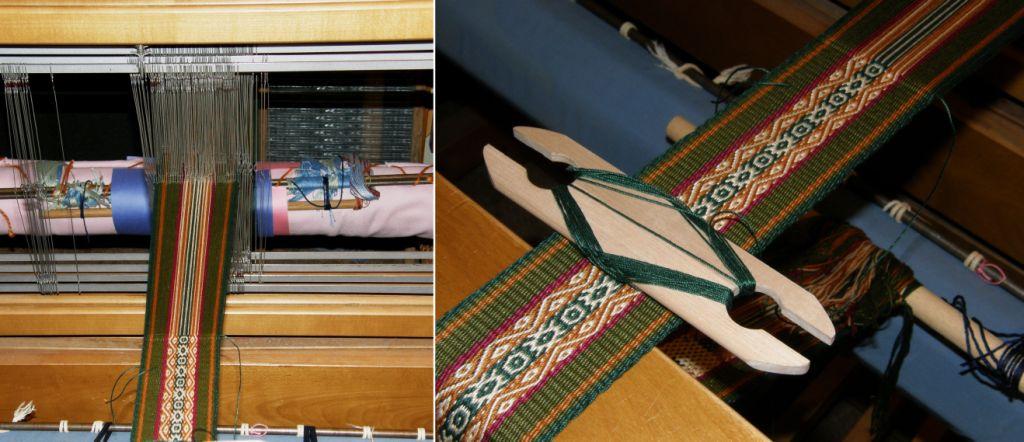
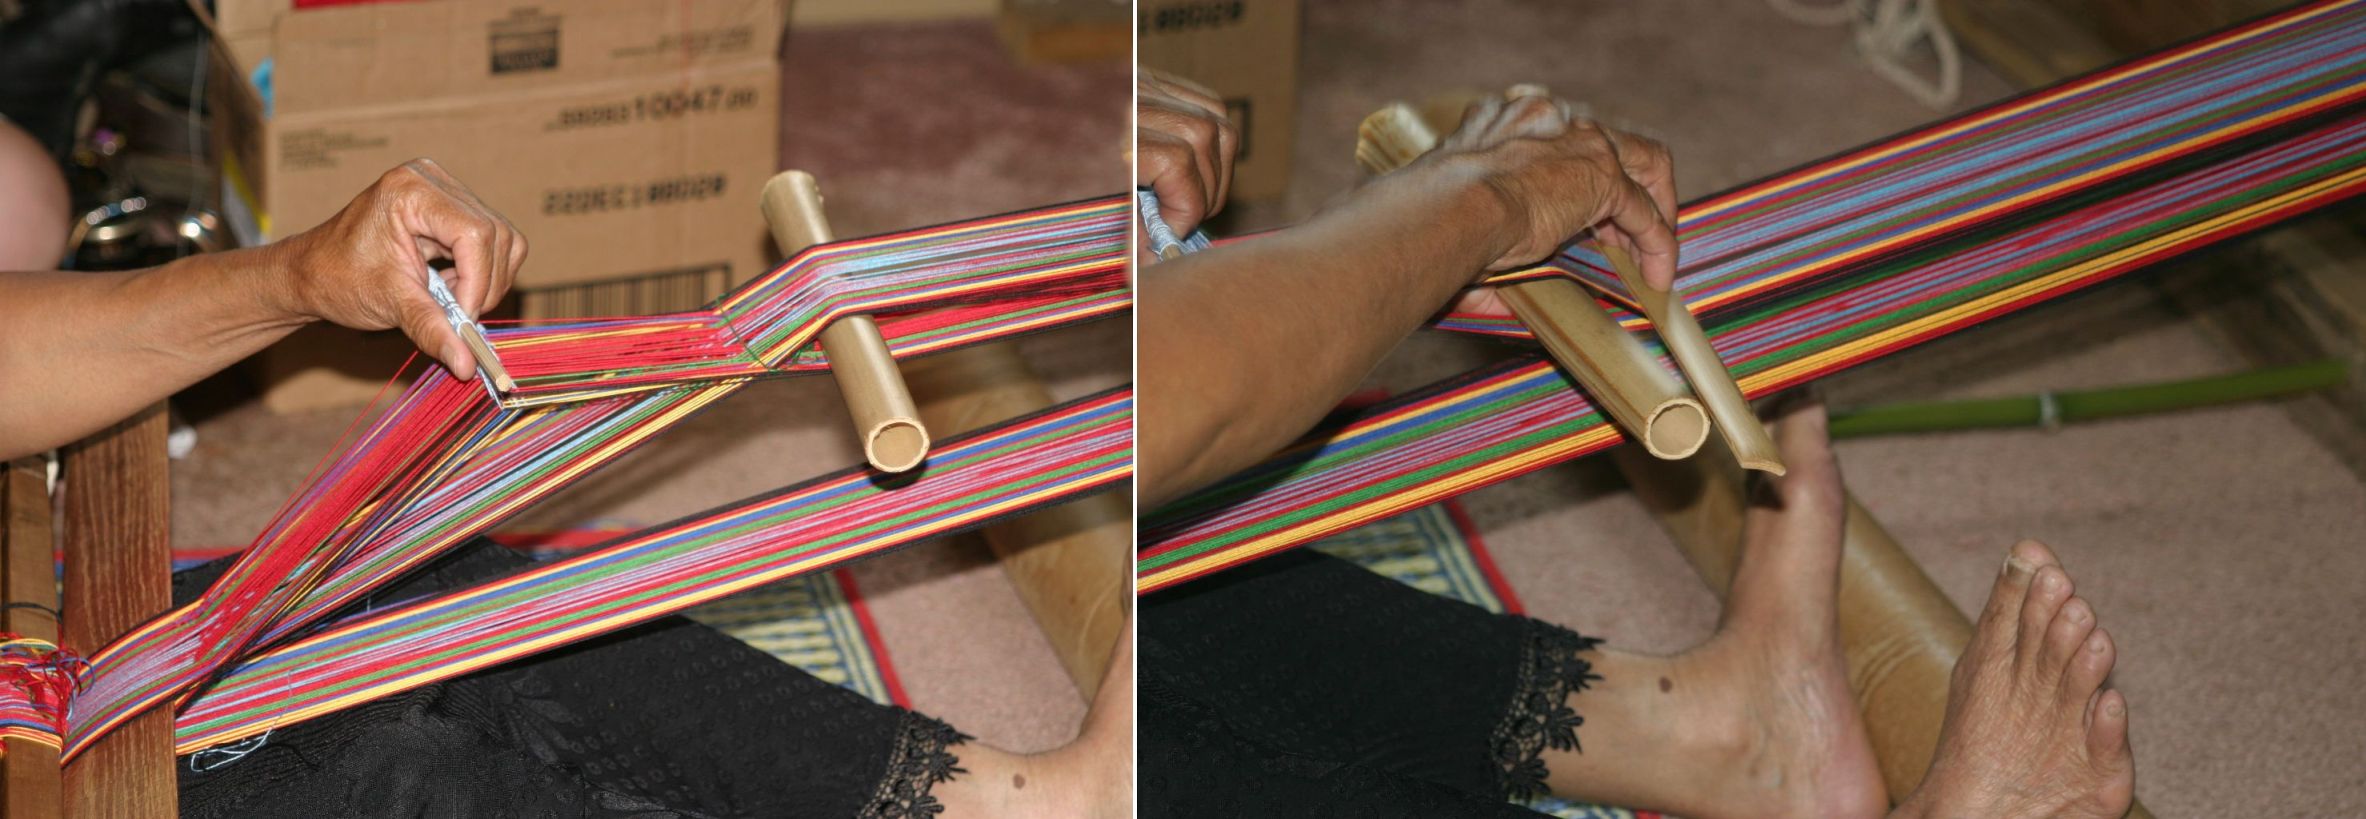
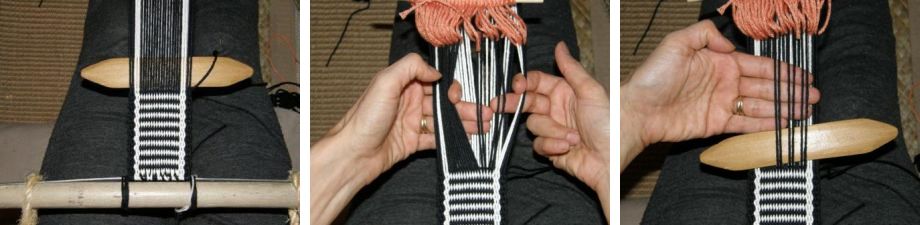
I made a video of Montagnard weaver Ju Nie making these heddles, at left, as she warped and, after watching it many many times was finally able to catch her quick movements and make sense of it. On the right are the heddles I made this way using thick yarn so that I could photograph the process for my journal. I have also made step-by-step diagrams and a video of my own showing the process very slowly just in case I forget! I doubt, however, that I will ever use this technique on my own warps as I am a big fan of the extra hitch on the heddle stick bteween heddle loops.
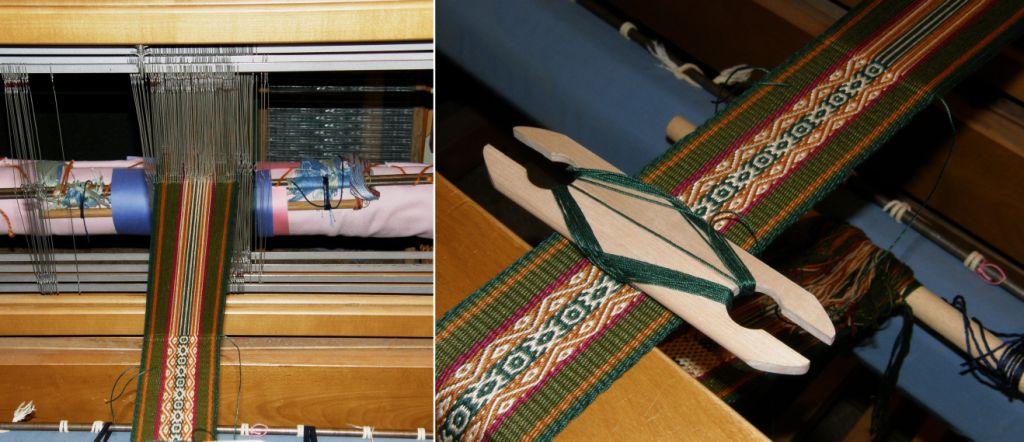
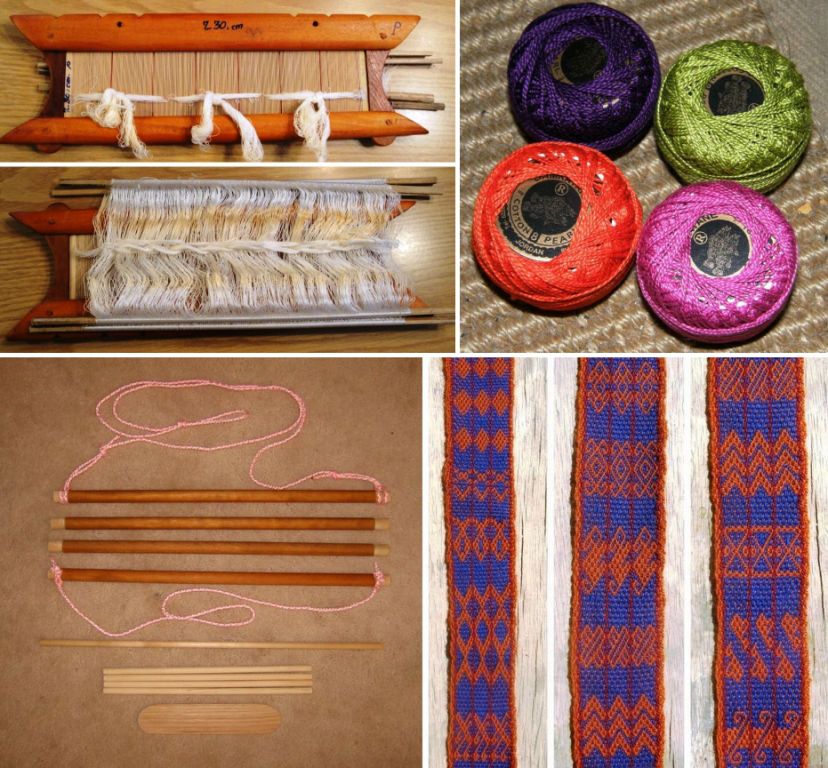
From the inbox and the mail box...Quiltparalegal sent me this picture of a loom that her son bought for her in Laos with its incredibly fine bamboo reed and string heddles. It amazes me that these bamboo reeds are still being made. What a piece of work! Weave2, sent me a lot of thread made in Jordan where she lives. Here are some examples of the rich colors she chose. AJM showed me a backstrap loom he made for a friend even before he can get one for himself finished! Anna, who is cycling from Alaska to Ushuaia, is weaving on the road after having classes in Huancayo. She downloaded my book along the way and has been weaving some of the motifs from it wich you can see on the right. The designs on the left were woven with her Peruvian teacher. She is now in Santa Cruz and is coming to weave with me tomorrow!

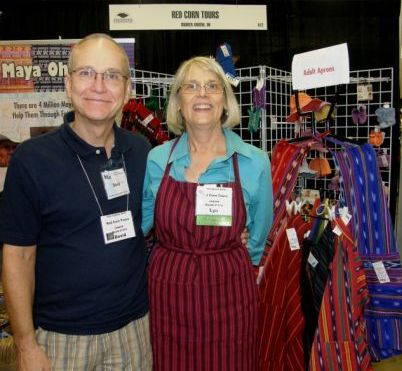
Above you see vivacious, no, REALLY vivacious Lyn Lucas and David Anderson of Red Corn whom I met at Convergence. I showed you one of the beautiful huipiles of Chichcastenango that they had on their stand in a previous post. Recently I discoverd their Facebook page and I highly recommend taking a look and “liking” their page. There they post two to three videos on Guatemalan weaving every week. It is a real treat!

And to finish, I have created a new tab at the top of the page named FAQ INDEX. That is all it is at the moment…an index. What you will find there along with the index is the following notice….

It will take some time to put this together but I am really looking forward to having all this information which I have posted in various places online all in the one place once and for all! Curious about the questions? Hit the FAQ INDEX tab at the top of the page. Maybe you have some questions to add.

Backstrap Weaving – Vietnamese Hilltribe Weavers in North Carolina

VIETNAMESE HILLTRIBE WEAVERS IN NORTH CAROLINA

The colors and motifs of the Jarai and Rhade tribes of Vietnam have found their way into my work this week thanks to an amazing visit with two of these Montagnard weavers in North Carolina during the end of my US visit. Montagnard is the name that the French gave to the various hilltribes of Vietnam.

I have had to resist writing about all my fun fiber adventures with my good weaving buddies Lisa and Maurice during my stay in North Carolina and limit this post as much as I can to the two wonderful afternoons we spent with master weavers Ju Nie and Nach Rahlan.

Unfortunately on this trip I didn’t really have time to dawdle in North Carolina but we did manage to pack a whole lot of activity into my short time there.

When not warping four-shaft looms, backstrap weaving, spinning and wrestling with sheets of felt, we went blueberry picking, hung out with the family, made s’mores (first time for me, okay they weren’t made over a campfire but they were still gooood!) and spent time with Maurice who made this warping board and beaters for us to play with.
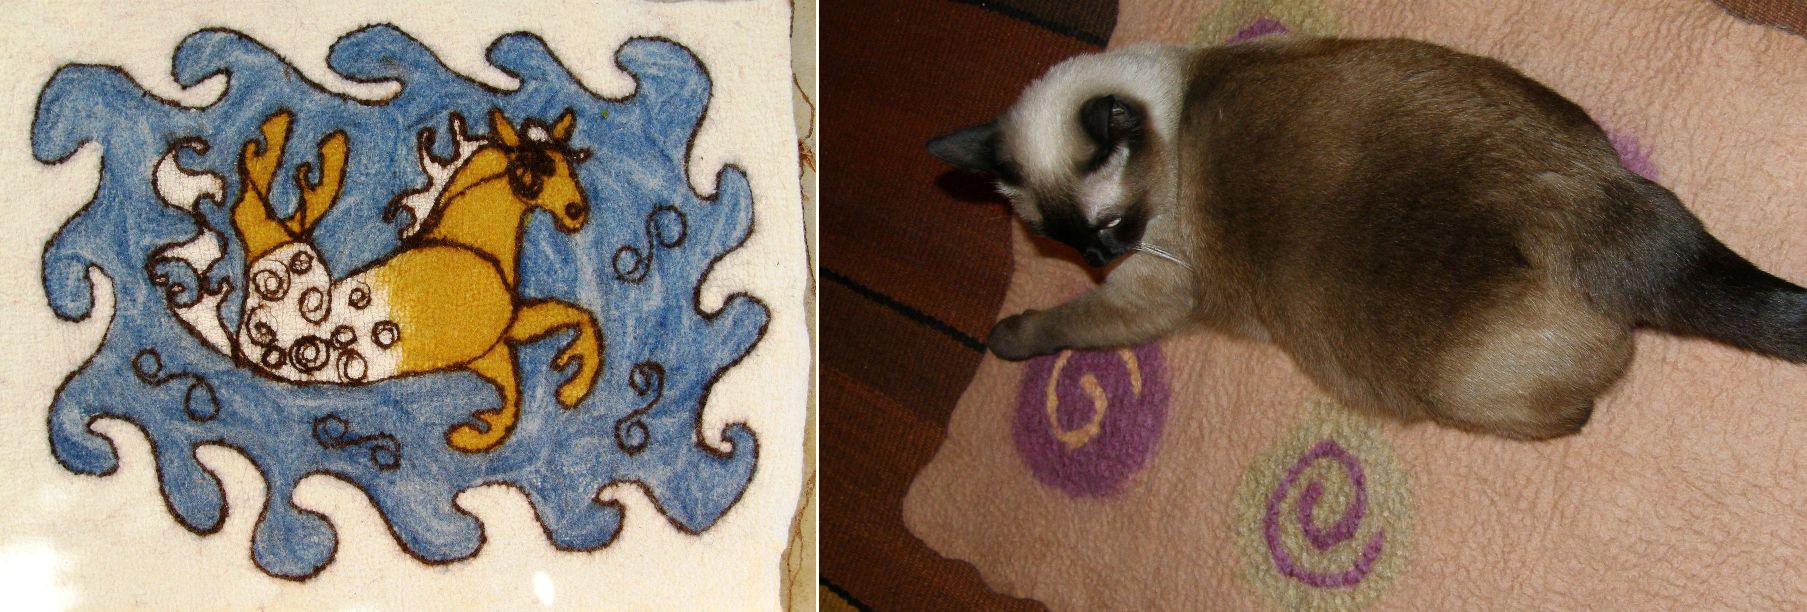
Lisa makes beautiful felt pieces like the one here on the left. She took me through the steps to making my own simple piece on the right. Mine has an animal on it too but not a felted one! I had made felt before when I lived in Chile. Now I realize, thanks to Lisa, that I hadn’t felted it enough and that explains why I have to give it a haircut every now and then. Photos of the fun and physically demanding process will be in next week’s blog post!!
We gathered a group of friends for a day of backstrap weaving. Renate here is showing off her warp while Lisa works on a yurt band design in two-color simple warp floats.

We warped up Lisa’s four-shaft loom to weave a guitar strap patterned with designs in Andean pebble weave. I will have more pictures of this next week too.

And as if that wasn’t enough….

The highlight of this visit was the trip we made to spend time with the Montagnard weavers. I was lucky to have been able to make contact with Betsy Renfrew, at left with weaver Nach Rahlan, some weeks before leaving Bolivia for this US trip. She invited me to her home where she and her husband Andrew arranged for us to meet two of the Montagnard weavers with whom she has been working. Read about Betsy and Andrew and their goals for working with the weavers here.

The first day was a “show and tell”. Maurice, Lisa and I took examples of our own fiber projects to share with weavers Ju Nie of the Rhade tribe and and Nach Rahlan of the Jarai tribe. Ju Nie’s husband Thomas Tlur Eban acted as Ju Nie’s translator at the times when she struggled to express herself in English while Nach’s English was a lot more fluent. I have to say that I was quite nervous on the drive there. Betsy had told me about Ju Nie’s lack of English fluency and had also mentioned that Ju and Nach were from two tribes that did not particularly get on. I envisioned a very awkward gathering with difficult communication and perhaps a cold stoniness between the two weavers. This couldn’t have been further from the truth!

The room virtually exploded from the very start with lots of excited chatter and movement. We were a group of weavers sharing our mutual passion!

I showed my backstrap loom, woven pieces and tools to a fascinated Ju. Lisa took her spindles and soon had both Nach and Thomas trying them out. Maurice showed several of his own floor loom pieces and explained shibori weaving.

And then it was our turn to be shown. The room that was already packed with eight people, filled to overflowing as enormous looms, blankets, skirts, carrying cloths, bags and straps were brought in to cover the floor and every available space. It was overwhelming and it was hard to concentrate on any one piece and hold back the urge to touch and examine everything at once.

Nach brought in her large loom and unravelled it to reveal one of the panels for a traditional skirt that she is weaving. The design panels on this piece are decorated with motifs woven with supplementary wefts.

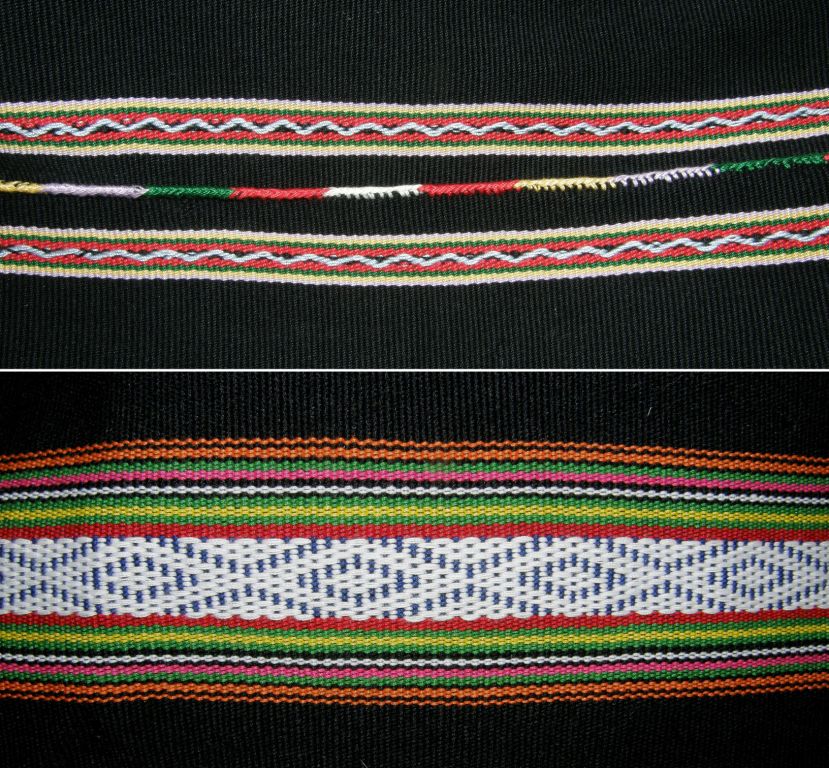
The supplementary weft patterning technique used is the same as that described here. It is a single faced technique and both Ju and Nach were delighted to see Bolivian examples of this. Above you can see how panels of blankets and skirts are often joined using single columns of cross knit looping which I am used to seeing here in Bolivia in double and triple columns to edge coca leaf bags and other items. The lower picture shows simple warp float patterning where single warps are floated over a background of horizontal bars to create this striking pattern.

The most astonishing pieces for me were the ones decorated with a twining technique called kteh. Seen in the example on the right, red and white threads are twined around the fringes at the end of large woven pieces to form intricate patterns and then adorned with beads.On the left you can see gun and airplane motifs which often appear among geometric, human and animal figures.
More fabulous examples of the kteh work.
The weavers have lately been making shoulder bags to sell and experimenting with traditional and non traditional color combinations. They weave straps for the bags placing two warps on the loom at a time (picture at left) as they are not used to weaving such narrow pieces on their enormous looms. Having two bands on the loom at once helps balance things out. At left you can see the tiny temple fashioned from a piece of bamboo much the same as that used by the weavers in coastal Ecuador with whom I studied.
Words and phrases are also woven into the bag straps. Some of these appear to be lines from scripture and a google translation turned up such words as “peace” and “wisdom”
Ju here is showing us how to wrap the baby carrying cloth. This piece was more warp dominant than truly warp faced and profusely patterned with suplementary wefts.
I was coaxed into donning the traditional skirt and blouse. At right is a photo in Ju’s home of young girls in similar costume wearing woven headbands.
Ju, Nach and myself wearing one of the skirts. It felt beautiful on but it beats me how they manage to keep them up as they don’t wear a belt. It is simply gathered and tucked. And just in case you are wondering, I am not tall! At right another gorgeously patterned garment with warp float patterns and kteh edging.

So, that was day one! I have no idea how much time we spent there but the time just flew by and I arrived home thinking, why didn’t I take a closer photo of that and how did I forget to ask about this? I am very grateful to Maurice  and Lisa who took photos when I was not able and allowed me to use some of theirs.

Are you ready for day two?

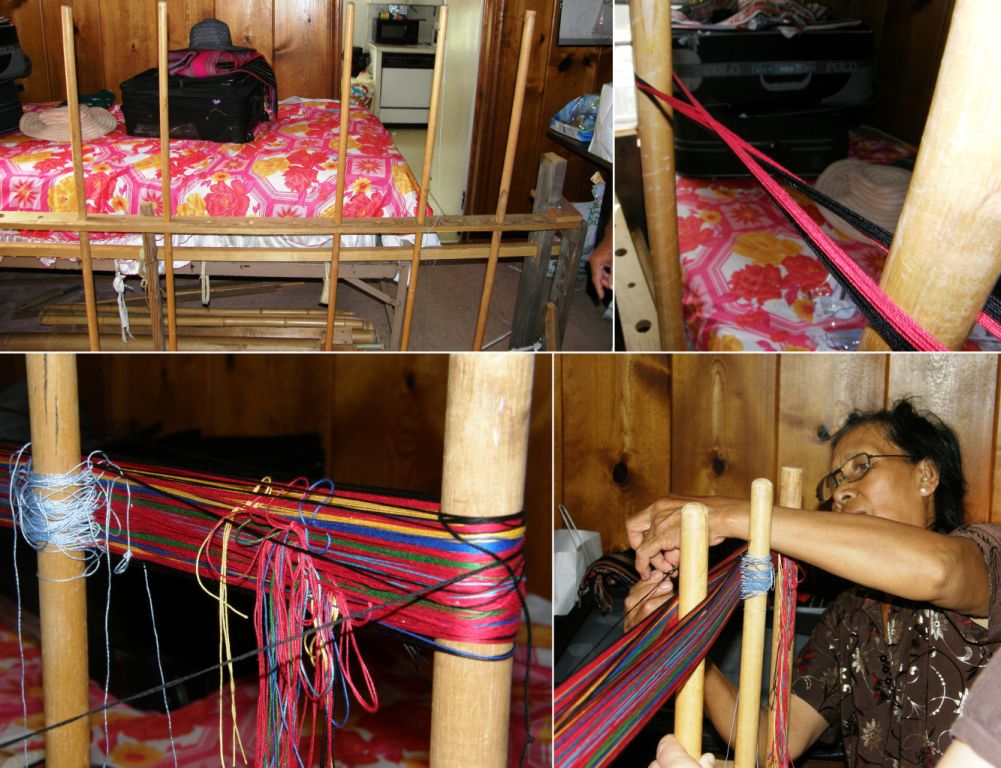
Day two found us at Ju Nie’s home where she was set up and ready to warp. Ju’s husband builds all her tools and he has made her a very nice warping arrangement which fits conveniently in the house beside the bed to which she attaches her backstrap loom. It reminds me of my situation here at home where I weave attached to my bed and warp on the floor nearby.

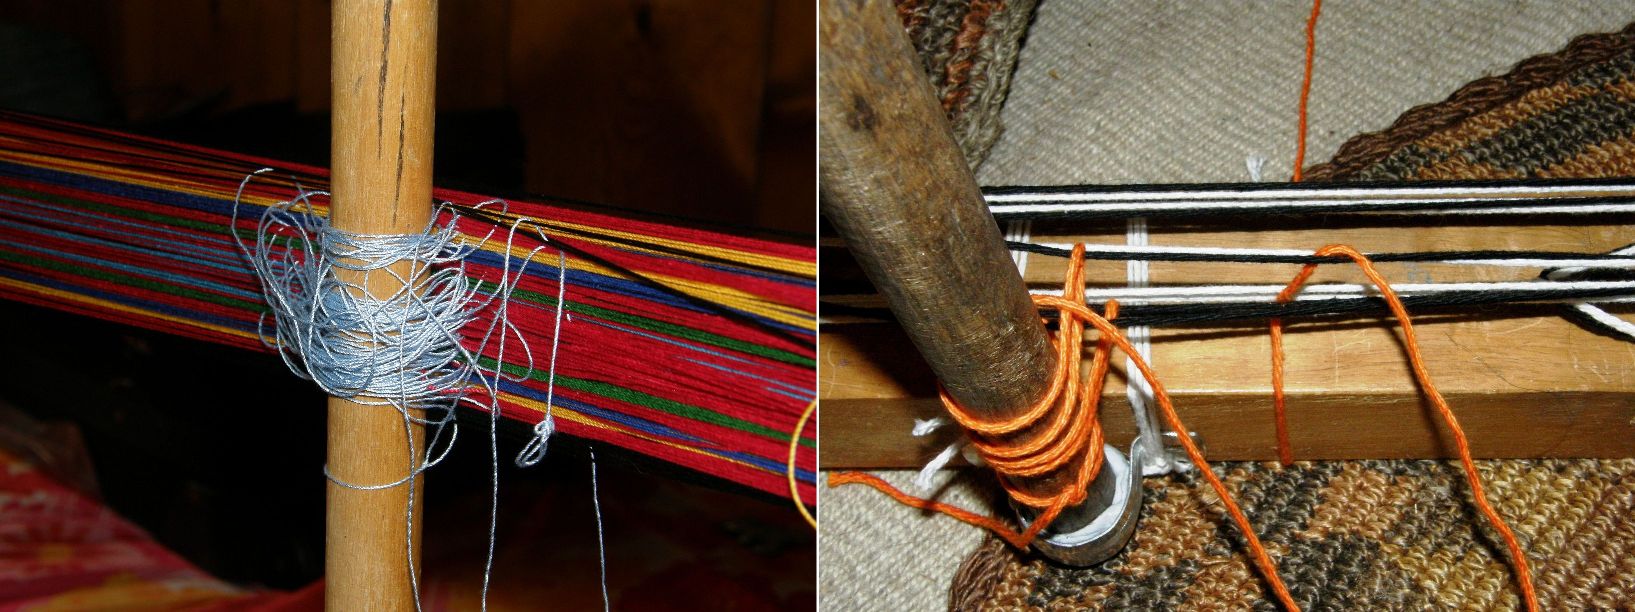
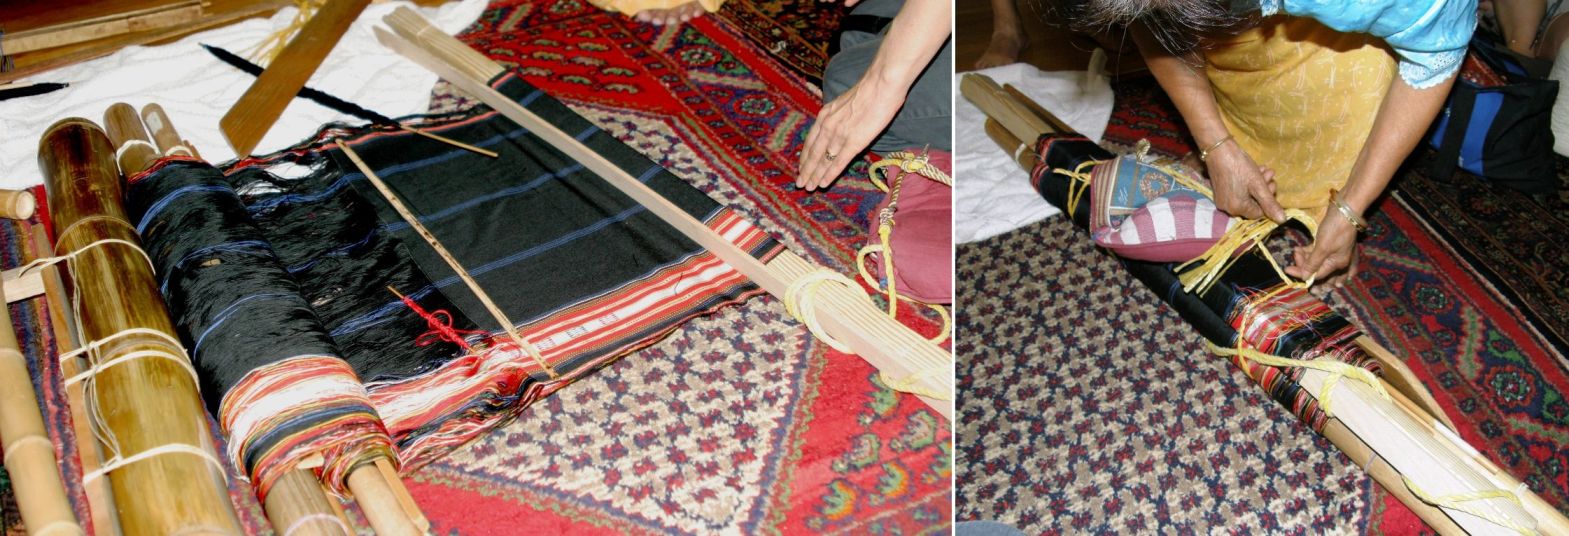
The warping set up. Five posts are used. One post, the second from the right, acts only as a measure around which the heddle strings are wound. Ju encloses the warps in continuous string heddles as she winds the warp. I was tickled to see that she uses Aunt Lydia’s number 10 mercerized crochet cotton as I have done and uses this same yarn for her string heddles.

In the blink of an eye Ju was off and warping and it was very hard to keep up. Not wanting to interrupt her, as I know how important it is to concentrate when warping, I struggled to follow her quick movements which at first weren’t making sense to me. I had mistakenly thought that the cross was that shown in the upper right hand photo but later realized that it wasn’t. My sketch of the process had to be frequently modified until I finally caught up with her.

Ju makes a circular warp and uses two strands of yarn at once much the same as I do in my four stake warping, separating out the doubled threads only around the cross post and at the place where she pulled the string heddles through. The cross shown above is made of doubled threads and serves as the place where she later inserts her “rolling stick” or “coil rod” as it is sometimes known.

Her movement with the string heddles was so quick that only after having studied the video I had made multiple times am I able to follow it and reproduce it on my warping board here at home. All the warp ends where color changes occur are tied in slip knots which are untied and retensioned once on the loom. This results in an intimidating mess of yarn ends and even the heddles looked loose, uneven and scary! Of course eveything was under control!

Ju was kind enough to let me try warping. I would never let anyone touch my warp!! She, however, took control of the heddle string at each pass but I was slowly coming to understand what was going on.
Warping finished, safety ties were added to the warp and it was slipped off the warping stakes and the rolling stick was put in place. Ju closed the end “cross” around the rolling stick and then put the main loom bar in place which was attached to her bed, just like mine!

Ikat weavers that I have seen in Ecuador told me that the rolling stick helps stop their warps from slipping and blurring their design. I have seen other weavers use it to help space the warps. I imagine it also stops the warp threads from slipping in together as they often do on the far loom bar and keeps them in order.

The weaver’s loom bar seen at left has prongs around which the backstrap cords pass. The sword has a hooked end which is used for picking up threads for patterning. All these pieces have been fashioned by Ju’s husband Thomas. Ju had warped a sample band for us to witness the process. Her loom is normally used for much wider pieces which explains how oversized and unwieldly everything looks.
The thick roll against which Ju braces her feet then had to be placed at just the right distance. Having something against which to brace one’s feet is a big help. I have sheets of wood under my bed which serve this purpose and this helps spread the load of tensioning the warp between one’s back and legs. Once Ju had untied the knots in the warps ends and retensioned the warps, she sent Thomas out into the yard to cut some thin bamboo sticks which she inserted in the sheds to get the weaving underway. She then carefully moved each and every warp into place with the point of a stick before passing the first weft.
Ju opens the heddles by grabbing hold of the shed roll and a bamboo slat which she places on top of the warp. She then rolls both away from her while pulling up on the heddles.When I use a second cross in my warp, I use this method by rolling the shed rod and the second cross stick together. I enjoyed showing Ju another way that I use to open my heddles by rolling them over my hand. At first she was anxious to show me that I was doing something wrong but then saw that it worked and laughed, pointing and saying “new way”. Her shuttle is a simple stick around which the weft yarn is wrapped. These photos were taken by Maurice Blackburn.

I was dying to get into the loom and finally asked Ju’s permission to do so.

What a wonderful birthday gift! A day spent with a master backstrap weaver! There I am happy as a baby. The picture at right shows my view up the warp!

We went home with images spinning in our brains! It wasn’t until I got back to Bolivia that I sat down and went through my notes and sketches, watched the videos and managed to sort it all out. I bought a 12 ft long band from Ju that she had intended using as straps for many bags but was happy to part with. I liked this piece as it gave me many examples of the motifs that they weave with warp floats. I was able to examine it to figure out the technique. This is a new one for me! And so, to work. I wanted to reproduce the structure and make something useful.

First to sample. I could see that Ju’s white and red warps had a 3:2 weight ratio but I wanted to see if I could get away weaving it 1:1.

In the photo on the left, Ju’s band is the one on the right. My first 1:1 sample is on the left and my second sample, in the middle, where I also used a 3:2 weight ratio looked far better than my first attempt.

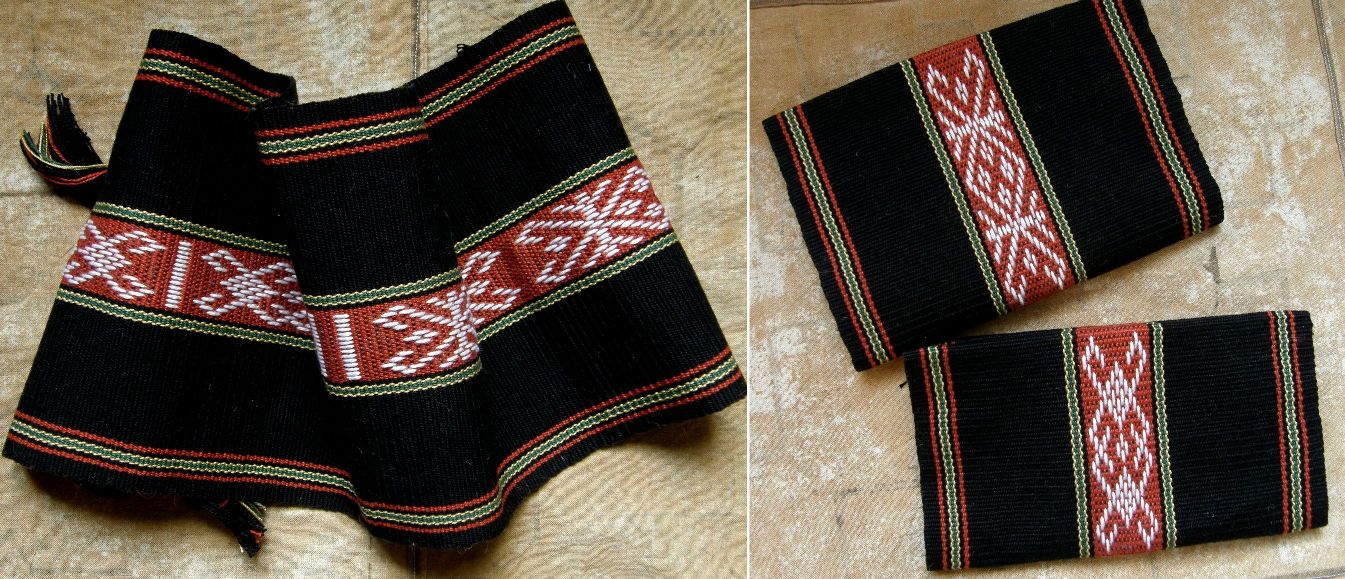
So I went ahead and wove more motifs on this sample band until I was convinced that I had the technique down. I decided to weave a wider piece so I could make a couple of zippered pouches and tried to copy the traditional colors used by my new weaver friends as much as possible. Here is the piece I made on the loom. By cutting between the two white horizontal bands in the center I woud have two pieces which I could fold and sew into bags.

Here is the piece off the loom, then cut and folded. I sewed two lines of stitches in the center of the piece and cut between the two.
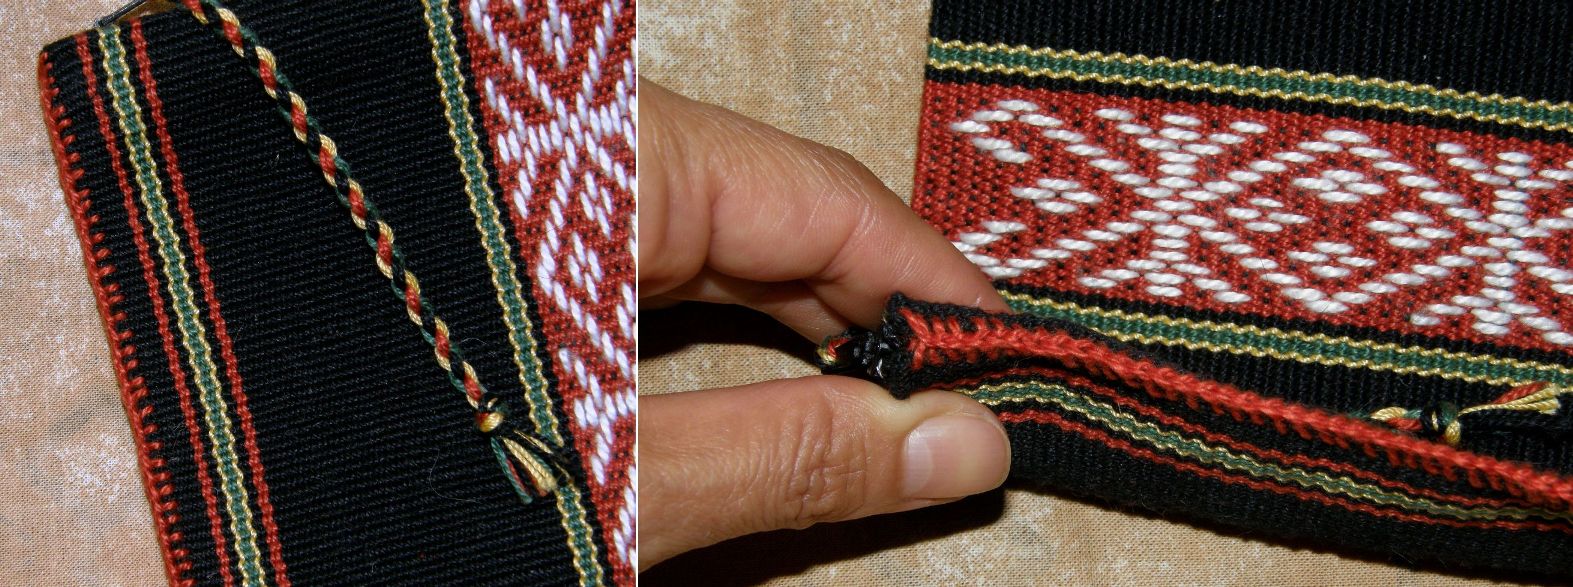
I sewed a single column of cross knit looping along the edges of the larger of the two bags as Ju and Nach also use this for decorative finishes.
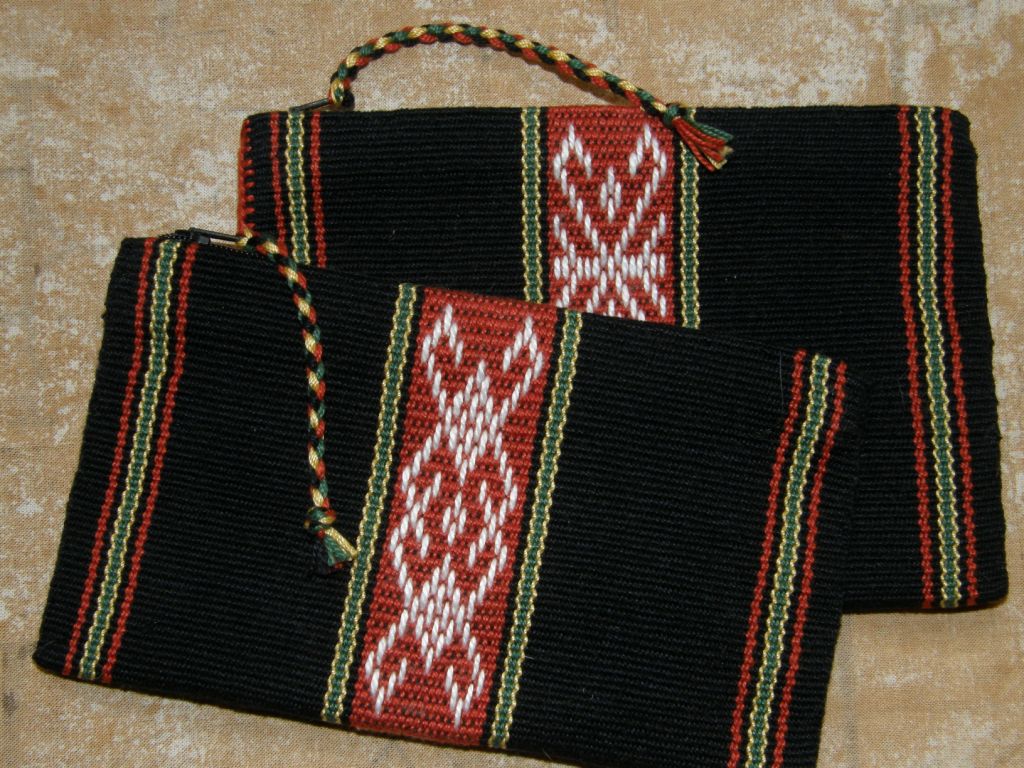
Here are the two bags with zips in place and braided zip pulls. I had yet to sew the other edge of cross knit looping when I took this picture as I wasn’t convinced about using it at all.

Once the bags were made (I kept the cross knit looping in the end and really like it), I decided that I would try to make something using the blue and black color combination that Ju and Nach also use in a lot of their pieces. I warped up for a band in these colors wide enough to make a cellphone case and chose some motifs from my photos.

I had trouble settling on the colors for this band and had to pull out warps and replace them once it was on the loom. I decided to keep it very plain and dress it up later with cross knit looping.
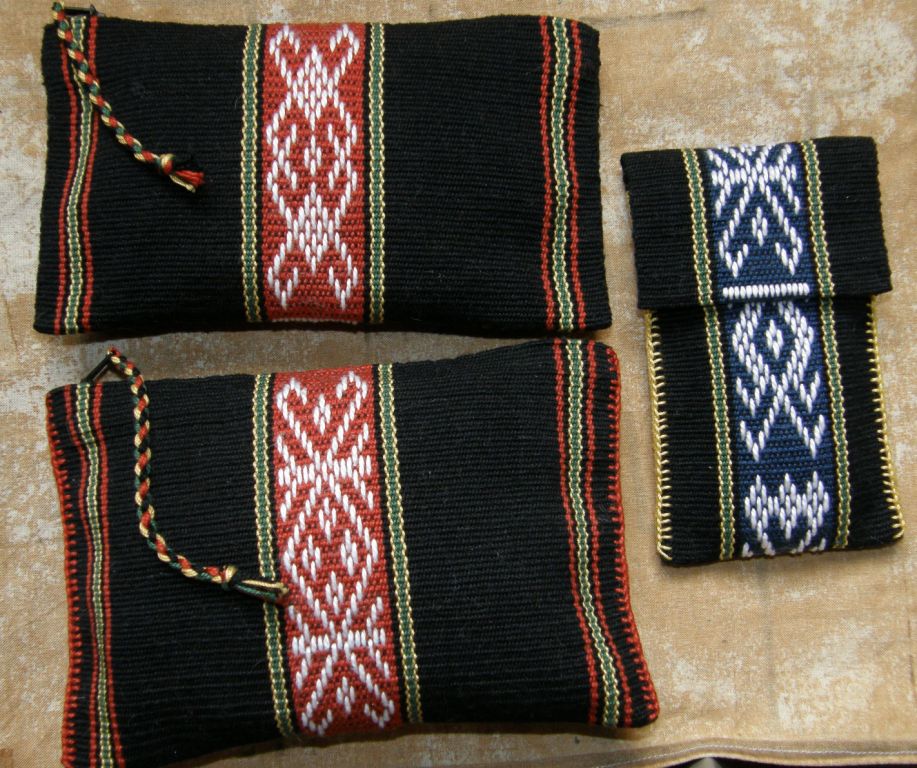
Here it is finished. I am not sure about working the cross knit looping on the flap as well.
And here is the set almost finished. I would like to put a cord on the cell phone pouch but would like to ask Betsy if she knows if Ju and Nach use any particular kinds of braids in their work so I can use the same.

I can’t thank Betsy and Andrew enough for making this visit possible. The work they have done teaching English to the members of this community and documenting these traditional techniques and processes is wonderful. Together they are building a blog which will document this journey.

I hope that I will be able to contribute something to this project by perhaps helping with the documentation work or maybe helping to develop small woven products that the weavers can sell. This was part of my reason for experimenting with these bags. The other part of the reason was my insatiable curiosity and love of the backstrap loom and traditional techniques! Betsy hopes to inspire younger people in the community to want to learn the traditional weaving techniques.

This article gives further insight into Betsy’s work with Ju Nie and you can view a stunning photo essay on Jue Nie at her loom here.

And once again, the “worldwide weaving guild” that is the internet has led me  to a new weaving acquaintance, Susan Stem, who lives in northern Thailand and who has generously allowed me to use this image of a Rhade loin cloth which has the twined kteh technique.

Let me leave your here with what Jennifer has made on her inkle loom using Andean pebble weave technique.

She has a really nice inkle loom which has plenty of space in front to have the two string heddles controlling the pebble sheds, allows her to use the saver cord and she uses the loom’s heddles to form her picking cross.