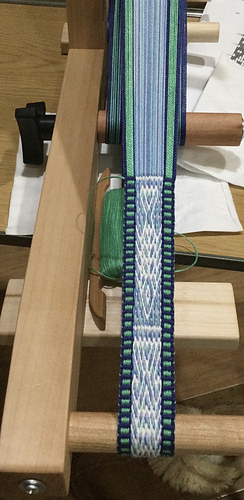
Backstrap Weaving – Thinking Outside the Walls

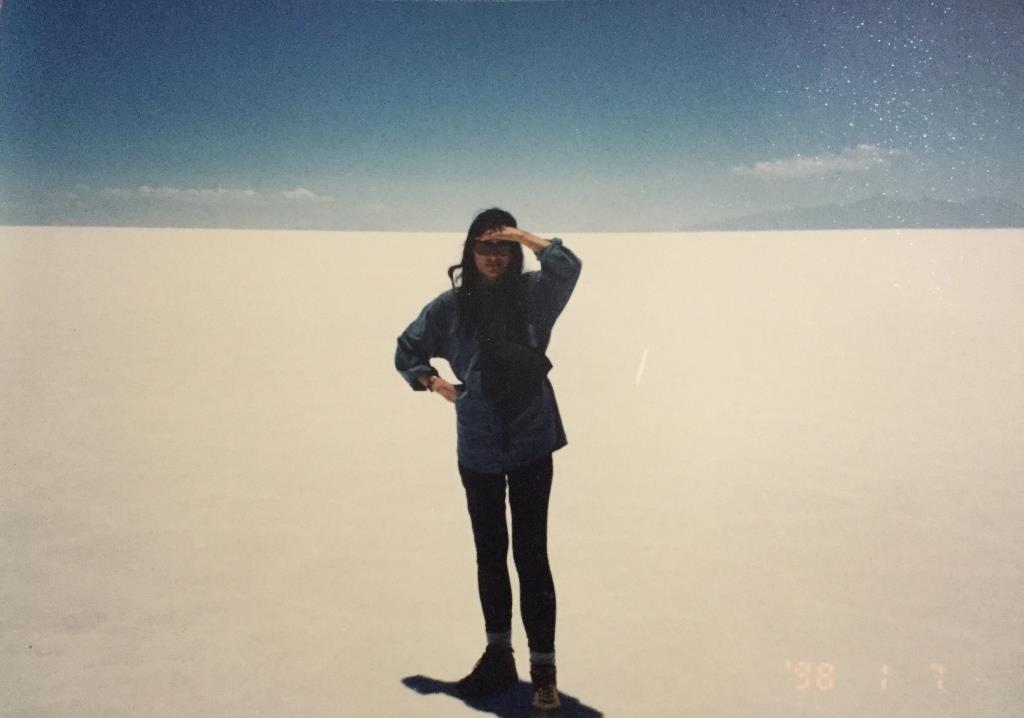
Is there anybody out there?! This was taken on a visit many years ago to the fabulous Salar de Uyuni here in Bolivia.

Fully vaccinated (albeit with the Sinopharm one in which I have little faith), I decided it was time to think outside the walls and venture out for my first outing, since the arrival of Covid-19 in Bolivia, that didn’t involve the supermarket or the dentist.

What would I find out there? Would I find that I have been behaving in an overly cautious way all this time and perhaps one of the few still hiding away within walls?

Would everything be completely normal? After all, we are not under any kind of restrictions now. Case, hospitalization and death numbers rise and fall from day to day as the third-wave curve wends its way downward. The fourth wave has already been predicted to arrive in October. Have we all just learned to live with this?

I have always been good at physical distancing! This was taken on a visit to a large expanse of sand dunes that inexplicably emerge from the surrounding jungle right here in Santa Cruz where I live.

This outing wasn’t about visiting spectacular salt lakes or mysterious sand dunes. It was simply about eating a burger with a friend in one of my old favorite hang-outs…the main Plaza here in the center of Santa Cruz. I used to live one and a half blocks away from it and would pass through it every day on my way to and from work. After finishing work at 10pm, I used to love stopping to sit there on balmy summer nights. The place would be full of activity as others gathered to enjoy the relative coolness of the evening before reluctantly heading home to face a restless night within heated walls.

My companion suggested the Plaza. The thought of being amongst all those people doing something that required the removal of masks made me nervous, even though it was an outdoor setting.

A typical sunny weekend afternoon would see the Plaza completely full…standing room only… as families gathered to eat ice cream and watch the world go by. There would be wandering coffee cart vendors in their crisp white uniforms, others selling cotton candy, balloon animals and toys and trinkets, people feeding the pigeons, kids chasing the pigeons, teenagers gathered in their little groups in every corner, the shoe shine guys poised ready for the next customer, elderly men playing chess surrounded by youngsters studying their moves, wanna-be models having their photos taken outside the cathedral. The Municipal Police would be strolling around although it is hard to imagine anything “bad” happening in that place of good clean fun. In a city in which it is often impossible to escape the blast of salsa and cumbia music, the Plaza is blissfully music-free.

And so it was with a mixture of relief and sadness that we found the Plaza almost deserted. There was no need to make circuits while looking for a place in the shade. Clearly people are being careful and largely staying home which is a big ask when home can often be a simple adobe or single brick dwelling, the interior of which resembles a pizza oven on hot days. It was sad to see this popular cooling refuge abandoned in this way.

Yes, I admit that it is strange to be writing several paragraphs about an outing to get a burger! So I’ll get back to the weaving now. In my last post I showed you the start of my hummingbird piece. This is another effort to think outside the walls and capture a feeling of uninhibited movement and joy.

I am weaving this in warp-faced double weave. It is certainly not the fastest patterning technique that I know. However, you might remember that I have just spent seven months picking up threads one by one to form intricate patterns on four panels. As a result, nothing feels slow any more and I just simply enjoy watching each and every one of the little figures I have created emerge. I loved designing the plants and piecing all the figures together. Weaving this lifts my spirits!

This is the final third of the band which I photographed so that you can see what the two faces look like. The plant at the very top is the one which is showering the scene with its parachuting seeds.

There was never meant to be an end product but I did find myself thinking about cutting this strip into three and sewing the pieces side by side to make something useful. But then a couple of people in a recent band-weaving Zoom gathering suggested weaving two more strips to flank this one. They could reveal more of the garden that surrounds this happy scene. I like that idea. It spares me the agony of having to do any cutting. All of you who produce hand woven cloth will know exactly what I mean. Plus it gives me a chance to do some more designing in this fun double- weave structure. It amazes me how far removed this is from the kind of pieces that I generally choose to weave.

And so I get to sprawl on the floor and do some more double-weave doodling. The chart for the hummingbird piece ended up being 130 inches long! I suppose I could photograph it in sections, erase the drawings and re-use the paper.

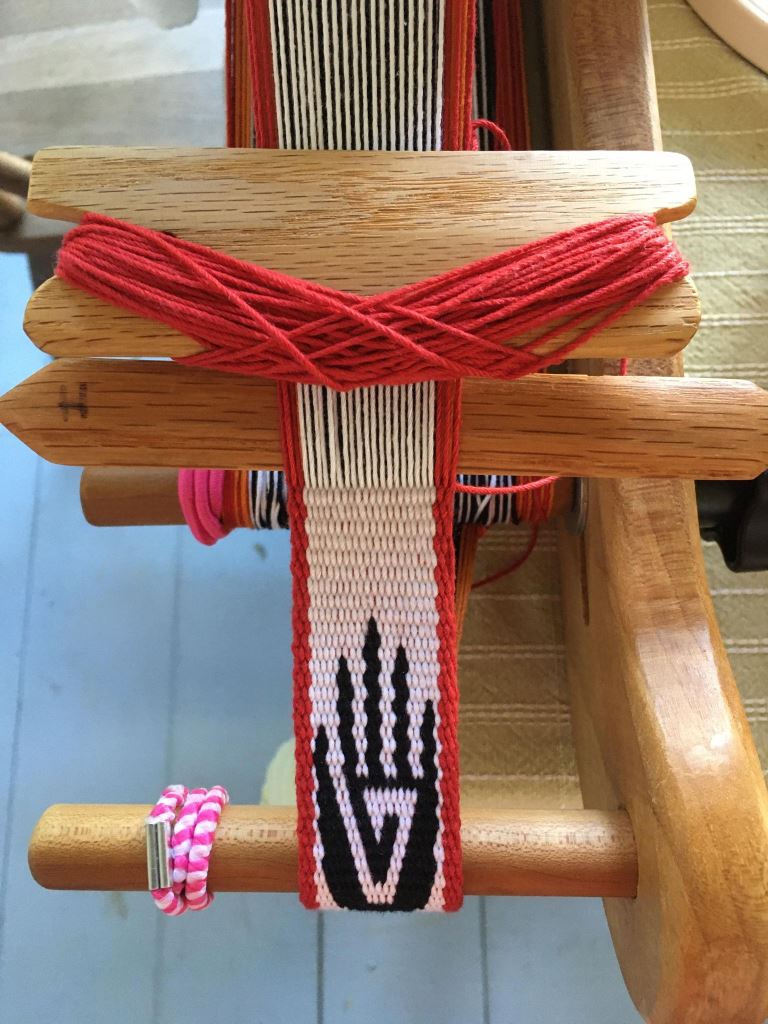
I was very pleased to see that Vicky Erker has been designing her own double-weave motifs after having learned the technique from my book Warp-faced Double Weave on Inkle Looms. My book includes a section on designing in which I use a leaf motif as the example. Some people take to designing more easily and quickly than others while some have no desire to design at all and are happy weaving from charts that have been provided in books.

This striking hand petroglyph is the first pattern that Vicki showed me…..
And then she blew me away with this pattern that she based on a Quetzal motif that is often used in textiles of Guatemala. In Guatemala it is woven using completely different patterning structures.. Isn’t that awesome!
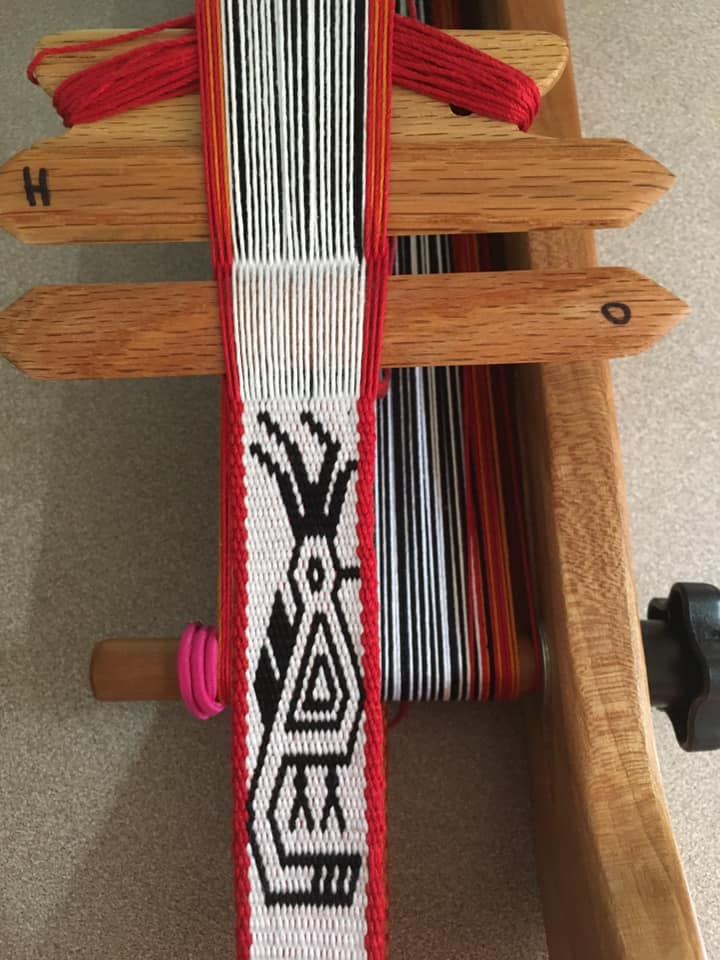
If you are wondering about the H and O lettering on Vicki’s swords. it is something I suggest doing to help you keep track of the shed in which you are working when weaving double weave. You can always mark tape and apply that to the sword if you don’t want to mark your sword. The H stands for Heddle Shed and the O for Open Shed. It is one of the tips I give weavers for working in double weave which of course will make much more sense when you are using the book. I hope you might consider trying warp-faced double weave. There are plenty of charts in the book and perhaps you will feel motivated to try creating some of your own designs.

When I was going through my old photos and finding the ones I posted earlier of the Uyuni Salt Lake and the sand dunes, one of my first thoughts on seeing those pictures, was…wow, not a single tree to which I could attach a backstrap loom! Of course, a tree would not be entirely necessary as backstrap weavers can turn themselves into completely self-contained looms using our feet or toes to hold the end of the warp.

Carolin shows here that if you happen to find yourself at the Uyuni salt lake while cycling from Alaska to Ushuaia, one’s bicycle can always provide a handy anchor point for the end of the warp….

Carolin with tiny loom tied to her bike and weaving on the salt lake.

Others have chosen to create something a little more comfortable that can be picked up, carried around and enjoyed both indoors and out. I don’t quite remember who started the frame-making thing in the Facebook group but several members have found these to be a really nice idea when they got fed up with looking for suitable places in their homes, both indoors and out, to which they can attach the ends of their warps. Here’s the one that Martina in Germany built….

Here’s Jenny’s with a clever pool-noodle hack to stop the beam from sliding….
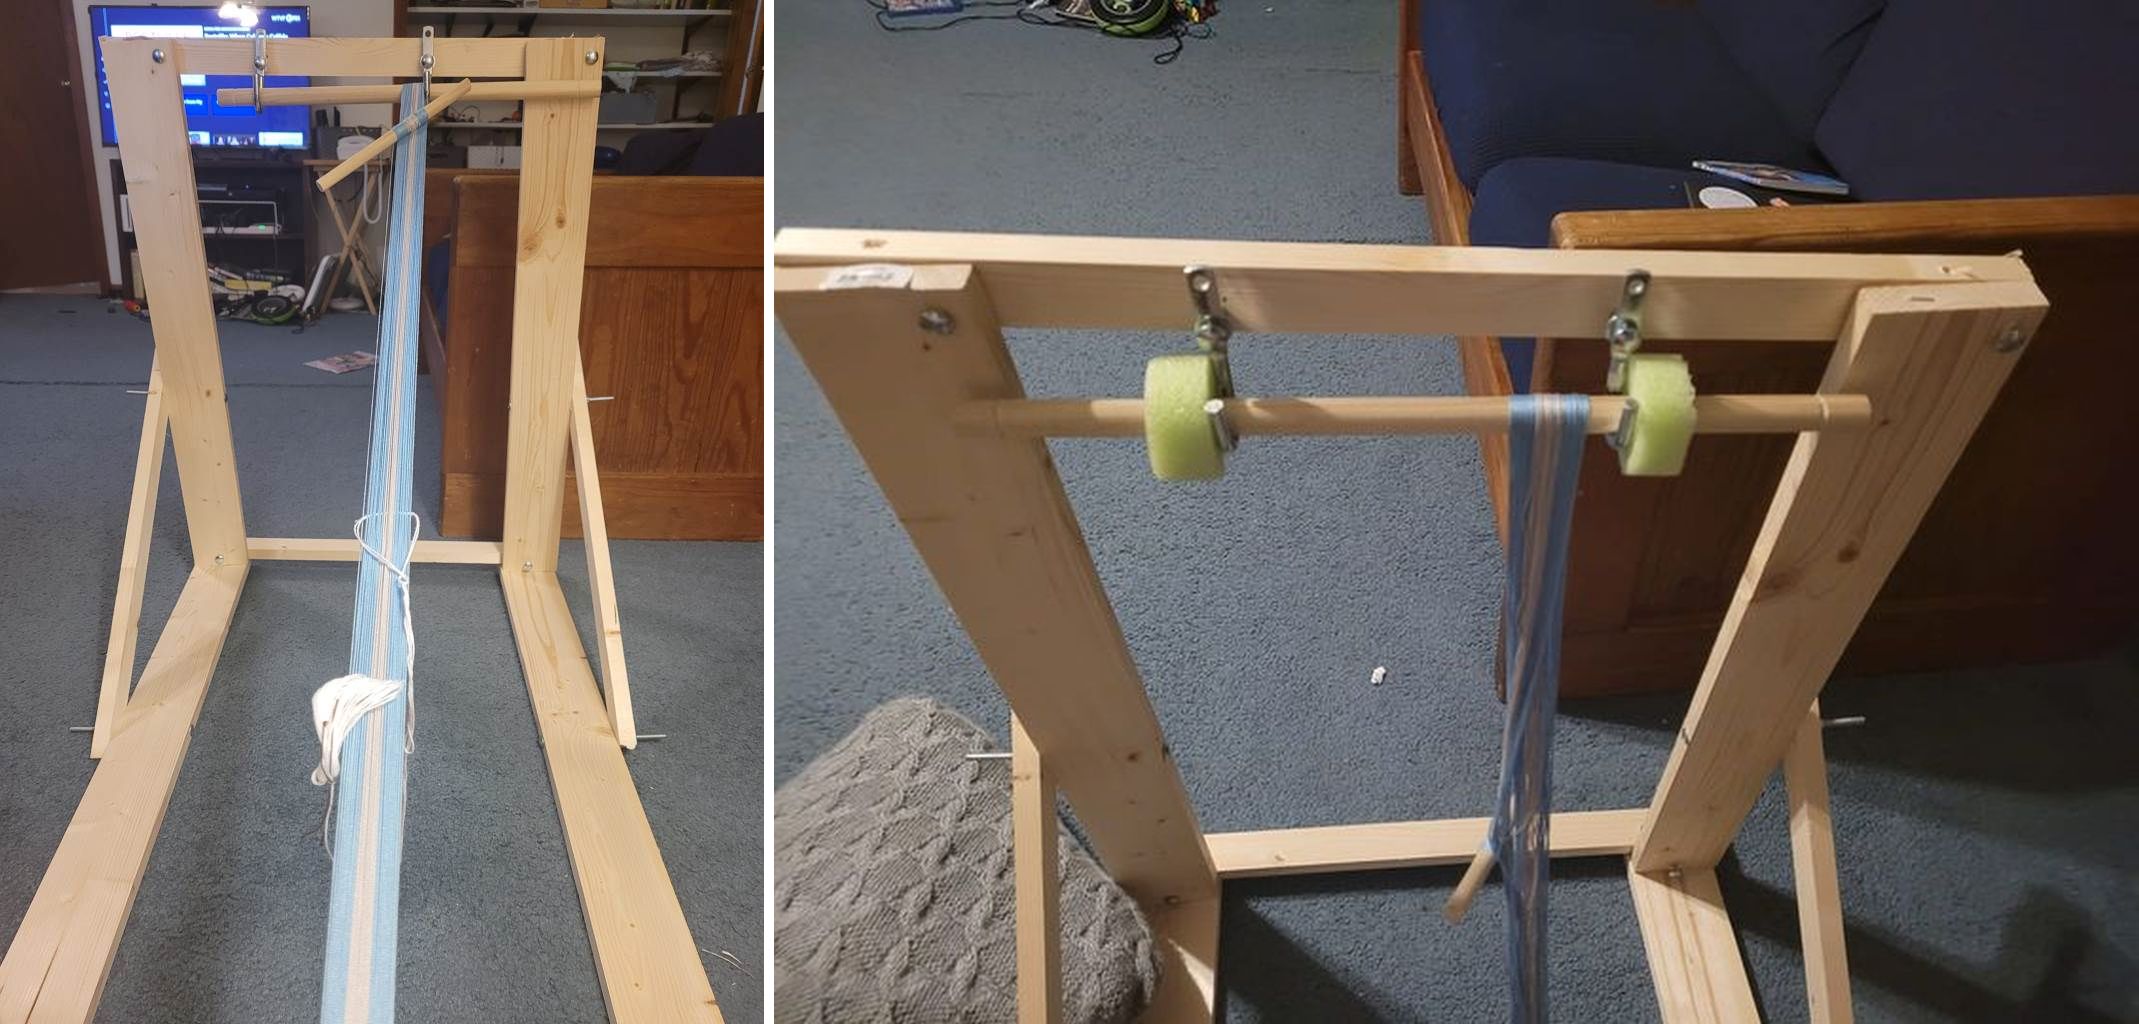
And here are models by Carlos on the left and Rosemary on the right…

Ritika Mittal allowed me to show this image of a weaver in Nagaland using a study frame to hold the end of her warp and provide a nice place for her to brace her feet.

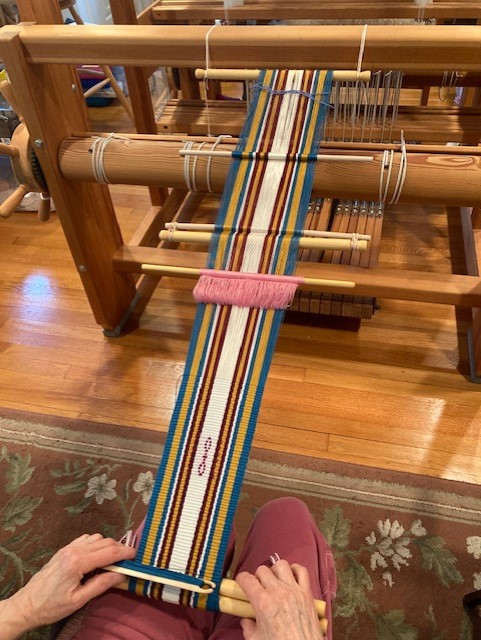
Nancy’s anchor point isn’t exactly a portable one, but I always enjoy seeing a simple backstrap warp being attached to the more complex floor loom…this is Nancy’s first ever backstrap loom project and its a beauty.
When I was having my Operating a Backstrap Loom class filmed, we had some trouble finding an anchor spot in the studio that was close enough to the set because I insisted on sitting on the floor. Eventually we managed to pile a lot of heavy stuff into a portable storage bin and use that.

While on the topic of that video class, Operating a Backstrap Loom, I’ll take this opportunity to let you know that the stock of DVDs is really low now and that I won’t be replacing them when Taproot Video runs out. The purchase of the Lifetime Streaming option caught up with, and now far outnumbers, the purchases of DVDs. So, if DVDs are your preference (they still are mine), you might want to make sure you get one while they are still around.

I showed Nancy’s first-ever weaving on a backstrap loom. I neglected to ask her if this piece is destined to become a backstrap. The dimensions are right. The backstrap itself is often a new backstrap-loom user’s first project and I am happy to see that the article I wrote about weaving your own backstrap way back in 2009 is still being used and enjoyed.

Here are a couple of backstraps that have been woven recently by Lieve on the left and Louise on the right….

My birthday is on Friday (lucky Friday the 13th) and I’ll hopefully be venturing outside the walls again for a little celebration.

Until next time.

Backstrap Weaving – Come Fly With Me

Let’s do a little armchair traveling.

I have been enjoying talking to my weaving friends in the USA via Zoom and hearing about the little freedoms that they are now experiencing in their small post-vaccination worlds. Bubbles seem to be expanding to allow some people to feel comfortable in gatherings of vaccinated friends. Here in Bolivia as in many countries around the world, some of which are deemed wealthy, poor or somewhere in-between, we are still waiting. Thankfully, the internet allows us to travel to far off places from the safety of our homes.

First stop: the Tibetan Plateau. Daniel Miller allowed me to share this photo that he took of a backstrap weaver who is part of a nomadic group of people that lives on the high Tibetan plateau. The tent has been constructed from panels of woven yak fiber that are woven on a ground loom. The piece that the lady is weaving in this picture is more likely destined to be a saddle bag. She has found the perfect rock against which to brace her feet and make the operation of the loom a little easier on her back. The rock seems to be deeply embedded in the ground. However, I have to wonder if a rock of such perfect shape and size is a favorite that she transports on the back of a yak from from place to place so that she can quickly set up and weave more comfortably. Cheese made from yak and goat milk lies on the surrounding sheets of cloth.

I like to stare at this picture and imagine the sounds that might accompany this weaver…a gust of wind passing across the plain that causes the panels of the tent to billow and flap, the gentle clacking of the sticks as she changes sheds, the rasping sound of the sword against the handspun wool, perhaps the snorting, stamping or sighing of the yaks or a burst of bleating from the goats. I have a recently-formed habit of thinking sounds into pictures.

Tent panels of woven yak yarn. Photo: Daniel Miller

I have been listening to a BBC Radio program called Ramblings in which Clare Balding walks paths in urban and rural Britain while chatting with friends and other personalities. As beautiful as all that countryside must be, there’s something very special about only being able to listen to the sounds of Clare’s ramblings and her descriptions rather than being able to see it all. There’s the squelching sound of her feet on wet turf, the patter of hooves along a bridle path, the gurgling of a stream….

On a recent episode she walked with a sound recordist who introduced me to the words “geophony”, which covers sounds that are made by wind and water, for example; “biophony” which covers the sounds of animal life; and “anthropophony”, the sounds that we humans produce. It made me think of roughly this time last year when we were in our very tight lockdown and the way I had suddenly become aware for the first time of the sounds of our fall season in the form of the rustling leaves traveling over the cobbled yard as well as the birds that sounded like party whistles. It was weird and just a little difficult to adjust to at first.

Enjoying the sounds of lockdown from my third-floor window.

Sadly, one year later, that has all been drowned out now by the typical sounds we humans make as we go about our daily lives. Some are not necessarily unpleasant. Others are disturbing on many levels.

Just this morning I became aware of a new and unusual sound…a strange grinding metallic scraping followed by a heavy thump which was repeated at least twenty times. Leaning out the window, I came to discover that it was the sound of one man struggling to transport a large green oxygen bottle down four flights of stairs and into a truck. Apparently someone in one of the downstairs apartments has been suffering with Covid. The fact that the bottle was being removed and not replaced by another is hopefully a good sign.

But, back to the backstrap weaver seated at her loom far away on the Tibetan plateau. I would like to share a link of more of Daniel Miller’s spectacular photos that accompany an article that he wrote about these nomadic peoples. He has also published several books that are available on Blurb.

From the Himalaya, a video of a backstrap weaver preparing her warp and weaving her cloth has been making the rounds in the various online forums. Here we get to enjoy the sounds and don’t need to imagine them. The clacking of the sticks is my favorite part and makes me smile every time I watch this precious video. I like hearing her whispered mutterings to herself as she works and try to imagine from my own experience with warping what she might be saying. I love listening to her counting her threads while roosters crow and chickens fuss.

How wonderful that she separates the threads into the various sheds that she needs to weave her houndstooth pattern right there on the warping stakes. I marvel at the weaver’s confidence as she removes the warp from the stakes with her shed rods floating in the warp. I would have them all tied off with additional safety strings in place and still feel nervous about losing one!

And now, let’s fly over to the Outer Islands of Micronesia. Unfortunately, this very low-resolution map image is the only one that I could find. I hope that it gives you some idea of the location of Yap which is written in red on the map.

From visityap.com

I met Emily Robison when she came to weave with me on one of my visits to the USA. She told me about her experience learning to weave with backstrap weavers when she was living In Micronesia and allowed me to share some of her pictures in a blog post I published some time ago. This is the loom that Emily built and set up for her own use in the style that she was taught by the weavers of the Outer Islands of Yap state.

This and the following three photos are from the website of weavingconnections.org

An organization called Habele found Emily via my blog post and contacted her for help on one of their projects called “Weaving Connections. Habele describes itself as…

a 501c3 nonprofit promoting educational access and accomplishment among Micronesian communities.

“Weaving Connections” an initiative of Habele established in 2020 to support Remathau women in the mainland United States. “Weaving Connections” helps in sustaining and continuing their distinctive weaving traditions that keep and maintain cultural identities and can provide means for economic support.

On their website you can find detailed instructions with plenty of step-by-step photos on how to build one of the typical looms as well as tutorials on constructing a warping board and making a sword.

An interesting feature of these looms which I find quite unusual is the use of a board as the cloth beam. Instead of a rod, a broad board is used as the near beam and it is to this piece of shaped wood that the backstrap is attached. I can see the advantage of this in that it raises the top layer of the circular warp high above the lower layer. I have often found the closeness of the cloth to the unwoven warp ends in the lower layer of a circular warp to be distracting, particularly when I am using supplementary weft.

You wll find more pictures of this broad beam in use on the loom on the website.

Emily writes:

I’m super excited to share a project I’ve been working on to support the preservation of indigenous Outer Island Yapese backstrap weaving. One of our major goals is to help young Micronesian women living in the US get access to the tools they need to learn their craft while going to school and such, but this website is a great resource for any backstrap weaver interested in Pacific Island technique, including plans for building tools.

Other articles on the website talk about the lavalava which is the typical garment that is made from the cloth woven on the backstrap loom. You can also read about what weaving means to the women who live on these Outer Islands.

When thinking about sounds, I like to add those of the ocean, tropical birdlife and breezes blowing through tropical vegetation as I imagine these women seated at their backstrap looms.

In my next post, I’ll take you to visit the Boruca people of Costa Rica via the pictures that Constance Lee generously shared with me. Constance traveled to Costa Rica from her home in the USA to stay with a family in a Boruca village in the Talamanca Mountains. She was shown the process of preparing, spinning and dyeing cotton with natural plant dyes so that it could be woven into cloth on a backstrap loom. I had no idea that backstrap loom weaving was still practiced in Costa Rica and was so grateful that Constance organized an invitation for me to attend a program that she gave on her experience via Zoom. Here’s a taster…

As for my own backstrap loom, it currently sits as a pile of sticks on my bedroom floor while I plan Panel 4 in the Within These Walls series. Yes, I have decided that a fourth panel is a must and I would like this one to represent what I imagine my post-pandemic world will look like. I am skipping the post-vaccination stage as I have absolutely no idea what that world might look like. Does anyone?

The panel that I just finished is the transition between the chaos of Panel 1 and the relative harmony of my new normal within the walls of Panel 3.

The hummingbirds will unravel the lines of chaos from the first panel and help build a space of safety and harmony.

I won’t explain this in detail. Everyone has had their own pandemic experience and I have actually been enjoying hearing how others are interpreting this series. As I have said before, it is a combination of literal story-telling and symbolism. You can make of it what you will. 🙂 Yes, I am still struggling to get decent photos of it.

So, I see a definite need to weave a fourth panel so that I can end the story on a note of hope as well as create a match for Panel 1 in terms of layout.

I would like to include several weaving figures in the fourth panel and have been working on designing another backstrap weaver in the Andean Pebble Weave structure. This one is viewed from the back rather than in profile. That way I can place several weavers sitting around a tree weaving together.

This is my fourth attempt on this sample band to get this weaver right and I am pretty pleased with. It does include some floats that are longer than ones that I would normally tolerate in this structure but I think that I can get away with them in 60/2 silk. I just need to add a heddle rod and shed rod to the warp. That part is easy. The stick that is currently in the warp is a sword sitting within a shed. The hard part was creating a weaver in the same scale as the other weaver figure that I have been using in the other panels so that they can happily sit side by side.

So, launching into another warp of doubled 140/2 silk that needs to be tied and dyed before I can even begin weaving gives me a lot more time to spin yarn for the projects that will follow this Within These Walls series. There won’t be a fifth panel! I have been devoting all my Zoom time to spinning and that’s coming along nicely.

As I type these final lines, the sounds I hear are those of the birds raucously finishing their day with the setting of the sun. And then one of them gives a signal, or so it seems, and they all stop at once. There’s a moment of hush.

Until next time…..

Backstrap Weaving – Mayhem

I am kind of holding my breath here on this Carnival weekend to see what shape the Santa Cruz Carnival 2021 celebrations take in this time of corona virus mayhem.

Carnival is a big deal here…not as big a deal as the one in Rio de Janeiro, of course, but big all the same… with three-and-a half days of non-stop drinking, dancing, very loud music, and the throwing of water balloons and paint, all of which kicks off on the Saturday night.

The city has been placed into full quarantine lock down for the next four days so that people won’t gather in the center and cause a possible super-spreader event. I’m sure that all the downtown businesses have been pleased not to have to go through the usual task of boarding up their shop fronts and protecting their walls with plastic. Residents who park their cars downtown haven’t had to cover them in mud as a way of protecting them from the paint and junk that gets thrown around. The clean-up crews won’t have the task of hosing down streets (imagine all those partying people in streets with no public toilets!) and scrubbing paint off buildings.

  I have always passed a fairly peaceful time at home as all the mayhem generally happens several blocks away. This time, however, might be different and I am bracing myself for three days trapped inside with my idea of hell right outside my door.

Carnival Santa Cruz style. Photo by Steven Sheehy stevensheehy.com

The problem is that the full lock down was only called a couple of days ago. I am guessing that leaves lots of people with ruined party plans…alcohol will already have been purchased along with meat for the barbecue. Yesterday, I was nervously watching a couple of men who live in my condo unloading a vehicle with boxes and boxes of stuff in preparation for their celebrations right here in my Fortress of Solitude. When the truck shows up with the music system and gigantic speakers, I’ll know that I am in real trouble! Normally they would be having these parties at their Fraternity headquarters which is usually a property in a semi-rural area far, far away from me!

I guess, I’ll just shut all the windows, turn on the fan and continue weaving my own version of mayhem at my backstrap loom. If you have read my last couple of blog posts, you will know what I mean by that. I am still working on my three-part wall hanging series. The second panel has a design that is meant to represent the feeling of mayhem and chaos that I experienced at the very start of the pandemic.

I created a drawing that shows more or less what I am aiming for, at least color-wise, in this three part series…

Each piece is only about 7″ wide and 15″ long. I have finished Number Three. Number One, which is the one on which I am currently working, is the exact opposite of Number Three color-wise. The center one shows a transition from the first to the third. I have been creating the shapes in ikat by wrapping bundles of red warp threads in plastic tape before dyeing the warp black. The wrapped sections resist the dye and remain red. That’s basically the way ikat works. I am, however, putting a slightly different spin on it which I believe to be my very own.

Here’s the completed central pattern of Number Three in the series…

Here I am working my way through the chaos section in Number One in the series…

It’s still on the loom. There’s a lot more chaos to go!  I can at least show you what the two pieces look like side by side at the moment. My attempts to photograph these have been very frustrating!

And yes, I will make an attempt to explain what this all means, if anyone is interested, when I have finished all three panels. The series is called Within These Walls. I am using 60/2 silk and each piece has 1200 ends. I mentioned in my last post that I had run out of the amount of red 60/2 silk that I would need for the final piece, Number Two. I am now thinking that I will try to substitute two strands of 140/2 silk, in a similar red, and see how that goes as warp. Wish me luck!

I might take a small break from this when I finish this piece because there’s a small double weave project that has been tempting me all the while. Well…maybe  not a complete break…I don’t want to lose momentum! I might just throw a short narrow warp onto a backstrap loom and try a sample of the double weave pattern that has been teasing me to give me a break when I am wrapping Number Two with ikat tape. 

So, that’s what has been keeping me grounded…that and all the wonderful folk with whom I get to hang out in Zoom gatherings. And, of course, there’s interaction in the various online weaving groups in which I get to meet band weavers and backstrap weavers from around the world.

Roland Polk sent me these images of his latest project on his backstrap loom…

This is a silk warp with his own handspun merino (20 wpi) weft…imagine! He was able to get hold of a bamboo reed to help him produce this beautiful balanced cloth.

I love this picture of his warping set-up on a door! Resourceful!

Emilie Landré wove a length of band which she was able to sew into a neck tie. I love how the motif that she chose so perfectly fits the shape of the point of the tie.

She has also been dabbling in Andean Pebble Weave and wove this lovely tape using a chart from my very first book. I am so grateful that Sandrine translated that first book to French for me.

Mary Spanos wove a strap for her watch on her backstrap loom using an Andean Pebble Weave pattern…..so elegant!

And, this is Lizzie Ruffell’s guitar strap on which she used patterns which are charted in one of my pattern books….Carol Berry wove this beautiful band using patterns that are charted in my Andean Pebble Weave on Inkle Looms book….

Kathy Olsen is weaving a pretty band of fish motifs in the Andean Pebble Weave structure that are charted in my Complementary-warp Pattern Book. I love those four fish patterns and think that they are fun to weave along with the other River and Ocean-themed motifs in that set. It’s always interesting to see borders that are not solid-color plain weave.

All my books, as well as my video class, can be found at Taproot Video. There are detailed descriptions of each item at Taproot Video with an opportunity to “look inside” at a few pages of each but, if you ever have any doubts about where to start or which book to buy next, please feel free to ask me via a comment on this blog…or find me under my full name, Laverne Waddington, on Facebook or Instagram. I welcome the opportunity to correspond with you. There’s also a short Preview Video at Taproot Video for my backstrap loom class Operating a Backstrap Loom.

And finally, I would like to tell you about the series of awesome instructional videos that my friend Wendy Garrity has made and is generously offering for free on Youtube. Wendy studied the traditional kushutara technique of Bhutan while living there. In this technique, patterns are created on warp-faced cloth via the use of supplemental weft threads. Wendy has created and shared a series of videos called Kushutara Basics. 

I know that many of my backstrap weaving friends are taking advantage of this wonderful opportunity to learn this beautiful and versatile technique.

The last time I saw Wendy was in August 2019 when we enjoyed a beachside dinner while watching the sun set over the Indian ocean in her hometown of Perth, Western Australia. She was helping me celebrate my birthday that evening in the middle of one of my Australian teaching tours.

So, for now, I will leave you hoping that my Carnival 2021 experience will be an unmemorable one! 

Happy weaving and stay safe.


Backstrap Weaving – Within These Walls Part 2

There really wasn’t any other name that I could give to this post except “Within These Walls Part 2” because that is pretty much all that I have been working on in the relatively long period of time that has passed since my last post. It’s partly about ikat. That alone is slow stuff. And, then there’s something even slower going on in this project…Andean Pebble Weave pick-up over 1200 ends of 60/2 silk.

Here’s the first finished piece that I showed you in my last post. It may actually end up being the third in the sequence when all is done. I haven’t quite straightened out my idea for Part 3 and so, who knows in which order the three pieces will end up in the final sequence.

Part 2 is the opposite of this piece color-wise. All the red areas will be black and vice versa. You can see the warp in the picture below after it had been dyed and partially unwrapped. I am using two sets of heddles for the two pebble sheds in the Andean Pebble Weave structure. Yep, that’s a lot of heddles but I love making them!

But really, apart from the time spent wrapping the warp threads with tape and dyeing, the thing on which I have probably spent the most time so far is planning what I am calling the “chaos section”. Coming up with a chart for that had me covering my floor with eraser dust. I wanted something that looked like an impenetrable maze. I drew maze-like patterns on my charting paper but the problem was that they looked like patterns. They made sense. I needed something that looked chaotic and unpredictable and I wanted the dominant color to be red. Once I had decided that what I wanted to see was pretty much “a mess”, it was much easier to get it down on paper. Just doodle a mess. Draw lines every which way. It was fun.

The first section was all about birds. And then came the chaos. I love the sheen of the silk that the camera’s flash picked up in this picture. The silk that I am using generally doesn’t show any signs of sheen until the finished piece has been washed and pressed. It can be disappointingly dull on the loom.

Weaving the chaos section wasn’t so much fun until I came up with a way to color code sections and match those to color markings on the charting paper. Then I also discovered that when you are trying to create chaos, nothing really counts as a mistake unless, of course, it is structural.

So, while I do manage to stick very well to what I have drawn on paper, an occasional line that wanders off to the right when the charts says it should be going left is no big deal at all…thankfully!

There will be some hummingbirds hidden within the chaos. I like how some of the chaos shapes can start to look like recognizable forms if you stare at them long enough…one shape might look like a llama, another like a rabbit, another like a demon, another like a flamingo. If you blink, you lose the spot on which you had been focusing and chances are you won’t find the rabbit again! It’s sort of like when you see figures in fast-moving clouds. 

And so, I am creeping along with this. It’s slow but I would say that it’s painlessly so! There’ll be an addition to the story when I get to the center. Once I get to the main black shape that the ikat tape had enclosed, I won’t be picking up across 1200 ends any more and the number of threads of pick-up pattern will gradually reduce. I am sure to feel as if I am zooming along at that point.

You can probably spot the hummingbirds in amongst the chaos in this shot. They are on a journey, the end of which will be revealed when I get to the center of this piece.

I am still not able to capture the richness of the red in these pieces. Once Part 2 is finished, I’ll put the two finished pieces together and get to work trying to figure out how to photograph them better.

I hope I’ll be able to show where those hummingbirds are heading in my next post.

Zoom meetings are still keeping me good company. I so love being able to get together with weaving friends on a regular basis and my Andean Pebble Weave on Inkle Looms workshops have been going really well with students turning out some really pretty bands, some of which have their own original patterns. By the way, the new book that I am currently writing is another project that has been keeping me busy behind the scenes.

Take care everyone and please continue to stay safe.

Backstrap Weaving – At the Bottom of the Tool Box

Last year I decided that something had to be done about my collection of backstrap weaving tools. This picture was taken back in 2016 and I can assure you that between then and 2019, the collection had grown with the bins being replaced by larger ones and the addition of yet another. My smaller tools were getting lost at the bottom, things I hadn’t used for a while were getting dusty and one of the bins was top heavy and inclined to topple over. It was time to make a change.

I bought a four-drawer chest. I won’t show it to you because it was kind of cheap and nasty. It did the trick. The top drawer holds all the beams…the round ones, the square ones, the split beams and all the shed rods and heddle rods in their various lengths and girths. Some of the beams have carved ends. Some don’t, and just have rubber bands at their ends to hold the backstrap in position. The beams that support the two ends of the warp are pretty much all around the same length. It’s the sticks that go between that vary greatly depending on the width of the piece I am weaving.

The second drawer that hold the swords and shuttles is my favorite and it’s in that drawer that I can often get lost in nostalgia. One of my favorite parts of the set-up process for a new project is selecting just the right swords for the job. Sometimes, I’ll need two or three. Sometimes they need to be hefty, other times slim. Sometimes I like to have them in two distinctly different colors of wood. It’s easier to select and pick up dark threads when they are sitting on top of a light sword and vice versa. I love projects that require multiple swords as I enjoy the clack-clack sound that they make as they bump against each other in the warp or when I remove them and place them in a pile by my side.

The red, black and white project at left, which I wove some years ago, was woven in a fairly dense structure in 8/2 cotton which meant that I got to use one of my heftier swords.

The teal silk project was the first I had woven in a width that was too great for my standard beams. I got to use an extra long rod that I happened to have for the near beam (it had been a particularly long shed rod in a Guatemalan loom that I had been given) and cut some dowel for the other end.

That long beam came in handy again when I wove these two wool panels that were sewn together to make a lap blanket. The structure was less dense which meant that I chose to use lighter swords. I needed several because I was working with multiple sets of heddles.

Here are some swords in vastly different sizes for different kinds of projects…Above, you can see two swords that are the biggest and smallest in a collection of six that make up the standard set used by my weaving teachers in Salasaca, Ecuador. Below, you can see one of the big boys alongside the very first band-weaving sword that I was given to me to use by one of my teachers in Peru. That sword has become bent out of shape with use over the twenty-four years that I have owned it.

While selecting tools for my current project, I found myself sitting on the floor surrounded by swords and shuttles enjoying trips down many memory lanes as I recalled the places I had been when I had acquired a certain piece, the people I had been with, or the person who had made the tool or given it to me. If there is anything good to be said about the times in which we are currently living, it is that I allow myself the time to do things like this.

I laid out just some of the pieces for a photograph before they got returned to the pile in the drawer.

There are swords that I have bought from, or have been given by, my weaving teachers. Others were given to me by my weaving students. There’s a lovely collection of five band-weaving swords on the left that came to me via two of my Australian students and which are made from different woods that are native to Australia. The tool with its label still attached is some kind of spatula made from sassafras wood from Tasmania. One of these days I will bevel the edge and use it as a sword.

The sword with the pretty carved pattern was made by Allen Berry and given to me by my students. You will see a shawl pin (another gift) and a hair stick that are being repurposed as pick-up sticks along with others in wood and bone. Some of these came from trades that I made with my indigenous teachers in the highlands and lowlands. A lovely fine sword in olive wood sits above the hefty one and was made and given to me by a student. There’s one very fine sword in that lot that came with a Guatemalan loom I was given. I treasure that one when I am weaving a piece with four selvedges.

I love my ice cream-stick shuttles and there’s a quirky little shuttle-like thing near the spatula which is actually supposed to hold fishing line. I found it in an antique store while on a road trip in Australia with a weaving friend.

This is just a basic outline of the “wheres” and the “whos” behind those pieces.. Of course, all the pieces hold stories and fond memories that go much deeper than these brief descriptions.

This piece sitting on top of one of my ikat experiments from years back, is the one that started the whole nostalgia trip! It was well and truly lost at the bottom of the drawer. This is my oldest home-made tool. It is ugly, grubby and unimpressive, right? It started its life at three times this length as my attempt to make a shuttle for the Navajo-style tapestry pieces that I was weaving back in 1995. Once I discovered backstrap weaving, I knew that I was unlikely to continue making tapestries. The shuttle got cut down and roughly beveled and started its new life as a sword and beater. I love it. You can see the darkened ends where my hands have grasped it to beat the weft into place. I wish it were long enough to use in my latest project. It’s been hidden away for far too long.

The third drawer in the chest holds many of my weaving samples and some of the finished pieces. The last one is full of all those odd bits and pieces….cable ties, turn buckles, cord, backstraps, reeds, rigid heddles, band clamps, umbrella ribs, bicycle spokes, rubber bands, dpns….you get the idea.  I can reach over and open it while still seated at my backstrap loom and dig out just the right little piece of equipment that I need.

As for progress on my latest project, I washed the finnweave sample that I showed you last week and was happy with the way it looked and felt. I figured that the sett I had used had been good. I have two pre-colombian balanced-double-weave textile fragments and it’s amazing how these two pieces that both have exactly the same pattern are so different in appearance. It’s almost like one got washed and the other never did…

Cloth that is woven using the finnweave structure has a very distinctive look on the back. A comparison of the back of the sample that I wove a few years ago as a replica of these fragments and the backs of these very fragments confirmed that I was using the same balanced-double-weave structure that the weavers who produced this cloth had been using in pre-colombian times.

Here’s my washed and pressed sample alongside the new finnweave warp and my selection of tools. I later added a light-colored sword to that set when I realized that picking-up black threads on a dark background wasn’t going to work for me.

Backstrap loom warps are often left just lying on the ground while the weaver is off doing something else. In their limp state they can often look like a freaky mess…

Place the backstrap around the hips, place tension on the threads and everything immediately looks friendlier!

And friendlier still once the heddles are in place…

I often read comments in online groups from people who wonder what happens to the warp on a backstrap loom if you have to get up and do something. They think that surely all the sticks must fall out once you relax tension. No, they don’t. The kinds of heddles that I make grip the sticks to which they are attached. I can tilt and shake that warp about knowing that those sticks are going nowhere. Nor is my shed rod which is tied to a second cross stick. My far beam is lashed to the bottom of my bed and the near end of the warp is safely lashed to its beam. It might look like an ugly mess on the floor but it’s all under control!

Probably the worst that can happen is tripping on the weft as you walk away. That’s like pulling on a drawstring which totally rumples up the fabric.

For that reason. I am now in the habit of parking my shuttles, in this case two, on top of the fabric at the base of the warp before I remove my backstrap and place the near beam gently down on the floor. You can see the nice light-colored sword that is sitting under my black threads. And, there nestled between the two swords is the sweetest little tool that I am using to help pick-up the threads. My student, Claire, made that and gave it to me when I was visiting in Tasmania. It was cut from a stick from an apple tree. You might know that Tasmania is often referred to as the “Apple Isle”. 

#########################################################

You will notice that I have managed to get through this post so far without any reference to my books! Until now!! Those who have been following my blog over the years will realize that my travel-to-teach lifestyle can no longer be. Fortunately, I can continue teaching and showing you things through my blog posts. I try to illustrate with as many pictures as possible. I know that not everyone wants to read all the text and that just being able to scroll through some eye-candy is also nice.

And, there’s also teaching via my books which gives me an income. So, I will leave you here with a little bit about my latest books and hope that you may feel inspired to make a purchase. And to all those who already have….THANK YOU!


One of the features of my most recent publications is the inclusion of supplemental instructional video clips.

I know that some people like to have movements and steps frozen in images. Others like to have detailed written instructions that help them to visualize the process. And others like to hear the instructions while watching the movements on video. Some people tell me that they hear my voice in their heads as they weave.

I like to include all three options so that I can satisfy a variety of learning styles. Apart from the instructional video clips, I include some “just weaving” clips so that you can also watch the movements in silence without interruption.

All my books are available at Taproot Video as PDFs. The titles in English are also available as spiral-bound books.