Backstrap Weaving – An Interesting Beginning

First of all, I will say that I am not superstitious. I jokingly wrote on this blog some time ago that getting bitten by a dog on a recent outing was a sign that perhaps I was getting too cocky in the range and frequency of my outings. And then I opened my big mouth in a Facebook post on December 29 with this: “I feel less locked-in now and more able to manage this situation we all find ourselves in.”

The universe responded: “Lol, that’s what you think.”

I strolled a block and a half to the bakery on Dec 31 and….bam! Five days later, Covid. Yes, sometimes you just get unlucky. I am well now, feeling back to normal and grateful that I had managed to get an AZ booster before this happened. First task now…find better masks. The chief medical officer in Australia is now coming straight out and saying that in the face of the more contagious Omicron, cloth masks (I am guessing he is talking about those home-made ones that we were all using) should not be used. I had been lining my two-layer cloth job with two disposable masks…still no good.

So, yes, the beginning of 2022 was “interesting”.

I had what I am calling Covid-head for a while which I would describe as feeling like particularly bad jet-lag. I dared not touch my weaving after losing the plot and destroying one of my PowerPoint presentations. This is what I had been working on before I got ill….

3-color reversible Andean Pebble Weave

This is 8/2 tencel and my attempt to get once more accustomed to the steps that I use to produce this 3-color reversible structure. My plan was to use the structure with my hand spun and I didn’t want to risk stressing my yarn with a whole lot of fussing about and unweaving while I got back into the swing of this technique. I wouldn’t call the way I do this efficient and I am waiting for that magical “aha” moment to come which will allow me to eliminate a step or two… or three. For now, I just plod along with it because I love the results.

Wrist cuff in 3-color reversible Andean Pebble Weave

During the pandemic I have been pulling out every bit of wool I can find in my closet and spinning it on my drop spindle during the various Zoom gatherings I have been attending. It has been slow going because I have only allowed myself to spin during these few gatherings. Goodness knows what I will do now that I have cleared out my closet and there is no more wool left to spin. Actually, there is a bunch of cotton to spin in there as well as alpaca…..

Part-way through the spinning project, I paused to try some of my yarn in two small wrist-cuff projects. I wanted to see if it would be able to stand up to the extra handling that it would experience in the 3-color method. They were just very short warps but I did feel confident after that test that my yarn would perform well even in much longer warps. I decided then that I would try to spin finer hoping that I could also produce finer yarn that would stand up well. That remains to be seen.

Applying an eye-pattern tubular band to a second 3-color pebble weave cuff in my hand spun.

I’ve been enjoying the tencel project. It’s just a mish-mash of various shapes and color combinations. And, yes, there are hummingbirds.

It has allowed me to play with swapping the outline and background colors and change the pebble spot colors at will. After sampling, I decided that a red outline with a green filler looks good against a yellow background while the same thing does not look good against a green background. The funny thing is that I had to walk away from this every now and then because the colors would suddenly start to get on my nerves! This never happens when I work with only two colors. So, I would go away and do something else and then return, look at the piece, and fall in love with it all over again.

Yesterday I knew for sure that I was fully recovered from Covid because instead of giving in to the post-lunch urge to nap, I was able to easily push it aside and go wind a warp.

These are the four colors I chose from my little stash of hand spun wool. Three will be part of the 3-color pebble and the one in the foreground will be the narrow border. I wanted to come up with a project that would allow both faces of the piece to be seen after going to all the trouble of using this reversible 3-color technique. I decided that a strap for a bag would be perfect….not very wide, but long enough to be able to play with patterns, and both sides would be seen. So, I am working completely backwards by first weaving a strap and then planning a bag to go with it. It’s not like I need a bag…I just like weaving and if I need an excuse and the piece simply MUST be something, then a bag strap it will be.

I know what you are thinking…that’s one ridiculously wide strap…but this will narrow considerably once I start weaving. My hand spun is finer than the 8/2 tencel and this warp has the same number of ends as that tencel sample. One of my concerns is that the blue is a tad thicker and hairier than the other two colors and may swallow them up. There’s only one way to find out, though.

I just really like this shot. It almost looks like ikat. This was right after I had made the heddles. I was testing my heddle-making by clearing the sheds. The three colors played together briefly as I raised one color layer above the others. It made for a pretty picture.

And so, I start 2022 with a weaving project that I find challenging and interesting, a collection of Covid anti-bodies (which of course won’t last forever), and the need to find something else to do during those Zoom gatherings. I find it impossible to just sit there. Maybe I will get back into learning about cotton spinning. I was playing around with cotton spinning a few years ago and even wove with some of the results, which you can see below, when I was studying the sheer cotton cloth with supplementary-weft inlay that is woven in some areas in Guatemala and Mexico. It’s the stuff of a beginner spinner but I was pretty pleased with it at the time

By Rodrick Owen

So, I just bought Joan Ruane’s video class on Cotton Spinning on the Takli from Taproot Video because I really need some guidance.

While on the subject of Taproot Video offerings, I should also let you know that Rodrick Owen’s beautiful book on braids that was published in 1995 and which is now out of print, has just become available for purchase as a PDF.

You can see that I am in some very fine company on the Taproot Video website! I hope that in this new year you might consider buying one of my books at Taproot Video if perhaps you have been thinking about it. We niche-craft authors need all the help we can get. Tell a friend, please! See you next time.

Backstrap Weaving – The Story So Far

More books! Well, just one more for now. I still have a book that I had originally bought for my current book-cover obsession but which I had decided wasn’t quite the right size. I might just cover that one too. I already have a name in mind for it…Daily Mischief. I would like to do this one in Andean Pebble Weave. It’s not an ideal structure for lettering but my friend Ruth in Australia came up with some quirky fun lettering in it when she wove a name tag for herself. A quirky, fun style would suit the Daily Mischief title, I think.

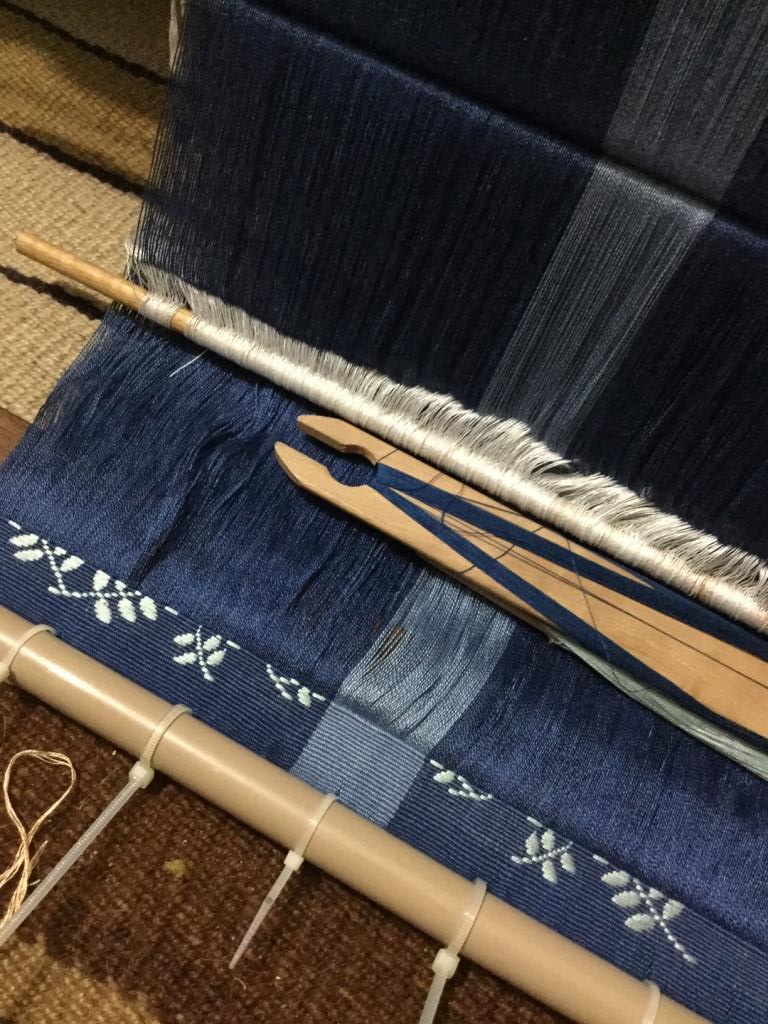
My latest book cover is once again in 30/2 silk and, as I only have natural white, I had to measure out my needs for this project and dye it. I combined two blues that I have with a color called Quarry and I am delighted to say that this is one of those times when I can declare that I got exactly what I had wanted. I am wondering if maybe I am getting better at this!

Although I loved the color, this scraggily heap was rather dull and uninspiring. I had to keep reminding myself that this is soft, sleek silk. When wound back into balls for warping, it started showing once again its silky loveliness. It’s funny how when it is woven on the loom it somehow takes on a very matte cotton-like quality only to recover its sheen once again after having been wet-finished.

The sheen returns.

The color palette…

All the smaller balls are the 60/2 silk which might get used as supplementary weft to create the patterns. The skein on the left is more 30/2 silk for warp that I also dyed.

The warps for the last three book covers that I have woven in 30/2 silk have all had 904 ends and the warp is just short of 13 inches wide. I use Schacht warping stakes that are five inches inches long. I take a lot of care with tension when I am winding my warps for the backstrap loom. These ends aren’t going to cut and threaded through a rigid heddle or reed and then tied and re-tensioned. This means that I need to get it right as I am winding at the stakes. I always say that a beginner can be handed a well-wound and well-tensioned warp and then proceed to weave something decent. But even a very experienced weaver will have a very difficult time dealing with a poorly prepared warp. There are ways of dealing with a certain kinds of tension issues but it doesn’t make for fun weaving.

I love seeing a new wide, evenly-tensioned warp stretched out before me.

For that reason, I don’t like piling more then two inches worth of thread on my stakes in case they lean, even ever so slightly, and will always wind my wide warps in sections. The following pictures are some that I quickly snapped as I worked. First I chose and then laid out my sticks on the floor…cloth beam, warp beam and cross sticks.

Then I decided how many ends I would have in each section. In this case I had 80 in each in the dark blue areas. I wrote that out so that I could check it off as I went. I wound the first section on my stakes, replaced the stakes with safety strings, saved the cross and transfered it all to the sticks on the floor.

I leave the safety strings in place. Later when I am weaving, I only remove the ones at the cloth beam. The ones near the warp beam will make good counting strings when I need to lay in the first row of each of the pattern sections.

Adding more and more sections. If I lose track because I neglected to check off the numbers on my paper, I can always count the safety strings.

This is a very basic figure-eight warp in a single plane. Backstrap loom weavers in some regions add the heddles and often a coil rod as they wind the warp. It’s not my habit to do so even though I was taught this way on a circular warp by my Montagnard (Vietnamese hilltribe) teacher. (You can read more about that here).

Next comes the lashing. I have my own rather unconventional way of doing this. Most backstrap loom weavers will tightly lash a header cord to the cloth and warp beams all the way across the width of the warp. I prefer using a metal rod instead of a header cord.

Using a metal rod in place of a header cord and lashing it to the beam. On this narrow warp from many years ago I only needed two lashing points at the edges of the warp. I prefer using cable ties now.

I have collected rods in a multitude of girths and lengths over the years. My lashing is done with cable ties, usually five to seven depending on the width of the piece. I count the threads so that one is placed exactly in the center and further divide the warp into other sections with two or more…again counting so that the cable ties are placed in exactly the right spots. Two more cable ties are placed at the two edges. Being precise in the placement of the cable ties really helps me when it comes to measuring and setting the width before the first shot of weft is thrown. I can calculate how wide the warp should be in each section that the cable ties divide and distribute the warp threads within those sections as evenly as possible.

Starting on the 452 string heddles.

Next, I set up a second cross so that I can use what I call the “twisty sticks”. These are two sticks that I grasp and twist to help me open the heddle shed. I explain how I set up and use these in my video class Operating a Backstrap Loom which you can stream or buy as a dvd at Taproot Video. You can also see me using them in one of the video clips in this blog post.

You can see the two rods that are bound with rubber bands on my warp in this picture. Those are my “twist sticks”. In the various regions around the world in which the backstrap loom is used, weavers use a variety of techniques to help them raise the heddled threads smoothly and create a clear shed. Using the twisty sticks just happens to be my current favorite way of doing this.

You can also see me using the twisty sticks on a silk warp in this video:

And finally, because I will be weaving this piece in warp-faced plain weave and want to avoid the corrugated look that plain-weave cloth can sometimes develop especially when the warp material is one which has little to no stretch, I insert a coil rod. The coil rod locks the two layers of warp threads together so that they can’t see-saw back and forth as I operate the loom. Many weavers achieve the same thing by weaving an inch or so first at the far end of the loom before turning the loom around and starting at the cloth beam. That also locks the two layers of threads together. In fact, that was the way I was taught to do it by my several of my indigenous teachers but I have since become a big fan of the coil rod. For me, it has other benefits in addition to the one I mention here.

Dar Ku from Myanmar allowed me to spend some time with her as she wove at her backstrap loom You can see the coil rod in her warp, the rod that is furthest to the left.

After measuring and pushing threads around and measuring and repeating, I finally feel that the sett is just right and that I can start weaving. Of course, there was time spent drawing patterns onto charting paper. That was something that I was doing while waiting for the dyed thread to dry. I had decided that this would be a Traveler’s Diary (yes, I settled on the single ‘l’ spelling) and charted out lines of verse that I thought would suit the theme as well as picked the best hummingbird figure to go with them.

The first lines of writing appear.

I really like the way the light blue supplementary weft looks on the light blue spine color and am thinking about perhaps weaving an entire piece that way in which there is only a subtle difference in color between the warp and patterning weft…even more subtle than what you see here. It will depend on how clever I can be at the dye pot. My dyeing is still all a bit “mess or success” at the moment.

The second line of verse and the hummingbird leaving us for its long journey of migration. I have been seeing articles recently on hummingbirds in some parts of the U.S that have actually started to change their habits and winter over.

Bye-bye hummingbirds. You can see the two swords I use to prop open sheds and beat. My current favorite pick-up stick from Guatemala is also there. The little tool with the handle is from Ecuador and also used to beat. I use it when I feel that I need a little extra “oomph” and use it to press the weft into place while inching my way across the warp. I use it in much the same way as highland weavers here use the llama bone tool. My llama bone tools are too harsh for this silk.

It’s still on the loom as I write. It will be cut off, washed and placed on the book cover. I will most likely need to weave narrow strips as I have with the other covers to compensate for lost width during the wet-finishing process. I don’t feel that I can precisely account for shrinkage in the number of warp-ends to ensure a perfect fit. Adding the narrow strips to the other books has actually provided quite a lovely finishing touch. You can see three that were added to the Weaver’s Journal. A fourth was also added to the edge of the back cover.

So that’s the story of the books so far…to be continued. I actually remembered to take a picture of myself at the loom as I approached the end of this one so that I can wish you all a very happy, safe and peaceful transition into the new year.

Backstrap Weaving – I Made a Thing

First of all, I have to tell you just how wonderful it was to hear from so many people behind the scenes about the bonus video clips I talked about in my last post. Those who had bought my tubular band book on Patternfish needed to contact me to gain access to the video gifts. And contact me you did! I have to apologize for not having sent each and every one of you a personal reply…it got a bit overwhelming! But it served as a reminder that there are many many eyes out there reading my posts….yes, actually reading all my ramblings and not just scrolling down through the pictures (although, there’s nothing wrong with that!). I do try to provide a lot of eye candy for those who stop by and don’t have the time to read everything.. All this is to say, thank you. It made me feel good.

You’ll see that the title of this post is I Made a Thing. I did… but this thing I made is not THE thing that I am planning for my hummingbird motifs. That idea is still developing in my head, But, yes, I made A thing. However, there was still some sampling to do as I had come up with another idea for my little birds.

Two posts ago I showed you a new version woven with supplementary weft rather than in double weave in which I used the idea of embellishing the hummers with curls and swirls. The sample above is in 30/2 silk with silk supplementary weft. I used this idea one more time in some green cotton thread that I had brought back from Guatemala in 2008. I think the cotton might be something like 30/2 in size and I am pretty sure that it isn’t mercerized.

In the example on the left, I created the outline and the swirls within the hummingbird shapes with teal supplementary weft. On the right, I filled in the negative space around the swirls with white supplementary weft. That means that the swirls are revealed in the exposed green ground cloth. It’s a different look. I love both versions! I may have to combine both in that distant “real” project”.

An advantage of the using the supplementary-weft technique is the simplicity of the loom set-up. I like to use four sets of string heddles when I weave with fine warp material in warp-faced double weave. I need only use the most basic set-up of all when I use this supplementary-weft technique.

I am using five strands of very fine silk as the supplementary weft and played around with the idea of using strands of different colors. I abandoned the first attempt at the bottom…too pale…and liked the darker version at the top. Dwindling stash has me using color combinations that I might not have normally considered. I do like the green and orange-y red tones together. A weaver friend told me that green goes with everything because, after all, Nature has combined it with every imaginable color of flower. True!

supplementary-weft colors

I love how my backstrap loom allows me to set-up a short sample warp like the one above. I could probably squeeze a couple more inches out of that warp if I remove the coil rod and replace the pencils with finer sticks. I can even drop back to just one stick or even to no stick at all…using a shed loop instead to contain the threads in that half of the warp.

So, while I ponder that “real” project to which I keep referring, I decided to use all that I had learned so far and weave a cover for a book. This is the Thing that I made. I found a book in a size I like in a local store. It has blank, thick lovely pages that have lots of texture. It was a chance to use the cotton thread from Guatemala that has been sitting here since 2008. I had brought it back with plans to use it as supplementary weft rather than as warp. I didn’t have enough green and so I decided to get even more comfortable with orange and use orange as both warp and weft. What I am calling orange in the warp is more of a coral color really.

I love the look of all those crisp white heddles against the green. I normally weave my book covers with the selvedges running along the horizontal edges of the book. Because I wanted my hummingbirds to be be the right way up rather than sideways, I planned this piece to have the selvedges aligned with the vertical sides of the book. I crossed my fingers in the hope that my one short and narrow sample in this thread would give me reliable information in terms of ends per inch. I wanted the cloth to sit right at the vertical edges. I didn’t want to turn it over all four edges and create all that bulk at the corners.

I also decided that I wouldn’t wet-finish the cloth. I know....Shocking! I figured that it’s a nice tight warp-faced weave that doesn’t require further tightening in the water. I simply was not going to deal with accounting for shrinkage. The cotton has a rough rustic feel that I like. Wet finishing would have softened it I am sure, but I am happy with the rustic feel.

Completely removing the cover from the book was easy and made the process so much simpler. This way, I didn’t have to cut the cloth and tuck a tab into the spine. Contact cement has become my friend since I learned to work with it. This isn’t the first book I have ever completely covered with my woven cloth…number 11, in fact, and I have learned some do’s and don’t’s along the way.

And here it is finished. I managed to get the little flower positioned on the spine right where I had wanted it to be .I apologize that I have been lazy lately just snapping all my photos with my tiny ipod, some of them as you can probably tell, late at night . I still haven’t bought myself a new tripod for the “good” camera.

Naturally, questions arise about technique tutorials when I show these projects on social media. I did write a very basic tutorial on this supplementary-weft technique many years ago which you can find right here on my blog. I admit that the tutorial makes me cringe just a little as the base warp that I used in the blue example all those years ago was so terribly corrugated! Nevertheless, the tutorial will give you a good idea of how this works and I know that many people have successfully used it.

A wonderful resource for supplementary-weft techniques that I have come across in the last few months is the website of Guatemalan-based Mari Gray’s Kakaw Designs. Mari writes on her site that Kakaw means cacao and goes on to explain that Kakaw Designs supports “traditions as deep as the root of the cacao tree”. Apart from selling clothing, accessories and even footwear made from Guatemalan textiles that she and her partners have specially designed, she runs tours, offers courses and sells kits for weavers who would like to try their hand at operating a backstrap loom.

One of several pre-warped and pre-heddled loom styles offered by Kakaw Designs.

You can order fully warped and set-up backstrap looms, like the one above, with everything you need to weave brocade (supplementary-weft) patterns using the techniques employed by weavers in San Antonio Aguas Calientes. The kit can be supplemented by classes via Zoom given by Guatemalan weaver Doña Lidia in English. There are classes on basic backstrap loom operation and plain warp-faced weaving as well beginner and intermediate-level brocading classes. For more advanced weavers, they even offer a class in the double-faced supplementary-weft technique. Other offerings include tamale and tortilla-making classes.

A piece that I photographed of a Quetzal bird woven in the double-faced technique while in San Antonio Aguas Calientes, Guatemala in 2008.
This simple bee motif is the first I learned to weave in the double-faced structure with my teacher in Guatemala.
Single and double-faced styles that I studied and wove in the same area in which instructor Doña Lidia is located in Guatemala.
This piece shows the nature of single-faced supplementary-weft patterning.

Instructions are also available via PDF with accompanying video clips for those in time zones that don’t fit well with the scheduled Zoom classes or for those who are not able to attend the live classes for any other reason. Take a look at the Experiences page on the Kakaw Designs website for more details. If any of you have taken any of these classes with Kakaw Designs, please do let me know. Perhaps you would be willing to share pictures.

Doña Lidia being filmed for one of her weaving classes.

From the archives….here’s me practicing all I learned in Guatemala back in 2008. I learned so much that expanded my knowledge of supplementary-weft techniques far beyond what I had learned here in South America. Guatemala is so much about weaving with supplementary weft. and there are so many different styles. Once you learn more about it, you will understand how Guatemalan textiles can be so wonderfully colorful.

In this picture I was weaving the cloth that would become the front and back covers of the journal in which I recorded all the instructions. Even back then I was enjoying creating woven covers for my books. I finished the piece that I had started with my teacher in Guatemala (inset) and used that on the lid of a backstrap loom tool box.

Ah…my weaving space looks so neat and tidy in that picture! I wasn’t living alone back then. Here’s what it looks like now. You can see my book cover cloth on the loom and the rest is all the accompanying creative chaos.

I’ll finish by showing you a picture that Kathy sent me of her warp-faced double weave project. She used some rather soft cotton that she happened to have in her stash and was surprised that it behaved so well. Warp-faced double weave is a dense structure and can be hard on softer yarn so that’s something about which you should be careful when choosing thread for this technique. Crochet cotton with its high twist works very well when you are learning. With experience you could ty branching out to using less hardy materials. Kathy has used motifs from my Warp-faced Double Weave on Inkle Looms book but she is a backstrap-loom gal at heart and prefers to weave double weave that way. She is using just two basic sheds as I teach in my inkle loom book.

Warp-faced Double Weave is wonderfully versatile in the range of images that it allows you create…from whimsical birds, butterflies and bunnies to delicate leaf and floral patterns, to the bold angular shapes of Mapuche-style motifs or the more intricate Al Sadu-style patterns of the Bedouin. It’s one of my favorite structures for creating images and lettering.

See you next time!

Backstrap Weaving – It isn’t all in the Wrist

The Garden Bands are finished and now the question is whether to use them in a project and, if the answer is yes, how?

In my last blog post, I showed you the first of the two bands sitting alongside my hummingbird band.

When I had finished the hummingbird band, I had been thinking about cutting it into two or three pieces, placing them side by side and making “something”. Friends in one of my Zoom groups were not enthusiastic and suggested I weave two bands to flank the hummers and use the whole thing as a wall hanging. I liked the idea of not having to cut (and possibly regret having done so). On top of that, weaving accompanying narrow bands meant that I could once again try out the little flower motifs and the subtle color transitions that I had been sampling in 20/2 cotton.

Now both bands are finished and here they are together…..

I am really pleased with them and may never use them for anything at all. I just really enjoyed creating them. I will play around with placing them next to the hummingbirds in various ways to create symmetry or even asymmetry as some of my weaving friends have suggested. I might keep the borders or perhaps fold them back so that they are hidden. I might hang them together so that they look like one complete piece or leave space between them.

Right now, I think I just need to leave them be and think about all that. Put it this way, there won’t be any cutting or sewing happening just yet.

What I would like to do next is sample these motifs in heavier thread. I have some 8/2 tencel that I would like to try. It will be interesting to see how wide the piece will be in this tencel. I have quite a few people asking me if I plan to publish these patterns and I am not really sure how they will look on a larger scale. They are fine and delicate in 60/2 silk. How will they look in 8/2 tencel?

At the same time I am not even sure if I would like to publish the hummingbirds. The hummingbirds have become part of my pandemic experience…they represent my yearning to be out of all this and zipping about freely. My friends in the States tell me that it is time to take in their feeders as the hummingbirds start their migration south. It must be so nice spotting the first ones arriving at the start of the season the following year. I have often thought about doing a similar seasonal change by spending the mild winters here in Bolivia and the summers in Australia but that was a pre-pandemic dream. I am not sure if I can pull that off any more. I, like many of you I am sure, have had to modify plans with the times.

This is the warp I created for the second band…

In this photo, I have finished creating the heddles for one half of the warp in this warp-faced double weave structure (one heddle set for all the light threads, and one for the darks), and have just started creating a third set for the light threads on the other side of the cross. A fourth will hold all the dark threads on that side of the cross. Those of you who have used my book Warp-faced Double Weave on Inkle Looms will have learned a two-shed set-up for this same structure that is perfect for the inkle loom. I only use four sets of heddles when I am weaving with a lot of ends and especially if the thread is fine. The inkle loom is perfect for the more basic two-shed set-up with heavier thread and fewer ends. Bolivian weavers who use this structure will use the method that is traditionally used in their community. Some of them use the two-shed method even when the threads are fine and numerous. This was the way that I was initially taught. Others use a four-shed set-up.

Working with multiple sets of heddles for a warp-faced structure on a fixed-tension loom, like the horizontal ground looms that are used in certain areas of Bolivia and Peru, is challenging.

Bunches of string heddles control the colored layers of warps on the horizontal loom of Taquile Island, Peru

In my experience, using a loom where the weaver can modify tension at will with his or her body makes the process of using multiple heddles much easier. Of course, I am talking about the backstrap loom. The weaver can control just how much the warp threads are able to rise and bend to form as large a shed as necessary without dragging up any sticky neighboring threads that don’t belong, and without causing abrasion.

A two-heddle set-up for Andean Pebble Weave for one of my Within These Walls panels.

When I was first taught Andean Pebble Weave way back in 1996 using narrow warps with quite fine thread, I was shown how to manage two sets of heddles. It took quite some time to figure out what was going on. I would just watch my teachers hands deftly manipulating the heddles, magically and effortlessly creating clean sheds, but at first was not able to replicate the moves. What I wasn’t noticing was how the rest of the body was also involved in the process. It wasn’t only about what their hands were doing. My teachers had to move to slightly relax tension on the warp while working with their hands. I broke a few warp threads in my rough handling before that key piece of information clicked. Those broken threads did not make me popular! You might understand what the title of this blog post is about now.

On narrow warps, I was able to wrap one set of heddles over one hand and roll it away while pulling up on the other heddle with the other hand. The wrapping and rolling tightens all the threads in those heddles. It holds them taut and in place so that they simply cannot grab on to neighboring threads and become part of a shed in which they don’t belong.

Here’s 7-year old Lily doing just that:

This and some of the following images are screen shots from videos that I took and will be blurry as a result. I think they still allow you to see what is going on. You can see how slack Lily’s warp is because she has relaxed tension (more than is really necessary as you can get away with very slight movements when the warp is this narrow). One hand is pulling up the second group of heddles while the other wraps and rolls the first set away.

Here’s my student Berna doing the same: (Hi Berna! I know you read this blog from time to time). She is raising the first heddle while rolling the other away. You can see how her left pinky rests on the warp and acts as the pivot point for the roll. Having placed her other pinky within the shed to save it, her body is on its way to returning to the “neutral” position in which the tension on the warp is no longer relaxed. She had relaxed tension just enough to enable her to save the shed on her finger. She can later replace her finger within the shed with a sword to beat.

Susan learned all this about operating a loom with two sets of heddles on narrow warps from me during my visits in the States. She needed to contact me recently after having set up the beautiful Andean Pebble Weave warp (below) with its two sets of pretty heddles as it’s her first time attempting something this wide. She works with wood and has had to prepare swords that will suit the width of this new project. I hope that she sends pictures of them.

The heddles on their rods fill a narrower space than the width of the warp as some of the heddles hold two threads. This difference in width is expected as the woven cloth will be a fair bit narrower than the width of the warp as you see it here. The fact that this structure uses warp floats on both faces of the fabric means that the fabric will be narrower and thicker than one with the same number of ends in plain weave.

Isn’t this warp gorgeous? I can’t wait to see what she does with this asymmetric layout.

This is Susan’s first attempt at this kind of width having woven several beautiful Andean Pebble Weave guitar straps for friends and family which have given her plenty of practice in winding nicely-tensioned warps and making string heddles. Of course, now her question is how to manage these two sets of much wider heddles. A hand is simply not large enough to wrap and roll these.

For wide warps, I was taught to substitute a sword for the hand….

Here I am demonstrating doing this for a group of friends and exaggerating somewhat to show the effect of moving my body forward to relax tension on the warp. The more I move forward, the larger the shed. The edge of the sword rests on the warp and is the pivot point. Once the shed is open, I can let go of the sword in the wrapped-and-rolled heddle, maintain the forward position, keep pulling up on the heddle rod, and save the open shed on a sword. You can see how my sword is completely wrapped within the heddles and rolled. So, an important tip is to take account of the width of your sword when you are making the heddles. If they are shorter than the width of the sword, this move will not work so well. If they are a lot longer, they will be clumsy.

This still-shot which I grabbed from one of my videos, shows a backstrap weaver in Peru positioning herself to wrap and roll her sword away while her other hand lifts the heddle nearest to her. She chooses to use a sword rather than her hand even on this relatively narrow warp. Her sword sits just below the heddle stick which shows that her heddles are the perfect length for this. That is what I always aim for. No doubt she has been doing this for most of her life and doesn’t even need to think about it.

Now you can see her raised heddle a lot more clearly and her forward position is evident.

So, this was precisely what I was doing on my double-weave Garden warp. I would roll Heddle One away with my hand while lifting Heddle Two. And I worked Heddles Three and Four in the same way. It enabled me to work with this fine 60/2 silk without breaking any threads from abrasion and achieve nice clean sheds every time.

When working with just one heddle together with a shed rod, I like to use what I call the “twisty stick” method. You can see this in action in this video clip. Twisting the two sticks tightens that layer of threads so that the threads remain taut and in place while I bend and raise the threads in the other layer. I go into this in more detail (how to set it up etc) in my video class Operating a Backstrap Loom.

You can see me using the twisty sticks a few times in this next video where I am nearing the end of a warp of 60/2 silk…

Of course, it is important to point out that there are many many different methods used by backstrap weavers to operate their looms. I share with you some of my current favorite methods that work well for me with a variety of warp materials. There is no single correct way to do any of this. Some materials, for example, are just friendlier in terms of stickiness and work well with simpler methods. Some materials are so sturdy that the weaver can get away with simply grabbing and pulling up on the heddle while sawing it back and forth along the warp to clear the shed and remove any stray threads that don’t belong.

How I would love to be there with all of you who are venturing into weaving on backstrap looms. Who knows when that will be possible? In the meantime, I hope that some of what you have seen here today is helpful and perhaps interesting even to those who don’t use a backstrap loom.

It’s time to wet finish the Garden and Hummingbird bands and give them a good hard press in order to better enjoy the loveliness of the silk. Right now they could easily be mistaken for cotton. I am looking forward to bringing out their sheen.

Until next time….

Backstrap Weaving – Thinking Outside the Walls

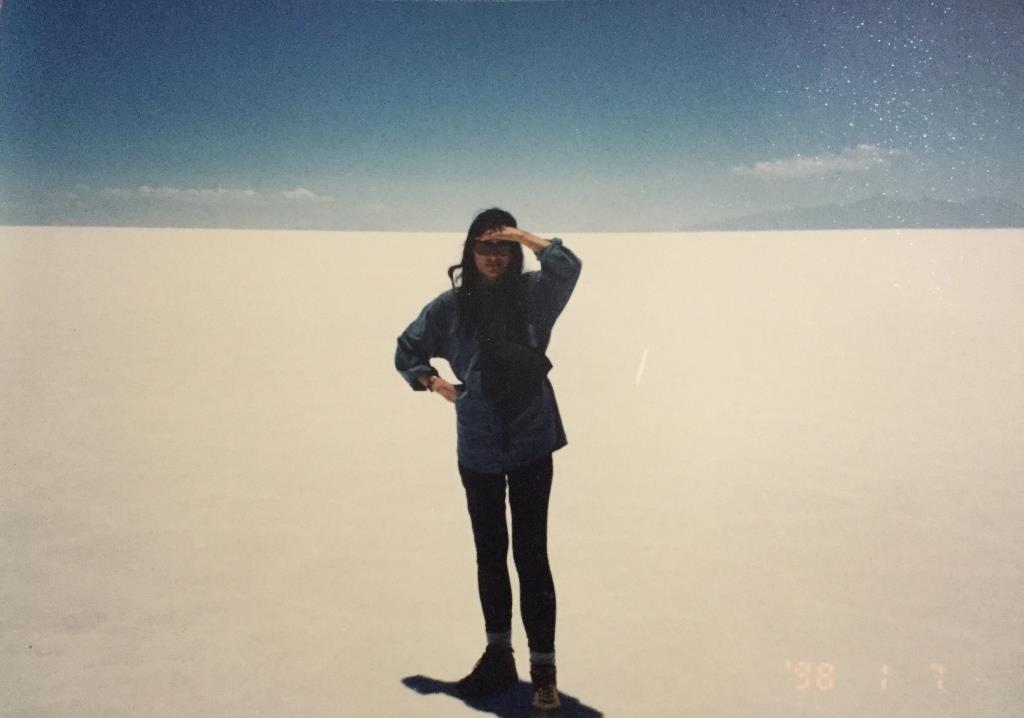
Is there anybody out there?! This was taken on a visit many years ago to the fabulous Salar de Uyuni here in Bolivia.

Fully vaccinated (albeit with the Sinopharm one in which I have little faith), I decided it was time to think outside the walls and venture out for my first outing, since the arrival of Covid-19 in Bolivia, that didn’t involve the supermarket or the dentist.

What would I find out there? Would I find that I have been behaving in an overly cautious way all this time and perhaps one of the few still hiding away within walls?

Would everything be completely normal? After all, we are not under any kind of restrictions now. Case, hospitalization and death numbers rise and fall from day to day as the third-wave curve wends its way downward. The fourth wave has already been predicted to arrive in October. Have we all just learned to live with this?

I have always been good at physical distancing! This was taken on a visit to a large expanse of sand dunes that inexplicably emerge from the surrounding jungle right here in Santa Cruz where I live.

This outing wasn’t about visiting spectacular salt lakes or mysterious sand dunes. It was simply about eating a burger with a friend in one of my old favorite hang-outs…the main Plaza here in the center of Santa Cruz. I used to live one and a half blocks away from it and would pass through it every day on my way to and from work. After finishing work at 10pm, I used to love stopping to sit there on balmy summer nights. The place would be full of activity as others gathered to enjoy the relative coolness of the evening before reluctantly heading home to face a restless night within heated walls.

My companion suggested the Plaza. The thought of being amongst all those people doing something that required the removal of masks made me nervous, even though it was an outdoor setting.

A typical sunny weekend afternoon would see the Plaza completely full…standing room only… as families gathered to eat ice cream and watch the world go by. There would be wandering coffee cart vendors in their crisp white uniforms, others selling cotton candy, balloon animals and toys and trinkets, people feeding the pigeons, kids chasing the pigeons, teenagers gathered in their little groups in every corner, the shoe shine guys poised ready for the next customer, elderly men playing chess surrounded by youngsters studying their moves, wanna-be models having their photos taken outside the cathedral. The Municipal Police would be strolling around although it is hard to imagine anything “bad” happening in that place of good clean fun. In a city in which it is often impossible to escape the blast of salsa and cumbia music, the Plaza is blissfully music-free.

And so it was with a mixture of relief and sadness that we found the Plaza almost deserted. There was no need to make circuits while looking for a place in the shade. Clearly people are being careful and largely staying home which is a big ask when home can often be a simple adobe or single brick dwelling, the interior of which resembles a pizza oven on hot days. It was sad to see this popular cooling refuge abandoned in this way.

Yes, I admit that it is strange to be writing several paragraphs about an outing to get a burger! So I’ll get back to the weaving now. In my last post I showed you the start of my hummingbird piece. This is another effort to think outside the walls and capture a feeling of uninhibited movement and joy.

I am weaving this in warp-faced double weave. It is certainly not the fastest patterning technique that I know. However, you might remember that I have just spent seven months picking up threads one by one to form intricate patterns on four panels. As a result, nothing feels slow any more and I just simply enjoy watching each and every one of the little figures I have created emerge. I loved designing the plants and piecing all the figures together. Weaving this lifts my spirits!

This is the final third of the band which I photographed so that you can see what the two faces look like. The plant at the very top is the one which is showering the scene with its parachuting seeds.

There was never meant to be an end product but I did find myself thinking about cutting this strip into three and sewing the pieces side by side to make something useful. But then a couple of people in a recent band-weaving Zoom gathering suggested weaving two more strips to flank this one. They could reveal more of the garden that surrounds this happy scene. I like that idea. It spares me the agony of having to do any cutting. All of you who produce hand woven cloth will know exactly what I mean. Plus it gives me a chance to do some more designing in this fun double- weave structure. It amazes me how far removed this is from the kind of pieces that I generally choose to weave.

And so I get to sprawl on the floor and do some more double-weave doodling. The chart for the hummingbird piece ended up being 130 inches long! I suppose I could photograph it in sections, erase the drawings and re-use the paper.

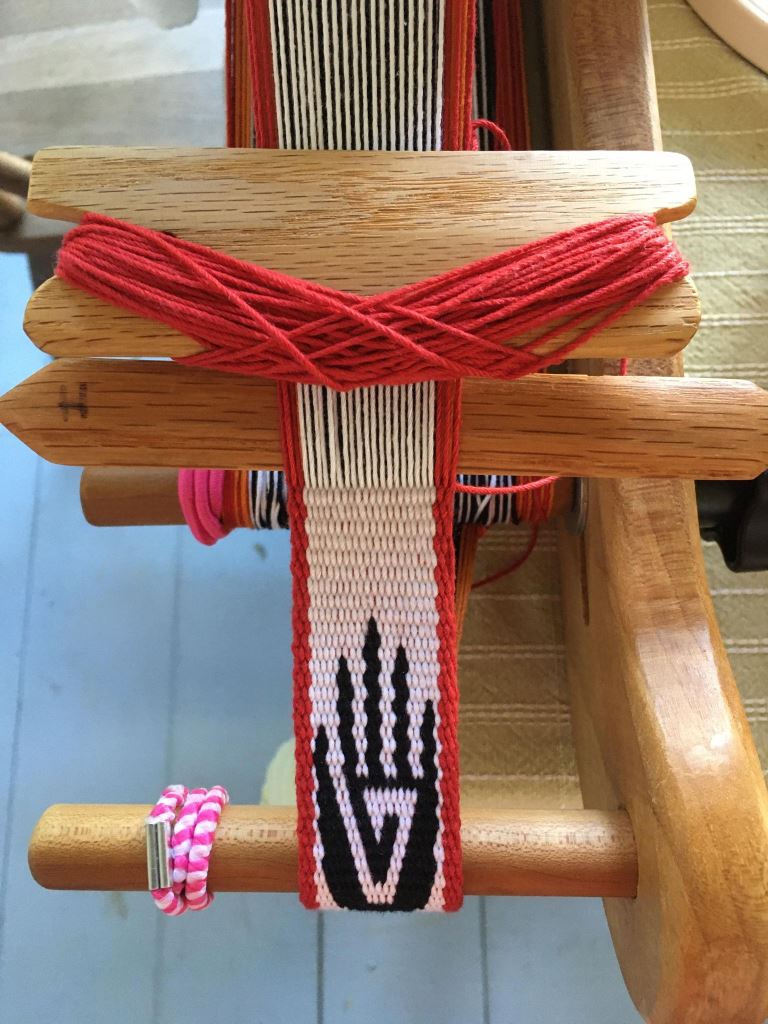
I was very pleased to see that Vicky Erker has been designing her own double-weave motifs after having learned the technique from my book Warp-faced Double Weave on Inkle Looms. My book includes a section on designing in which I use a leaf motif as the example. Some people take to designing more easily and quickly than others while some have no desire to design at all and are happy weaving from charts that have been provided in books.

This striking hand petroglyph is the first pattern that Vicki showed me…..

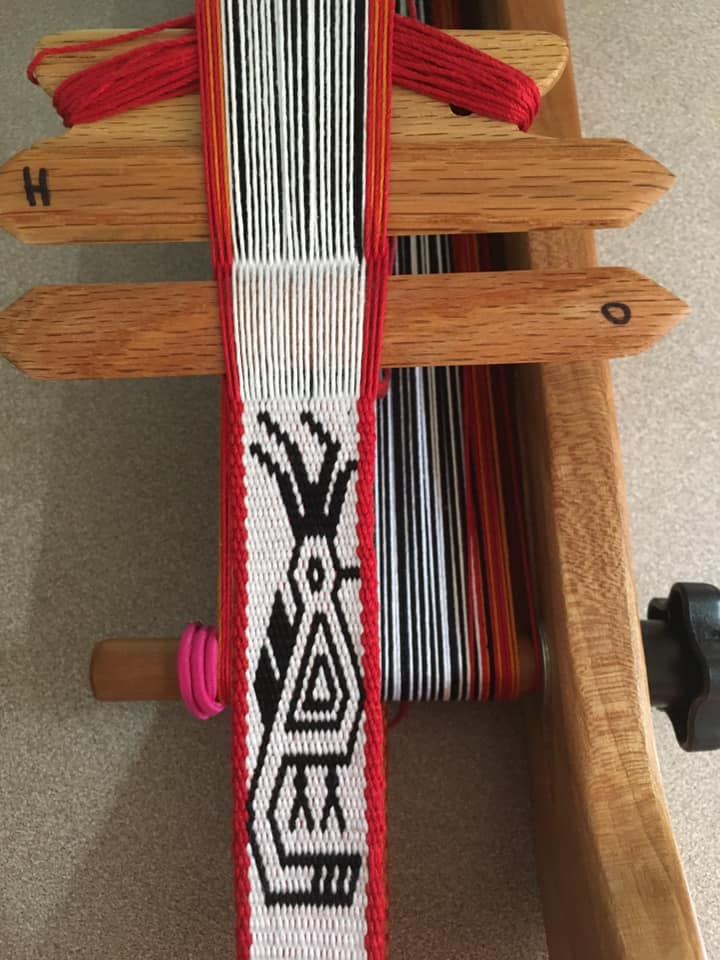
And then she blew me away with this pattern that she based on a Quetzal motif that is often used in textiles of Guatemala. In Guatemala it is woven using completely different patterning structures.. Isn’t that awesome!

If you are wondering about the H and O lettering on Vicki’s swords. it is something I suggest doing to help you keep track of the shed in which you are working when weaving double weave. You can always mark tape and apply that to the sword if you don’t want to mark your sword. The H stands for Heddle Shed and the O for Open Shed. It is one of the tips I give weavers for working in double weave which of course will make much more sense when you are using the book. I hope you might consider trying warp-faced double weave. There are plenty of charts in the book and perhaps you will feel motivated to try creating some of your own designs.

When I was going through my old photos and finding the ones I posted earlier of the Uyuni Salt Lake and the sand dunes, one of my first thoughts on seeing those pictures, was…wow, not a single tree to which I could attach a backstrap loom! Of course, a tree would not be entirely necessary as backstrap weavers can turn themselves into completely self-contained looms using our feet or toes to hold the end of the warp.

Carolin shows here that if you happen to find yourself at the Uyuni salt lake while cycling from Alaska to Ushuaia, one’s bicycle can always provide a handy anchor point for the end of the warp….

Carolin with tiny loom tied to her bike and weaving on the salt lake.

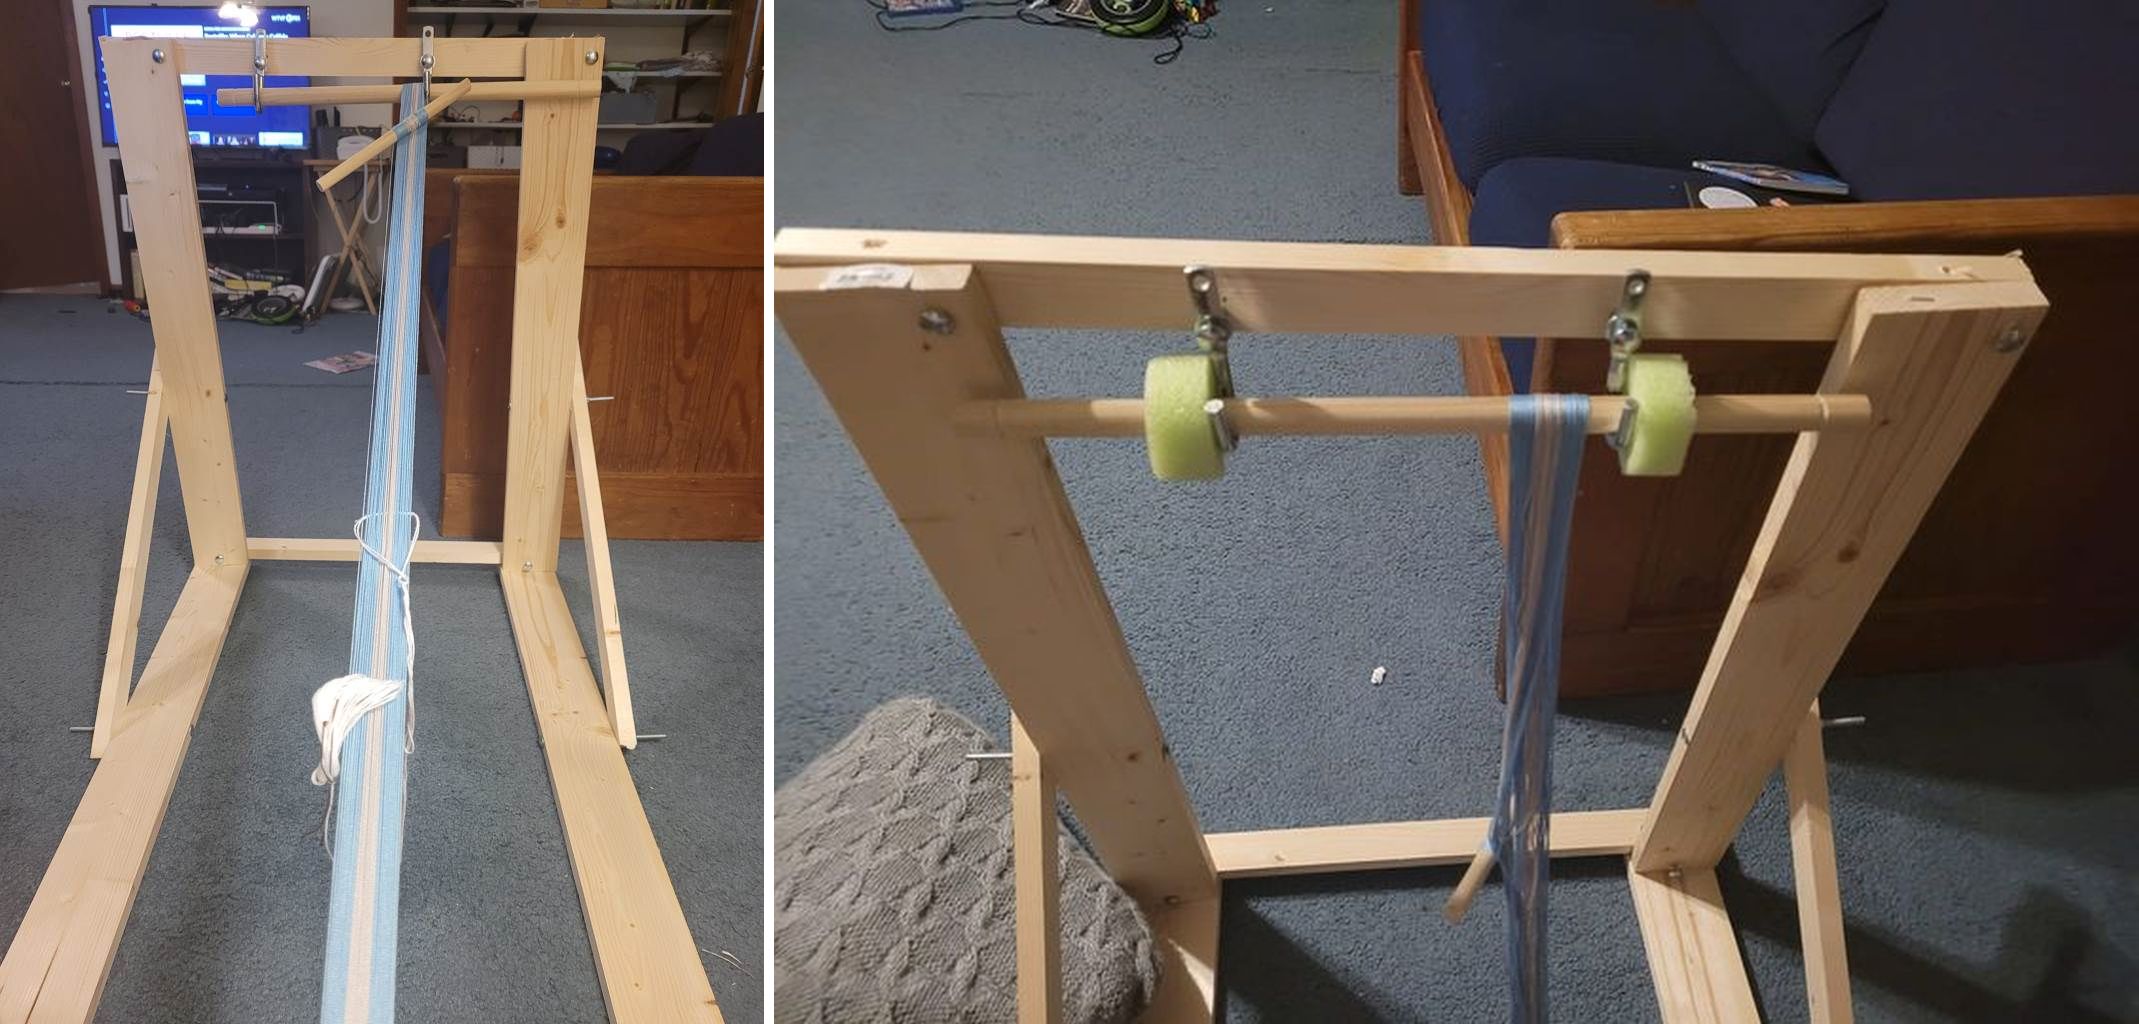
Others have chosen to create something a little more comfortable that can be picked up, carried around and enjoyed both indoors and out. I don’t quite remember who started the frame-making thing in the Facebook group but several members have found these to be a really nice idea when they got fed up with looking for suitable places in their homes, both indoors and out, to which they can attach the ends of their warps. Here’s the one that Martina in Germany built….

Here’s Jenny’s with a clever pool-noodle hack to stop the beam from sliding….

And here are models by Carlos on the left and Rosemary on the right…

Ritika Mittal allowed me to show this image of a weaver in Nagaland using a study frame to hold the end of her warp and provide a nice place for her to brace her feet.

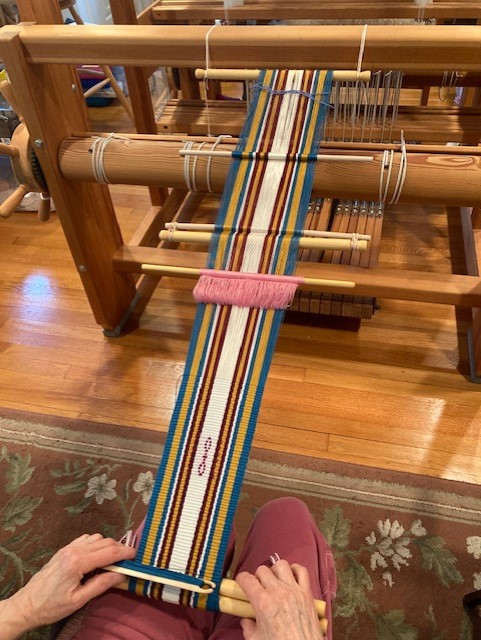
Nancy’s anchor point isn’t exactly a portable one, but I always enjoy seeing a simple backstrap warp being attached to the more complex floor loom…this is Nancy’s first ever backstrap loom project and its a beauty.

When I was having my Operating a Backstrap Loom class filmed, we had some trouble finding an anchor spot in the studio that was close enough to the set because I insisted on sitting on the floor. Eventually we managed to pile a lot of heavy stuff into a portable storage bin and use that.

While on the topic of that video class, Operating a Backstrap Loom, I’ll take this opportunity to let you know that the stock of DVDs is really low now and that I won’t be replacing them when Taproot Video runs out. The purchase of the Lifetime Streaming option caught up with, and now far outnumbers, the purchases of DVDs. So, if DVDs are your preference (they still are mine), you might want to make sure you get one while they are still around.

I showed Nancy’s first-ever weaving on a backstrap loom. I neglected to ask her if this piece is destined to become a backstrap. The dimensions are right. The backstrap itself is often a new backstrap-loom user’s first project and I am happy to see that the article I wrote about weaving your own backstrap way back in 2009 is still being used and enjoyed.

Here are a couple of backstraps that have been woven recently by Lieve on the left and Louise on the right….

My birthday is on Friday (lucky Friday the 13th) and I’ll hopefully be venturing outside the walls again for a little celebration.

Until next time.